Deploy OpenShift using Jenkins Pipeline and Terraform

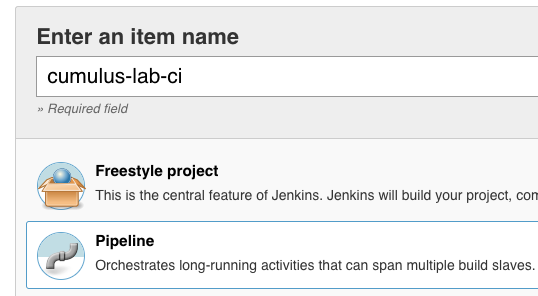
I wanted to make my life a bit easier and created a simple Jenkins pipeline to spin-up the AWS instance and deploy OpenShift. Read my previous article: Deploying OpenShift 3.11 Container Platform on AWS using Terraform. You will see in between steps which require input to stop the pipeline, and that keep the OpenShift cluster running without destroying it directly after installing OpenShift. Also check out my blog post I wrote about running Jenkins in a container with Ansible and Terraform.

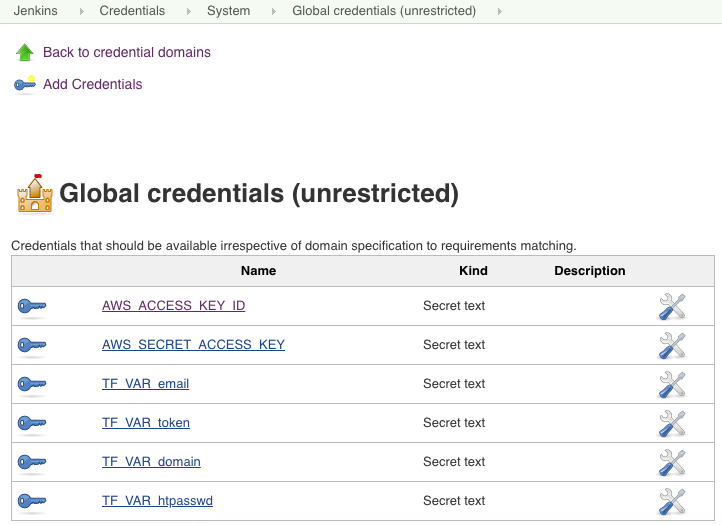
The Jenkins pipeline requires a few environment variables for the credentials to access AWS and CloudFlare. You need to create the necessary credentials beforehand and they get loaded when the pipeline starts.

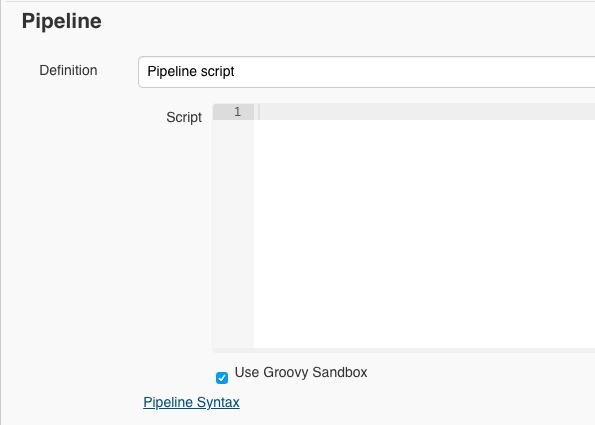
Here are the pipeline steps which are self explanatory:

pipeline {
    agent any
    environment {
        AWS_ACCESS_KEY_ID = credentials('AWS_ACCESS_KEY_ID')
        AWS_SECRET_ACCESS_KEY = credentials('AWS_SECRET_ACCESS_KEY')
        TF_VAR_email = credentials('TF_VAR_email')
        TF_VAR_token = credentials('TF_VAR_token')
        TF_VAR_domain = credentials('TF_VAR_domain')
        TF_VAR_htpasswd = credentials('TF_VAR_htpasswd')
    }
    stages {
        stage('Prepare workspace') {
            steps {
                sh 'rm -rf *'
                git branch: 'aws-dev', url: 'https://github.com/berndonline/openshift-terraform.git'
                sh 'ssh-keygen -b 2048 -t rsa -f ./helper_scripts/id_rsa -q -N ""'
                sh 'chmod 600 ./helper_scripts/id_rsa'
                sh 'terraform init'
            }
        }
        stage('Run terraform apply') {
            steps {
                input 'Run terraform apply?'
            }
        }
        stage('terraform apply') {
            steps {
                sh 'terraform apply -auto-approve'
            }
        }
        stage('OpenShift Installation') {
            steps {
                sh 'sleep 600'
                sh 'scp -o StrictHostKeyChecking=no -o UserKnownHostsFile=/dev/null -i ./helper_scripts/id_rsa -r ./helper_scripts/id_rsa centos@$(terraform output bastion):/home/centos/.ssh/'
                sh 'scp -o StrictHostKeyChecking=no -o UserKnownHostsFile=/dev/null -i ./helper_scripts/id_rsa -r ./inventory/ansible-hosts  centos@$(terraform output bastion):/home/centos/ansible-hosts'
                sh 'ssh -o StrictHostKeyChecking=no -o UserKnownHostsFile=/dev/null -i ./helper_scripts/id_rsa -l centos $(terraform output bastion) -A "cd /openshift-ansible/ && ansible-playbook ./playbooks/openshift-pre.yml -i ~/ansible-hosts"'
                sh 'ssh -o StrictHostKeyChecking=no -o UserKnownHostsFile=/dev/null -i ./helper_scripts/id_rsa -l centos $(terraform output bastion) -A "cd /openshift-ansible/ && ansible-playbook ./playbooks/openshift-install.yml -i ~/ansible-hosts"'
            }
        }        
        stage('Run terraform destroy') {
            steps {
                input 'Run terraform destroy?'
            }
        }
        stage('terraform destroy') {
            steps {
                sh 'terraform destroy -force '
            }
        }
    }
}

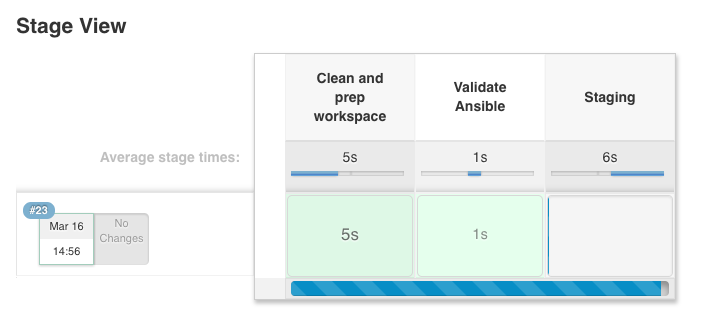
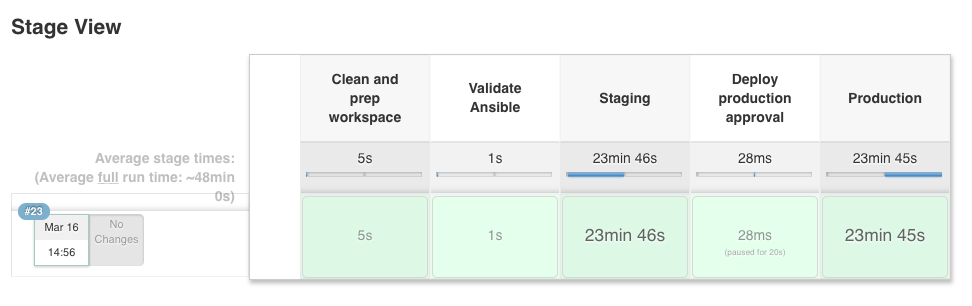
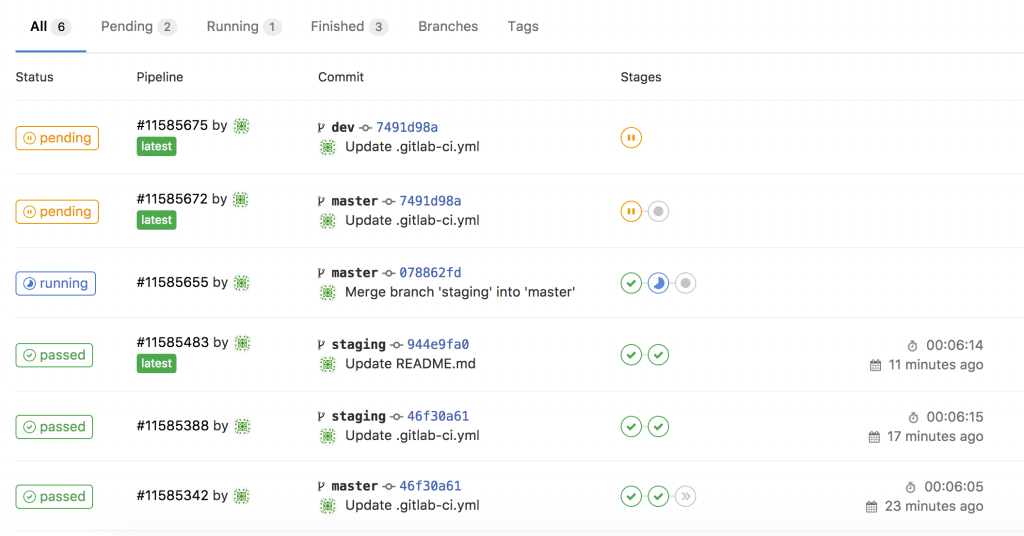
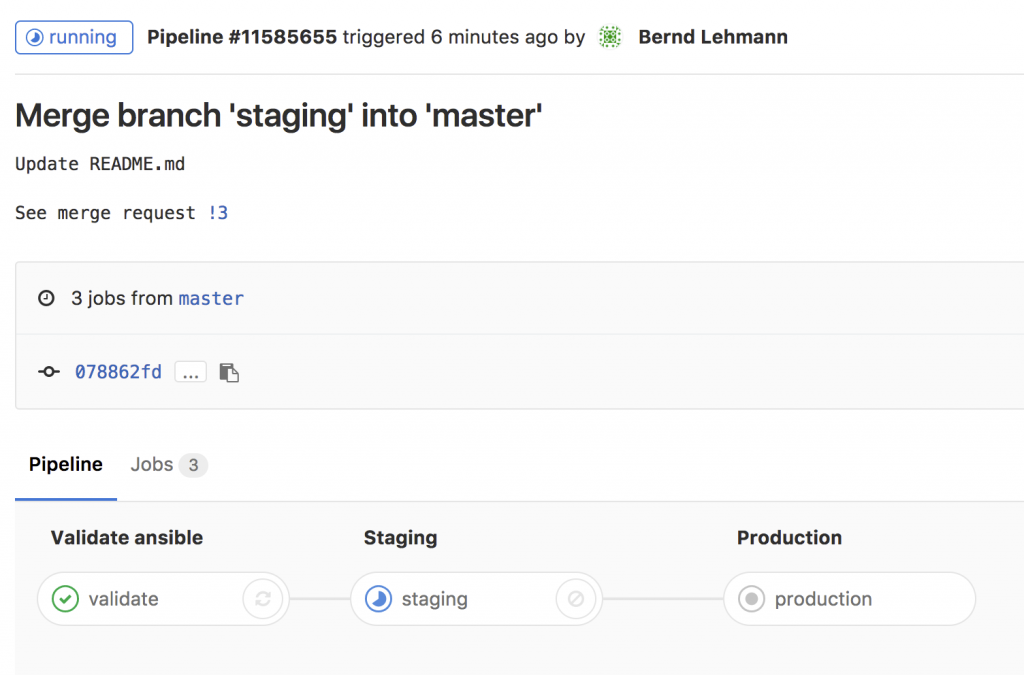
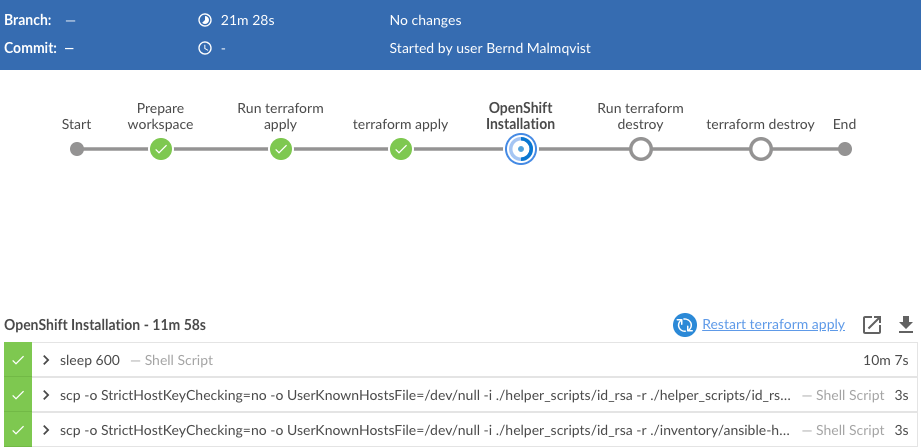
Let’s trigger the pipeline and look at the progress of the different steps.

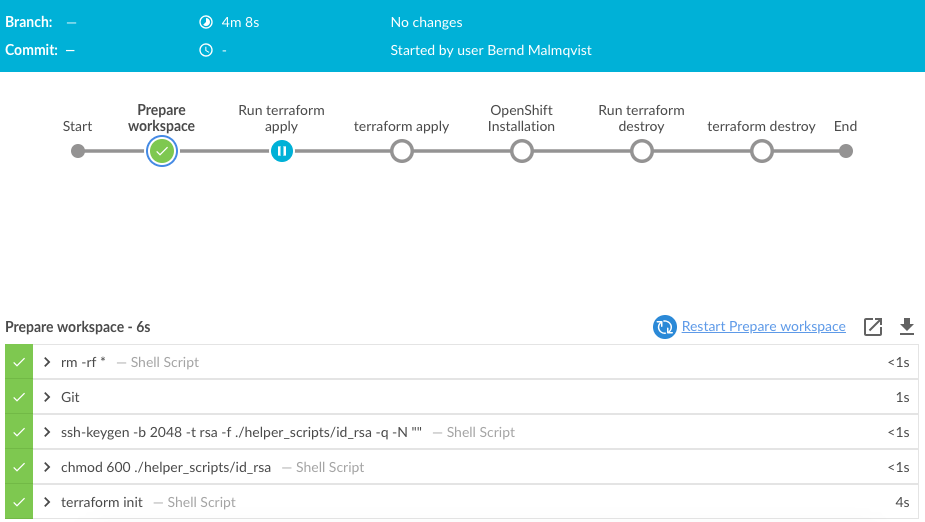
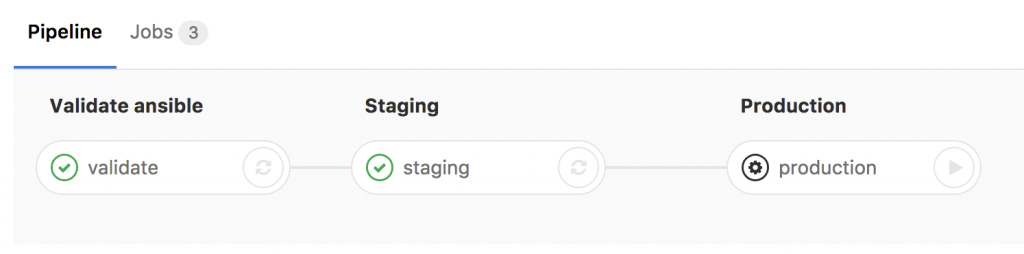
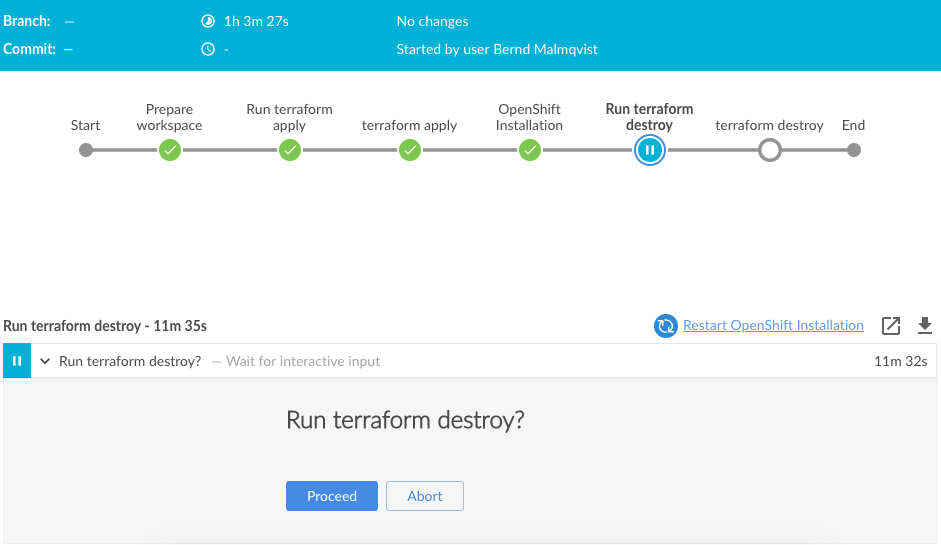
The first step preparing the workspace is very quick and the pipeline is waiting for an input to run terraform apply:

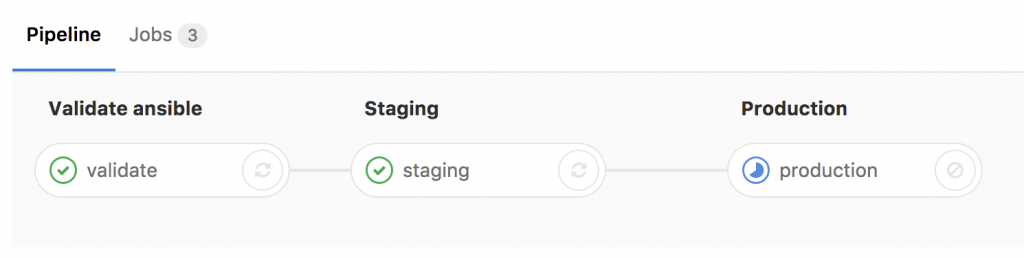
Just click on proceed to continue:

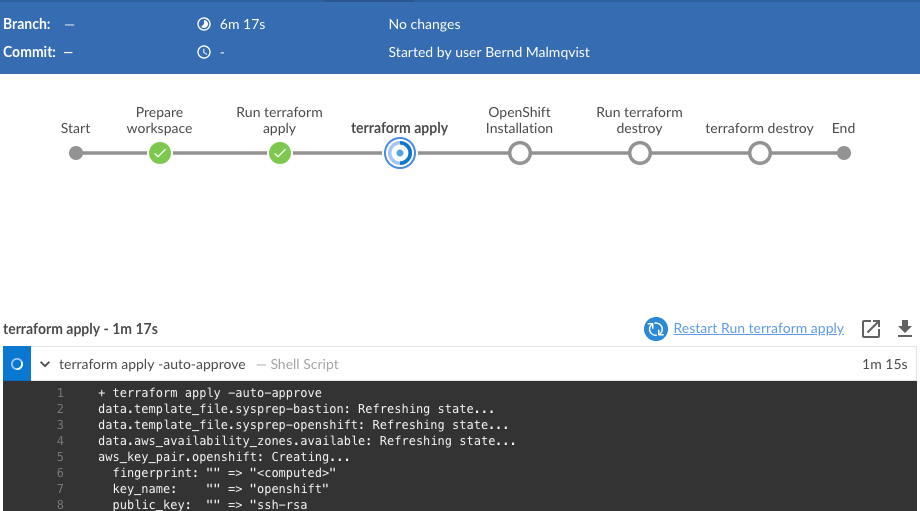
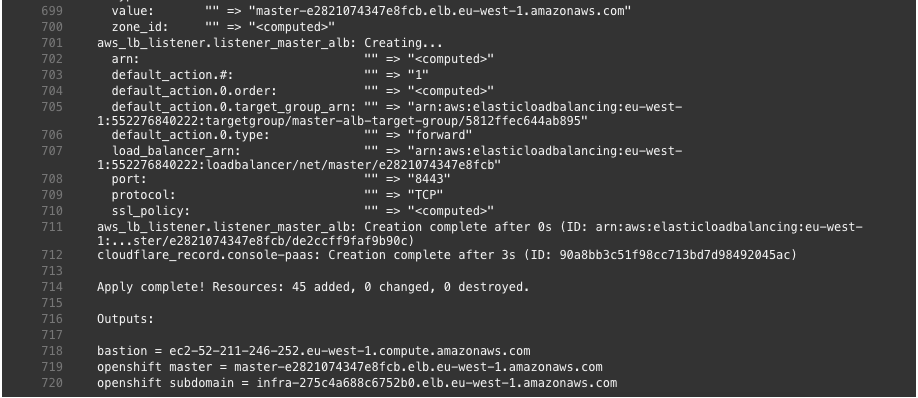
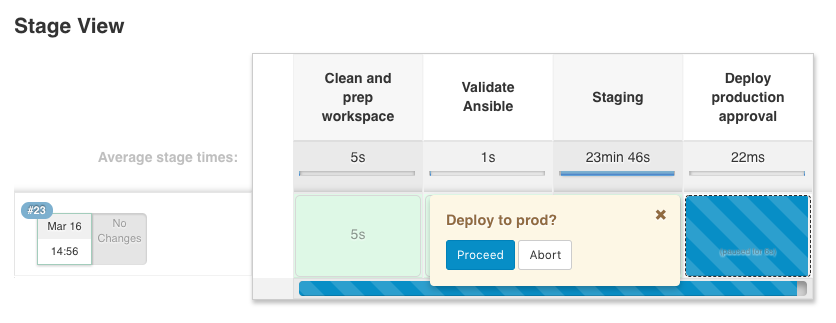
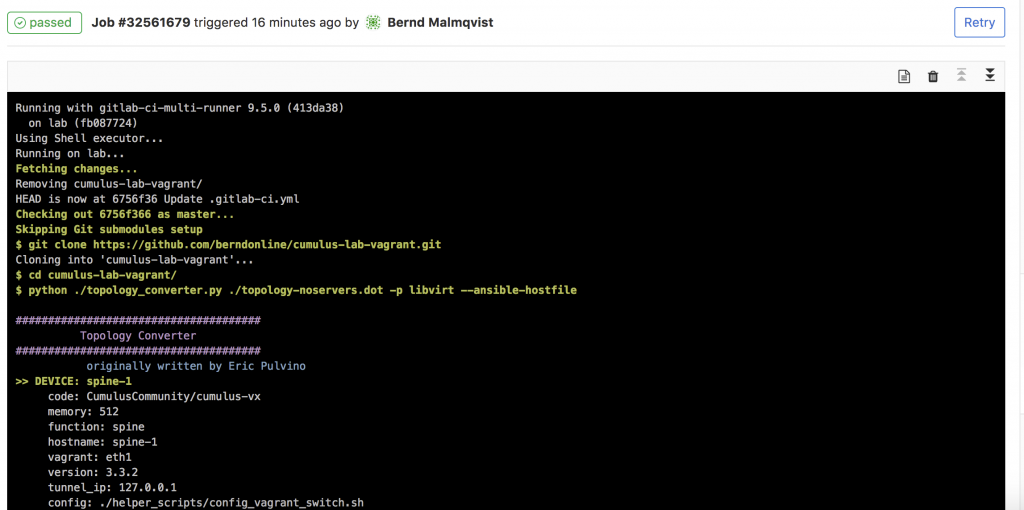
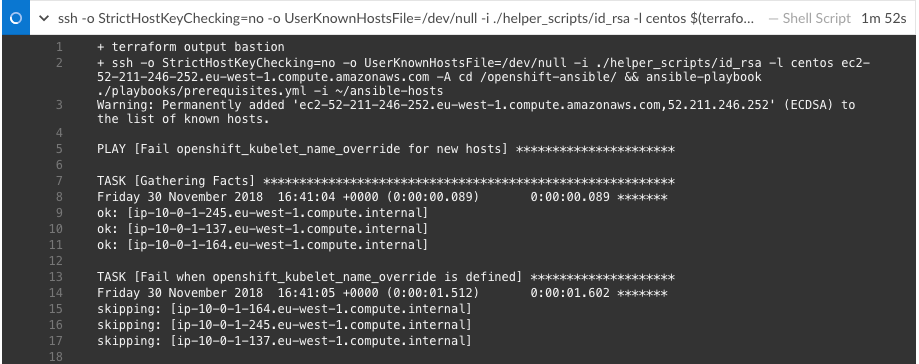
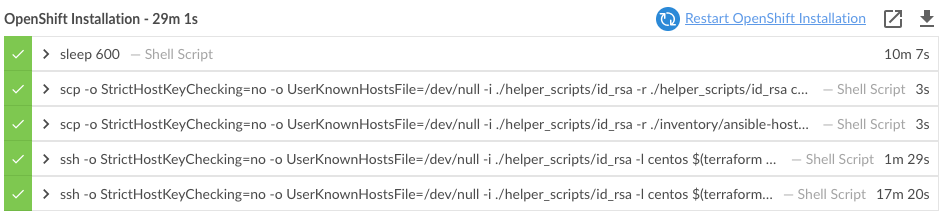
After the AWS and CloudFlare resources are created with Terraform, it continues with the next step installing OpenShift 3.11 on the AWS instances:

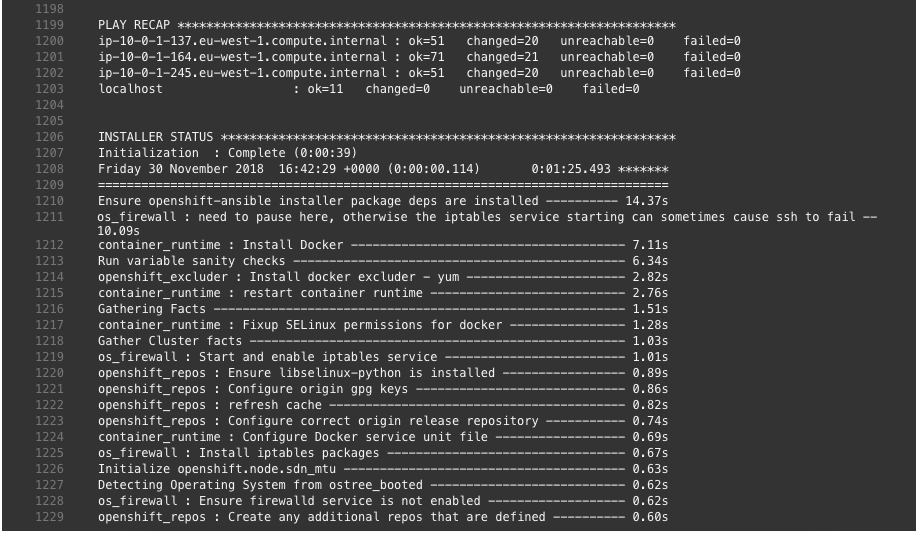
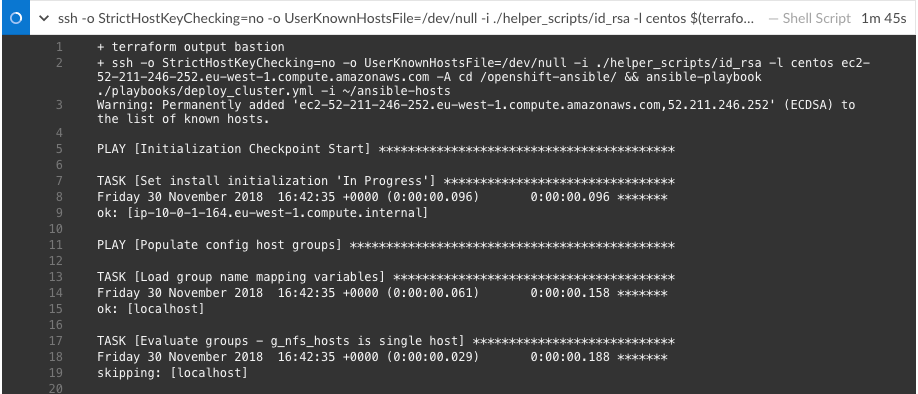
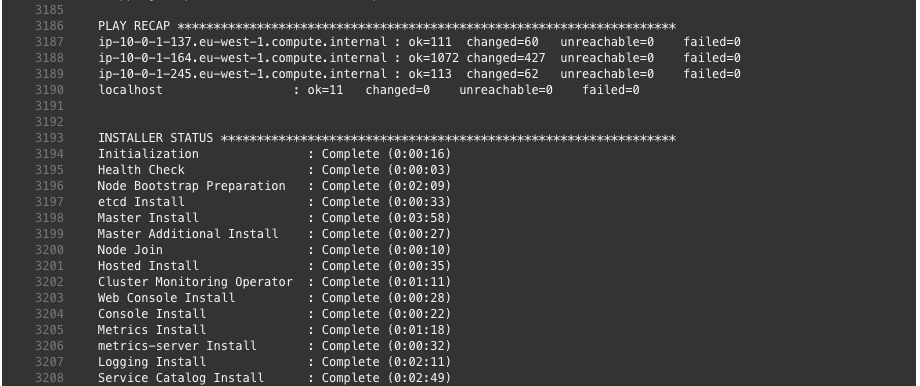
By this point the OpenShift installation is completed.

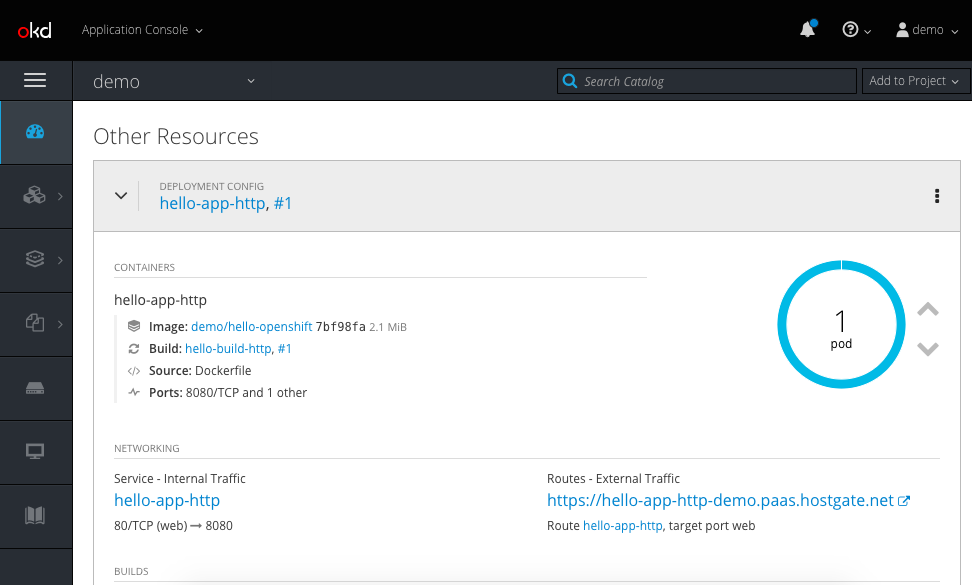
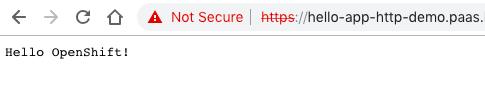
You can continue and login to the console-paas.. and continue doing your testing on OpenShift.

Terraform not only created all the AWS resources it also configured the necessary CNAME on CloudFlare DNS to point to the AWS load balancers.

Once you are finished with your OpenShift testing you can go back into Jenkins pipeline and commit to destroy the environment again:

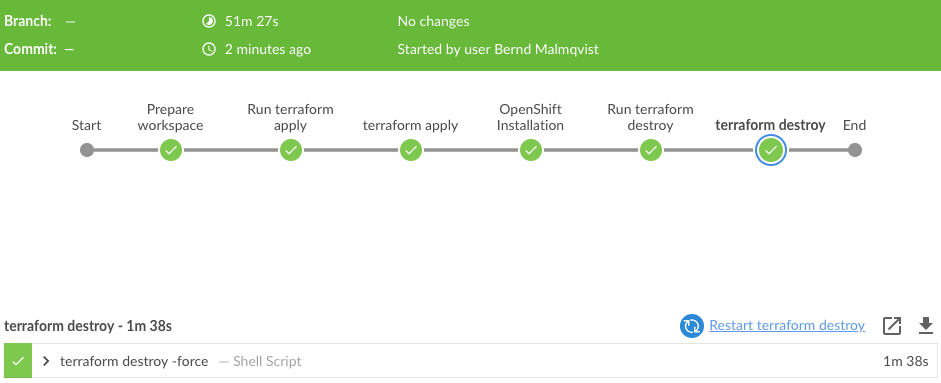
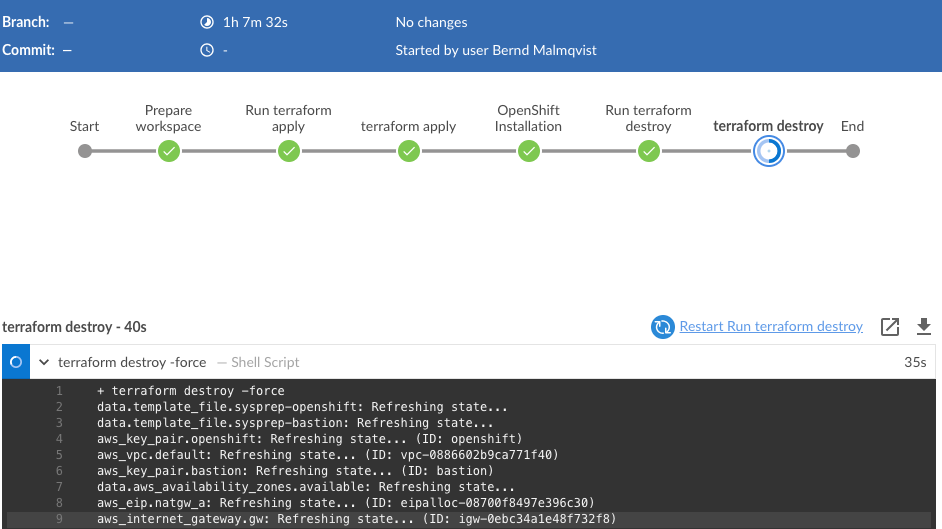
Running terraform destroy:

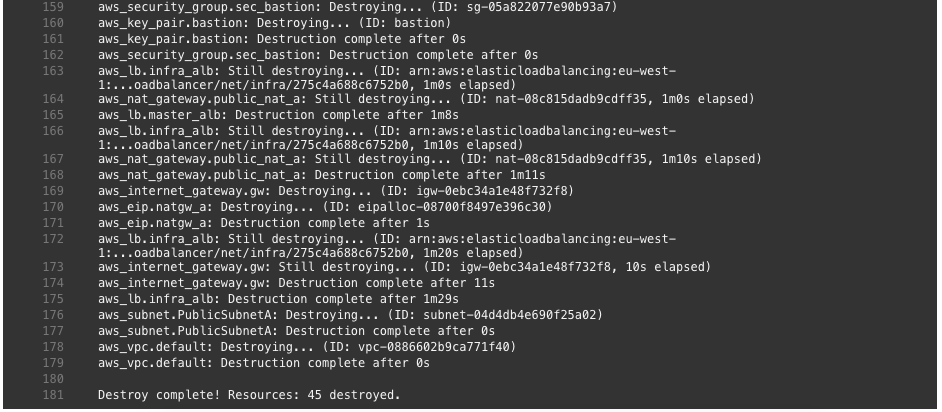
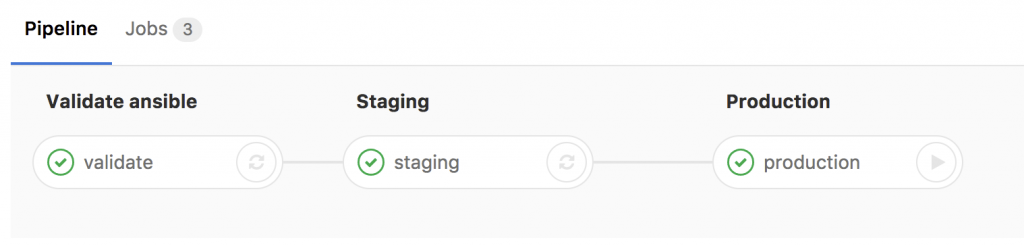
The pipeline completed successfully:

I hope this was in interesting post and let me know if you like it and want to see more of these. I am planning some improvements to integrate a validation step in the pipeline, to create a project and build, and deploy container on OpenShift automatically.

Please share your feedback and leave a comment.

Getting started with Jenkins for Network Automation

As I have mentioned my previous post about Getting started with Gitlab-CI for Network Automation, Jenkins is another continuous integration pipelining tool you can use for network automation. Have a look about how to install Jenkins: https://wiki.jenkins.io/display/JENKINS/Installing+Jenkins+on+Ubuntu

To use the Jenkins with Vagrant and KVM (libvirt) there are a few changes needed on the linux server similar with the Gitlab-Runner. The Jenkins user account needs to be able to control KVM and you need to install the vagrant-libvirt plugin:

usermod -aG libvirtd jenkins
sudo su jenkins
vagrant plugin install vagrant-libvirt

Optional: you may need to copy custom Vagrant boxes into the users vagrant folder ‘/var/lib/jenkins/.vagrant.d/boxes/*’. Note that the Jenkins home directory is not located under /home.

Now lets start configuring a Jenkins CI-pipeline, click on ‘New item’:

This creates an empty pipeline where you need to add the different stages  of what needs to be executed:

Below is an example Jenkins pipeline script which is very similar to the Gitlab-CI pipeline I have used with my Cumulus Linux Lab in the past.

pipeline {
    agent any
    stages {
        stage('Clean and prep workspace') {
            steps {
                sh 'rm -r *'
                git 'https://github.com/berndonline/cumulus-lab-provision'
                sh 'git clone --origin master https://github.com/berndonline/cumulus-lab-vagrant'
            }
        }
        stage('Validate Ansible') {
            steps {
                sh 'bash ./linter.sh'
            }
        }
        stage('Staging') {
            steps {
                sh 'cd ./cumulus-lab-vagrant/ && ./vagrant_create.sh'
                sh 'cd ./cumulus-lab-vagrant/ && bash ../staging.sh'
            }
        }
        stage('Deploy production approval') {
            steps {
                input 'Deploy to prod?'
            }
        }
        stage('Production') {
            steps {
                sh 'cd ./cumulus-lab-vagrant/ && ./vagrant_create.sh'
                sh 'cd ./cumulus-lab-vagrant/ && bash ../production.sh'
            }
        }
    }
}

Let’s run the build pipeline:

The stages get executed one by one and, as you can see below, the production stage has an manual approval build-in that nothing gets deployed to production without someone to approve before, for a controlled production deployment:

Finished pipeline:

This is just a simple example of a network automation pipeline, this can of course be more complex if needed. It should just help you a bit on how to start using Jenkins for network automation.

Please share your feedback and leave a comment.

Continuous Integration and Delivery for Networking with Cumulus Linux

Continuous Integration – Continuous Delivery (CICD) is becoming more and more popular for network automation but the problem is how to validate your scripts and stage the configuration because you don’t want to deploy untested code to a production system. Especially in networking that could be pretty destructive if you made a mistake which could cause a loss in connectivity.

I spend some days working on a Cumulus Linux lab using Vagrant which I use to stage configuration. You find the basic Ansible playbook and the gitlab-ci configuration for the Cumulus lab in my Github repo: cumulus-lab-provision

For the continuous integration and delivery (CI/CD) pipeline I am using Gitlab.com and their Gitlab-runner which is running on my server. I will not get into too much detail what is needed on the server, basically it runs vargant, libvirt (kvm), virtualbox, ansible and the gitlab-runner.

  • You need to register your Gitlab-runner with the Gitlab repository.

  • The next step is to create your .gitlab-ci.yml which defines your CI-pipeline.
---
stages:
    - validate ansible
    - staging
    - production
validate:
    stage: validate ansible
    script:
        - bash ./linter.sh
staging:
    before_script:
        - git clone https://github.com/berndonline/cumulus-lab-vagrant.git
        - cd cumulus-lab-vagrant/
        - python ./topology_converter.py ./topology-staging.dot
          -p libvirt --ansible-hostfile
    stage: staging
    script:
        - bash ../staging.sh
production:
    before_script:
        - git clone https://github.com/berndonline/cumulus-lab-vagrant.git
        - cd cumulus-lab-vagrant/
        - python ./topology_converter.py ./topology-production.dot
          -p libvirt --ansible-hostfile
    stage: production
    when: manual
    script:
        - bash ../production.sh
    only:
        - master

In the gitlab-ci you see that I clone the cumulus vagrant lab which I use to spin-up a virtual staging environment and run the Ansible playbook against the virtual lab. The production stage is in my example also a vagrant environment because I had no physical switches for testing.

  • Basically any commit or merge in the Gitlab repo triggers the pipeline which I define in the gitlab-ci.

  • You can see the details in the running job. The first stage is only to validate that the YAML files have the correct syntax.

  • Here the details of the running job of staging and when everything goes well the job succeeded.

  • The last stage is production which needs to be triggered manually.

  • After the changes run through all defined stages you see that you successfully validate, staged and deployed your configuration to a cumulus production system.

This is a complete different way of working for a network engineer but the way it goes in fully automated datacenter network environments. It gets very powerful when you combine this with the Cumulus NetQ server to validate the state of your switch fabric after you run changes in production.

The next topic I am working on, is using Cumulus NetQ to validate configuration changes.

Here again my two repositories I use:

https://github.com/berndonline/cumulus-lab-vagrant

https://github.com/berndonline/cumulus-lab-provision

Read my new posts about an Ansible Playbook for Cumulus Linux BGP IP-Fabric and Cumulus NetQ Validation and BGP EVPN and VXLAN with Cumulus Linux.