Kubernetes Cluster API – Machine Health Check and AWS Spot instances

In my first article about the Kubernetes Cluster API and provisioning of AWS workload clusters I mentioned briefly configuring Machine Health Check for the data-place/worker nodes. The Cluster API also supports Machine Health Check for control-plane/master nodes and can automatically remediate any node issues by replacing and provision new instances. The configuration is the same, only the label selector is different for the node type.

Let’s take a look again at the Machine Health Check for data-plane/worker nodes, the selector label is set to nodepool: nodepool-0 to match the label which is configured in the MachineDeployment.

---
apiVersion: cluster.x-k8s.io/v1alpha3
kind: MachineHealthCheck
metadata:
  name: cluster-1-node-unhealthy-5m
  namespace: k8s
spec:
  clusterName: cluster-1
  maxUnhealthy: 40%
  nodeStartupTimeout: 10m
  selector:
    matchLabels:
      nodepool: nodepool-0
  unhealthyConditions:
  - type: Ready
    status: Unknown
    timeout: 300s
  - type: Ready
    status: "False"
    timeout: 300s

To configure Machine Health Check for your control-plane/master add the label cluster.x-k8s.io/control-plane: “” as selector.

---
apiVersion: cluster.x-k8s.io/v1alpha3
kind: MachineHealthCheck
metadata:
  name: cluster-1-master-unhealthy-5m
spec:
  clusterName: cluster-1
  maxUnhealthy: 30%
  selector:
    matchLabels:
      cluster.x-k8s.io/control-plane: ""
  unhealthyConditions:
    - type: Ready
      status: Unknown
      timeout: 300s
    - type: Ready
      status: "False"
      timeout: 300s

When both are applied you see the two node groups and the status of available nodes and expected/desired state.

$ kubectl get machinehealthcheck
NAME                                       MAXUNHEALTHY   EXPECTEDMACHINES   CURRENTHEALTHY
cluster-1-node-unhealthy-5m                40%            3                  3
cluster-1-master-unhealthy-5m              30%            3                  3

If you terminate one control- and data-plane node, the Machine Health Check identifies these after a couple of minutes and starts the remediation by provisioning new instances to replace the faulty ones. This takes around 5 to 10 min and your cluster is back into the desired state. The management cluster automatically repaired the workload cluster without manual intervention.

$ kubectl get machinehealthcheck
NAME                            MAXUNHEALTHY   EXPECTEDMACHINES   CURRENTHEALTHY
cluster-1-node-unhealthy-5m     40%            3                  2
cluster-1-master-unhealthy-5m   30%            3                  2

More information about Machine Health Check you can find in the Cluster API documentation.

However, a few ago, I didn’t test running the data-plane/worker nodes on AWS EC2 spot instances which is also supported option in the AWSMachineTemplate. Spot instances for control-plane nodes are not supported and don’t make sense because you need the master nodes available at all time.

Using spot instances can reduce the cost of running your workload cluster and you can see a cost saving of up to 60% – 70% compared to the on-demand price. Although AWS can reclaim these instance by terminating your spot instance at any point in time, they are reliable enough in combination with the Cluster API Machine Health Check that you could run production on spot instances with huge cost savings.

To use spot instances simply add the spotMarketOptions to the AWS Machine Template of the data-plane nodes and the Cluster API will automatically issue spot instance requests for these. If you don’t specify the maxPrice and leave this value blank, this will automatically put the on-demand price as max value for the requested instance type. It makes sense to leave this empty because you cannot be outbid if the marketplace of spot instance suddenly changes because of increasing compute demand.

---
apiVersion: infrastructure.cluster.x-k8s.io/v1alpha3
kind: AWSMachineTemplate
metadata:
  name: cluster-1-data-plane-0
  namespace: k8s
spec:
  template:
    spec:
      iamInstanceProfile: nodes.cluster-api-provider-aws.sigs.k8s.io
      instanceType: t3.small
      sshKeyName: default
      spotMarketOptions:
        maxPrice: ""

In the AWS console you see the spot instance requests.

This is great in combination with the Machine Health Check that I explained earlier: if AWS suddenly does reclaim one or multiple of your spot instances, the Machine Health Check will automatically starts to remediate for these missing nodes by requesting new spot instance.
Create and manage AWS EKS cluster using eksctl command-line

A few month back I stumbled across the Weave.works command-line tool eksctl.io to create and manage AWS EKS clusters. Amazon recently announced eksctl.io is the official command-line tool for managing AWS EKS clusters. It follows a similar approach what we have seen with the new openshift-installer to create an OpenShift 4 cluster or with the Google Cloud Shell to create a GKE cluster with a single command and I really like the simplicity of these tools.

Before we start creating a EKS cluster, see below the IAM user policy to set the required permissions for eksctl.

{
    "Version": "2012-10-17",
    "Statement": [
        {
            "Sid": "VisualEditor0",
            "Effect": "Allow",
            "Action": [
                "iam:CreateInstanceProfile",
                "iam:DeleteInstanceProfile",
                "iam:GetRole",
                "iam:GetInstanceProfile",
                "iam:RemoveRoleFromInstanceProfile",
                "iam:CreateRole",
                "iam:DeleteRole",
                "iam:AttachRolePolicy",
                "iam:PutRolePolicy",
                "iam:ListInstanceProfiles",
                "iam:AddRoleToInstanceProfile",
                "iam:ListInstanceProfilesForRole",
                "iam:PassRole",
                "iam:CreateServiceLinkedRole",
                "iam:DetachRolePolicy",
                "iam:DeleteRolePolicy",
                "iam:DeleteServiceLinkedRole",
                "ec2:DeleteInternetGateway",
                "iam:GetOpenIDConnectProvider",
                "iam:GetRolePolicy"
            ],
            "Resource": [
                "arn:aws:iam::552276840222:instance-profile/eksctl-*",
                "arn:aws:iam::552276840222:oidc-provider/oidc.eks*",
                "arn:aws:iam::552276840222:role/eksctl-*",
                "arn:aws:ec2:*:*:internet-gateway/*"
            ]
        },
        {
            "Sid": "VisualEditor1",
            "Effect": "Allow",
            "Action": [
                "ec2:AuthorizeSecurityGroupIngress",
                "ec2:DeleteSubnet",
                "ec2:AttachInternetGateway",
                "ec2:DeleteRouteTable",
                "ec2:AssociateRouteTable",
                "ec2:DescribeInternetGateways",
                "autoscaling:DescribeAutoScalingGroups",
                "ec2:CreateRoute",
                "ec2:CreateInternetGateway",
                "ec2:RevokeSecurityGroupEgress",
                "autoscaling:UpdateAutoScalingGroup",
                "ec2:DeleteInternetGateway",
                "ec2:DescribeKeyPairs",
                "ec2:DescribeRouteTables",
                "ec2:ImportKeyPair",
                "ec2:DescribeLaunchTemplates",
                "ec2:CreateTags",
                "ec2:CreateRouteTable",
                "ec2:RunInstances",
                "cloudformation:*",
                "ec2:DetachInternetGateway",
                "ec2:DisassociateRouteTable",
                "ec2:RevokeSecurityGroupIngress",
                "ec2:DescribeImageAttribute",
                "ec2:DeleteNatGateway",
                "autoscaling:DeleteAutoScalingGroup",
                "ec2:DeleteVpc",
                "ec2:CreateSubnet",
                "ec2:DescribeSubnets",
                "eks:*",
                "autoscaling:CreateAutoScalingGroup",
                "ec2:DescribeAddresses",
                "ec2:DeleteTags",
                "ec2:CreateNatGateway",
                "autoscaling:DescribeLaunchConfigurations",
                "ec2:CreateVpc",
                "ec2:DescribeVpcAttribute",
                "autoscaling:DescribeScalingActivities",
                "ec2:DescribeAvailabilityZones",
                "ec2:CreateSecurityGroup",
                "ec2:ModifyVpcAttribute",
                "ec2:ReleaseAddress",
                "ec2:AuthorizeSecurityGroupEgress",
                "ec2:DeleteLaunchTemplate",
                "ec2:DescribeTags",
                "ec2:DeleteRoute",
                "ec2:DescribeLaunchTemplateVersions",
                "elasticloadbalancing:*",
                "ec2:DescribeNatGateways",
                "ec2:AllocateAddress",
                "ec2:DescribeSecurityGroups",
                "autoscaling:CreateLaunchConfiguration",
                "ec2:DescribeImages",
                "ec2:CreateLaunchTemplate",
                "autoscaling:DeleteLaunchConfiguration",
                "iam:ListOpenIDConnectProviders",
                "ec2:DescribeVpcs",
                "ec2:DeleteSecurityGroup"
            ],
            "Resource": "*"
        }
    ]
}

Now let’s create the EKS cluster with the following command:

$ eksctl create cluster --name=cluster-1 --region=eu-west-1 --nodes=3 --auto-kubeconfig
[ℹ]  eksctl version 0.10.2
[ℹ]  using region eu-west-1
[ℹ]  setting availability zones to [eu-west-1a eu-west-1c eu-west-1b]
[ℹ]  subnets for eu-west-1a - public:192.168.0.0/19 private:192.168.96.0/19
[ℹ]  subnets for eu-west-1c - public:192.168.32.0/19 private:192.168.128.0/19
[ℹ]  subnets for eu-west-1b - public:192.168.64.0/19 private:192.168.160.0/19
[ℹ]  nodegroup "ng-b17ac84f" will use "ami-059c6874350e63ca9" [AmazonLinux2/1.14]
[ℹ]  using Kubernetes version 1.14
[ℹ]  creating EKS cluster "cluster-1" in "eu-west-1" region
[ℹ]  will create 2 separate CloudFormation stacks for cluster itself and the initial nodegroup
[ℹ]  if you encounter any issues, check CloudFormation console or try 'eksctl utils describe-stacks --region=eu-west-1 --cluster=cluster-1'
[ℹ]  CloudWatch logging will not be enabled for cluster "cluster-1" in "eu-west-1"
[ℹ]  you can enable it with 'eksctl utils update-cluster-logging --region=eu-west-1 --cluster=cluster-1'
[ℹ]  Kubernetes API endpoint access will use default of {publicAccess=true, privateAccess=false} for cluster "cluster-1" in "eu-west-1"
[ℹ]  2 sequential tasks: { create cluster control plane "cluster-1", create nodegroup "ng-b17ac84f" }
[ℹ]  building cluster stack "eksctl-cluster-1-cluster"
[ℹ]  deploying stack "eksctl-cluster-1-cluster"
[ℹ]  building nodegroup stack "eksctl-cluster-1-nodegroup-ng-b17ac84f"
[ℹ]  --nodes-min=3 was set automatically for nodegroup ng-b17ac84f
[ℹ]  --nodes-max=3 was set automatically for nodegroup ng-b17ac84f
[ℹ]  deploying stack "eksctl-cluster-1-nodegroup-ng-b17ac84f"
[✔]  all EKS cluster resources for "cluster-1" have been created
[✔]  saved kubeconfig as "/home/ubuntu/.kube/eksctl/clusters/cluster-1"
[ℹ]  adding identity "arn:aws:iam::xxxxxxxxxx:role/eksctl-cluster-1-nodegroup-ng-b17-NodeInstanceRole-1DK2K493T8OM7" to auth ConfigMap
[ℹ]  nodegroup "ng-b17ac84f" has 0 node(s)
[ℹ]  waiting for at least 3 node(s) to become ready in "ng-b17ac84f"
[ℹ]  nodegroup "ng-b17ac84f" has 3 node(s)
[ℹ]  node "ip-192-168-5-192.eu-west-1.compute.internal" is ready
[ℹ]  node "ip-192-168-62-86.eu-west-1.compute.internal" is ready
[ℹ]  node "ip-192-168-64-47.eu-west-1.compute.internal" is ready
[ℹ]  kubectl command should work with "/home/ubuntu/.kube/eksctl/clusters/cluster-1", try 'kubectl --kubeconfig=/home/ubuntu/.kube/eksctl/clusters/cluster-1 get nodes'
[✔]  EKS cluster "cluster-1" in "eu-west-1" region is ready

Alternatively there is the option to create the EKS cluster in an existing VPC without eksctl creating the full-stack, you are required to specify the subnet IDs for private and public subnets:

eksctl create cluster --name=cluster-1 --region=eu-west-1 --nodes=3 \
       --vpc-private-subnets=subnet-0ff156e0c4a6d300c,subnet-0426fb4a607393184,subnet-0426fb4a604827314 \
       --vpc-public-subnets=subnet-0153e560b3129a696,subnet-009fa0199ec203c37,subnet-0426fb4a412393184

The option –auto-kubeconfig stores the kubeconfig under the users home directory in ~/.kube/eksctl/clusters/<-cluster-name-> or you can obtain cluster credentials at any point in time with the following command:

$ eksctl utils write-kubeconfig --cluster=cluster-1
[ℹ]  eksctl version 0.10.2
[ℹ]  using region eu-west-1
[✔]  saved kubeconfig as "/home/ubuntu/.kube/config"

Using kubectl to connect and manage the EKS cluster:

$ kubectl get nodes
NAME                                          STATUS   ROLES    AGE     VERSION
ip-192-168-5-192.eu-west-1.compute.internal   Ready    <none>   3m42s   v1.14.7-eks-1861c5
ip-192-168-62-86.eu-west-1.compute.internal   Ready    <none>   3m43s   v1.14.7-eks-1861c5
ip-192-168-64-47.eu-west-1.compute.internal   Ready    <none>   3m41s   v1.14.7-eks-1861c5

You are able to view the created EKS clusters:

$ eksctl get clusters
NAME		REGION
cluster-1	eu-west-1

As easy it is to create an EKS cluster you can also delete the cluster with a single command:

$ eksctl delete cluster --name=cluster-1 --region=eu-west-1
[ℹ]  eksctl version 0.10.2
[ℹ]  using region eu-west-1
[ℹ]  deleting EKS cluster "cluster-1"
[✔]  kubeconfig has been updated
[ℹ]  cleaning up LoadBalancer services
[ℹ]  2 sequential tasks: { delete nodegroup "ng-b17ac84f", delete cluster control plane "cluster-1" [async] }
[ℹ]  will delete stack "eksctl-cluster-1-nodegroup-ng-b17ac84f"
[ℹ]  waiting for stack "eksctl-cluster-1-nodegroup-ng-b17ac84f" to get deleted
[ℹ]  will delete stack "eksctl-cluster-1-cluster"
[✔]  all cluster resources were deleted

I can only recommend checking out eksctl.io because it has lot of potentials and the move towards an GitOps model to manage EKS clusters in a declarative way using a cluster manifests or hopefully in the future an eksctld operator to do the job. RedHat is working on a similar tool for OpenShift 4 called OpenShift Hive which I will write about very soon.

Running Istio Service Mesh on Amazon EKS

I have not spend too much time with Istio in the last weeks but after my previous article about running Istio Service Mesh on OpenShift I wanted to do the same and deploy Istio Service Mesh on an Amazon EKS cluster. This time I did the recommended way of using a helm template to deploy Istio which is more flexible then the Ansible operator for the OpenShift deployment.

Once you have created your EKS cluster you can start, there are not many prerequisite for EKS so you can basically create the istio namespace and create a secret for Kiali, and start to deploy the helm template:

kubectl create namespace istio-system

USERNAME=$(echo -n 'admin' | base64)
PASSPHRASE=$(echo -n 'supersecretpassword!!' | base64)
NAMESPACE=istio-system

cat <<EOF | kubectl apply -n istio-system -f -
apiVersion: v1
kind: Secret
metadata:
  name: kiali
  namespace: $NAMESPACE
  labels:
    app: kiali
type: Opaque
data:
  username: $USERNAME
  passphrase: $PASSPHRASE
EOF

You then create the Custom Resource Definitions (CRDs) for Istio:

helm template istio-1.1.4/install/kubernetes/helm/istio-init --name istio-init --namespace istio-system | kubectl apply -f -  

# Check the created Istio CRDs 
kubectl get crds -n istio-system | grep 'istio.io\|certmanager.k8s.io' | wc -l

At this point you can deploy the main Istio Helm template. See the installation options for more detail about customizing the installation:

helm template istio-1.1.4/install/kubernetes/helm/istio --name istio --namespace istio-system  --set grafana.enabled=true --set tracing.enabled=true --set kiali.enabled=true --set kiali.dashboard.secretName=kiali --set kiali.dashboard.usernameKey=username --set kiali.dashboard.passphraseKey=passphrase | kubectl apply -f -
 
# Validate and see that all components start
kubectl get pods -n istio-system -w  

The Kiali service has the type clusterIP which we need to change to type LoadBalancer:

kubectl patch svc kiali -n istio-system --patch '{"spec": {"type": "LoadBalancer" }}'

# Get the create AWS ELB for the Kiali service
$ kubectl get svc kiali -n istio-system --no-headers | awk '{ print $4 }'
abbf8224773f111e99e8a066e034c3d4-78576474.eu-west-1.elb.amazonaws.com

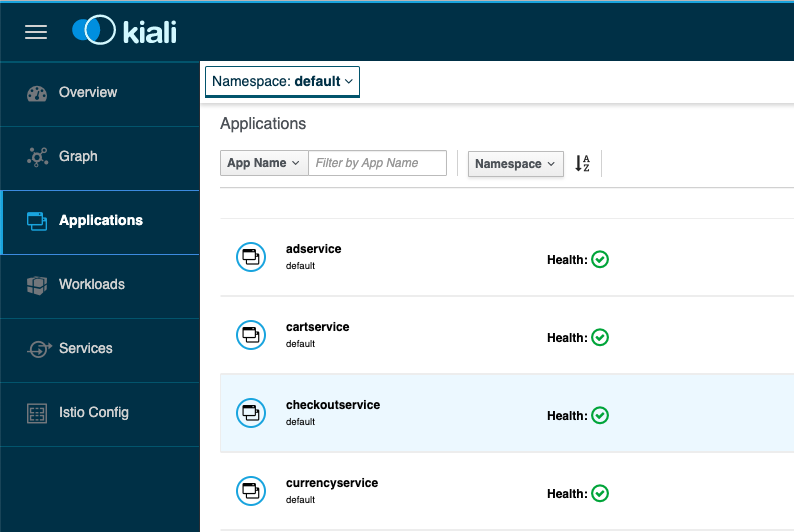
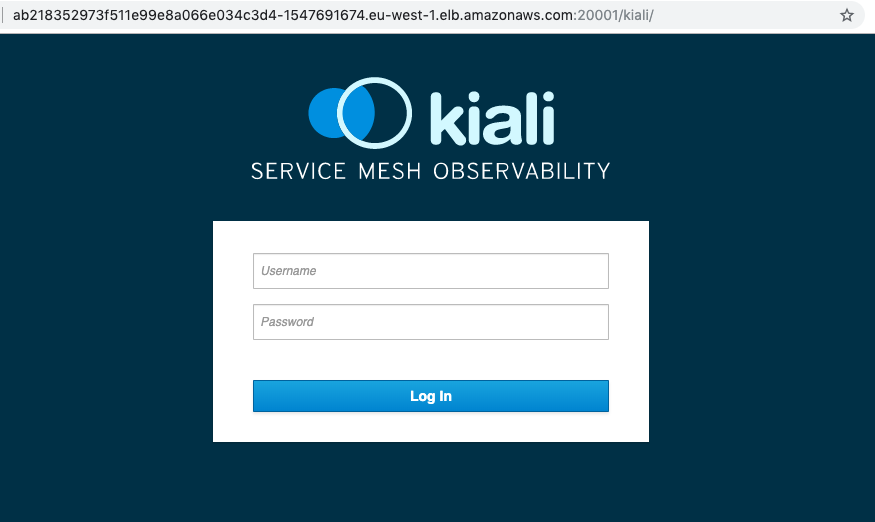
Now we are able to access the Kiali dashboard and login with the credentials I have specified earlier in the Kiali secret.

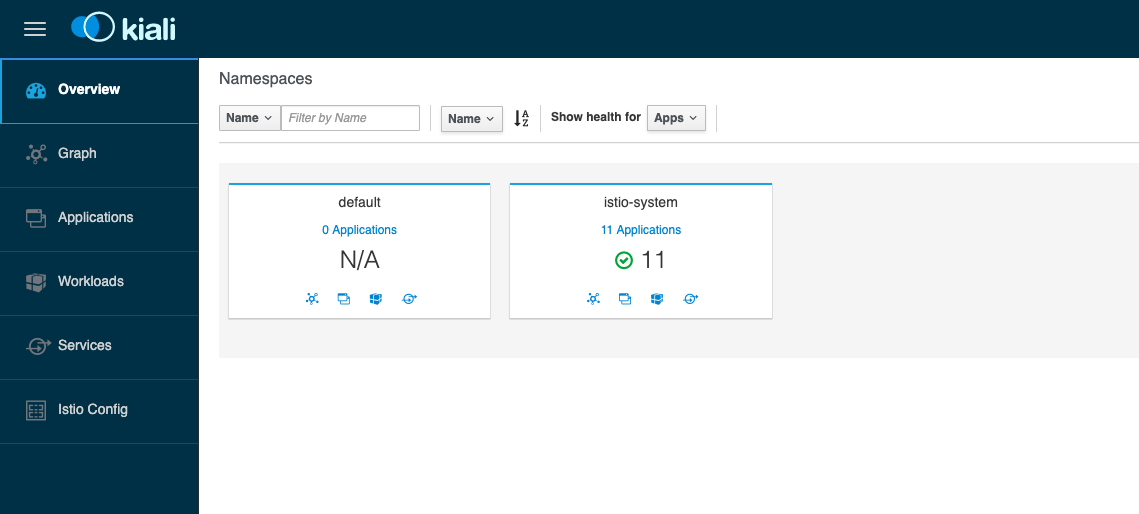
We didn’t deploy anything else yet so the default namespace is empty:

I recommend having a look at the Istio-Sidecar injection. If your istio-sidecar containers are not getting deployed you might forgot to allow TCP port 443 from your control-plane to worker nodes. Have a look at the Github issue about this: Admission control webhooks (e.g. sidecar injector) don’t work on EKS.

We can continue and deploy the Google Hipster Shop example.

# Label default namespace to inject Envoy sidecar
kubectl label namespace default istio-injection=enabled

# Check istio sidecar injector label
kubectl get namespace -L istio-injection

# Deploy Google hipster shop manifests
kubectl create -f https://raw.githubusercontent.com/berndonline/aws-eks-terraform/master/example/istio-hipster-shop.yml
kubectl create -f https://raw.githubusercontent.com/berndonline/aws-eks-terraform/master/example/istio-manifest.yml

# Wait a few minutes before deploying the load generator
kubectl create -f https://raw.githubusercontent.com/berndonline/aws-eks-terraform/master/example/istio-loadgenerator.yml

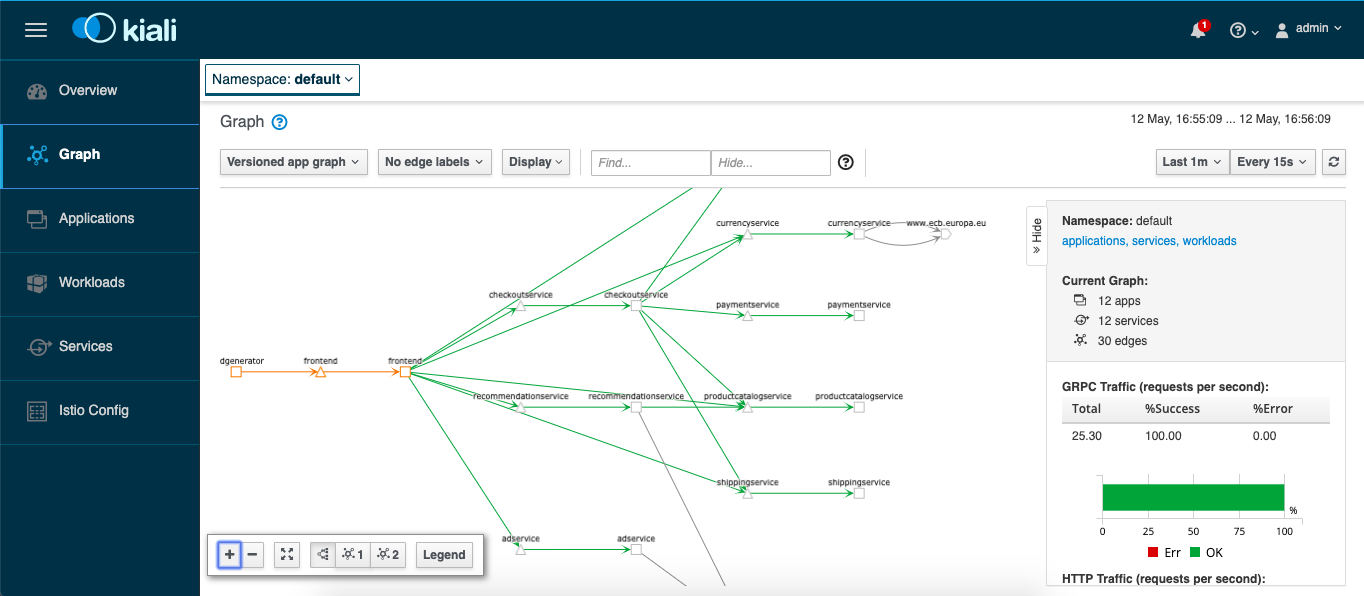
We can check again the Kiali dashboard once the application is deployed and healthy. If there are issues with the Envoy sidecar you will see a warning “Missing Sidecar”:

We are also able to see the graph which shows detailed traffic flows within the microservice application.

Let’s get the hostname for the istio-ingressgateway service and connect via the web browser:

$ kubectl get svc istio-ingressgateway -n istio-system --no-headers | awk '{ print $4 }'
a16f7090c74ca11e9a1fb02cd763ca9e-362893117.eu-west-1.elb.amazonaws.com

Before you destroy your EKS cluster you should remove all installed components because Kubernetes service type LoadBalancer created AWS ELBs which will not get deleted and stay behind when you delete the EKS cluster:

kubectl label namespace default istio-injection-
kubectl delete -f https://raw.githubusercontent.com/berndonline/aws-eks-terraform/master/example/istio-loadgenerator.yml
kubectl delete -f https://raw.githubusercontent.com/berndonline/aws-eks-terraform/master/example/istio-hipster-shop.yml
kubectl delete -f https://raw.githubusercontent.com/berndonline/aws-eks-terraform/master/example/istio-manifest.yml

Finally to remove Istio from EKS you run the same Helm template command but do kubectl delete:

helm template istio-1.1.4/install/kubernetes/helm/istio --name istio --namespace istio-system  --set grafana.enabled=true --set tracing.enabled=true --set kiali.enabled=true --set kiali.dashboard.secretName=kiali --set kiali.dashboard.usernameKey=username --set kiali.dashboard.passphraseKey=passphrase | kubectl delete -f -

Very simple to get started with Istio Service Mesh on EKS and if I find some time I will give the Istio Multicluster a try and see how this works to span Istio service mesh across multiple Kubernetes clusters.

Getting started with OpenShift 4.0 Container Platform

I had a first look at OpenShift 4.0 and I wanted to share some information from what I have seen so far. The installation of the cluster is super easy and RedHat did a lot to improve the overall experience of the installation process to the previous OpenShift v3.x Ansible based installation and moving towards ephemeral cluster deployments.

There are a many changes under the hood and it’s not as obvious as Bootkube for the self-hosted/healing control-plane, MachineSets and the many internal operators to install and manage the OpenShift components ( api serverscheduler, controller manager, cluster-autoscalercluster-monitoringweb-consolednsingressnetworkingnode-tuning, and authentication ).

For the OpenShift 4.0 developer preview you need an RedHat account because you require a pull-secret for the cluster installation. For more information please visit: https://cloud.openshift.com/clusters/install

First we need to download the openshift-installer binary:

wget https://github.com/openshift/installer/releases/download/v0.16.1/openshift-install-linux-amd64
mv openshift-install-linux-amd64 openshift-install
chmod +x openshift-install

Then we create the install-configuration, it is required that you already have AWS account credentials and an Route53 DNS domain set-up:

$ ./openshift-install create install-config
INFO Platform aws
INFO AWS Access Key ID *********
INFO AWS Secret Access Key [? for help] *********
INFO Writing AWS credentials to "/home/centos/.aws/credentials" (https://docs.aws.amazon.com/cli/latest/userguide/cli-configure-files.html)
INFO Region eu-west-1
INFO Base Domain paas.domain.com
INFO Cluster Name cluster1
INFO Pull Secret [? for help] *********

Let’s look at the install-config.yaml

apiVersion: v1beta4
baseDomain: paas.domain.com
compute:
- name: worker
  platform: {}
  replicas: 3
controlPlane:
  name: master
  platform: {}
  replicas: 3
metadata:
  creationTimestamp: null
  name: ew1
networking:
  clusterNetwork:
  - cidr: 10.128.0.0/14
    hostPrefix: 23
  machineCIDR: 10.0.0.0/16
  networkType: OpenShiftSDN
  serviceNetwork:
  - 172.30.0.0/16
platform:
  aws:
    region: eu-west-1
pullSecret: '{"auths":{...}'

Now we can continue to create the OpenShift v4 cluster which takes around 30mins to complete. At the end of the openshift-installer you see the auto-generate credentials to connect to the cluster:

$ ./openshift-install create cluster
INFO Consuming "Install Config" from target directory
INFO Creating infrastructure resources...
INFO Waiting up to 30m0s for the Kubernetes API at https://api.cluster1.paas.domain.com:6443...
INFO API v1.12.4+0ba401e up
INFO Waiting up to 30m0s for the bootstrap-complete event...
INFO Destroying the bootstrap resources...
INFO Waiting up to 30m0s for the cluster at https://api.cluster1.paas.domain.com:6443 to initialize...
INFO Waiting up to 10m0s for the openshift-console route to be created...
INFO Install complete!
INFO Run 'export KUBECONFIG=/home/centos/auth/kubeconfig' to manage the cluster with 'oc', the OpenShift CLI.
INFO The cluster is ready when 'oc login -u kubeadmin -p jMTSJ-F6KYy-mVVZ4-QVNPP' succeeds (wait a few minutes).
INFO Access the OpenShift web-console here: https://console-openshift-console.apps.cluster1.paas.domain.com
INFO Login to the console with user: kubeadmin, password: jMTSJ-F6KYy-mVVZ4-QVNPP

The web-console has a very clean new design which I really like in addition to all the great improvements.

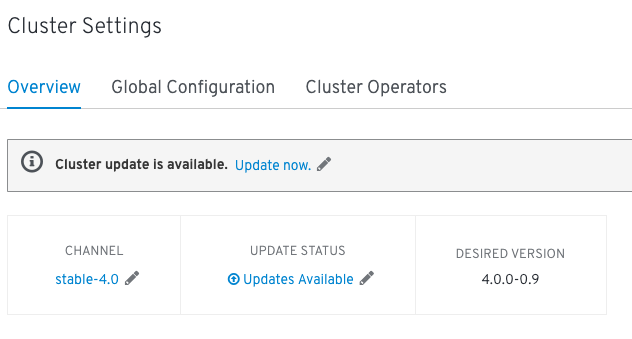
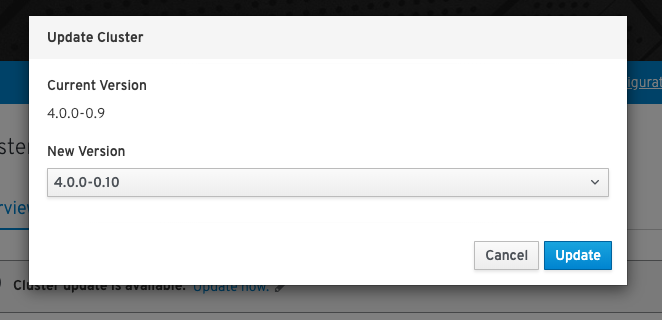
Under administration -> cluster settings you can explore the new auto-upgrade functionality of OpenShift 4.0:

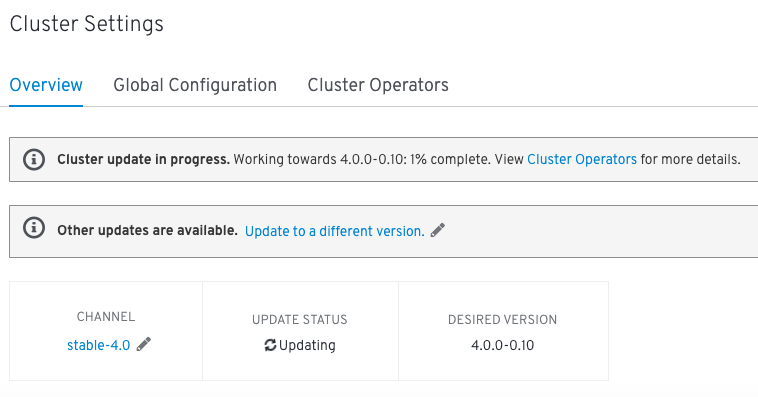
You choose the new version to upgrade and everything else happens in the background which is a massive improvement to OpenShift v3.x where you had to run the ansible installer for this.

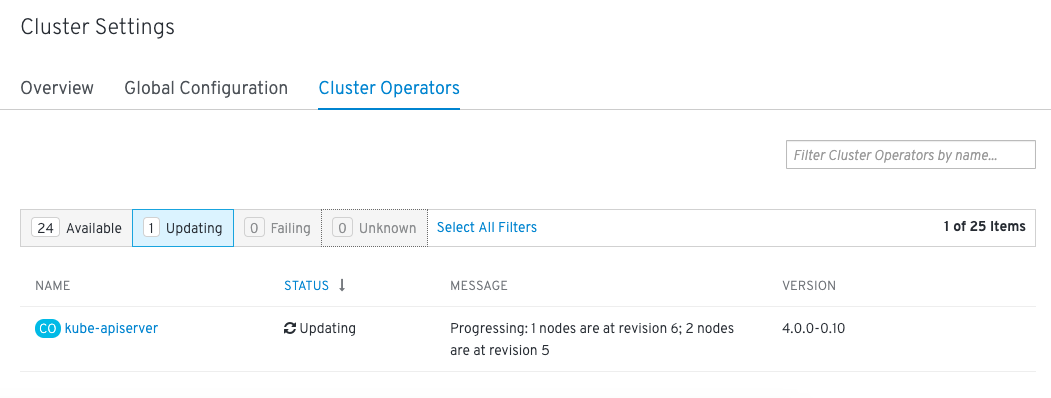
In the background the cluster operator upgrades the different platform components one by one.

Slowly you will see that the components move to the new build version.

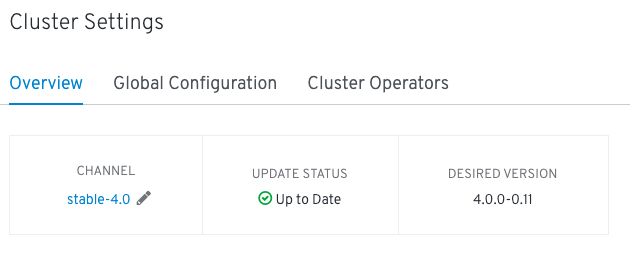
Finished cluster upgrade:

You can only upgrade from one version 4.0.0-0.9 to the next version 4.0.0-0.10. It is not possible to upgrade and go straight from x-0.9 to x-0.11.

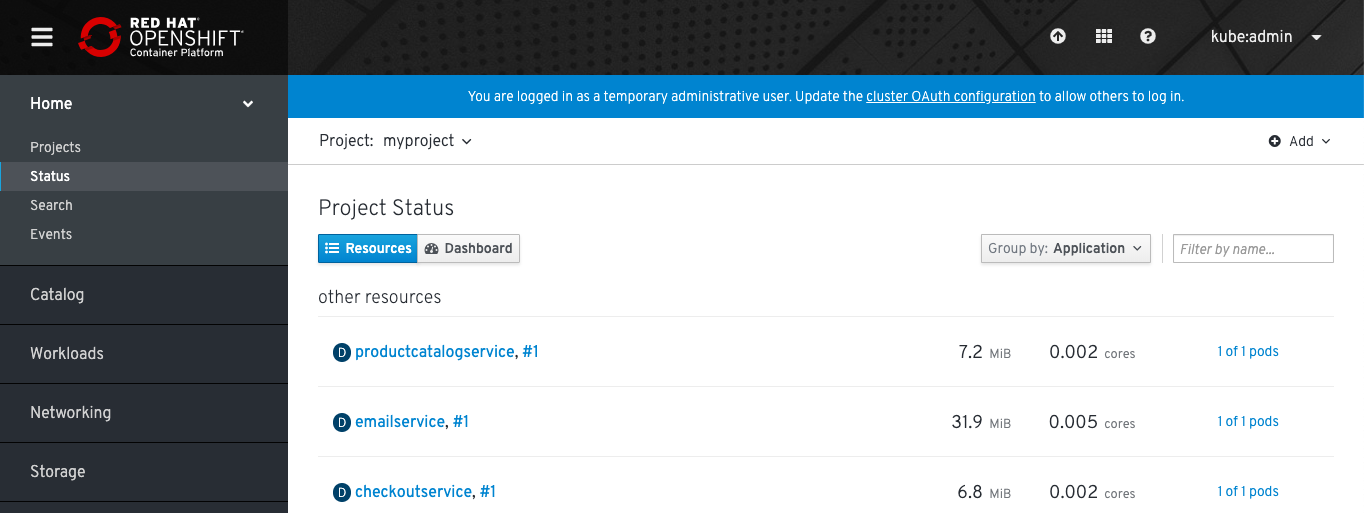
But let’s deploy the Google Hipster Shop example and expose the frontend-external service for some more testing:

oc login -u kubeadmin -p jMTSJ-F6KYy-mVVZ4-QVNPP https://api.cluster1.paas.domain.com:6443 --insecure-skip-tls-verify=true
oc new-project myproject
oc create -f https://raw.githubusercontent.com/berndonline/openshift-ansible/master/examples/hipster-shop.yml
oc expose svc frontend-external

Getting the hostname for the exposed service:

$ oc get route
NAME                HOST/PORT                                                   PATH      SERVICES            PORT      TERMINATION   WILDCARD
frontend-external   frontend-external-myproject.apps.cluster1.paas.domain.com             frontend-external   http                    None

Use the browser to connect to our Hipster Shop:

It’s also very easy to destroy the cluster as it is to create it, as you seen previously:

$ ./openshift-install destroy cluster
INFO Disassociated                                 arn="arn:aws:ec2:eu-west-1:552276840222:route-table/rtb-083e2da5d1183efa7" id=rtbassoc-01d27db162fa45402
INFO Disassociated                                 arn="arn:aws:ec2:eu-west-1:552276840222:route-table/rtb-083e2da5d1183efa7" id=rtbassoc-057f593640067efc0
INFO Disassociated                                 arn="arn:aws:ec2:eu-west-1:552276840222:route-table/rtb-083e2da5d1183efa7" id=rtbassoc-05e821b451bead18f
INFO Disassociated                                 IAM instance profile="arn:aws:iam::552276840222:instance-profile/ocp4-bgx4c-worker-profile" arn="arn:aws:ec2:eu-west-1:552276840222:instance/i-0f64a911b1ffa3eff" id=i-0f64a911b1ffa3eff name=ocp4-bgx4c-worker-profile role=ocp4-bgx4c-worker-role
INFO Deleted                                       IAM instance profile="arn:aws:iam::552276840222:instance-profile/ocp4-bgx4c-worker-profile" arn="arn:aws:ec2:eu-west-1:552276840222:instance/i-0f64a911b1ffa3eff" id=i-0f64a911b1ffa3eff name=0xc00090f9a8
INFO Deleted                                       arn="arn:aws:ec2:eu-west-1:552276840222:instance/i-0f64a911b1ffa3eff" id=i-0f64a911b1ffa3eff
INFO Deleted                                       arn="arn:aws:ec2:eu-west-1:552276840222:instance/i-00b5eedc186ba26a7" id=i-00b5eedc186ba26a7
...
INFO Deleted                                       arn="arn:aws:ec2:eu-west-1:552276840222:security-group/sg-016d4c7d435a1c97f" id=sg-016d4c7d435a1c97f
INFO Deleted                                       arn="arn:aws:ec2:eu-west-1:552276840222:subnet/subnet-076348368858e9a82" id=subnet-076348368858e9a82
INFO Deleted                                       arn="arn:aws:ec2:eu-west-1:552276840222:vpc/vpc-00c611ae1b9b8e10a" id=vpc-00c611ae1b9b8e10a
INFO Deleted                                       arn="arn:aws:ec2:eu-west-1:552276840222:dhcp-options/dopt-0ce8b6a1c31e0ceac" id=dopt-0ce8b6a1c31e0ceac

The install experience is great for OpenShift 4.0 which makes it very easy for everyone to create and get started quickly with an enterprise container platform. From the operational perspective I still need to see how to run the new platform because all the operators are great and makes it an easy to use cluster but what happens when one of the operators goes rogue and debugging this I am most interested in.

Over the coming weeks I will look into more detail around OpenShift 4.0 and the different new features, I am especially interested in Service Mesh.

Deploy OpenShift 3.11 Container Platform on AWS using Terraform

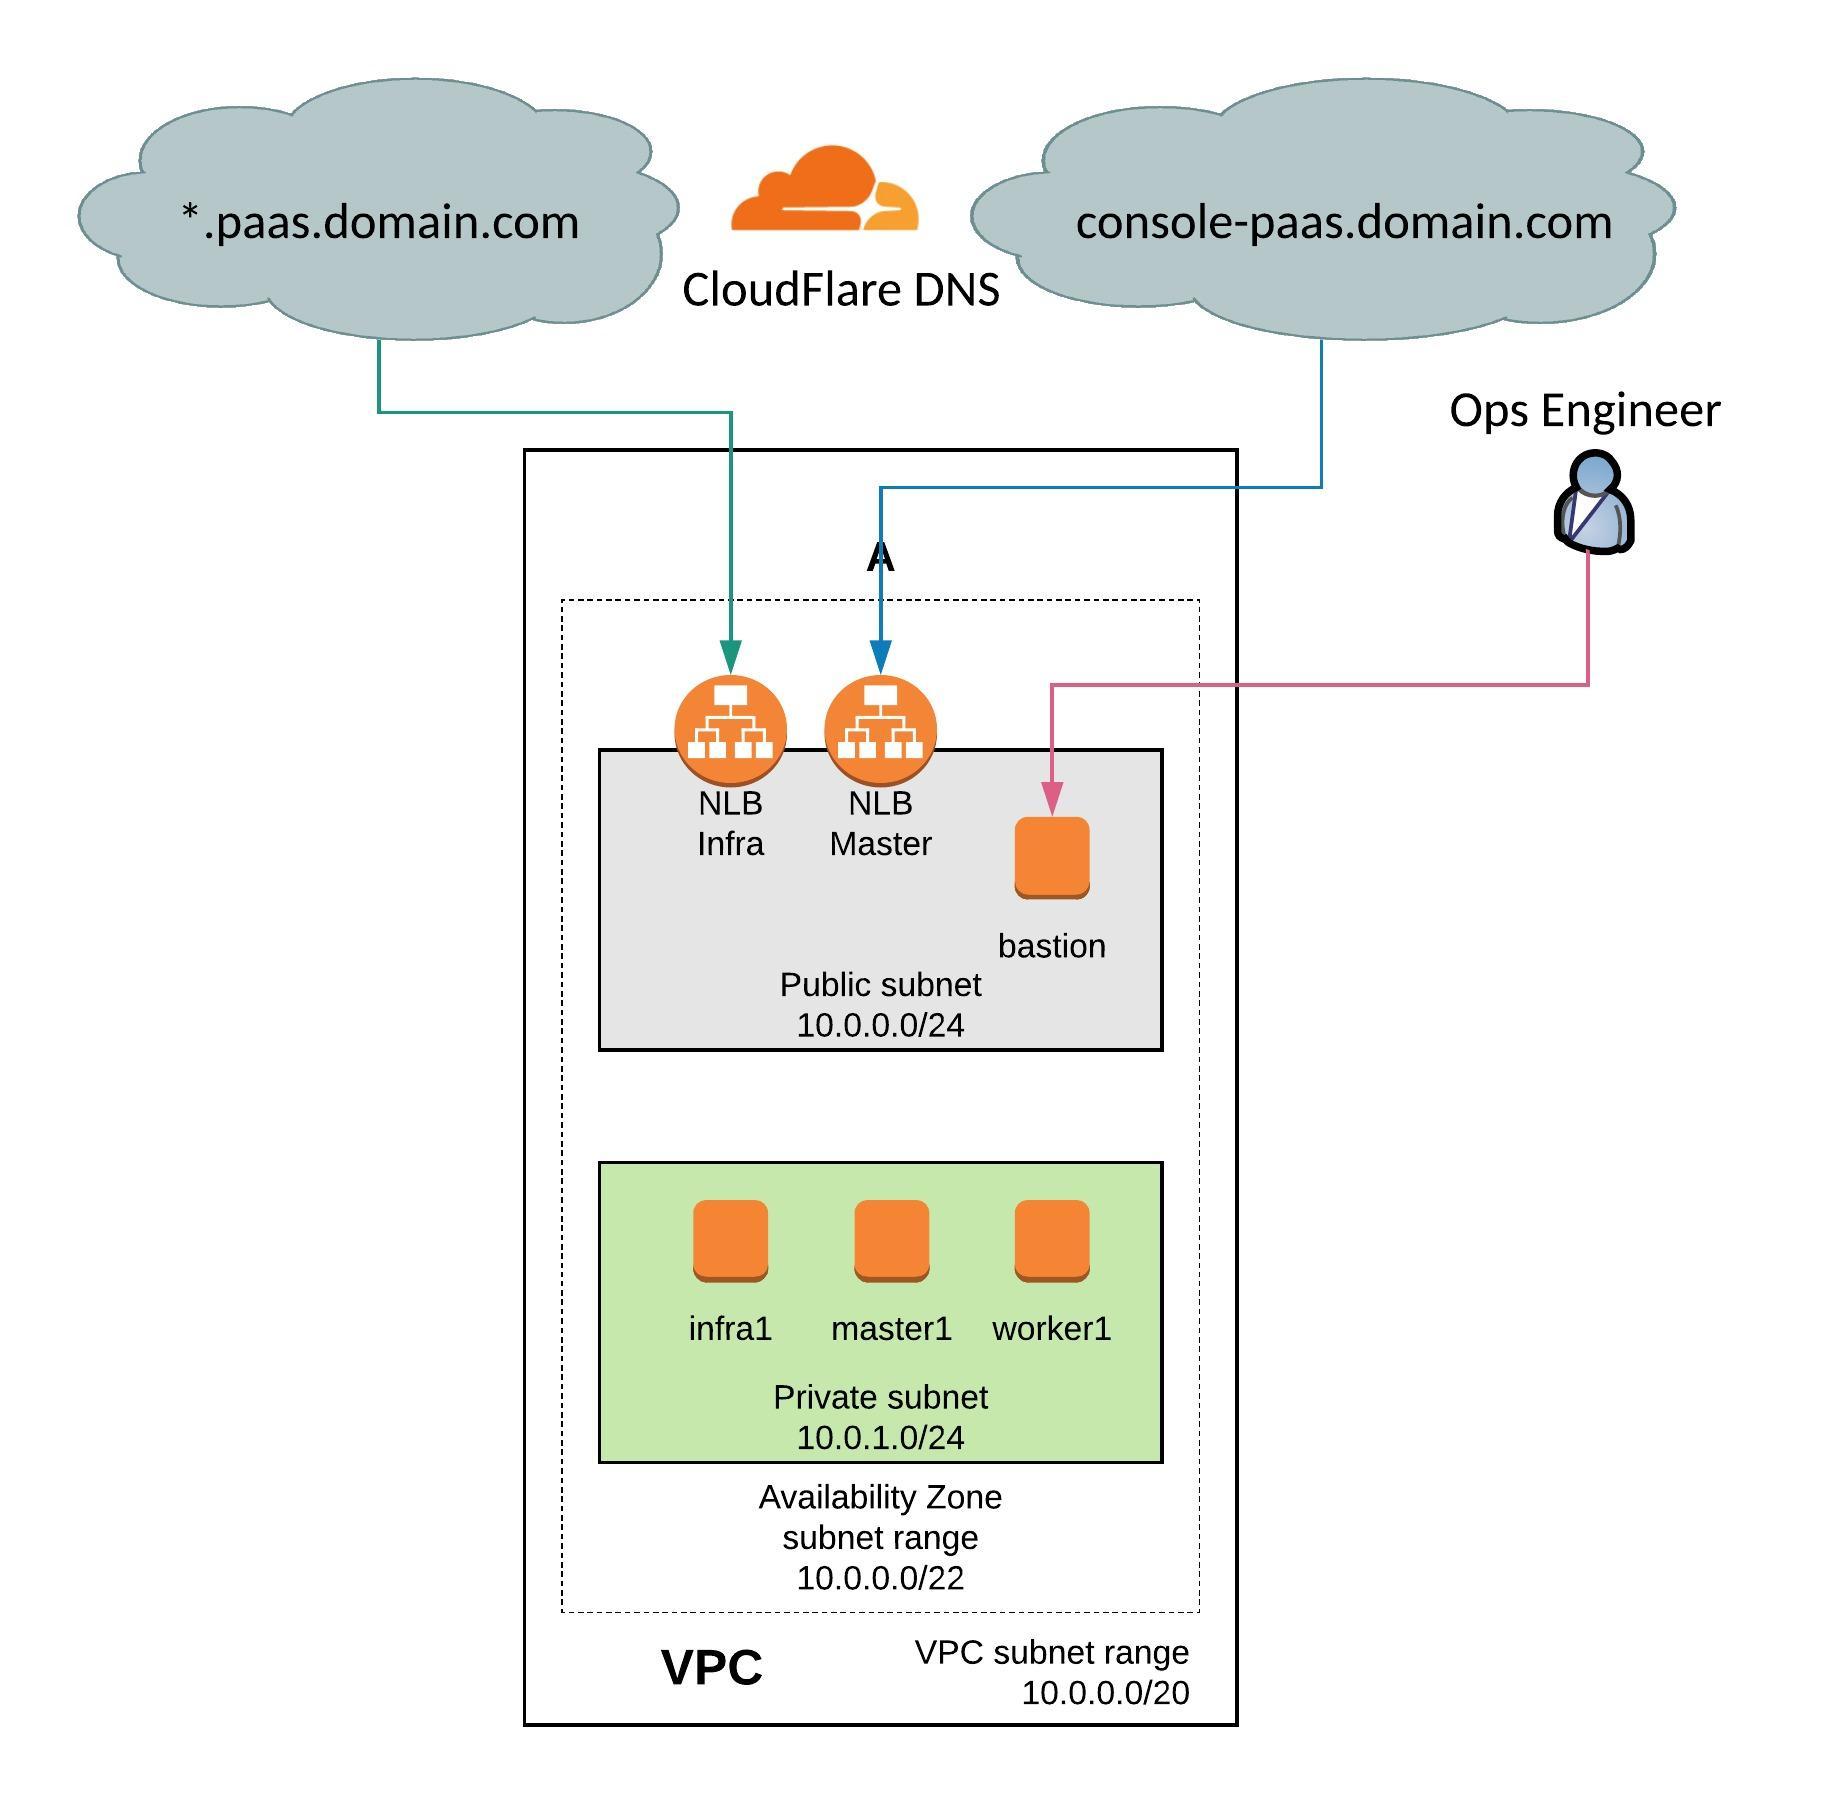
I have done a few changes on my Terraform configuration for OpenShift 3.11 on Amazon AWS. I have downsized the environment because I didn’t needed that many nodes for a quick test setup. I have added CloudFlare DNS to automatically create CNAME for the AWS load balancers on the DNS zone. I have also added an AWS S3 Bucket for storing the backend state. You can find the new Terraform configuration on my Github repository: https://github.com/berndonline/openshift-terraform/tree/aws-dev

From OpenShift 3.10 and later versions the environment variables changes and I modified the ansible-hosts template for the new configuration. You can see the changes in the hosts template: https://github.com/berndonline/openshift-terraform/blob/aws-dev/helper_scripts/ansible-hosts.template.txt

OpenShift 3.11 has changed a few things and put an focus on an Cluster Operator console which is pretty nice and runs on Kubernetes 1.11. I recommend reading the release notes for the 3.11 release for more details: https://docs.openshift.com/container-platform/3.11/release_notes/ocp_3_11_release_notes.html

I don’t wanted to get into too much detail, just follow the steps below and start with cloning my repository, and choose the dev branch:

git clone -b aws-dev https://github.com/berndonline/openshift-terraform.git
cd ./openshift-terraform/
ssh-keygen -b 2048 -t rsa -f ./helper_scripts/id_rsa -q -N ""
chmod 600 ./helper_scripts/id_rsa

You need to modify the cloudflare.tf and add your CloudFlare API credentials otherwise just delete the file. The same for the S3 backend provider, you find the configuration in the main.tf and it can be removed if not needed.

CloudFlare and Amazon AWS credentials can be added through environment variables:

export AWS_ACCESS_KEY_ID='<-YOUR-AWS-ACCESS-KEY->'
export AWS_SECRET_ACCESS_KEY='<-YOUR-AWS-SECRET-KEY->'
export TF_VAR_email='<-YOUR-CLOUDFLARE-EMAIL-ADDRESS->'
export TF_VAR_token='<-YOUR-CLOUDFLARE-TOKEN->'
export TF_VAR_domain='<-YOUR-CLOUDFLARE-DOMAIN->'
export TF_VAR_htpasswd='<-YOUR-OPENSHIFT-DEMO-USER-HTPASSWD->'

Run terraform init and apply to create the environment.

terraform init && terraform apply -auto-approve

Copy the ssh key and ansible-hosts file to the bastion host from where you need to run the Ansible OpenShift playbooks.

scp -o StrictHostKeyChecking=no -o UserKnownHostsFile=/dev/null -i ./helper_scripts/id_rsa -r ./helper_scripts/id_rsa centos@$(terraform output bastion):/home/centos/.ssh/
scp -o StrictHostKeyChecking=no -o UserKnownHostsFile=/dev/null -i ./helper_scripts/id_rsa -r ./inventory/ansible-hosts  centos@$(terraform output bastion):/home/centos/ansible-hosts

I recommend waiting a few minutes as the AWS cloud-init script prepares the bastion host. Afterwards continue with the pre and install playbooks. You can connect to the bastion host and run the playbooks directly.

ssh -o StrictHostKeyChecking=no -o UserKnownHostsFile=/dev/null -i ./helper_scripts/id_rsa -l centos $(terraform output bastion) -A "cd /openshift-ansible/ && ansible-playbook ./playbooks/openshift-pre.yml -i ~/ansible-hosts"
ssh -o StrictHostKeyChecking=no -o UserKnownHostsFile=/dev/null -i ./helper_scripts/id_rsa -l centos $(terraform output bastion) -A "cd /openshift-ansible/ && ansible-playbook ./playbooks/openshift-install.yml -i ~/ansible-hosts"

If for whatever reason the cluster deployment fails, you can run the uninstall playbook to bring the nodes back into a clean state and start from the beginning and run deploy_cluster.

ssh -o StrictHostKeyChecking=no -o UserKnownHostsFile=/dev/null -i ./helper_scripts/id_rsa -l centos $(terraform output bastion) -A "cd /openshift-ansible/ && ansible-playbook ./openshift-ansible/playbooks/adhoc/uninstall.yml -i ~/ansible-hosts"

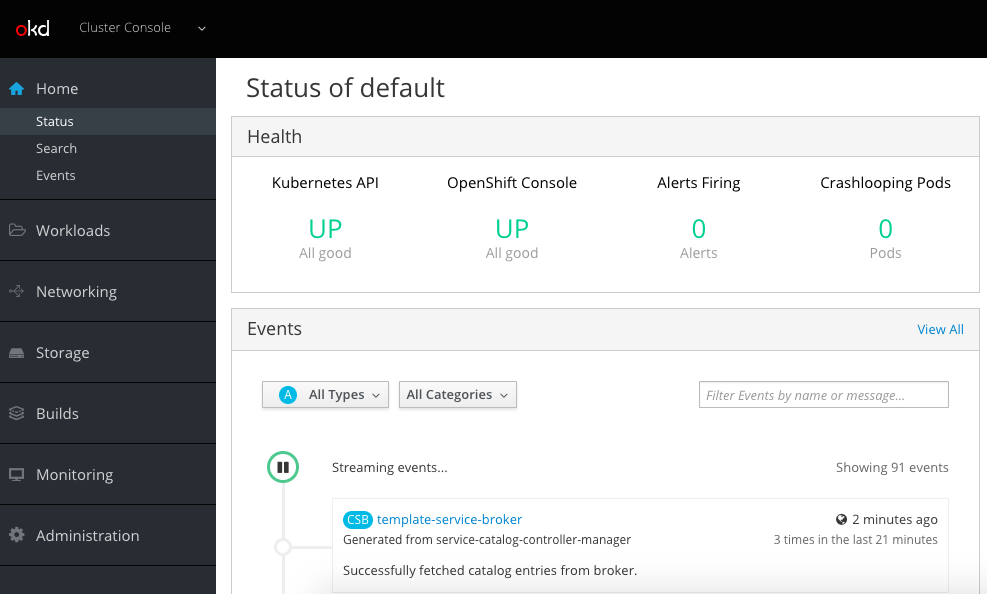
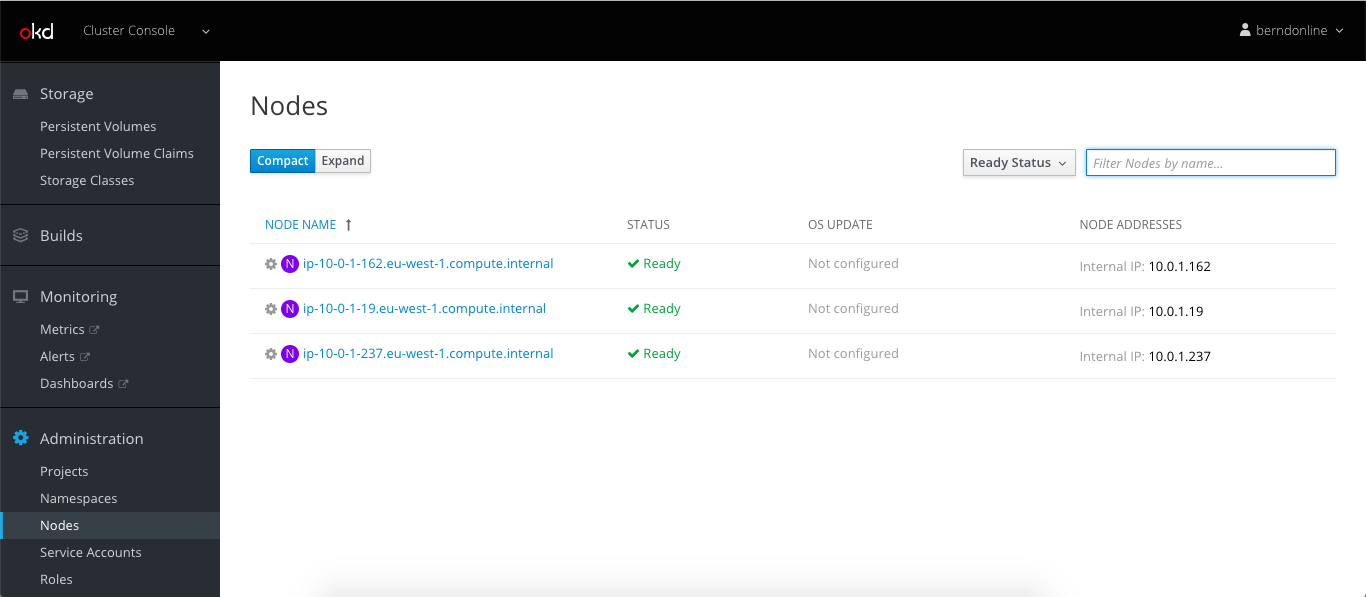
Here are some screenshots of the new cluster console:

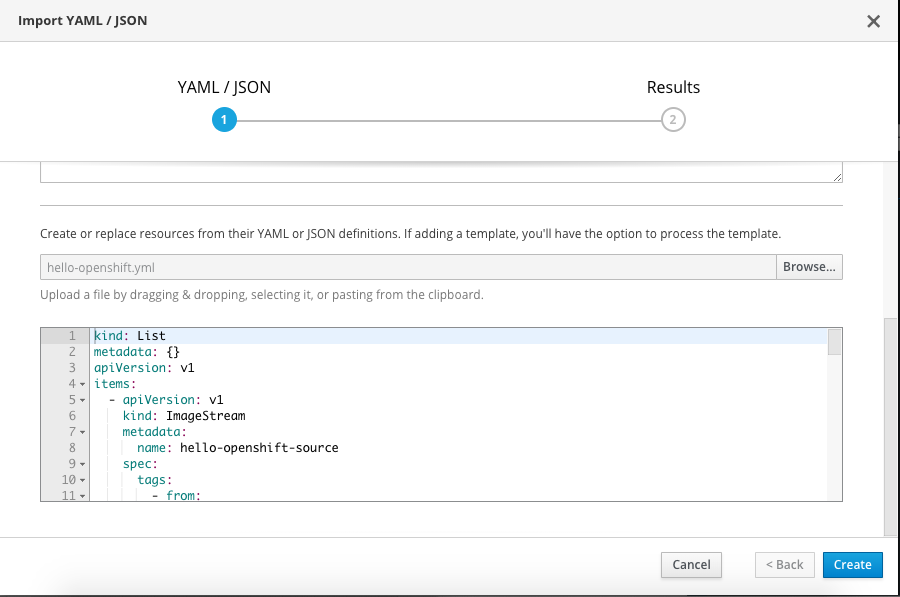
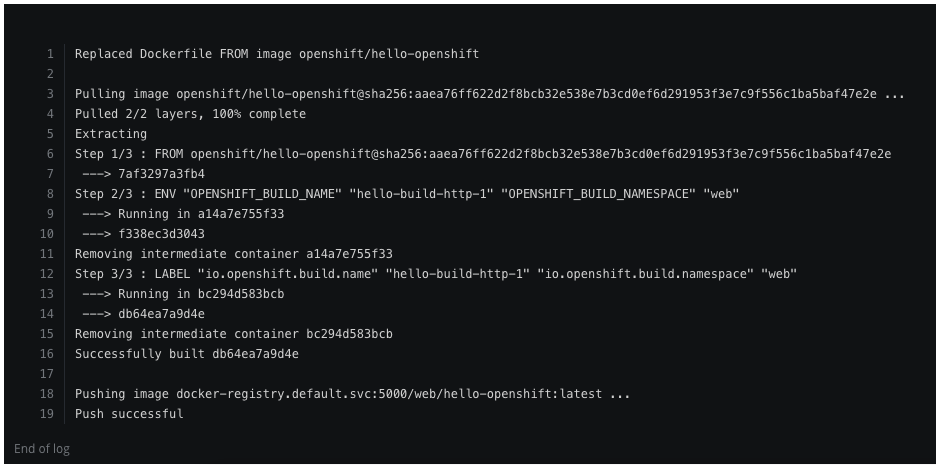
Let’s create a project and import my hello-openshift.yml build configuration:

Successful completed the build and deployed the hello-openshift container:

My example hello openshift application:

When you are finished with the testing, run terraform destroy.

terraform destroy -force