Ken Murphy from networkautomationblog.com asked me to do a more detailed post about how to setup Gitlab-Runner on your local server to use with Gitlab-CI. I will not get into too much detail about the installation because Gitlab has a very detailed information about it which you can find here: https://docs.gitlab.com/runner/install/linux-repository.html
Once the Gitlab Runner is installed on your server you need to configure and register the runner with your Gitlab repo. If you are interested in information about this, you can find the documentation here: https://docs.gitlab.com/runner/register/ but lets continue with how to register the runner.
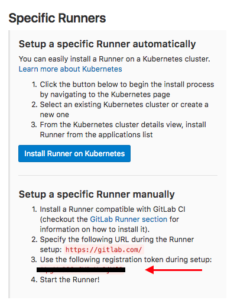
In your project go to ‘Settings -> CI / CD’ to find the registration token:

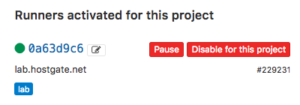
It is important to disable the shared runners:

Now let’s register the gitlab runner:
berndonline@lab ~ # sudo gitlab-runner register
Running in system-mode.

Please enter the gitlab-ci coordinator URL (e.g. https://gitlab.com/):
https://gitlab.com
Please enter the gitlab-ci token for this runner:
xxxxxxxxx
Please enter the gitlab-ci description for this runner:
[lab]:
Please enter the gitlab-ci tags for this runner (comma separated):
lab
Whether to run untagged builds [true/false]:
[false]: true
Whether to lock the Runner to current project [true/false]:
[true]: false
Registering runner... succeeded                     runner=xxxxx
Please enter the executor: docker-ssh, parallels, ssh, virtualbox, kubernetes, docker, shell, docker+machine, docker-ssh+machine:
shell
Runner registered successfully. Feel free to start it, but if it's running already the config should be automatically reloaded!
berndonline@lab ~ #
You will find the main configuration file under /etc/gitlab-runner/config.toml.
When everything goes well the runner is registered and active, and ready to apply the CI pipeline what is defined in the .gitlab-ci.yml.

To use the runner with Vagrant and KVM (libvirt) there are a few changes needed on the linux server itself, first the gitlab-runner user account needs to be able to control KVM, second the vagrant-libvirt plugin needs to be installed:
usermod -aG libvirtd gitlab-runner
sudo su gitlab-runner
vagrant plugin install vagrant-libvirt
Optional: you may need to copy custom Vagrant boxes into the users vagrant folder ‘/home/gitlab-runner/.vagrant.d/boxes/*’.
Here the example from my Cumulus CI-pipeline .gitlab-ci.yml that I have already shared in my other blog post about Continuous Integration and Delivery for Networking with Cumulus Linux:
---
stages:
    - validate ansible
    - staging
    - production
validate:
    stage: validate ansible
    script:
        - bash ./linter.sh
staging:
    before_script:
        - git clone https://github.com/berndonline/cumulus-lab-vagrant.git
        - cd cumulus-lab-vagrant/
        - python ./topology_converter.py ./topology-production.dot
          -p libvirt --ansible-hostfile
    stage: staging
    script:
        - bash ../staging.sh
production:
    before_script:
        - git clone https://github.com/berndonline/cumulus-lab-vagrant.git
        - cd cumulus-lab-vagrant/
        - python ./topology_converter.py ./topology-production.dot
          -p libvirt --ansible-hostfile
    stage: production
    when: manual
    script:
        - bash ../production.sh
    only:
        - master
The next step is the staging.sh shell script which boots up the vagrant instances and executes the Ansible playbooks. It is better to use a script and report the exit state so that if something goes wrong the Vagrant instances are correctly destroyed.
#!/bin/bash

EXIT=0
vagrant up mgmt-1 --color <<< 'mgmt-1 boot' || EXIT=$?
vagrant up netq-1 --color <<< 'netq-1 boot' || EXIT=$?
sleep 300
vagrant up spine-1 --color <<< 'spine-1 boot' || EXIT=$?
vagrant up spine-2 --color <<< 'spine-2 boot' || EXIT=$?
sleep 60
vagrant up edge-1 --color <<< 'edge-1 boot' || EXIT=$?
vagrant up edge-2 --color <<< 'edge-2 boot' || EXIT=$?
sleep 60
vagrant up leaf-1 --color <<< 'leaf-1 boot' || EXIT=$?
vagrant up leaf-2 --color <<< 'leaf-2 boot' || EXIT=$?
vagrant up leaf-3 --color <<< 'leaf-3 boot' || EXIT=$?
vagrant up leaf-4 --color <<< 'leaf-4 boot' || EXIT=$?
vagrant up leaf-5 --color <<< 'leaf-5 boot' || EXIT=$?
vagrant up leaf-6 --color <<< 'leaf-6 boot' || EXIT=$?
sleep 60
vagrant up server-1 --color <<< 'server-1 boot' || EXIT=$?
vagrant up server-2 --color <<< 'server-2 boot' || EXIT=$?
vagrant up server-3 --color <<< 'server-3 boot' || EXIT=$?
vagrant up server-4 --color <<< 'server-4 boot' || EXIT=$?
vagrant up server-5 --color <<< 'server-5 boot' || EXIT=$?
vagrant up server-6 --color <<< 'server-6 boot' || EXIT=$?
sleep 60
export ANSIBLE_FORCE_COLOR=true
ansible-playbook ./helper_scripts/configure_servers.yml <<< 'ansible playbook' || EXIT=$?
ansible-playbook ../site.yml <<< 'ansible playbook' || EXIT=$?
sleep 60
ansible-playbook ../icmp_check.yml <<< 'icmp check' || EXIT=$?
vagrant destroy -f
echo $EXIT
exit $EXIT
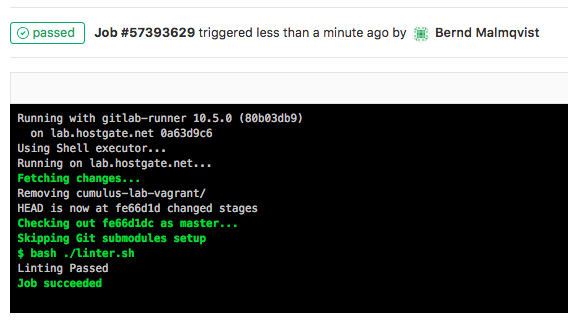
Basically any change in the repository triggers the .gitlab-ci.yml and executes the pipeline; starting with the stage validating the Ansible syntax:

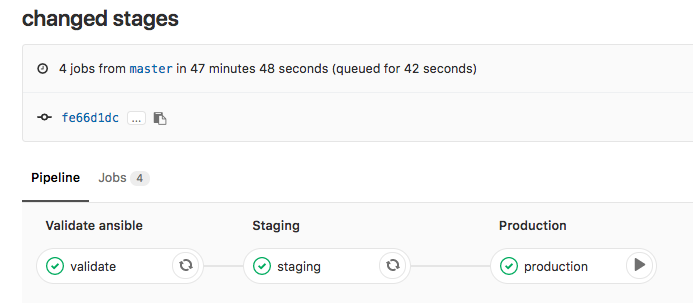
Continue with staging the configuration and deploying to production. The production stage is a manual trigger to have a controlled deployment:

In one of my next posts I will explain how to use Jenkins instead of Gitlab-CI for Network Automation. Jenkins is very similar to the runner but more flexible with what you can do with it.
Thanks Bernd, much appreciated!
Well written. A lot of great data here and an excellent starting point!