Getting started with OpenShift 4.0 Container Platform

I had a first look at OpenShift 4.0 and I wanted to share some information from what I have seen so far. The installation of the cluster is super easy and RedHat did a lot to improve the overall experience of the installation process to the previous OpenShift v3.x Ansible based installation and moving towards ephemeral cluster deployments.

There are a many changes under the hood and it’s not as obvious as Bootkube for the self-hosted/healing control-plane, MachineSets and the many internal operators to install and manage the OpenShift components ( api serverscheduler, controller manager, cluster-autoscalercluster-monitoringweb-consolednsingressnetworkingnode-tuning, and authentication ).

For the OpenShift 4.0 developer preview you need an RedHat account because you require a pull-secret for the cluster installation. For more information please visit: https://cloud.openshift.com/clusters/install

First we need to download the openshift-installer binary:

wget https://github.com/openshift/installer/releases/download/v0.16.1/openshift-install-linux-amd64
mv openshift-install-linux-amd64 openshift-install
chmod +x openshift-install

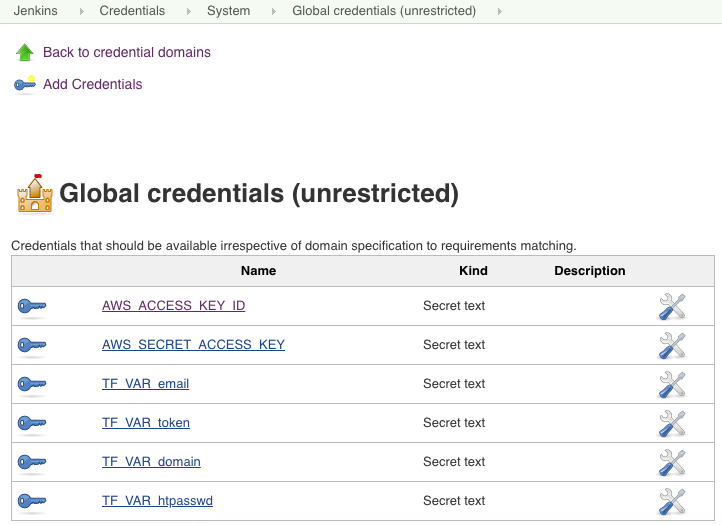
Then we create the install-configuration, it is required that you already have AWS account credentials and an Route53 DNS domain set-up:

$ ./openshift-install create install-config
INFO Platform aws
INFO AWS Access Key ID *********
INFO AWS Secret Access Key [? for help] *********
INFO Writing AWS credentials to "/home/centos/.aws/credentials" (https://docs.aws.amazon.com/cli/latest/userguide/cli-configure-files.html)
INFO Region eu-west-1
INFO Base Domain paas.domain.com
INFO Cluster Name cluster1
INFO Pull Secret [? for help] *********

Let’s look at the install-config.yaml

apiVersion: v1beta4
baseDomain: paas.domain.com
compute:
- name: worker
  platform: {}
  replicas: 3
controlPlane:
  name: master
  platform: {}
  replicas: 3
metadata:
  creationTimestamp: null
  name: ew1
networking:
  clusterNetwork:
  - cidr: 10.128.0.0/14
    hostPrefix: 23
  machineCIDR: 10.0.0.0/16
  networkType: OpenShiftSDN
  serviceNetwork:
  - 172.30.0.0/16
platform:
  aws:
    region: eu-west-1
pullSecret: '{"auths":{...}'

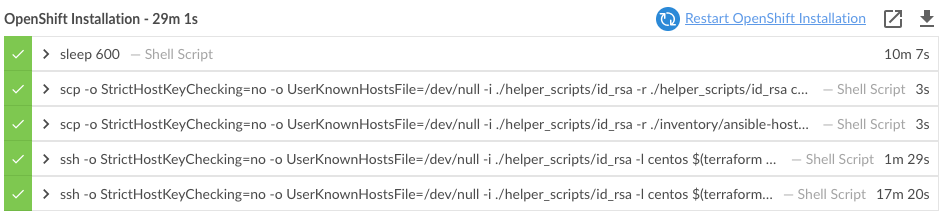
Now we can continue to create the OpenShift v4 cluster which takes around 30mins to complete. At the end of the openshift-installer you see the auto-generate credentials to connect to the cluster:

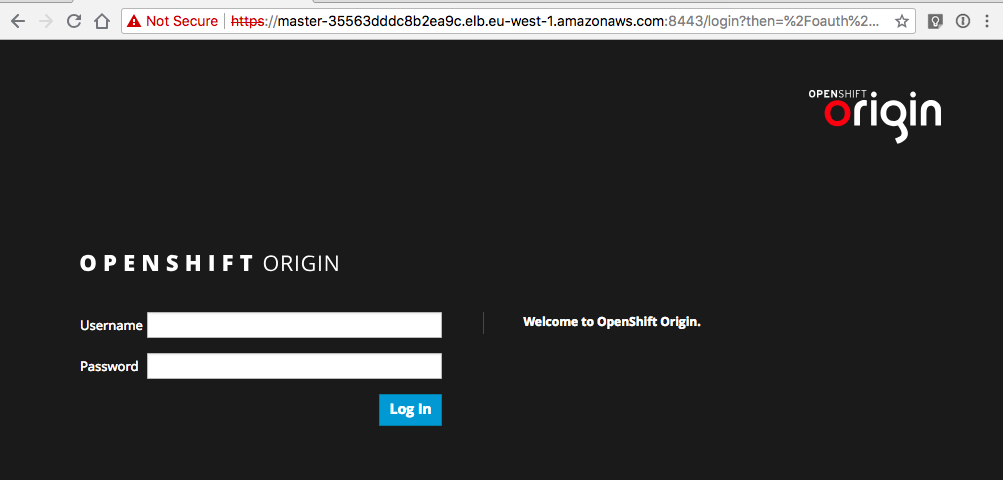
$ ./openshift-install create cluster
INFO Consuming "Install Config" from target directory
INFO Creating infrastructure resources...
INFO Waiting up to 30m0s for the Kubernetes API at https://api.cluster1.paas.domain.com:6443...
INFO API v1.12.4+0ba401e up
INFO Waiting up to 30m0s for the bootstrap-complete event...
INFO Destroying the bootstrap resources...
INFO Waiting up to 30m0s for the cluster at https://api.cluster1.paas.domain.com:6443 to initialize...
INFO Waiting up to 10m0s for the openshift-console route to be created...
INFO Install complete!
INFO Run 'export KUBECONFIG=/home/centos/auth/kubeconfig' to manage the cluster with 'oc', the OpenShift CLI.
INFO The cluster is ready when 'oc login -u kubeadmin -p jMTSJ-F6KYy-mVVZ4-QVNPP' succeeds (wait a few minutes).
INFO Access the OpenShift web-console here: https://console-openshift-console.apps.cluster1.paas.domain.com
INFO Login to the console with user: kubeadmin, password: jMTSJ-F6KYy-mVVZ4-QVNPP

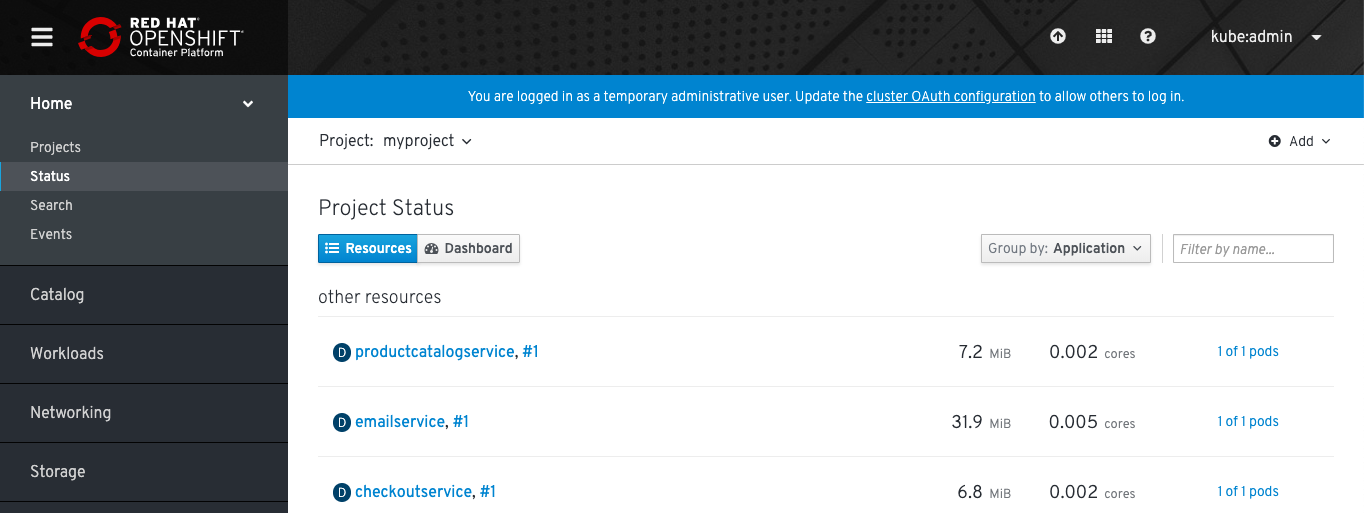
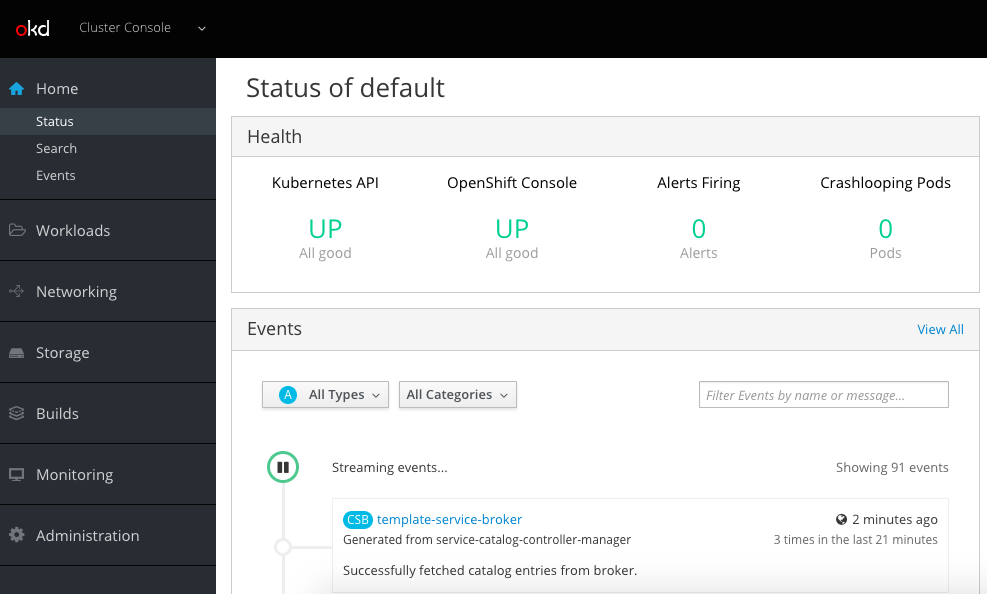
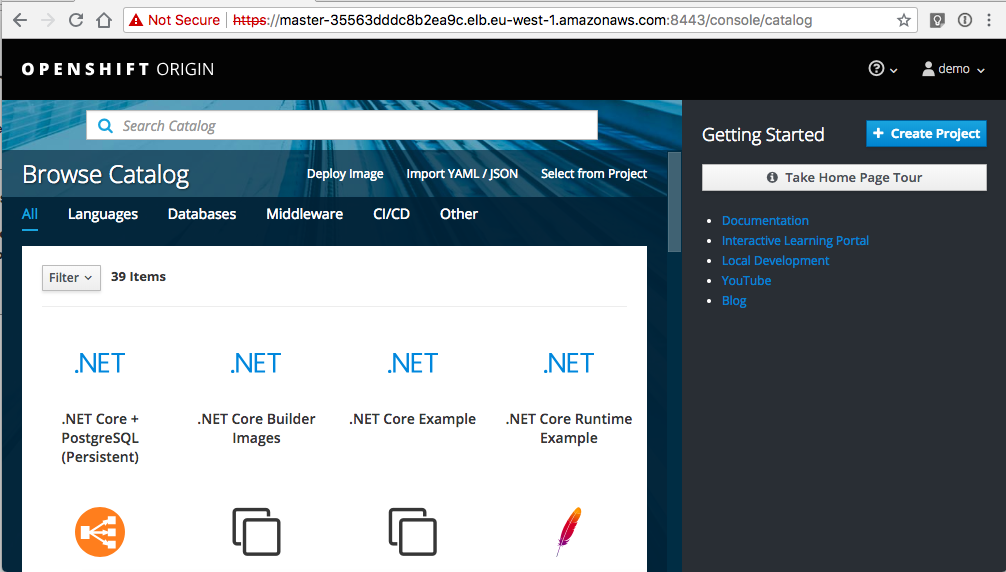
The web-console has a very clean new design which I really like in addition to all the great improvements.

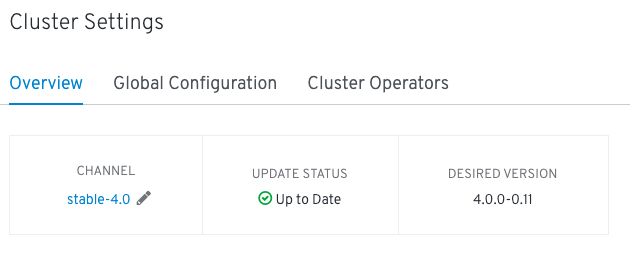
Under administration -> cluster settings you can explore the new auto-upgrade functionality of OpenShift 4.0:

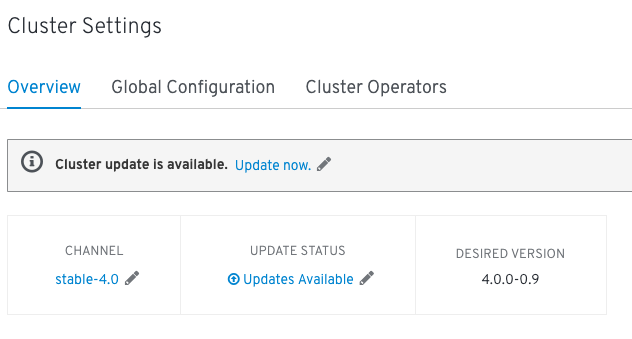
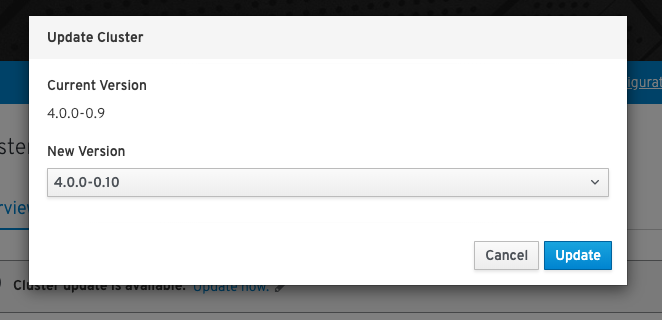
You choose the new version to upgrade and everything else happens in the background which is a massive improvement to OpenShift v3.x where you had to run the ansible installer for this.

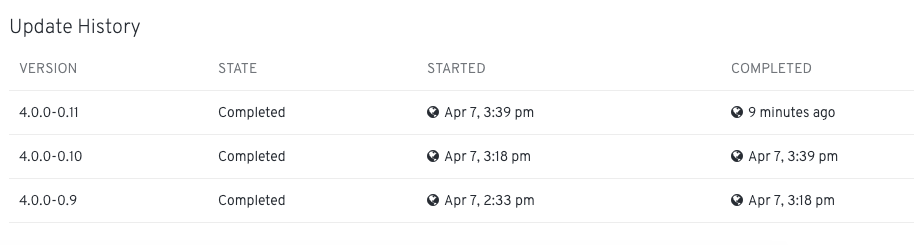
In the background the cluster operator upgrades the different platform components one by one.

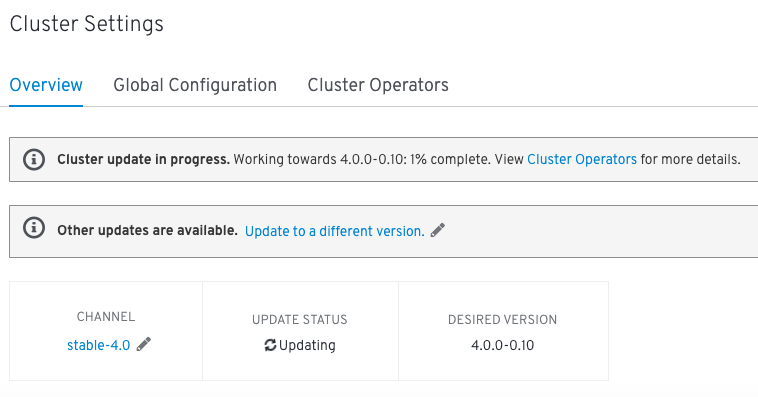
Slowly you will see that the components move to the new build version.

Finished cluster upgrade:

You can only upgrade from one version 4.0.0-0.9 to the next version 4.0.0-0.10. It is not possible to upgrade and go straight from x-0.9 to x-0.11.

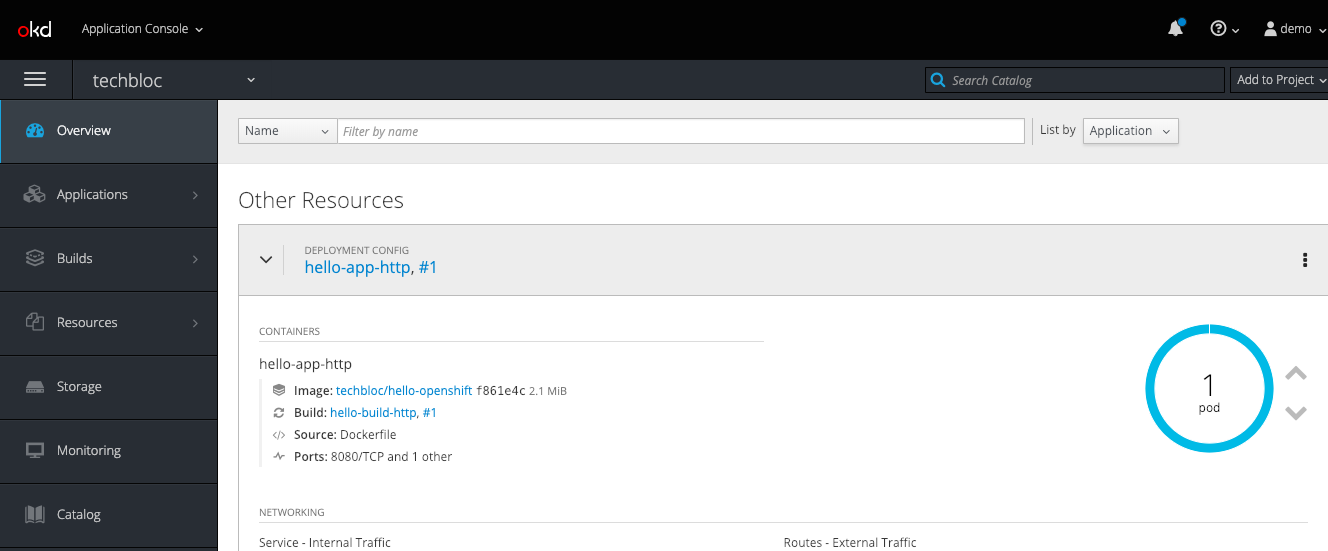
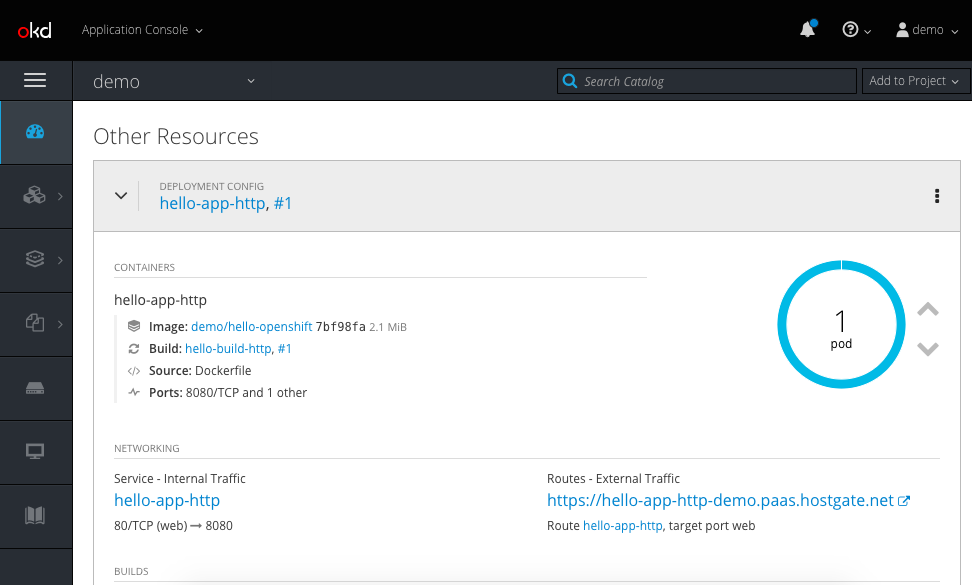
But let’s deploy the Google Hipster Shop example and expose the frontend-external service for some more testing:

oc login -u kubeadmin -p jMTSJ-F6KYy-mVVZ4-QVNPP https://api.cluster1.paas.domain.com:6443 --insecure-skip-tls-verify=true
oc new-project myproject
oc create -f https://raw.githubusercontent.com/berndonline/openshift-ansible/master/examples/hipster-shop.yml
oc expose svc frontend-external

Getting the hostname for the exposed service:

$ oc get route
NAME                HOST/PORT                                                   PATH      SERVICES            PORT      TERMINATION   WILDCARD
frontend-external   frontend-external-myproject.apps.cluster1.paas.domain.com             frontend-external   http                    None

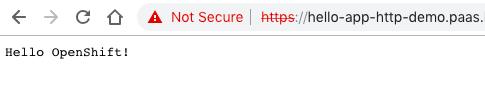
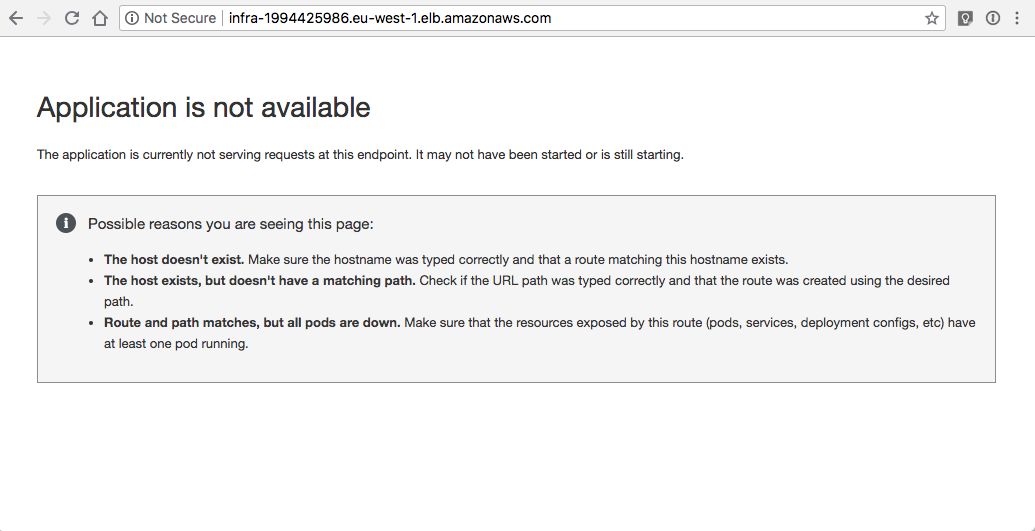
Use the browser to connect to our Hipster Shop:

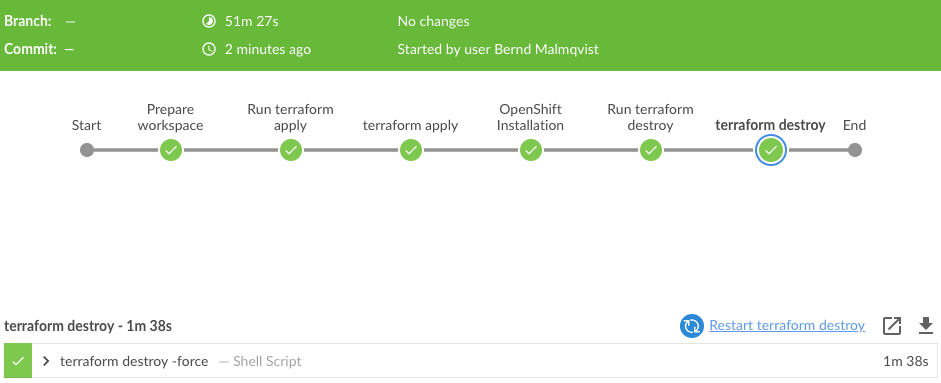
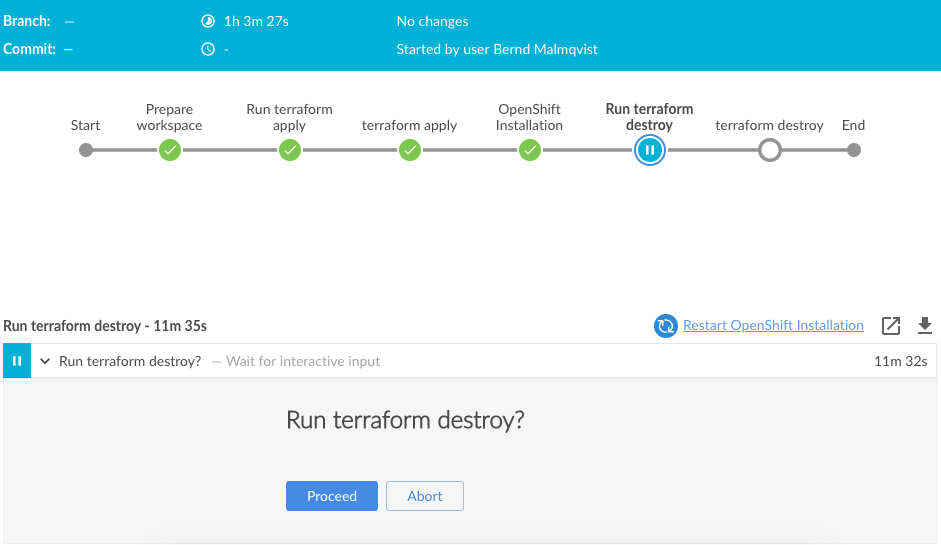
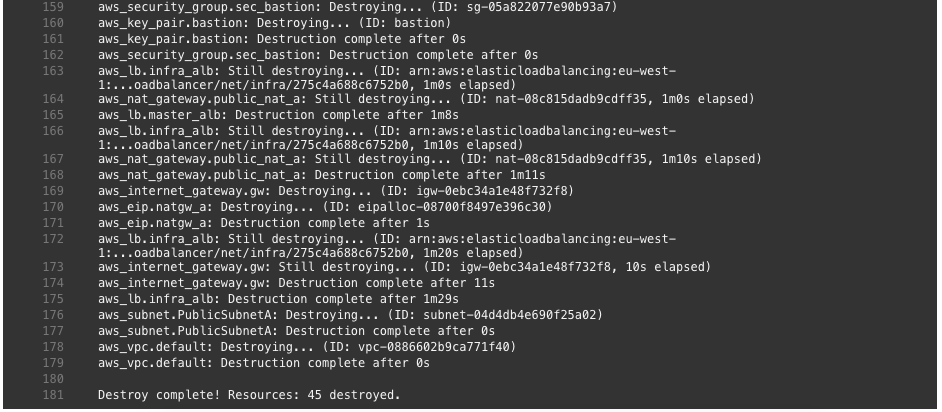
It’s also very easy to destroy the cluster as it is to create it, as you seen previously:

$ ./openshift-install destroy cluster
INFO Disassociated                                 arn="arn:aws:ec2:eu-west-1:552276840222:route-table/rtb-083e2da5d1183efa7" id=rtbassoc-01d27db162fa45402
INFO Disassociated                                 arn="arn:aws:ec2:eu-west-1:552276840222:route-table/rtb-083e2da5d1183efa7" id=rtbassoc-057f593640067efc0
INFO Disassociated                                 arn="arn:aws:ec2:eu-west-1:552276840222:route-table/rtb-083e2da5d1183efa7" id=rtbassoc-05e821b451bead18f
INFO Disassociated                                 IAM instance profile="arn:aws:iam::552276840222:instance-profile/ocp4-bgx4c-worker-profile" arn="arn:aws:ec2:eu-west-1:552276840222:instance/i-0f64a911b1ffa3eff" id=i-0f64a911b1ffa3eff name=ocp4-bgx4c-worker-profile role=ocp4-bgx4c-worker-role
INFO Deleted                                       IAM instance profile="arn:aws:iam::552276840222:instance-profile/ocp4-bgx4c-worker-profile" arn="arn:aws:ec2:eu-west-1:552276840222:instance/i-0f64a911b1ffa3eff" id=i-0f64a911b1ffa3eff name=0xc00090f9a8
INFO Deleted                                       arn="arn:aws:ec2:eu-west-1:552276840222:instance/i-0f64a911b1ffa3eff" id=i-0f64a911b1ffa3eff
INFO Deleted                                       arn="arn:aws:ec2:eu-west-1:552276840222:instance/i-00b5eedc186ba26a7" id=i-00b5eedc186ba26a7
...
INFO Deleted                                       arn="arn:aws:ec2:eu-west-1:552276840222:security-group/sg-016d4c7d435a1c97f" id=sg-016d4c7d435a1c97f
INFO Deleted                                       arn="arn:aws:ec2:eu-west-1:552276840222:subnet/subnet-076348368858e9a82" id=subnet-076348368858e9a82
INFO Deleted                                       arn="arn:aws:ec2:eu-west-1:552276840222:vpc/vpc-00c611ae1b9b8e10a" id=vpc-00c611ae1b9b8e10a
INFO Deleted                                       arn="arn:aws:ec2:eu-west-1:552276840222:dhcp-options/dopt-0ce8b6a1c31e0ceac" id=dopt-0ce8b6a1c31e0ceac

The install experience is great for OpenShift 4.0 which makes it very easy for everyone to create and get started quickly with an enterprise container platform. From the operational perspective I still need to see how to run the new platform because all the operators are great and makes it an easy to use cluster but what happens when one of the operators goes rogue and debugging this I am most interested in.

Over the coming weeks I will look into more detail around OpenShift 4.0 and the different new features, I am especially interested in Service Mesh.

Deploy OpenShift 3.11 Container Platform on Google Cloud Platform using Terraform

Over the past few days I have converted the OpenShift 3.11 infrastructure on Amazon AWS to run on Google Cloud Platform. I have kept the similar VPC network layout and instances to run OpenShift.

Before you start you need to create a project on Google Cloud Platform, then continue to create the service account and generate the private key and download the credential as JSON file.

Create the new project:

Create the service account:

Give the service account compute admin and storage object creator permissions:

Then create a storage bucket for the Terraform backend state and assign the correct bucket permission to the terraform service account:

Bucket permissions:

To start, clone my openshift-terraform github repository and checkout the google-dev branch:

git clone https://github.com/berndonline/openshift-terraform.git
cd ./openshift-terraform/ && git checkout google-dev

Add your previously downloaded credentials json file:

cat << EOF > ./credentials.json
{
  "type": "service_account",
  "project_id": "<--your-project-->",
  "private_key_id": "<--your-key-id-->",
  "private_key": "-----BEGIN PRIVATE KEY-----

...

}
EOF

There are a few things you need to modify in the main.tf and variables.tf before you can start:

...
terraform {
  backend "gcs" {
    bucket    = "<--your-bucket-name-->"
    prefix    = "openshift-311"
    credentials = "credentials.json"
  }
}
...
...
variable "gcp_region" {
  description = "Google Compute Platform region to launch servers."
  default     = "europe-west3"
}
variable "gcp_project" {
  description = "Google Compute Platform project name."
  default     = "<--your-project-name-->"
}
variable "gcp_zone" {
  type = "string"
  default = "europe-west3-a"
  description = "The zone to provision into"
}
...

Add the needed environment variables to apply changes to CloudFlare DNS:

export TF_VAR_email='<-YOUR-CLOUDFLARE-EMAIL-ADDRESS->'
export TF_VAR_token='<-YOUR-CLOUDFLARE-TOKEN->'
export TF_VAR_domain='<-YOUR-CLOUDFLARE-DOMAIN->'
export TF_VAR_htpasswd='<-YOUR-OPENSHIFT-DEMO-USER-HTPASSWD->'

Let’s start creating the infrastructure and verify afterwards the created resources on GCP.

terraform init && terraform apply -auto-approve

VPC and public and private subnets in region europe-west3:

Created instances:

Created load balancers for master and infra nodes:

Copy the ssh key and ansible-hosts file to the bastion host from where you need to run the Ansible OpenShift playbooks.

scp -o StrictHostKeyChecking=no -o UserKnownHostsFile=/dev/null -i ./helper_scripts/id_rsa -r ./helper_scripts/id_rsa centos@$(terraform output bastion):/home/centos/.ssh/
scp -o StrictHostKeyChecking=no -o UserKnownHostsFile=/dev/null -i ./helper_scripts/id_rsa -r ./inventory/ansible-hosts  centos@$(terraform output bastion):/home/centos/ansible-hosts

I recommend waiting a few minutes as the cloud-init script prepares the bastion host. Afterwards continue with the pre and install playbooks. You can connect to the bastion host and run the playbooks directly.

ssh -o StrictHostKeyChecking=no -o UserKnownHostsFile=/dev/null -i ./helper_scripts/id_rsa -l centos $(terraform output bastion) -A "cd /openshift-ansible/ && ansible-playbook ./playbooks/openshift-pre.yml -i ~/ansible-hosts"
ssh -o StrictHostKeyChecking=no -o UserKnownHostsFile=/dev/null -i ./helper_scripts/id_rsa -l centos $(terraform output bastion) -A "cd /openshift-ansible/ && ansible-playbook ./playbooks/openshift-install.yml -i ~/ansible-hosts"

After the installation is completed, continue to create your project and applications:

When you are finished with the testing, run terraform destroy.

terraform destroy -force 

Please share your feedback and leave a comment.

Deploy OpenShift using Jenkins Pipeline and Terraform

I wanted to make my life a bit easier and created a simple Jenkins pipeline to spin-up the AWS instance and deploy OpenShift. Read my previous article: Deploying OpenShift 3.11 Container Platform on AWS using Terraform. You will see in between steps which require input to stop the pipeline, and that keep the OpenShift cluster running without destroying it directly after installing OpenShift. Also check out my blog post I wrote about running Jenkins in a container with Ansible and Terraform.

The Jenkins pipeline requires a few environment variables for the credentials to access AWS and CloudFlare. You need to create the necessary credentials beforehand and they get loaded when the pipeline starts.

Here are the pipeline steps which are self explanatory:

pipeline {
    agent any
    environment {
        AWS_ACCESS_KEY_ID = credentials('AWS_ACCESS_KEY_ID')
        AWS_SECRET_ACCESS_KEY = credentials('AWS_SECRET_ACCESS_KEY')
        TF_VAR_email = credentials('TF_VAR_email')
        TF_VAR_token = credentials('TF_VAR_token')
        TF_VAR_domain = credentials('TF_VAR_domain')
        TF_VAR_htpasswd = credentials('TF_VAR_htpasswd')
    }
    stages {
        stage('Prepare workspace') {
            steps {
                sh 'rm -rf *'
                git branch: 'aws-dev', url: 'https://github.com/berndonline/openshift-terraform.git'
                sh 'ssh-keygen -b 2048 -t rsa -f ./helper_scripts/id_rsa -q -N ""'
                sh 'chmod 600 ./helper_scripts/id_rsa'
                sh 'terraform init'
            }
        }
        stage('Run terraform apply') {
            steps {
                input 'Run terraform apply?'
            }
        }
        stage('terraform apply') {
            steps {
                sh 'terraform apply -auto-approve'
            }
        }
        stage('OpenShift Installation') {
            steps {
                sh 'sleep 600'
                sh 'scp -o StrictHostKeyChecking=no -o UserKnownHostsFile=/dev/null -i ./helper_scripts/id_rsa -r ./helper_scripts/id_rsa centos@$(terraform output bastion):/home/centos/.ssh/'
                sh 'scp -o StrictHostKeyChecking=no -o UserKnownHostsFile=/dev/null -i ./helper_scripts/id_rsa -r ./inventory/ansible-hosts  centos@$(terraform output bastion):/home/centos/ansible-hosts'
                sh 'ssh -o StrictHostKeyChecking=no -o UserKnownHostsFile=/dev/null -i ./helper_scripts/id_rsa -l centos $(terraform output bastion) -A "cd /openshift-ansible/ && ansible-playbook ./playbooks/openshift-pre.yml -i ~/ansible-hosts"'
                sh 'ssh -o StrictHostKeyChecking=no -o UserKnownHostsFile=/dev/null -i ./helper_scripts/id_rsa -l centos $(terraform output bastion) -A "cd /openshift-ansible/ && ansible-playbook ./playbooks/openshift-install.yml -i ~/ansible-hosts"'
            }
        }        
        stage('Run terraform destroy') {
            steps {
                input 'Run terraform destroy?'
            }
        }
        stage('terraform destroy') {
            steps {
                sh 'terraform destroy -force '
            }
        }
    }
}

Let’s trigger the pipeline and look at the progress of the different steps.

The first step preparing the workspace is very quick and the pipeline is waiting for an input to run terraform apply:

Just click on proceed to continue:

After the AWS and CloudFlare resources are created with Terraform, it continues with the next step installing OpenShift 3.11 on the AWS instances:

By this point the OpenShift installation is completed.

You can continue and login to the console-paas.. and continue doing your testing on OpenShift.

Terraform not only created all the AWS resources it also configured the necessary CNAME on CloudFlare DNS to point to the AWS load balancers.

Once you are finished with your OpenShift testing you can go back into Jenkins pipeline and commit to destroy the environment again:

Running terraform destroy:

The pipeline completed successfully:

I hope this was in interesting post and let me know if you like it and want to see more of these. I am planning some improvements to integrate a validation step in the pipeline, to create a project and build, and deploy container on OpenShift automatically.

Please share your feedback and leave a comment.

Deploy OpenShift 3.11 Container Platform on AWS using Terraform

I have done a few changes on my Terraform configuration for OpenShift 3.11 on Amazon AWS. I have downsized the environment because I didn’t needed that many nodes for a quick test setup. I have added CloudFlare DNS to automatically create CNAME for the AWS load balancers on the DNS zone. I have also added an AWS S3 Bucket for storing the backend state. You can find the new Terraform configuration on my Github repository: https://github.com/berndonline/openshift-terraform/tree/aws-dev

From OpenShift 3.10 and later versions the environment variables changes and I modified the ansible-hosts template for the new configuration. You can see the changes in the hosts template: https://github.com/berndonline/openshift-terraform/blob/aws-dev/helper_scripts/ansible-hosts.template.txt

OpenShift 3.11 has changed a few things and put an focus on an Cluster Operator console which is pretty nice and runs on Kubernetes 1.11. I recommend reading the release notes for the 3.11 release for more details: https://docs.openshift.com/container-platform/3.11/release_notes/ocp_3_11_release_notes.html

I don’t wanted to get into too much detail, just follow the steps below and start with cloning my repository, and choose the dev branch:

git clone -b aws-dev https://github.com/berndonline/openshift-terraform.git
cd ./openshift-terraform/
ssh-keygen -b 2048 -t rsa -f ./helper_scripts/id_rsa -q -N ""
chmod 600 ./helper_scripts/id_rsa

You need to modify the cloudflare.tf and add your CloudFlare API credentials otherwise just delete the file. The same for the S3 backend provider, you find the configuration in the main.tf and it can be removed if not needed.

CloudFlare and Amazon AWS credentials can be added through environment variables:

export AWS_ACCESS_KEY_ID='<-YOUR-AWS-ACCESS-KEY->'
export AWS_SECRET_ACCESS_KEY='<-YOUR-AWS-SECRET-KEY->'
export TF_VAR_email='<-YOUR-CLOUDFLARE-EMAIL-ADDRESS->'
export TF_VAR_token='<-YOUR-CLOUDFLARE-TOKEN->'
export TF_VAR_domain='<-YOUR-CLOUDFLARE-DOMAIN->'
export TF_VAR_htpasswd='<-YOUR-OPENSHIFT-DEMO-USER-HTPASSWD->'

Run terraform init and apply to create the environment.

terraform init && terraform apply -auto-approve

Copy the ssh key and ansible-hosts file to the bastion host from where you need to run the Ansible OpenShift playbooks.

scp -o StrictHostKeyChecking=no -o UserKnownHostsFile=/dev/null -i ./helper_scripts/id_rsa -r ./helper_scripts/id_rsa centos@$(terraform output bastion):/home/centos/.ssh/
scp -o StrictHostKeyChecking=no -o UserKnownHostsFile=/dev/null -i ./helper_scripts/id_rsa -r ./inventory/ansible-hosts  centos@$(terraform output bastion):/home/centos/ansible-hosts

I recommend waiting a few minutes as the AWS cloud-init script prepares the bastion host. Afterwards continue with the pre and install playbooks. You can connect to the bastion host and run the playbooks directly.

ssh -o StrictHostKeyChecking=no -o UserKnownHostsFile=/dev/null -i ./helper_scripts/id_rsa -l centos $(terraform output bastion) -A "cd /openshift-ansible/ && ansible-playbook ./playbooks/openshift-pre.yml -i ~/ansible-hosts"
ssh -o StrictHostKeyChecking=no -o UserKnownHostsFile=/dev/null -i ./helper_scripts/id_rsa -l centos $(terraform output bastion) -A "cd /openshift-ansible/ && ansible-playbook ./playbooks/openshift-install.yml -i ~/ansible-hosts"

If for whatever reason the cluster deployment fails, you can run the uninstall playbook to bring the nodes back into a clean state and start from the beginning and run deploy_cluster.

ssh -o StrictHostKeyChecking=no -o UserKnownHostsFile=/dev/null -i ./helper_scripts/id_rsa -l centos $(terraform output bastion) -A "cd /openshift-ansible/ && ansible-playbook ./openshift-ansible/playbooks/adhoc/uninstall.yml -i ~/ansible-hosts"

Here are some screenshots of the new cluster console:

Let’s create a project and import my hello-openshift.yml build configuration:

Successful completed the build and deployed the hello-openshift container:

My example hello openshift application:

When you are finished with the testing, run terraform destroy.

terraform destroy -force 


Deploy OpenShift 3.9 Container Platform using Terraform and Ansible on Amazon AWS

After my previous articles on OpenShift and Terraform I wanted to show how to create the necessary infrastructure and to deploy an OpenShift Container Platform in a more real-world scenario. I highly recommend reading my other posts about using Terraform to deploy an Amazon AWS VPC and AWS EC2 Instances and Load Balancers. Once the infrastructure is created we will use the Bastion Host to connect to the environment and deploy OpenShift Origin using Ansible.

I think this might be an interesting topic to show what tools like Terraform and Ansible can do together:

I will not go into detail about the configuration and only show the output of deploying the infrastructure. Please checkout my Github repository to see the detailed configuration: https://github.com/berndonline/openshift-terraform

Before we start you need to clone the repository and generate the ssh key used from the bastion host to access the OpenShift nodes:

git clone https://github.com/berndonline/openshift-terraform.git
cd ./openshift-terraform/
ssh-keygen -b 2048 -t rsa -f ./helper_scripts/id_rsa -q -N ""
chmod 600 ./helper_scripts/id_rsa

We are ready to create the infrastructure and run terraform apply:

berndonline@lab:~/openshift-terraform$ terraform apply

...

Plan: 56 to add, 0 to change, 0 to destroy.

Do you want to perform these actions?
  Terraform will perform the actions described above.
  Only 'yes' will be accepted to approve.

  Enter a value: yes

...

Apply complete! Resources: 19 added, 0 changed, 16 destroyed.

Outputs:

bastion = ec2-34-244-225-35.eu-west-1.compute.amazonaws.com
openshift master = master-35563dddc8b2ea9c.elb.eu-west-1.amazonaws.com
openshift subdomain = infra-1994425986.eu-west-1.elb.amazonaws.com
berndonline@lab:~/openshift-terraform$

Terraform successfully creates the VPC, load balancers and all needed instances. Before we continue wait 5 to 10 minutes because the cloud-init script takes a bit time and all the instance reboot at the end.

Instances:

Security groups:

Target groups for the Master and the Infra load balancers:

Master and the Infra load balancers:

Terraform also automatically creates the inventory file for the OpenShift installation and adds the hostnames for master, infra and worker nodes to the correct inventory groups. The next step is to copy the private ssh key and the inventory file to the bastion host. I am using the terraform output command to get the public hostname from the bastion host:

scp -o StrictHostKeyChecking=no -o UserKnownHostsFile=/dev/null -r ./helper_scripts/id_rsa centos@$(terraform output bastion):/home/centos/.ssh/
scp -o StrictHostKeyChecking=no -o UserKnownHostsFile=/dev/null -r ./inventory/ansible-hosts  centos@$(terraform output bastion):/home/centos/ansible-hosts
ssh -o StrictHostKeyChecking=no -o UserKnownHostsFile=/dev/null -l centos $(terraform output bastion)

On the bastion node, change to the /openshift-ansible/ folder and start running the prerequisites and the deploy-cluster playbooks:

cd /openshift-ansible/
ansible-playbook ./playbooks/prerequisites.yml -i ~/ansible-hosts
ansible-playbook ./playbooks/deploy_cluster.yml -i ~/ansible-hosts

Here the output from running the prerequisites playbook:

[centos@ip-10-0-0-22 ~]$ cd /openshift-ansible/
[centos@ip-10-0-0-22 openshift-ansible]$ ansible-playbook ./playbooks/prerequisites.yml -i ~/ansible-hosts

PLAY [Initialization Checkpoint Start] ****************************************************************************************************************************

TASK [Set install initialization 'In Progress'] *******************************************************************************************************************
Saturday 15 September 2018  11:04:50 +0000 (0:00:00.407)       0:00:00.407 ****
ok: [ip-10-0-1-237.eu-west-1.compute.internal]

PLAY [Populate config host groups] ********************************************************************************************************************************

TASK [Load group name mapping variables] **************************************************************************************************************************
Saturday 15 September 2018  11:04:50 +0000 (0:00:00.110)       0:00:00.517 ****
ok: [localhost]

TASK [Evaluate groups - g_etcd_hosts or g_new_etcd_hosts required] ************************************************************************************************
Saturday 15 September 2018  11:04:51 +0000 (0:00:00.033)       0:00:00.551 ****
skipping: [localhost]

TASK [Evaluate groups - g_master_hosts or g_new_master_hosts required] ********************************************************************************************
Saturday 15 September 2018  11:04:51 +0000 (0:00:00.024)       0:00:00.575 ****
skipping: [localhost]

TASK [Evaluate groups - g_node_hosts or g_new_node_hosts required] ************************************************************************************************
Saturday 15 September 2018  11:04:51 +0000 (0:00:00.024)       0:00:00.599 ****
skipping: [localhost]

...

PLAY RECAP ********************************************************************************************************************************************************
ip-10-0-1-192.eu-west-1.compute.internal : ok=56   changed=14   unreachable=0    failed=0
ip-10-0-1-237.eu-west-1.compute.internal : ok=64   changed=15   unreachable=0    failed=0
ip-10-0-1-248.eu-west-1.compute.internal : ok=56   changed=14   unreachable=0    failed=0
ip-10-0-5-174.eu-west-1.compute.internal : ok=56   changed=14   unreachable=0    failed=0
ip-10-0-5-235.eu-west-1.compute.internal : ok=58   changed=14   unreachable=0    failed=0
ip-10-0-5-35.eu-west-1.compute.internal : ok=56   changed=14   unreachable=0    failed=0
ip-10-0-9-130.eu-west-1.compute.internal : ok=56   changed=14   unreachable=0    failed=0
ip-10-0-9-51.eu-west-1.compute.internal : ok=58   changed=14   unreachable=0    failed=0
ip-10-0-9-85.eu-west-1.compute.internal : ok=56   changed=14   unreachable=0    failed=0
localhost                  : ok=11   changed=0    unreachable=0    failed=0


INSTALLER STATUS **************************************************************************************************************************************************
Initialization             : Complete (0:00:41)

[centos@ip-10-0-0-22 openshift-ansible]$

Continue with the deploy cluster playbook:

[centos@ip-10-0-0-22 openshift-ansible]$ ansible-playbook ./playbooks/deploy_cluster.yml -i ~/ansible-hosts

PLAY [Initialization Checkpoint Start] ****************************************************************************************************************************

TASK [Set install initialization 'In Progress'] *******************************************************************************************************************
Saturday 15 September 2018  11:08:38 +0000 (0:00:00.102)       0:00:00.102 ****
ok: [ip-10-0-1-237.eu-west-1.compute.internal]

PLAY [Populate config host groups] ********************************************************************************************************************************

TASK [Load group name mapping variables] **************************************************************************************************************************
Saturday 15 September 2018  11:08:38 +0000 (0:00:00.064)       0:00:00.167 ****
ok: [localhost]

TASK [Evaluate groups - g_etcd_hosts or g_new_etcd_hosts required] ************************************************************************************************
Saturday 15 September 2018  11:08:38 +0000 (0:00:00.031)       0:00:00.198 ****
skipping: [localhost]

TASK [Evaluate groups - g_master_hosts or g_new_master_hosts required] ********************************************************************************************
Saturday 15 September 2018  11:08:38 +0000 (0:00:00.026)       0:00:00.225 ****
skipping: [localhost]

...

PLAY RECAP ********************************************************************************************************************************************************
ip-10-0-1-192.eu-west-1.compute.internal : ok=132  changed=57   unreachable=0    failed=0
ip-10-0-1-237.eu-west-1.compute.internal : ok=591  changed=256  unreachable=0    failed=0
ip-10-0-1-248.eu-west-1.compute.internal : ok=132  changed=57   unreachable=0    failed=0
ip-10-0-5-174.eu-west-1.compute.internal : ok=132  changed=57   unreachable=0    failed=0
ip-10-0-5-235.eu-west-1.compute.internal : ok=325  changed=145  unreachable=0    failed=0
ip-10-0-5-35.eu-west-1.compute.internal : ok=132  changed=57   unreachable=0    failed=0
ip-10-0-9-130.eu-west-1.compute.internal : ok=132  changed=57   unreachable=0    failed=0
ip-10-0-9-51.eu-west-1.compute.internal : ok=325  changed=145  unreachable=0    failed=0
ip-10-0-9-85.eu-west-1.compute.internal : ok=132  changed=57   unreachable=0    failed=0
localhost                  : ok=13   changed=0    unreachable=0    failed=0

INSTALLER STATUS **************************************************************************************************************************************************
Initialization             : Complete (0:00:55)
Health Check               : Complete (0:00:01)
etcd Install               : Complete (0:01:03)
Master Install             : Complete (0:05:17)
Master Additional Install  : Complete (0:00:26)
Node Install               : Complete (0:08:24)
Hosted Install             : Complete (0:00:57)
Web Console Install        : Complete (0:00:28)
Service Catalog Install    : Complete (0:01:19)

[centos@ip-10-0-0-22 openshift-ansible]$

Once the deploy playbook finishes we have a working Openshift cluster:

Login with username: demo, and password: demo

For the infra load balancers you cannot access OpenShift routes via the Amazon DNS, this is not allowed. You need to create a wildcard DNS CNAME record like *.paas.domain.com and point to the AWS load balancer DNS record.

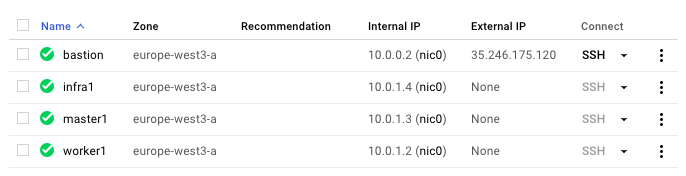
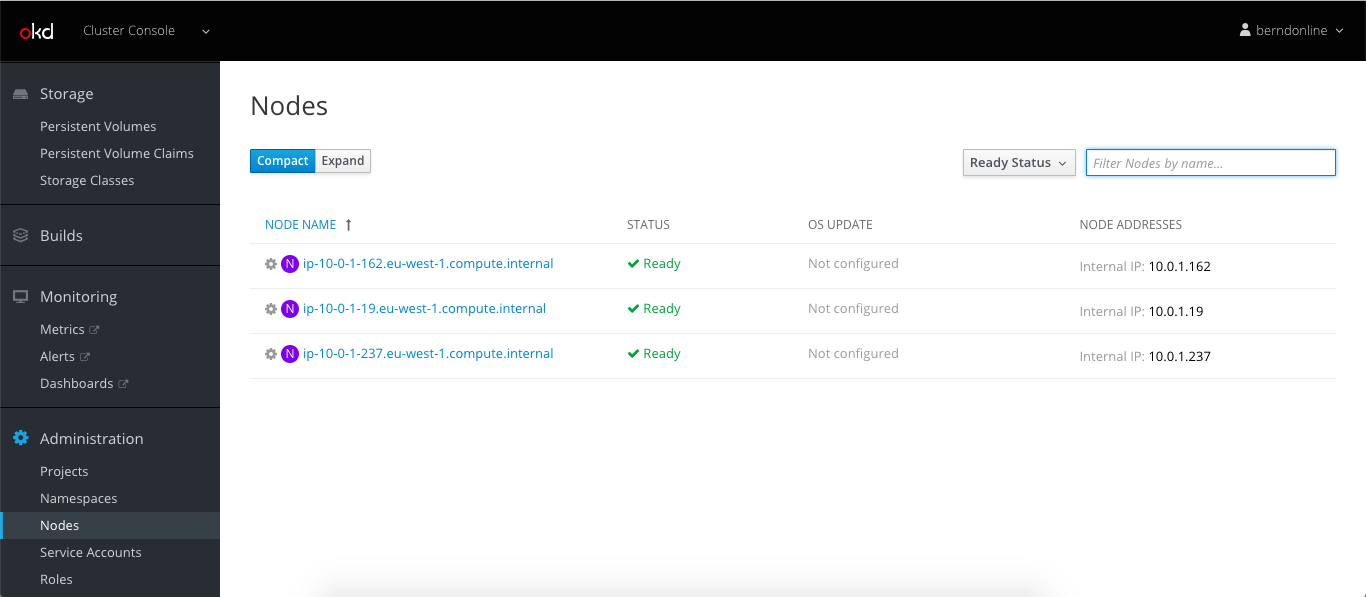
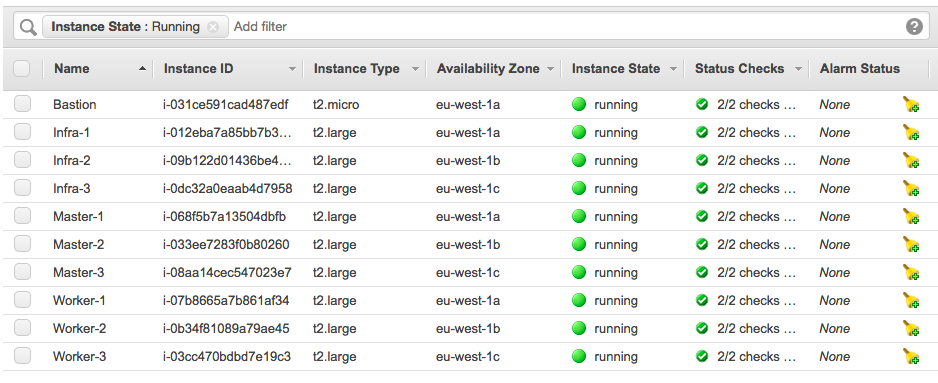
Let’s continue to do some basic cluster checks to see the nodes are in ready state:

[centos@ip-10-0-1-237 ~]$ oc get nodes
NAME                                       STATUS    ROLES     AGE       VERSION
ip-10-0-1-192.eu-west-1.compute.internal   Ready     compute   11m       v1.9.1+a0ce1bc657
ip-10-0-1-237.eu-west-1.compute.internal   Ready     master    16m       v1.9.1+a0ce1bc657
ip-10-0-1-248.eu-west-1.compute.internal   Ready         11m       v1.9.1+a0ce1bc657
ip-10-0-5-174.eu-west-1.compute.internal   Ready     compute   11m       v1.9.1+a0ce1bc657
ip-10-0-5-235.eu-west-1.compute.internal   Ready     master    15m       v1.9.1+a0ce1bc657
ip-10-0-5-35.eu-west-1.compute.internal    Ready         11m       v1.9.1+a0ce1bc657
ip-10-0-9-130.eu-west-1.compute.internal   Ready     compute   11m       v1.9.1+a0ce1bc657
ip-10-0-9-51.eu-west-1.compute.internal    Ready     master    14m       v1.9.1+a0ce1bc657
ip-10-0-9-85.eu-west-1.compute.internal    Ready         11m       v1.9.1+a0ce1bc657
[centos@ip-10-0-1-237 ~]$
[centos@ip-10-0-1-237 ~]$ oc get projects
NAME                                DISPLAY NAME   STATUS
default                                            Active
kube-public                                        Active
kube-service-catalog                               Active
kube-system                                        Active
logging                                            Active
management-infra                                   Active
openshift                                          Active
openshift-ansible-service-broker                   Active
openshift-infra                                    Active
openshift-node                                     Active
openshift-template-service-broker                  Active
openshift-web-console                              Active
[centos@ip-10-0-1-237 ~]$
[centos@ip-10-0-1-237 ~]$ oc get pods -o wide
NAME                       READY     STATUS    RESTARTS   AGE       IP           NODE
docker-registry-1-8798r    1/1       Running   0          10m       10.128.2.2   ip-10-0-5-35.eu-west-1.compute.internal
registry-console-1-zh9m4   1/1       Running   0          10m       10.129.2.3   ip-10-0-9-85.eu-west-1.compute.internal
router-1-96zzf             1/1       Running   0          10m       10.0.9.85    ip-10-0-9-85.eu-west-1.compute.internal
router-1-nfh7h             1/1       Running   0          10m       10.0.1.248   ip-10-0-1-248.eu-west-1.compute.internal
router-1-pcs68             1/1       Running   0          10m       10.0.5.35    ip-10-0-5-35.eu-west-1.compute.internal
[centos@ip-10-0-1-237 ~]$

At the end just destroy the infrastructure with terraform destroy:

berndonline@lab:~/openshift-terraform$ terraform destroy

...

Destroy complete! Resources: 56 destroyed.
berndonline@lab:~/openshift-terraform$

I will continue improving the configuration and I plan to use Jenkins to deploy the AWS infrastructure and OpenShift fully automatically.

Please let me know if you like the article or have questions in the comments below.