Create and run Ansible Operator on OpenShift

Since RedHat announced the new OpenShift version 4.0 they said it will be a very different experience to install and operate the platform, mostly because of Operators managing the components of the cluster. A few month back RedHat officially released the Operator-SDK and the Operator Hub to create your own operators and to share them.

I did some testing around the Ansible Operator which I wanted to share in this article but before we dig into creating our own operator we need to first install operator-sdk:

# Make sure you are able to use docker commands
sudo groupadd docker
sudo usermod -aG docker centos
ls -l /var/run/docker.sock
sudo chown root:docker /var/run/docker.sock

# Download Go
wget https://dl.google.com/go/go1.10.3.linux-amd64.tar.gz
sudo tar -C /usr/local -xzf go1.10.3.linux-amd64.tar.gz

# Modify bash_profile
vi ~/.bash_profile
export PATH=$PATH:/usr/local/go/bin:$HOME/go
export GOPATH=$HOME/go

# Load bash_profile
source ~/.bash_profile

# Install Go dep
mkdir -p /home/centos/go/bin
curl https://raw.githubusercontent.com/golang/dep/master/install.sh | sh
sudo cp /home/centos/go/bin/dep /usr/local/go/bin/

# Download and install operator framework
mkdir -p $GOPATH/src/github.com/operator-framework
cd $GOPATH/src/github.com/operator-framework
git clone https://github.com/operator-framework/operator-sdk
cd operator-sdk
git checkout master
make dep
make install
sudo cp /home/centos/go/bin/operator-sdk /usr/local/bin/

Let’s start creating our Ansible Operator using the operator-sdk command line which create a blank operator template which we will modify. You can create three different types of operators: Go, Helm or Ansible – check out the operator-sdk repository:

operator-sdk new helloworld-operator --api-version=hello.world.com/v1alpha1 --kind=Helloworld --type=ansible --cluster-scoped
cd ./helloworld-operator/

I am using the Ansible k8s module to create a Hello OpenShift deployment configuration in tasks/main.yml.

---
# tasks file for helloworld

- name: create deployment config
  k8s:
    definition:
      apiVersion: apps.openshift.io/v1
      kind: DeploymentConfig
      metadata:
        name: '{{ meta.name }}'
        labels:
          app: '{{ meta.name }}'
        namespace: '{{ meta.namespace }}'
...

Please have a look at my Github repository openshift-helloworld-operator for more details.

After we have modified the Ansible Role we can start and build operator which will create container we can afterwards push to a container registry like Docker Hub:

$ operator-sdk build berndonline/openshift-helloworld-operator:v0.1
INFO[0000] Building Docker image berndonline/openshift-helloworld-operator:v0.1
Sending build context to Docker daemon   192 kB
Step 1/3 : FROM quay.io/operator-framework/ansible-operator:v0.5.0
Trying to pull repository quay.io/operator-framework/ansible-operator ...
v0.5.0: Pulling from quay.io/operator-framework/ansible-operator
a02a4930cb5d: Already exists
1bdeea372afe: Pull complete
3b057581d180: Pull complete
12618e5abaa7: Pull complete
6f75beb67357: Pull complete
b241f86d9d40: Pull complete
e990bcb94ae6: Pull complete
3cd07ac53955: Pull complete
3fdda52e2c22: Pull complete
0fd51cfb1114: Pull complete
feaebb94b4da: Pull complete
4ff9620dce03: Pull complete
a428b645a85e: Pull complete
5daaf234bbf2: Pull complete
8cbdd2e4d624: Pull complete
fa8517b650e0: Pull complete
a2a83ad7ba5a: Pull complete
d61b9e9050fe: Pull complete
Digest: sha256:9919407a30b24d459e1e4188d05936b52270cafcd53afc7d73c89be02262f8c5
Status: Downloaded newer image for quay.io/operator-framework/ansible-operator:v0.5.0
 ---> 1e857f3522b5
Step 2/3 : COPY roles/ ${HOME}/roles/
 ---> 6e073916723a
Removing intermediate container cb3f89ba1ed6
Step 3/3 : COPY watches.yaml ${HOME}/watches.yaml
 ---> 8f0ee7ba26cb
Removing intermediate container 56ece5b800b2
Successfully built 8f0ee7ba26cb
INFO[0018] Operator build complete.

$ docker push berndonline/openshift-helloworld-operator:v0.1
The push refers to a repository [docker.io/berndonline/openshift-helloworld-operator]
2233d56d407b: Pushed
d60aa100721d: Pushed
a3a57fad5e76: Pushed
ab38e57f8581: Pushed
79b113b67633: Pushed
9cf5b154cadd: Pushed
b191ffbd3c8d: Pushed
5e21ced2d28b: Pushed
cdadb746680d: Pushed
d105c72f21c1: Pushed
1a899839ab25: Pushed
be81e9b31e54: Pushed
63d9d56008cb: Pushed
56a62cb9d96c: Pushed
3f9dc45a1d02: Pushed
dac20332f7b5: Pushed
24f8e5ff1817: Pushed
1bdae1c8263a: Pushed
bc08b53be3d4: Pushed
071d8bd76517: Mounted from openshift/origin-node
v0.1: digest: sha256:50fb222ec47c0d0a7006ff73aba868dfb3369df8b0b16185b606c10b2e30b111 size: 4495

After we have pushed the container to the registry we can continue on OpenShift and create the operator project together with the custom resource definition:

oc new-project helloworld-operator
oc create -f deploy/crds/hello_v1alpha1_helloworld_crd.yaml

Before we apply the resources let’s review and edit operator image configuration to point to our newly create operator container image:

$ cat deploy/operator.yaml
apiVersion: apps/v1
kind: Deployment
metadata:
  name: helloworld-operator
spec:
  replicas: 1
  selector:
    matchLabels:
      name: helloworld-operator
  template:
    metadata:
      labels:
        name: helloworld-operator
    spec:
      serviceAccountName: helloworld-operator
      containers:
        - name: helloworld-operator
          # Replace this with the built image name
          image: berndonline/openshift-helloworld-operator:v0.1
          imagePullPolicy: Always
          env:
            - name: WATCH_NAMESPACE
              value: ""
            - name: POD_NAME
              valueFrom:
                fieldRef:
                  fieldPath: metadata.name
            - name: OPERATOR_NAME
              value: "helloworld-operator"

$ cat deploy/role_binding.yaml
kind: ClusterRoleBinding
apiVersion: rbac.authorization.k8s.io/v1
metadata:
  name: helloworld-operator
subjects:
- kind: ServiceAccount
  name: helloworld-operator
  # Replace this with the namespace the operator is deployed in.
  namespace: helloworld-operator
roleRef:
  kind: ClusterRole
  name: helloworld-operator
  apiGroup: rbac.authorization.k8s.io

$ cat deploy/role_user.yaml
apiVersion: rbac.authorization.k8s.io/v1
kind: ClusterRole
metadata:
  creationTimestamp: null
  name: helloworld-operator-execute
rules:
- apiGroups:
  - hello.world.com
  resources:
  - '*'
  verbs:
  - '*'

Afterwards we can deploy the required resources:

oc create -f deploy/operator.yaml \
          -f deploy/role_binding.yaml \
          -f deploy/role.yaml \
          -f deploy/service_account.yaml

Create a cluster-role for the custom resource definition and add bind user to a cluster-role to be able to create a custom resource:

oc create -f deploy/role_user.yaml 
oc adm policy add-cluster-role-to-user helloworld-operator-execute berndonline

If you forget to do this you will see the following error message:

Now we can login as your openshift user and create the custom resource in the namespace myproject:

$ oc create -n myproject -f deploy/crds/hello_v1alpha1_helloworld_cr.yaml
helloworld.hello.world.com/hello-openshift created
$ oc describe Helloworld/hello-openshift -n myproject
Name:         hello-openshift
Namespace:    myproject
Labels:       
Annotations:  
API Version:  hello.world.com/v1alpha1
Kind:         Helloworld
Metadata:
  Creation Timestamp:  2019-03-16T15:33:25Z
  Generation:          1
  Resource Version:    19692
  Self Link:           /apis/hello.world.com/v1alpha1/namespaces/myproject/helloworlds/hello-openshift
  UID:                 d6ce75d7-4800-11e9-b6a8-0a238ec78c2a
Spec:
  Size:  1
Status:
  Conditions:
    Last Transition Time:  2019-03-16T15:33:25Z
    Message:               Running reconciliation
    Reason:                Running
    Status:                True
    Type:                  Running
Events:                    

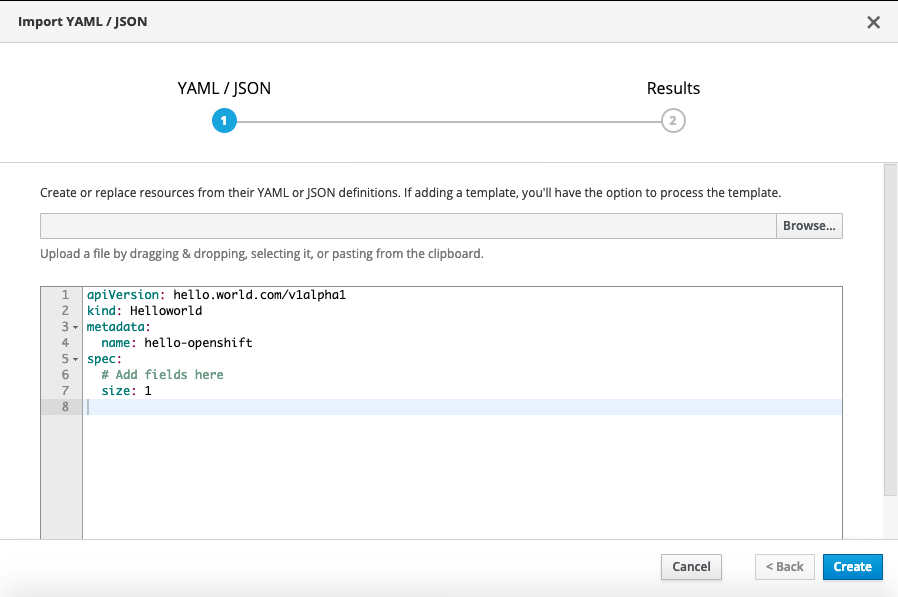
You can also create the custom resource via the web console:
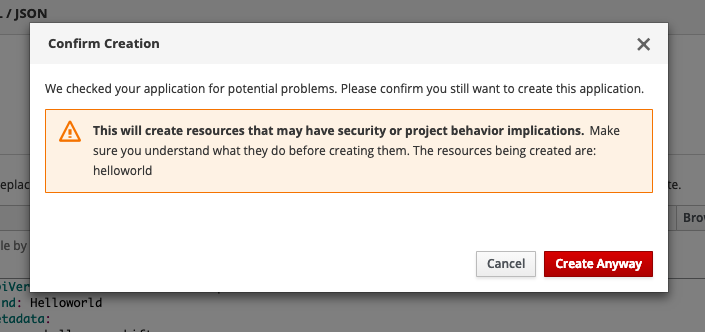
You will get a security warning which you need to confirm to apply the custom resource:
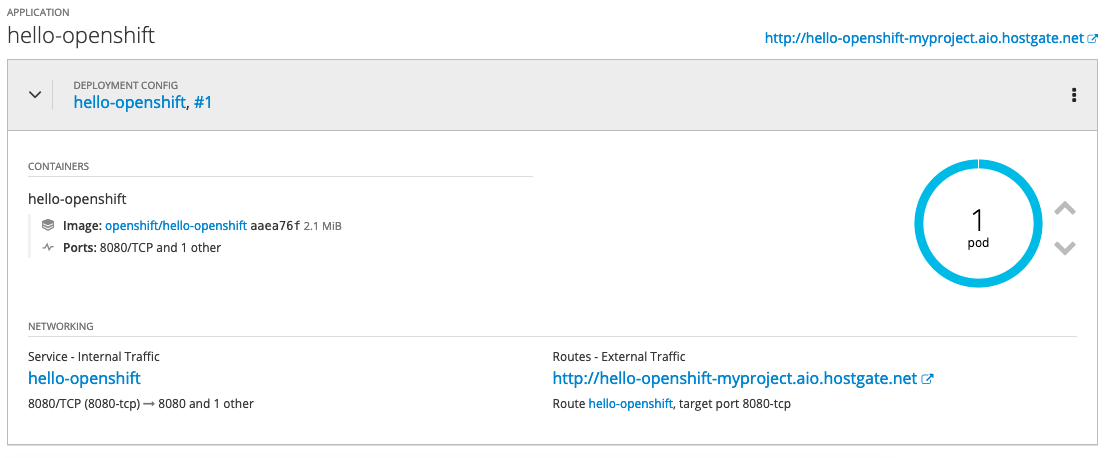
After a few minutes the operator will create the deploymentconfig and will deploy the hello-openshift pod:

$ oc get dc
NAME              REVISION   DESIRED   CURRENT   TRIGGERED BY
hello-openshift   1          1         1         config,image(hello-openshift:latest)

$ oc get pods
NAME                      READY     STATUS    RESTARTS   AGE
hello-openshift-1-pjhm4   1/1       Running   0          2m
We can modify custom resource and change the spec size to three:

$ oc edit Helloworld/hello-openshift
...
spec:
  size: 3
...

$ oc describe Helloworld/hello-openshift
Name:         hello-openshift
Namespace:    myproject
Labels:       
Annotations:  
API Version:  hello.world.com/v1alpha1
Kind:         Helloworld
Metadata:
  Creation Timestamp:  2019-03-16T15:33:25Z
  Generation:          2
  Resource Version:    24902
  Self Link:           /apis/hello.world.com/v1alpha1/namespaces/myproject/helloworlds/hello-openshift
  UID:                 d6ce75d7-4800-11e9-b6a8-0a238ec78c2a
Spec:
  Size:  3
Status:
  Conditions:
    Last Transition Time:  2019-03-16T15:33:25Z
    Message:               Running reconciliation
    Reason:                Running
    Status:                True
    Type:                  Running
Events:                    
~ centos(ocp: myproject) $

The operator will change the deployment config and change the desired state to three pods:

$ oc get dc
NAME              REVISION   DESIRED   CURRENT   TRIGGERED BY
hello-openshift   1          3         3         config,image(hello-openshift:latest)

$ oc get pods
NAME                      READY     STATUS    RESTARTS   AGE
hello-openshift-1-pjhm4   1/1       Running   0          32m
hello-openshift-1-qhqgx   1/1       Running   0          3m
hello-openshift-1-qlb2q   1/1       Running   0          3m
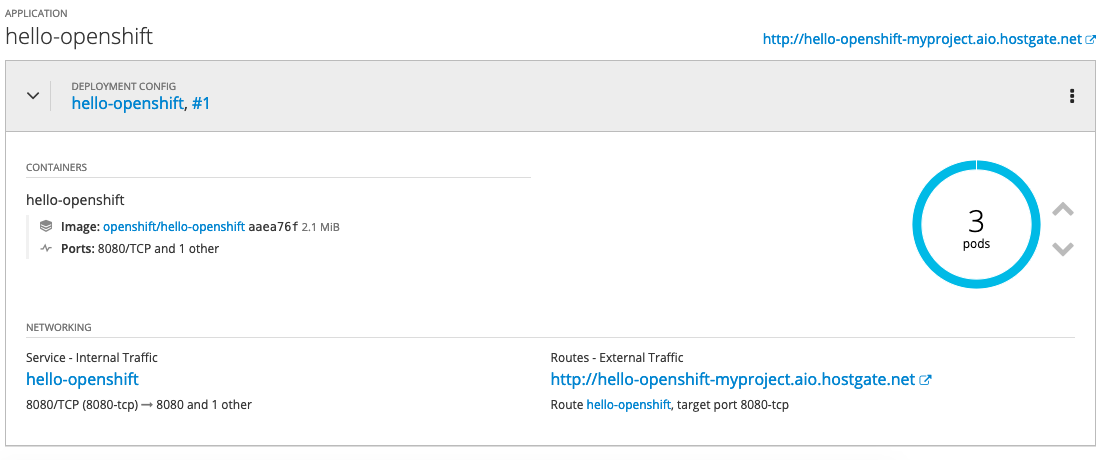
To clean-up and remove the deployment config you need to delete the custom resource

oc delete Helloworld/hello-openshift -n myproject
oc adm policy remove-cluster-role-from-user helloworld-operator-execute berndonline

I hope this is a good and simple example to show how powerful operators are on OpenShift / Kubernetes.
Create Amazon EKS cluster using Terraform

I have found AWS EKS introduction on the HashiCorp learning portal and thought I’d give it a try and test the Amazon Elastic Kubernetes Services. Using cloud native container services like EKS is getting more popular and makes it easier for everyone running a Kubernetes cluster and start deploying container straight away without the overhead of maintaining and patching the control-plane and leave this to AWS.

Creating the EKS cluster is pretty easy by just running terraform apply. The only prerequisite is to have kubectl and AWS IAM authenticator installed. You find the terraform files on my repository https://github.com/berndonline/aws-eks-terraform

# Initializing and create EKS cluster
terraform init
terraform apply  

# Generate kubeconfig and configmap for adding worker nodes
terraform output kubeconfig > ./kubeconfig
terraform output config_map_aws_auth > ./config_map_aws_auth.yaml

# Apply configmap for worker nodes to join the cluster
export KUBECONFIG=./kubeconfig
kubectl apply -f ./config_map_aws_auth.yaml
kubectl get nodes --watch

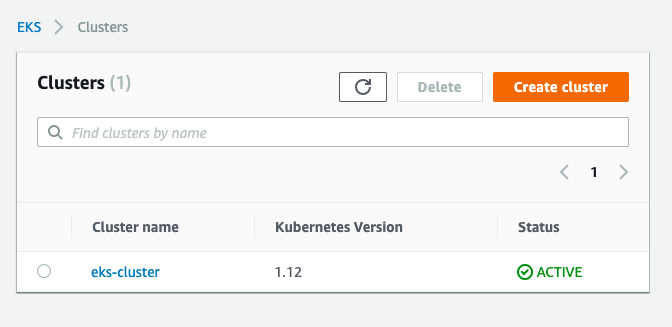
Let’s have a look at the AWS EKS console:

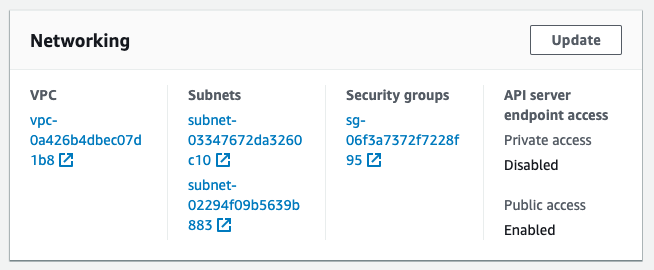
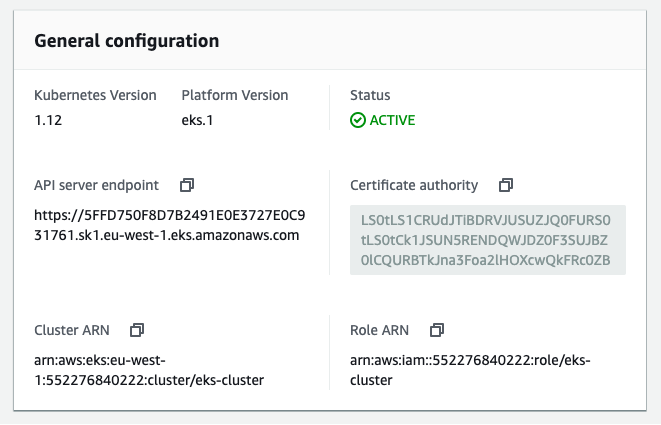
In the cluster details you see general information:

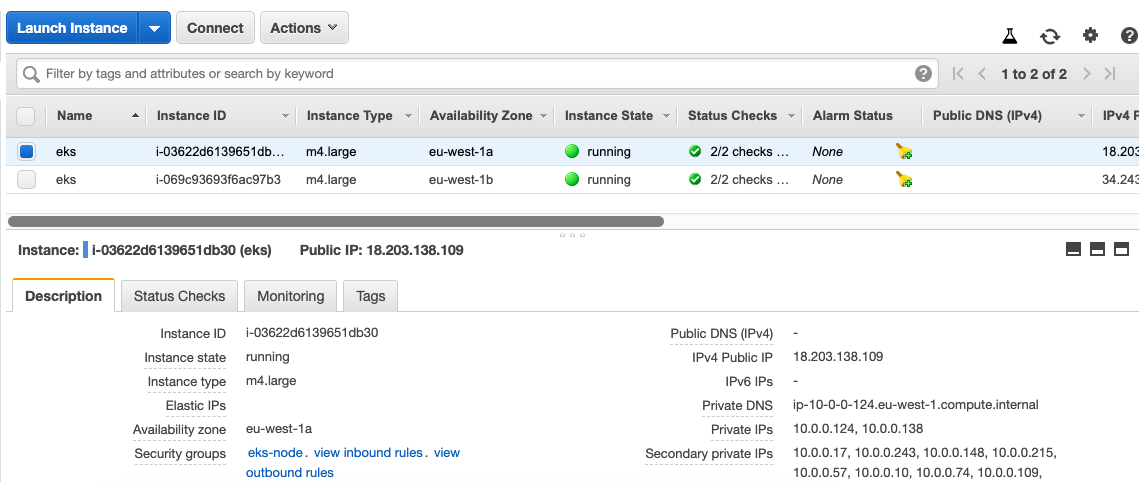
On the EC2 side you see two worker nodes as defined:

Now we can deploy an example application:

$ kubectl create -f example/hello-kubernetes.yml
service/hello-kubernetes created
deployment.apps/hello-kubernetes created
ingress.extensions/hello-ingress created

Checking that the pods are running and the correct resources are created:

$ kubectl get all
NAME                                   READY   STATUS    RESTARTS   AGE
pod/hello-kubernetes-b75555c67-4fhfn   1/1     Running   0          1m
pod/hello-kubernetes-b75555c67-pzmlw   1/1     Running   0          1m

NAME                       TYPE           CLUSTER-IP       EXTERNAL-IP                                                              PORT(S)        AGE
service/hello-kubernetes   LoadBalancer   172.20.108.223   ac1dc1ab84e5c11e9ab7e0211179d9b9-394134490.eu-west-1.elb.amazonaws.com   80:32043/TCP   1m
service/kubernetes         ClusterIP      172.20.0.1                                                                                443/TCP        26m

NAME                               DESIRED   CURRENT   UP-TO-DATE   AVAILABLE   AGE
deployment.apps/hello-kubernetes   2         2         2            2           1m

NAME                                         DESIRED   CURRENT   READY   AGE
replicaset.apps/hello-kubernetes-b75555c67   2         2         2       1m

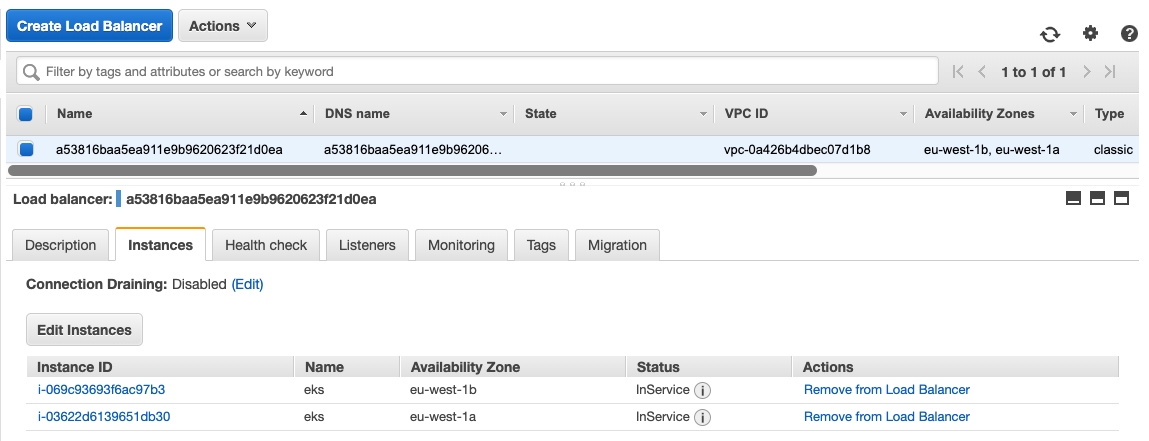
With the ingress service the EKS cluster is automatically creating an ELB load balancer and forward traffic to the two worker nodes:

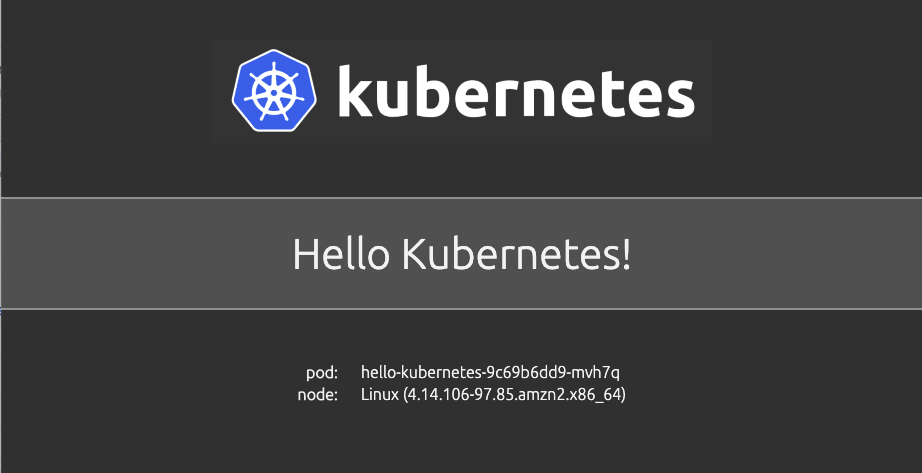
Example application:

I have used a very simple Jenkins pipeline to create the AWS EKS cluster:

pipeline {
    agent any
    environment {
        AWS_ACCESS_KEY_ID = credentials('AWS_ACCESS_KEY_ID')
        AWS_SECRET_ACCESS_KEY = credentials('AWS_SECRET_ACCESS_KEY')
    }
    stages {
        stage('prepare workspace') {
            steps {
                sh 'rm -rf *'
                git branch: 'master', url: 'https://github.com/berndonline/aws-eks-terraform.git'
                sh 'terraform init'
            }
        }
        stage('terraform apply') {
            steps {
                sh 'terraform apply -auto-approve'
                sh 'terraform output kubeconfig > ./kubeconfig'
                sh 'terraform output config_map_aws_auth > ./config_map_aws_auth.yaml'
                sh 'export KUBECONFIG=./kubeconfig'
            }
        }
        stage('add worker nodes') {
            steps {
                sh 'kubectl apply -f ./config_map_aws_auth.yaml --kubeconfig=./kubeconfig'
                sh 'sleep 60'
            }
        }
        stage('deploy example application') {
            steps {    
                sh 'kubectl apply -f ./example/hello-kubernetes.yml --kubeconfig=./kubeconfig'
                sh 'kubectl get all --kubeconfig=./kubeconfig'
            }
        }
        stage('Run terraform destroy') {
            steps {
                input 'Run terraform destroy?'
            }
        }
        stage('terraform destroy') {
            steps {
                sh 'kubectl delete -f ./example/hello-kubernetes.yml --kubeconfig=./kubeconfig'
                sh 'sleep 60'
                sh 'terraform destroy -force'
            }
        }
    }
}

I really like how easy and quick it is to create an AWS EKS cluster in less than 15 mins.

Running Istio Service Mesh on OpenShift

In the Kubernetes/OpenShift community everyone is talking about Istio service mesh, so I wanted to share my experience about the installation and running a sample microservice application with Istio on OpenShift 3.11 and 4.0. Service mesh on OpenShift is still at least a few month away from being available generally to run in production but this gives you the possibility to start testing and exploring Istio. I have found good documentation about installing Istio on OCP and OKD have a look for more information.

To install Istio on OpenShift 3.11 you need to apply the node and master prerequisites you see below; for OpenShift 4.0 and above you can skip these steps and go directly to the istio-operator installation:

sudo bash -c 'cat << EOF > /etc/origin/master/master-config.patch
admissionConfig:
  pluginConfig:
    MutatingAdmissionWebhook:
      configuration:
        apiVersion: apiserver.config.k8s.io/v1alpha1
        kubeConfigFile: /dev/null
        kind: WebhookAdmission
    ValidatingAdmissionWebhook:
      configuration:
        apiVersion: apiserver.config.k8s.io/v1alpha1
        kubeConfigFile: /dev/null
        kind: WebhookAdmission
EOF'
        
sudo cp -p /etc/origin/master/master-config.yaml /etc/origin/master/master-config.yaml.prepatch
sudo bash -c 'oc ex config patch /etc/origin/master/master-config.yaml.prepatch -p "$(cat /etc/origin/master/master-config.patch)" > /etc/origin/master/master-config.yaml'
sudo su -
master-restart api
master-restart controllers
exit       

sudo bash -c 'cat << EOF > /etc/sysctl.d/99-elasticsearch.conf 
vm.max_map_count = 262144
EOF'

sudo sysctl vm.max_map_count=262144

The Istio installation is straight forward by starting first to install the istio-operator:

oc new-project istio-operator
oc new-app -f https://raw.githubusercontent.com/Maistra/openshift-ansible/maistra-0.9/istio/istio_community_operator_template.yaml --param=OPENSHIFT_ISTIO_MASTER_PUBLIC_URL=<-master-public-hostname->

Verify the operator deployment:

oc logs -n istio-operator $(oc -n istio-operator get pods -l name=istio-operator --output=jsonpath={.items..metadata.name})

Once the operator is running we can start deploying Istio components by creating a custom resource:

cat << EOF >  ./istio-installation.yaml
apiVersion: "istio.openshift.com/v1alpha1"
kind: "Installation"
metadata:
  name: "istio-installation"
  namespace: istio-operator
EOF

oc create -n istio-operator -f ./istio-installation.yaml

Check and watch the Istio installation progress which might take a while to complete:

oc get pods -n istio-system -w

# The installation of the core components is finished when you see:
...
openshift-ansible-istio-installer-job-cnw72   0/1       Completed   0         4m

Afterwards, to finish off the Istio installation, we need to install the Kiali web console:

bash <(curl -L https://git.io/getLatestKialiOperator)
oc get route -n istio-system -l app=kiali

Verifying that all Istio components are running:

$ oc get pods -n istio-system
NAME                                          READY     STATUS      RESTARTS   AGE
elasticsearch-0                               1/1       Running     0          9m
grafana-74b5796d94-4ll5d                      1/1       Running     0          9m
istio-citadel-db879c7f8-kfxfk                 1/1       Running     0          11m
istio-egressgateway-6d78858d89-58lsd          1/1       Running     0          11m
istio-galley-6ff54d9586-8r7cl                 1/1       Running     0          11m
istio-ingressgateway-5dcf9fdf4b-4fjj5         1/1       Running     0          11m
istio-pilot-7ccf64f659-ghh7d                  2/2       Running     0          11m
istio-policy-6c86656499-v45zr                 2/2       Running     3          11m
istio-sidecar-injector-6f696b8495-8qqjt       1/1       Running     0          11m
istio-telemetry-686f78b66b-v7ljf              2/2       Running     3          11m
jaeger-agent-k4tpz                            1/1       Running     0          9m
jaeger-collector-64bc5678dd-wlknc             1/1       Running     0          9m
jaeger-query-776d4d754b-8z47d                 1/1       Running     0          9m
kiali-5fd946b855-7lw2h                        1/1       Running     0          2m
openshift-ansible-istio-installer-job-cnw72   0/1       Completed   0          13m
prometheus-75b849445c-l7rlr                   1/1       Running     0          11m

Let’s start to deploy the microservice application example by using the Google Hipster Shop, it contains multiple microservices which is great to test with Istio:

# Create new project
oc new-project hipster-shop

# Set permissions to allow Istio to deploy the Envoy-Proxy side-car container
oc adm policy add-scc-to-user anyuid -z default -n hipster-shop
oc adm policy add-scc-to-user privileged -z default -n hipster-shop

# Create Hipster Shop deployments and Istio services
oc create -f https://raw.githubusercontent.com/berndonline/openshift-ansible/master/examples/istio-hipster-shop.yml
oc create -f https://raw.githubusercontent.com/berndonline/openshift-ansible/master/examples/istio-manifest.yml

# Wait and check that all pods are running before creating the load generator
oc get pods -n hipster-shop -w

# Create load generator deployment
oc create -f https://raw.githubusercontent.com/berndonline/openshift-ansible/master/examples/istio-loadgenerator.yml

As you see below each pod has a sidecar container with the Istio Envoy proxy which handles pod traffic:

[centos@ip-172-26-1-167 ~]$ oc get pods
NAME                                     READY     STATUS    RESTARTS   AGE
adservice-7894dbfd8c-g4m9v               2/2       Running   0          49m
cartservice-758d66c648-79fj4             2/2       Running   4          49m
checkoutservice-7b9dc8b755-h2b2v         2/2       Running   0          49m
currencyservice-7b5c5f48fc-gtm9x         2/2       Running   0          49m
emailservice-79578566bb-jvwbw            2/2       Running   0          49m
frontend-6497c5f748-5fc4f                2/2       Running   0          49m
loadgenerator-764c5547fc-sw6mg           2/2       Running   0          40m
paymentservice-6b989d657c-klp4d          2/2       Running   0          49m
productcatalogservice-5bfbf4c77c-cw676   2/2       Running   0          49m
recommendationservice-c947d84b5-svbk8    2/2       Running   0          49m
redis-cart-79d84748cf-cvg86              2/2       Running   0          49m
shippingservice-6ccb7d8ff7-66v8m         2/2       Running   0          49m
[centos@ip-172-26-1-167 ~]$

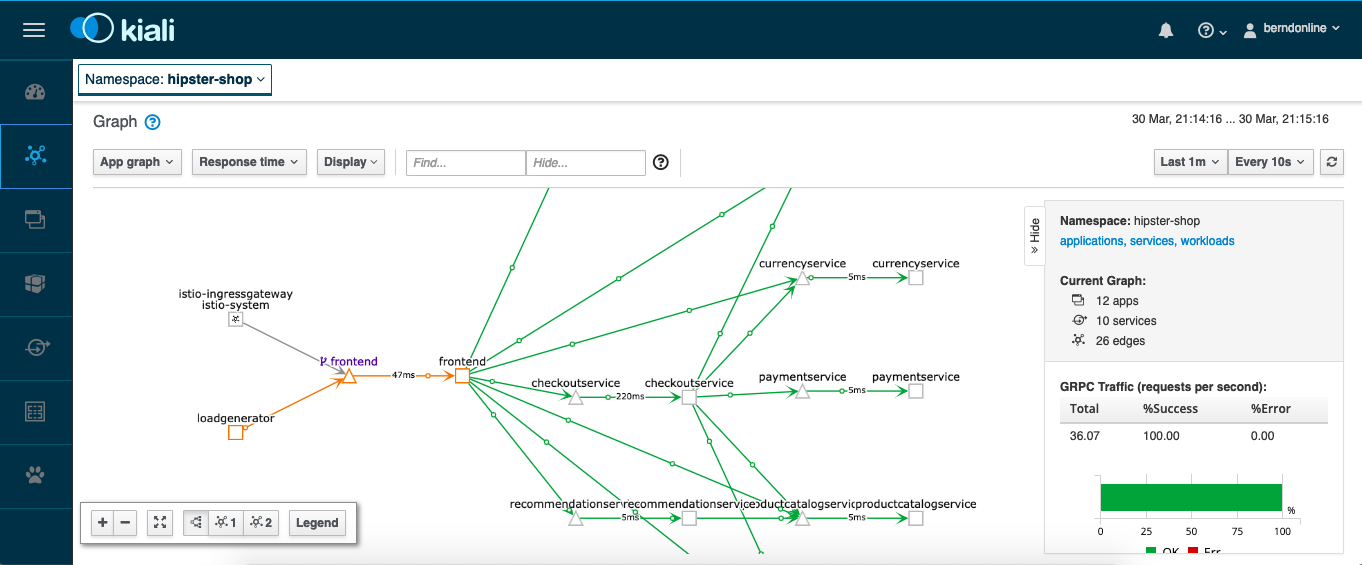
The Kiali web console answers the question about what microservices are part of the service mesh and how are they connected which gives you a great level of detail about the traffic flows:

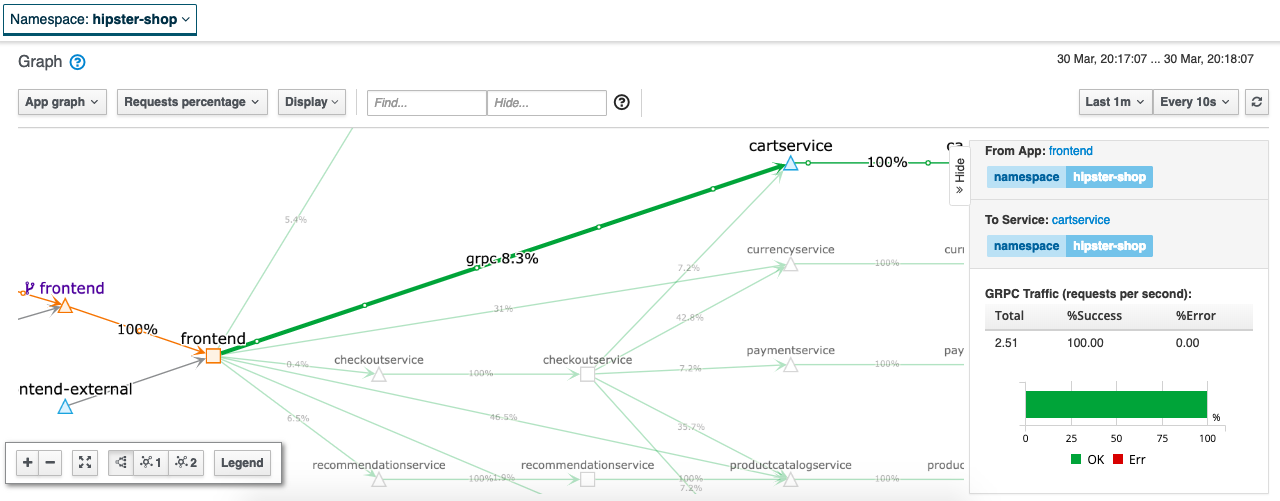
Detailed traffic flow view:

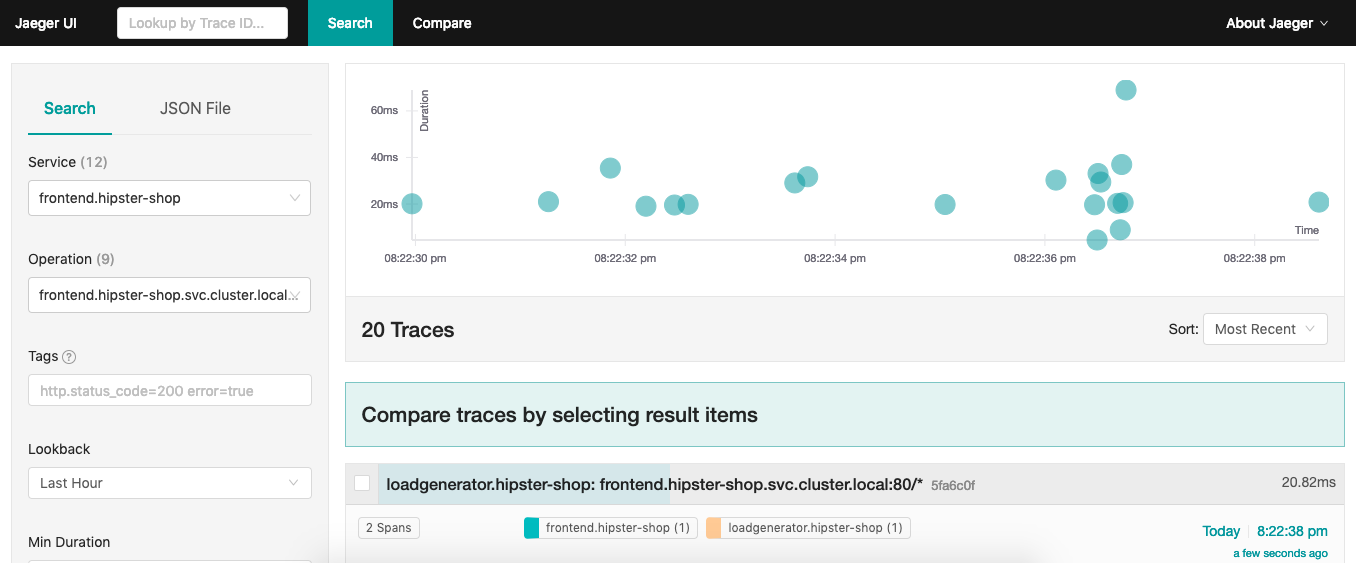
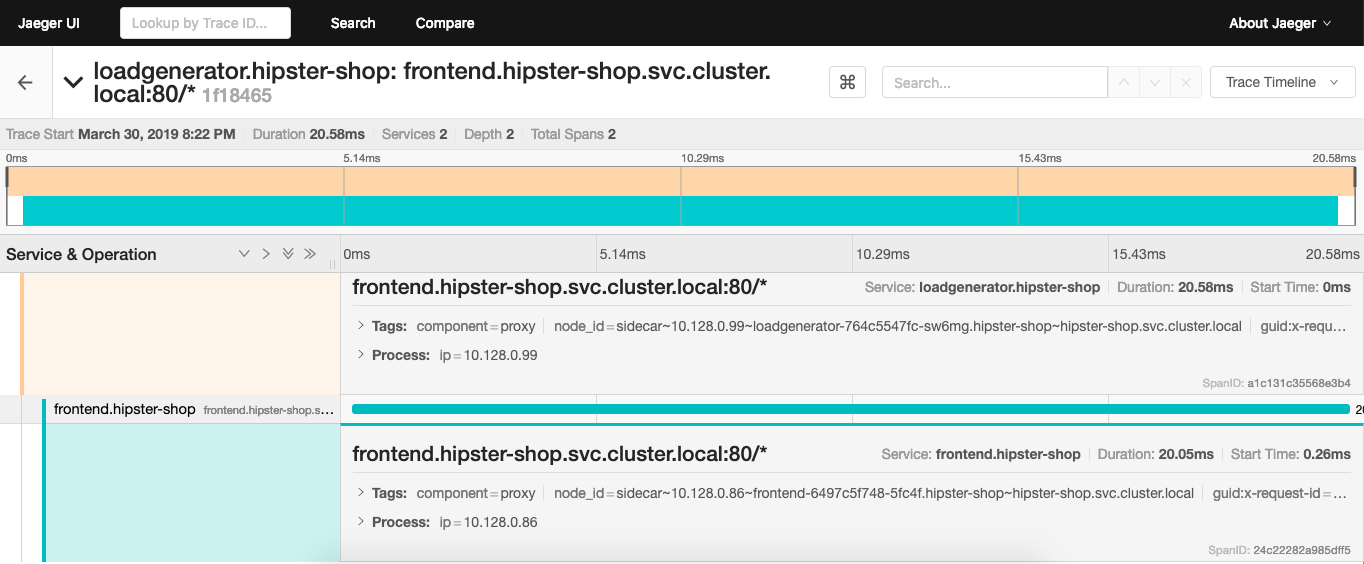
The Isito installation comes with Jaeger which is an open source tracing tool to monitor and troubleshoot transactions:

Enough about this, lets connect to our cool Hipster Shop and happy shopping:

Additionally there is another example, the Istio Bookinfo if you want to try something smaller and less complex:

oc new-project myproject

oc adm policy add-scc-to-user anyuid -z default -n myproject
oc adm policy add-scc-to-user privileged -z default -n myproject

oc apply -n myproject -f https://raw.githubusercontent.com/Maistra/bookinfo/master/bookinfo.yaml
oc apply -n myproject -f https://raw.githubusercontent.com/Maistra/bookinfo/master/bookinfo-gateway.yaml
export GATEWAY_URL=$(oc get route -n istio-system istio-ingressgateway -o jsonpath='{.spec.host}')
curl -o /dev/null -s -w "%{http_code}\n" http://$GATEWAY_URL/productpage

curl -o destination-rule-all.yaml https://raw.githubusercontent.com/istio/istio/release-1.0/samples/bookinfo/networking/destination-rule-all.yaml
oc apply -f destination-rule-all.yaml

curl -o destination-rule-all-mtls.yaml https://raw.githubusercontent.com/istio/istio/release-1.0/samples/bookinfo/networking/destination-rule-all-mtls.yaml
oc apply -f destination-rule-all-mtls.yaml

oc get destinationrules -o yaml

I hope this is a useful article for getting started with Istio service mesh on OpenShift.

Getting started with OpenShift 4.0 Container Platform

I had a first look at OpenShift 4.0 and I wanted to share some information from what I have seen so far. The installation of the cluster is super easy and RedHat did a lot to improve the overall experience of the installation process to the previous OpenShift v3.x Ansible based installation and moving towards ephemeral cluster deployments.

There are a many changes under the hood and it’s not as obvious as Bootkube for the self-hosted/healing control-plane, MachineSets and the many internal operators to install and manage the OpenShift components ( api serverscheduler, controller manager, cluster-autoscalercluster-monitoringweb-consolednsingressnetworkingnode-tuning, and authentication ).

For the OpenShift 4.0 developer preview you need an RedHat account because you require a pull-secret for the cluster installation. For more information please visit: https://cloud.openshift.com/clusters/install

First we need to download the openshift-installer binary:

wget https://github.com/openshift/installer/releases/download/v0.16.1/openshift-install-linux-amd64
mv openshift-install-linux-amd64 openshift-install
chmod +x openshift-install

Then we create the install-configuration, it is required that you already have AWS account credentials and an Route53 DNS domain set-up:

$ ./openshift-install create install-config
INFO Platform aws
INFO AWS Access Key ID *********
INFO AWS Secret Access Key [? for help] *********
INFO Writing AWS credentials to "/home/centos/.aws/credentials" (https://docs.aws.amazon.com/cli/latest/userguide/cli-configure-files.html)
INFO Region eu-west-1
INFO Base Domain paas.domain.com
INFO Cluster Name cluster1
INFO Pull Secret [? for help] *********

Let’s look at the install-config.yaml

apiVersion: v1beta4
baseDomain: paas.domain.com
compute:
- name: worker
  platform: {}
  replicas: 3
controlPlane:
  name: master
  platform: {}
  replicas: 3
metadata:
  creationTimestamp: null
  name: ew1
networking:
  clusterNetwork:
  - cidr: 10.128.0.0/14
    hostPrefix: 23
  machineCIDR: 10.0.0.0/16
  networkType: OpenShiftSDN
  serviceNetwork:
  - 172.30.0.0/16
platform:
  aws:
    region: eu-west-1
pullSecret: '{"auths":{...}'

Now we can continue to create the OpenShift v4 cluster which takes around 30mins to complete. At the end of the openshift-installer you see the auto-generate credentials to connect to the cluster:

$ ./openshift-install create cluster
INFO Consuming "Install Config" from target directory
INFO Creating infrastructure resources...
INFO Waiting up to 30m0s for the Kubernetes API at https://api.cluster1.paas.domain.com:6443...
INFO API v1.12.4+0ba401e up
INFO Waiting up to 30m0s for the bootstrap-complete event...
INFO Destroying the bootstrap resources...
INFO Waiting up to 30m0s for the cluster at https://api.cluster1.paas.domain.com:6443 to initialize...
INFO Waiting up to 10m0s for the openshift-console route to be created...
INFO Install complete!
INFO Run 'export KUBECONFIG=/home/centos/auth/kubeconfig' to manage the cluster with 'oc', the OpenShift CLI.
INFO The cluster is ready when 'oc login -u kubeadmin -p jMTSJ-F6KYy-mVVZ4-QVNPP' succeeds (wait a few minutes).
INFO Access the OpenShift web-console here: https://console-openshift-console.apps.cluster1.paas.domain.com
INFO Login to the console with user: kubeadmin, password: jMTSJ-F6KYy-mVVZ4-QVNPP

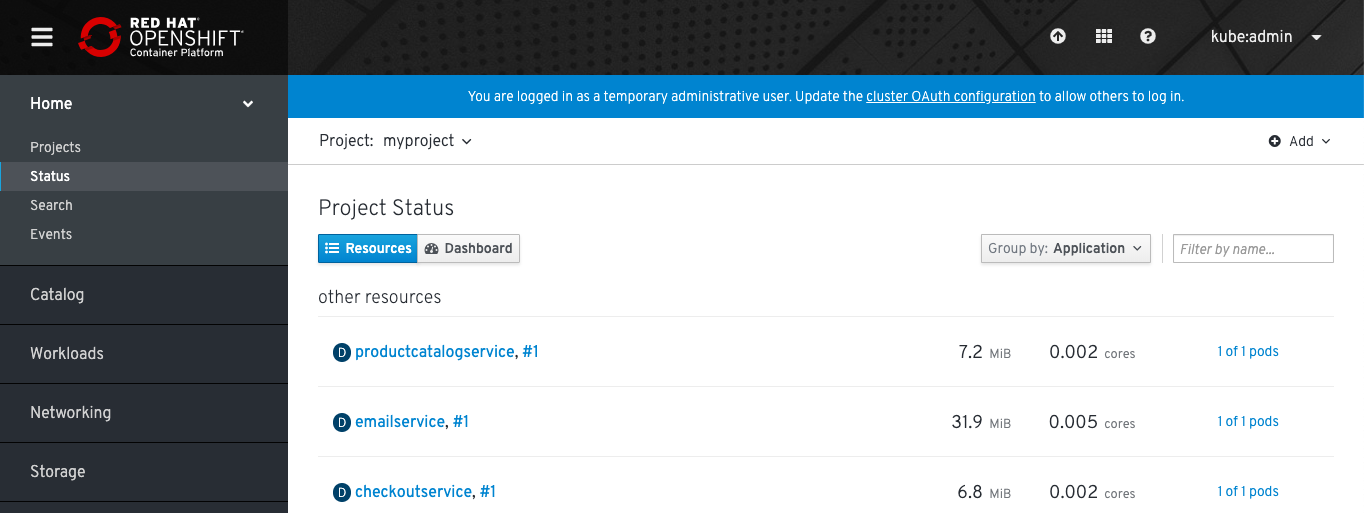
The web-console has a very clean new design which I really like in addition to all the great improvements.

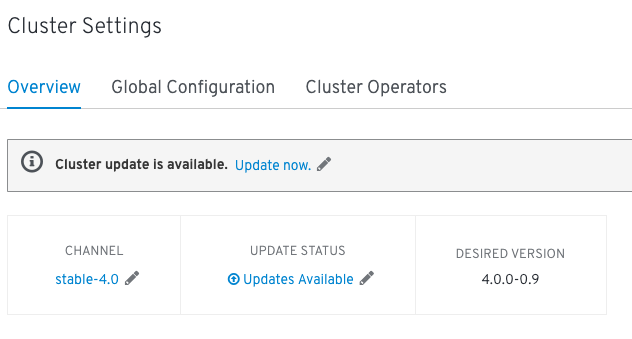
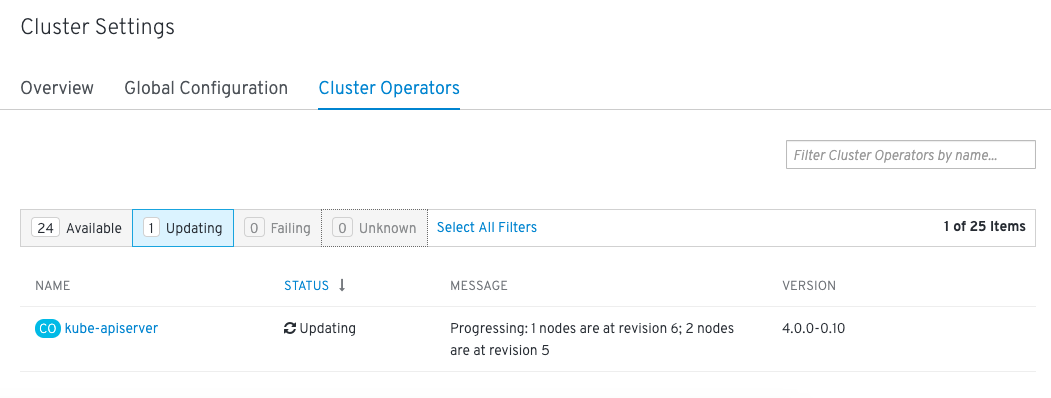
Under administration -> cluster settings you can explore the new auto-upgrade functionality of OpenShift 4.0:

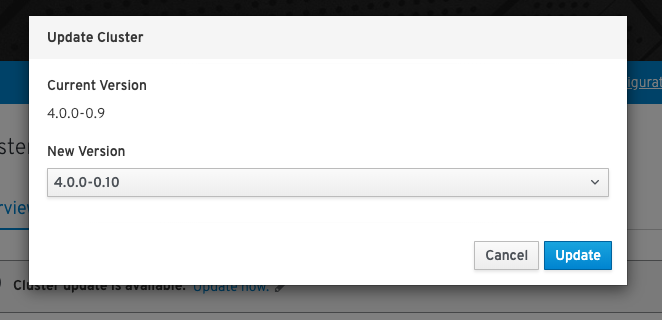
You choose the new version to upgrade and everything else happens in the background which is a massive improvement to OpenShift v3.x where you had to run the ansible installer for this.

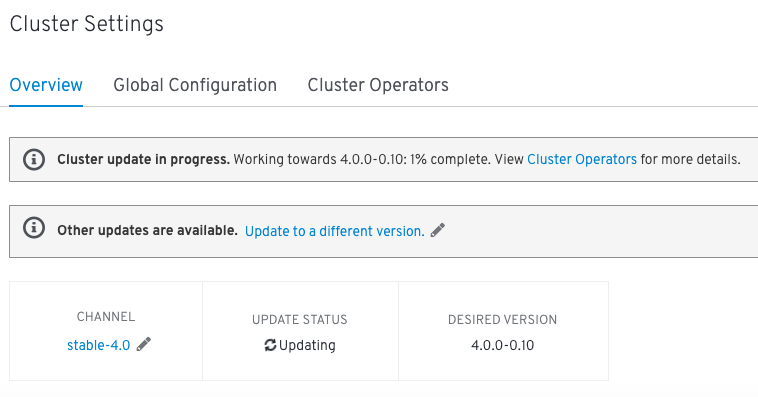
In the background the cluster operator upgrades the different platform components one by one.

Slowly you will see that the components move to the new build version.

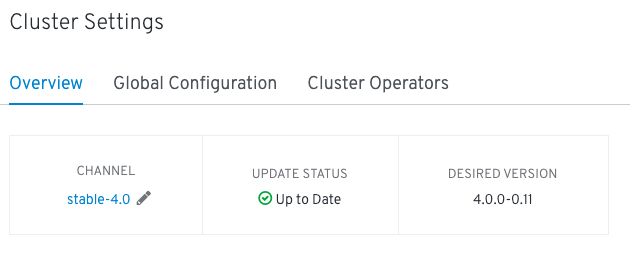
Finished cluster upgrade:

You can only upgrade from one version 4.0.0-0.9 to the next version 4.0.0-0.10. It is not possible to upgrade and go straight from x-0.9 to x-0.11.

But let’s deploy the Google Hipster Shop example and expose the frontend-external service for some more testing:

oc login -u kubeadmin -p jMTSJ-F6KYy-mVVZ4-QVNPP https://api.cluster1.paas.domain.com:6443 --insecure-skip-tls-verify=true
oc new-project myproject
oc create -f https://raw.githubusercontent.com/berndonline/openshift-ansible/master/examples/hipster-shop.yml
oc expose svc frontend-external

Getting the hostname for the exposed service:

$ oc get route
NAME                HOST/PORT                                                   PATH      SERVICES            PORT      TERMINATION   WILDCARD
frontend-external   frontend-external-myproject.apps.cluster1.paas.domain.com             frontend-external   http                    None

Use the browser to connect to our Hipster Shop:

It’s also very easy to destroy the cluster as it is to create it, as you seen previously:

$ ./openshift-install destroy cluster
INFO Disassociated                                 arn="arn:aws:ec2:eu-west-1:552276840222:route-table/rtb-083e2da5d1183efa7" id=rtbassoc-01d27db162fa45402
INFO Disassociated                                 arn="arn:aws:ec2:eu-west-1:552276840222:route-table/rtb-083e2da5d1183efa7" id=rtbassoc-057f593640067efc0
INFO Disassociated                                 arn="arn:aws:ec2:eu-west-1:552276840222:route-table/rtb-083e2da5d1183efa7" id=rtbassoc-05e821b451bead18f
INFO Disassociated                                 IAM instance profile="arn:aws:iam::552276840222:instance-profile/ocp4-bgx4c-worker-profile" arn="arn:aws:ec2:eu-west-1:552276840222:instance/i-0f64a911b1ffa3eff" id=i-0f64a911b1ffa3eff name=ocp4-bgx4c-worker-profile role=ocp4-bgx4c-worker-role
INFO Deleted                                       IAM instance profile="arn:aws:iam::552276840222:instance-profile/ocp4-bgx4c-worker-profile" arn="arn:aws:ec2:eu-west-1:552276840222:instance/i-0f64a911b1ffa3eff" id=i-0f64a911b1ffa3eff name=0xc00090f9a8
INFO Deleted                                       arn="arn:aws:ec2:eu-west-1:552276840222:instance/i-0f64a911b1ffa3eff" id=i-0f64a911b1ffa3eff
INFO Deleted                                       arn="arn:aws:ec2:eu-west-1:552276840222:instance/i-00b5eedc186ba26a7" id=i-00b5eedc186ba26a7
...
INFO Deleted                                       arn="arn:aws:ec2:eu-west-1:552276840222:security-group/sg-016d4c7d435a1c97f" id=sg-016d4c7d435a1c97f
INFO Deleted                                       arn="arn:aws:ec2:eu-west-1:552276840222:subnet/subnet-076348368858e9a82" id=subnet-076348368858e9a82
INFO Deleted                                       arn="arn:aws:ec2:eu-west-1:552276840222:vpc/vpc-00c611ae1b9b8e10a" id=vpc-00c611ae1b9b8e10a
INFO Deleted                                       arn="arn:aws:ec2:eu-west-1:552276840222:dhcp-options/dopt-0ce8b6a1c31e0ceac" id=dopt-0ce8b6a1c31e0ceac

The install experience is great for OpenShift 4.0 which makes it very easy for everyone to create and get started quickly with an enterprise container platform. From the operational perspective I still need to see how to run the new platform because all the operators are great and makes it an easy to use cluster but what happens when one of the operators goes rogue and debugging this I am most interested in.

Over the coming weeks I will look into more detail around OpenShift 4.0 and the different new features, I am especially interested in Service Mesh.

Typhoon Kubernetes Distribution

I stumbled across a very interesting Kubernetes distribution called Typhoon which runs a self-hosted control-plane using Bootkube running on CoreOS. Typhoon uses Terraform to deploy the required instances on various cloud providers or on bare-metal servers. I really like the concept of a minimal Kubernetes distribution and a simple bootstrap to deploy a full featured cluster in a few minutes. Check out the official Typhoon website or their Github repository for more information.

To install Typhoon I followed the documentation, everything is pretty simple with a bit of Terraform knowledge. Here’s my Github repository with my cluster configuration: https://github.com/berndonline/typhoon-kubernetes/tree/aws

Before you start you need to install Terraform v0.11.x and terraform-provider-ct, and setup a AWS Route53 domain for the Kubernetes cluster.

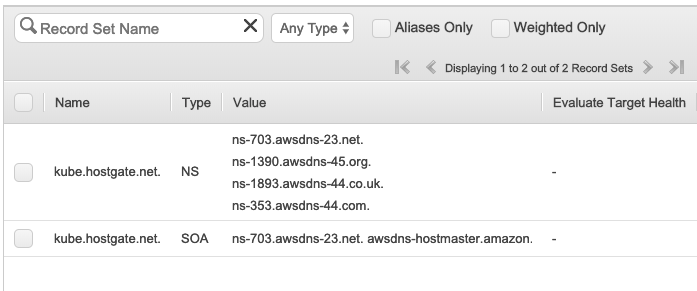
I created a new subdomain on Route53 and configured delegation on CloudFlare for the domain.

Let’s checkout the configuration, first the cluster.tf which I have modified slightly because I use Jenkins to deploy the Kubernetes cluster.

module "aws-cluster" {
  source = "git::https://github.com/poseidon/typhoon//aws/container-linux/kubernetes?ref=v1.13.3"

  providers = {
    aws = "aws.default"
    local = "local.default"
    null = "null.default"
    template = "template.default"
    tls = "tls.default"
  }

  # AWS
  cluster_name = "typhoon"
  dns_zone     = "${var.dns}"
  dns_zone_id  = "${var.dns_id}"

  # configuration
  ssh_authorized_key = "${var.ssh_key}"
  asset_dir          = "./.secrets/clusters/typhoon"

  # optional
  worker_count = 2
  worker_type  = "t3.small"
}

In the provider.tf I have only added S3 to be used for the Terraform backend state but otherwise I’ve left the defaults.

provider "aws" {
  version = "~> 1.13.0"
  alias   = "default"

  region  = "eu-west-1"
}

terraform {
  backend "s3" {
    bucket = "techbloc-terraform-data"
    key    = "openshift-311"
    region = "eu-west-1"
  }
}

...

I added a variables.tf file for the DNS and SSH variables.

variable "dns" {
}
variable "dns_id" {
}
variable "ssh_key" {
}

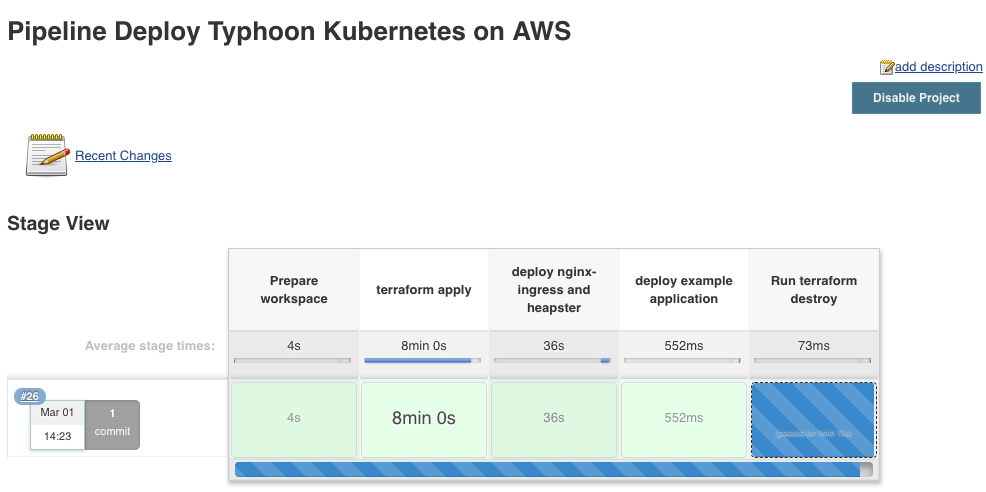
Let’s have a quick look at my simple Jenkins pipeline to deploy Typhoon Kubernetes. Apart from installing Kubernetes I am deploying the Nginx Ingress controller and  Heapster addons for the cluster. I’ve also added an example application I have used previously after deploying the cluster.

pipeline {
    agent any
    environment {
        AWS_ACCESS_KEY_ID = credentials('AWS_ACCESS_KEY_ID')
        AWS_SECRET_ACCESS_KEY = credentials('AWS_SECRET_ACCESS_KEY')
        TF_VAR_dns = credentials('TF_VAR_dns')
        TF_VAR_dns_id = credentials('TF_VAR_dns_id')
        TF_VAR_ssh_key = credentials('TF_VAR_ssh_key')
    }
    stages {
        stage('Prepare workspace') {
            steps {
                sh 'rm -rf *'
                git branch: 'aws', url: 'https://github.com/berndonline/typhoon-kubernetes.git'
                sh 'terraform init'
            }
        }
        stage('terraform apply') {
            steps {
                sshagent (credentials: ['fcdca8fa-aab9-3846-832f-4756392b7e2c']) {
                    sh 'terraform apply -auto-approve'
                    sh 'sleep 30'
                }
            }
        }
        stage('deploy nginx-ingress and heapster') {
            steps {    
                sh 'kubectl apply -R -f ./nginx-ingress/ --kubeconfig=./.secrets/clusters/typhoon/auth/kubeconfig'
                sh 'kubectl apply -R -f ./heapster/ --kubeconfig=./.secrets/clusters/typhoon/auth/kubeconfig'
                sh 'sleep 30'
            }
        }
        stage('deploy example application') {
            steps {    
                sh 'kubectl apply -f ./example/hello-kubernetes.yml --kubeconfig=./.secrets/clusters/typhoon/auth/kubeconfig'
            }
        }
        stage('Run terraform destroy') {
            steps {
                input 'Run terraform destroy?'
            }
        }
        stage('terraform destroy') {
            steps {
                sshagent (credentials: ['fcdca8fa-aab9-3846-832f-4756392b7e2c']) {
                    sh 'terraform destroy -force'
                }
            }
        }
    }
}

Let’s start the Jenkins pipeline:

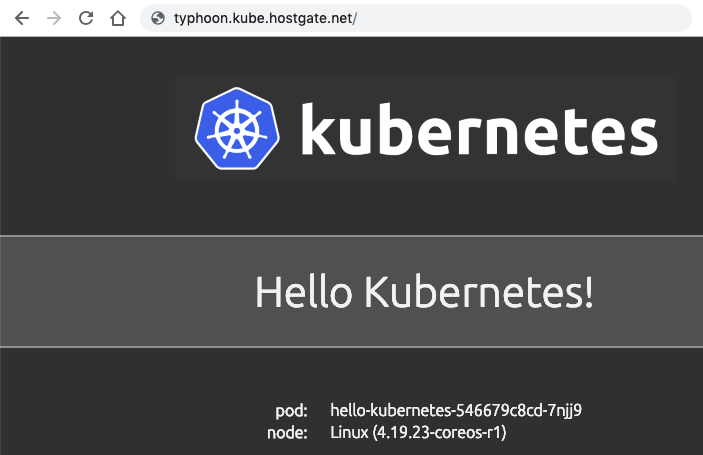
Let’s check if I can access the hello-kubernetes application. For everyone who is interested, this is the link to the Github repository for the hello-kubernetes example application I have used.

I really like the Typhoon Kubernetes distribution and the work that went into it to create a easy way for everyone to install a Kubernetes cluster and start using it in a few minutes. I also find the way they’ve used Terraform and Bootkube to deploy the platform on CoreOS very inspiring and it gave me some ideas how I can make use of it for production clusters.

I actually like CoreOS and the easy bootstrapping with Terraform and Bootkube which I have not used before, I’ve always deployed OpenShift/Kubernetes on either RedHat or CentOS with Ansible, and find it a very interesting way to deploy a Kubernetes platform.