Using Kubernetes Impersonate (sudo) for least-privilege

It has become very easy and simple to deploy Kubernetes services using the various cloud offerings like EKS or GKE, after you created your cluster and have the cluster-admin privileges to apply changes as you like. This model is great for development because you can start consuming Kubernetes services right away but this doesn’t work well for production clusters and gets more challenging when running PCI compliant workloads.

I want to explain a bit how to apply a least-privilege principle for Elastic Kubernetes Services (EKS) using the AWS integrated IAM. The diagram below is a simple example showing two IAM roles for admin and reader privileges for AWS resources. On the Kubernetes cluster the IAM roles are bound to the k8s cluster-admin and reader roles. The k8s sudoer role allows to impersonate cluster-admin privileges for cluster readers:
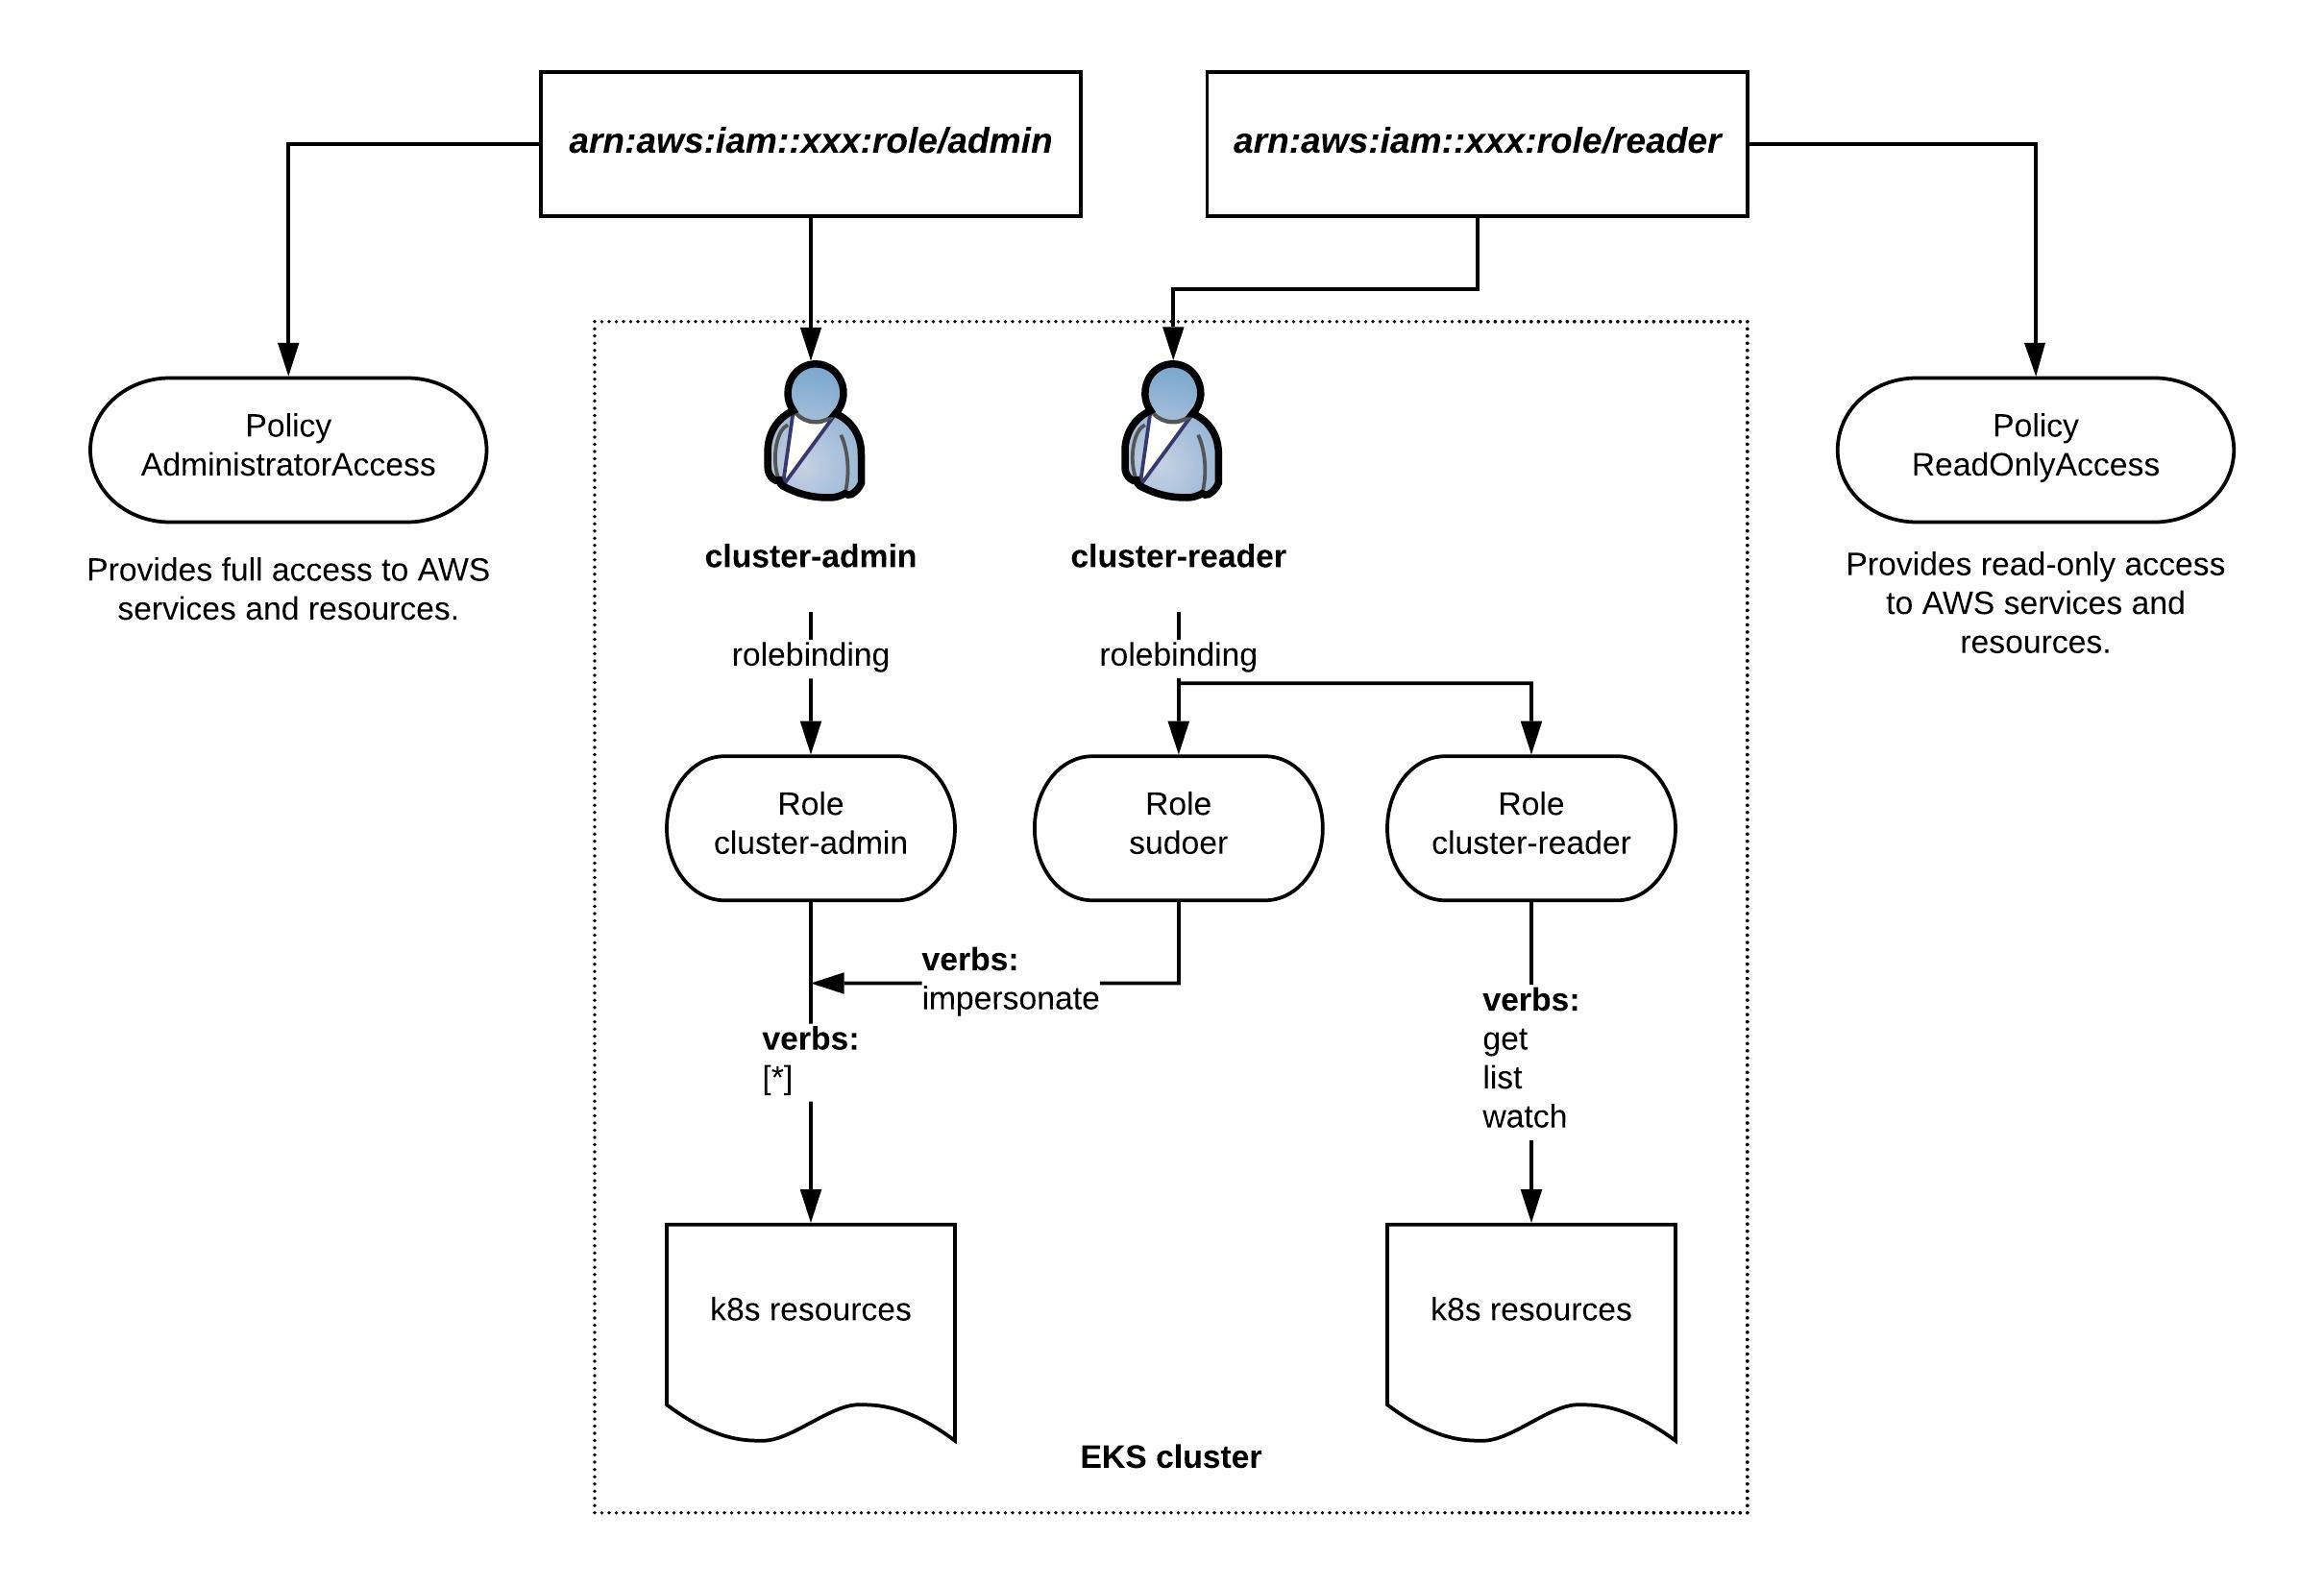
Normally you would add your DevOps team to the IAM reader role. This way the DevOps team has the default read permissions for AWS and Kubernetes resources but they can also elevate Kubernetes permissions to cluster-admin level when required without having full access to the AWS resources.

Let’s look at the EKS aws-auth ConfigMap where you need to define the IAM role mapping for admin and reader to internal Kubernetes groups:

apiVersion: v1
kind: ConfigMap
metadata:
  name: aws-auth
  namespace: kube-system
data:
  mapRoles: |
    - rolearn: arn:aws:iam::xxx:role/admin
      username: cluster-admin
      groups:
        - system:masters
    - rolearn: arn:aws:iam::xxx:role/reader
      username: cluster-reader
      groups:
        - cluster-reader
    - rolearn: arn:aws:iam::555555555555:role/devel-worker-nodes-NodeInstanceRole-74RF4UBDUKL6
      username: system:node:{{EC2PrivateDNSName}}
      groups:
        - system:bootstrappers
        - system:nodes
  mapUsers: |
    []

The system:masters group is a Kubernetes default role and rolebinding and requires no additional configuration. For the cluster-reader we need to apply a ClusterRole and a ClusterRoleBinding:

apiVersion: rbac.authorization.k8s.io/v1
kind: ClusterRole
metadata:
  name: cluster-reader
rules:
- apiGroups:
  - ""
  resources:
  - componentstatuses
  - nodes
  - nodes/status
  - persistentvolumeclaims/status
  - persistentvolumes
  - persistentvolumes/status
  - pods/binding
  - pods/eviction
  - podtemplates
  - securitycontextconstraints
  - services/status
  verbs:
  - get
  - list
  - watch
- apiGroups:
  - admissionregistration.k8s.io
  resources:
  - mutatingwebhookconfigurations
  - validatingwebhookconfigurations
  verbs:
  - get
  - list
  - watch
- apiGroups:
  - apps
  resources:
  - controllerrevisions
  - daemonsets/status
  - deployments/status
  - replicasets/status
  - statefulsets/status
  verbs:
  - get
  - list
  - watch
- apiGroups:
  - apiextensions.k8s.io
  resources:
  - customresourcedefinitions
  - customresourcedefinitions/status
  verbs:
  - get
  - list
  - watch
- apiGroups:
  - apiregistration.k8s.io
  resources:
  - apiservices
  - apiservices/status
  verbs:
  - get
  - list
  - watch
- apiGroups:
  - autoscaling
  resources:
  - horizontalpodautoscalers/status
  verbs:
  - get
  - list
  - watch
- apiGroups:
  - batch
  resources:
  - cronjobs/status
  - jobs/status
  verbs:
  - get
  - list
  - watch
- apiGroups:
  - coordination.k8s.io
  resources:
  - leases
  verbs:
  - get
  - list
  - watch
- apiGroups:
  - extensions
  resources:
  - daemonsets/status
  - deployments/status
  - horizontalpodautoscalers
  - horizontalpodautoscalers/status
  - ingresses/status
  - jobs
  - jobs/status
  - podsecuritypolicies
  - replicasets/status
  - replicationcontrollers
  - storageclasses
  - thirdpartyresources
  verbs:
  - get
  - list
  - watch
- apiGroups:
  - events.k8s.io
  resources:
  - events
  verbs:
  - get
  - list
  - watch
- apiGroups:
  - policy
  resources:
  - poddisruptionbudgets/status
  - podsecuritypolicies
  verbs:
  - get
  - list
  - watch
- apiGroups:
  - rbac.authorization.k8s.io
  resources:
  - clusterrolebindings
  - clusterroles
  - rolebindings
  - roles
  verbs:
  - get
  - list
  - watch
- apiGroups:
  - settings.k8s.io
  resources:
  - podpresets
  verbs:
  - get
  - list
  - watch
- apiGroups:
  - storage.k8s.io
  resources:
  - storageclasses
  - volumeattachments
  - volumeattachments/status
  verbs:
  - get
  - list
  - watch
- apiGroups:
  - scheduling.k8s.io
  resources:
  - priorityclasses
  verbs:
  - get
  - list
  - watch
- apiGroups:
  - certificates.k8s.io
  resources:
  - certificatesigningrequests
  - certificatesigningrequests/approval
  - certificatesigningrequests/status
  verbs:
  - get
  - list
  - watch
- apiGroups:
  - authorization.k8s.io
  resources:
  - localsubjectaccessreviews
  - selfsubjectaccessreviews
  - selfsubjectrulesreviews
  - subjectaccessreviews
  verbs:
  - create
- apiGroups:
  - authentication.k8s.io
  resources:
  - tokenreviews
  verbs:
  - create
- apiGroups:
  - ""
  resources:
  - podsecuritypolicyreviews
  - podsecuritypolicyselfsubjectreviews
  - podsecuritypolicysubjectreviews
  verbs:
  - create
- apiGroups:
  - ""
  resources:
  - nodes/metrics
  - nodes/spec
  verbs:
  - get
- apiGroups:
  - ""
  resources:
  - nodes/stats
  verbs:
  - create
  - get
- nonResourceURLs:
  - '*'
  verbs:
  - get
- apiGroups:
  - networking.k8s.io
  resources:
  - ingresses/status
  verbs:
  - get
- apiGroups:
  - networking.k8s.io
  resources:
  - ingresses/status
  verbs:
  - list
- apiGroups:
  - networking.k8s.io
  resources:
  - ingresses/status
  verbs:
  - watch
- apiGroups:
  - node.k8s.io
  resources:
  - runtimeclasses
  verbs:
  - get
- apiGroups:
  - node.k8s.io
  resources:
  - runtimeclasses
  verbs:
  - list
- apiGroups:
  - node.k8s.io
  resources:
  - runtimeclasses
  verbs:
  - watch
- apiGroups:
  - storage.k8s.io
  resources:
  - csidrivers
  verbs:
  - get
- apiGroups:
  - storage.k8s.io
  resources:
  - csidrivers
  verbs:
  - list
- apiGroups:
  - storage.k8s.io
  resources:
  - csidrivers
  verbs:
  - watch
- apiGroups:
  - storage.k8s.io
  resources:
  - csinodes
  verbs:
  - get
- apiGroups:
  - storage.k8s.io
  resources:
  - csinodes
  verbs:
  - list
- apiGroups:
  - storage.k8s.io
  resources:
  - csinodes
  verbs:
  - watch
- apiGroups:
  - operators.coreos.com
  resources:
  - clusterserviceversions
  - catalogsources
  - installplans
  - subscriptions
  - operatorgroups
  verbs:
  - get
  - list
  - watch
- apiGroups:
  - packages.operators.coreos.com
  resources:
  - packagemanifests
  - packagemanifests/icon
  verbs:
  - get
  - list
  - watch
- apiGroups:
  - packages.operators.coreos.com
  resources:
  - packagemanifests
  verbs:
  - get
  - list
  - watch
- apiGroups:
  - ""
  resources:
  - namespaces
  verbs:
  - get
- apiGroups:
  - ""
  resources:
  - configmaps
  - endpoints
  - persistentvolumeclaims
  - pods
  - replicationcontrollers
  - replicationcontrollers/scale
  - serviceaccounts
  - services
  verbs:
  - get
  - list
  - watch
- apiGroups:
  - ""
  resources:
  - bindings
  - events
  - limitranges
  - namespaces/status
  - pods/log
  - pods/status
  - replicationcontrollers/status
  - resourcequotas
  - resourcequotas/status
  verbs:
  - get
  - list
  - watch
- apiGroups:
  - ""
  resources:
  - namespaces
  verbs:
  - get
  - list
  - watch
- apiGroups:
  - apps
  resources:
  - controllerrevisions
  - daemonsets
  - deployments
  - deployments/scale
  - replicasets
  - replicasets/scale
  - statefulsets
  - statefulsets/scale
  verbs:
  - get
  - list
  - watch
- apiGroups:
  - autoscaling
  resources:
  - horizontalpodautoscalers
  verbs:
  - get
  - list
  - watch
- apiGroups:
  - batch
  resources:
  - cronjobs
  - jobs
  verbs:
  - get
  - list
  - watch
- apiGroups:
  - extensions
  resources:
  - daemonsets
  - deployments
  - deployments/scale
  - ingresses
  - networkpolicies
  - replicasets
  - replicasets/scale
  - replicationcontrollers/scale
  verbs:
  - get
  - list
  - watch
- apiGroups:
  - policy
  resources:
  - poddisruptionbudgets
  verbs:
  - get
  - list
  - watch
- apiGroups:
  - networking.k8s.io
  resources:
  - networkpolicies
  verbs:
  - get
  - list
  - watch
- apiGroups:
  - networking.k8s.io
  resources:
  - ingresses
  verbs:
  - get
- apiGroups:
  - networking.k8s.io
  resources:
  - ingresses
  verbs:
  - list
- apiGroups:
  - networking.k8s.io
  resources:
  - ingresses
  verbs:
  - watch
- apiGroups:
  - metrics.k8s.io
  resources:
  - pods
  verbs:
  - get
  - list
  - watch
- apiGroups:
  - ""
  resources:
  - resourcequotausages
  verbs:
  - get
  - list
  - watch

After you created the ClusterRole you need to create the ClusterRoleBinding:

apiVersion: rbac.authorization.k8s.io/v1
kind: ClusterRoleBinding
metadata:
  name: cluster-reader
roleRef:
  apiGroup: rbac.authorization.k8s.io
  kind: ClusterRole
  name: cluster-reader
subjects:
- apiGroup: rbac.authorization.k8s.io
  kind: Group
  name: cluster-reader

To give a cluster-reader impersonate permissions you need to create the sudoer ClusterRole with the right to impersonate system:admin:

apiVersion: rbac.authorization.k8s.io/v1
kind: ClusterRole
metadata:
  name: sudoer
rules:
- apiGroups:
  - ""
  resourceNames:
  - system:admin
  resources:
  - systemusers
  - users
  verbs:
  - impersonate
- apiGroups:
  - ""
  resourceNames:
  - system:masters
  resources:
  - groups
  - systemgroups
  verbs:
  - impersonate

Create the ClusterRoleBinding:

apiVersion: rbac.authorization.k8s.io/v1
kind: ClusterRoleBinding
metadata:
  name: sudoer
roleRef:
  apiGroup: rbac.authorization.k8s.io
  kind: ClusterRole
  name: sudoer
subjects:
- apiGroup: rbac.authorization.k8s.io
  kind: Group
  name: cluster-reader

For a cluster-reader to impersonate and get cluster-admin privileges you use the following kubectl options –as-group and –as:

kubectl get nodes --as-group system:masters --as system:admin

You want to restrict the membership of the IAM admin role as much as possible as everyone should only use the read permissions to not accidentally delete Kubernetes or AWS resources.
How to manage Kubernetes clusters the GitOps way with Flux CD

Kubernetes is becoming more and more popular, and so is managing clusters at scale. This article is about how to manage Kubernetes clusters the GitOps way using the Flux CD operator.

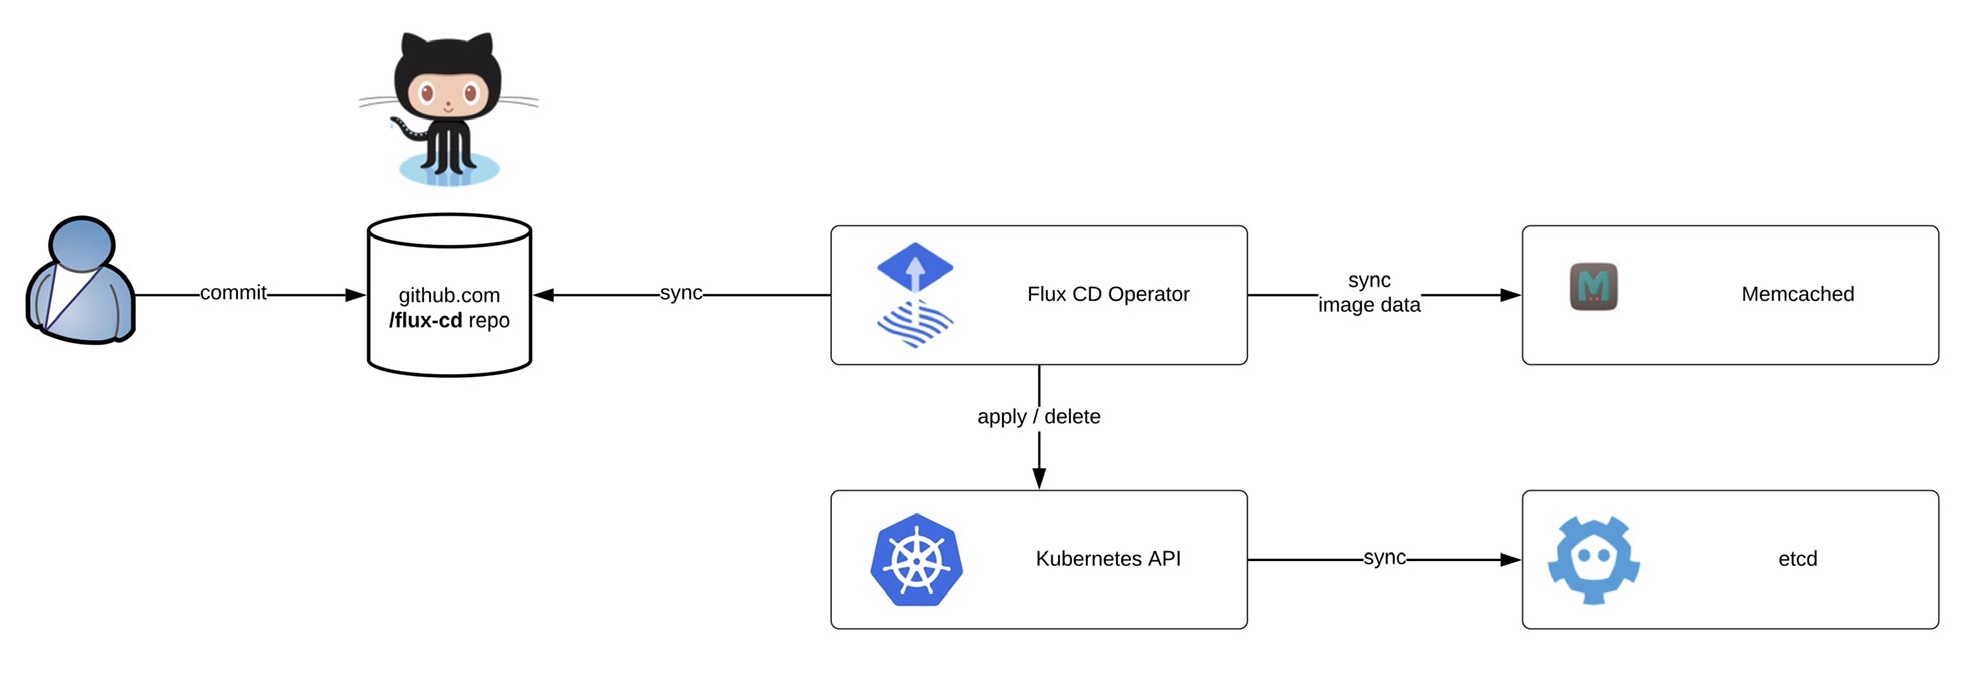
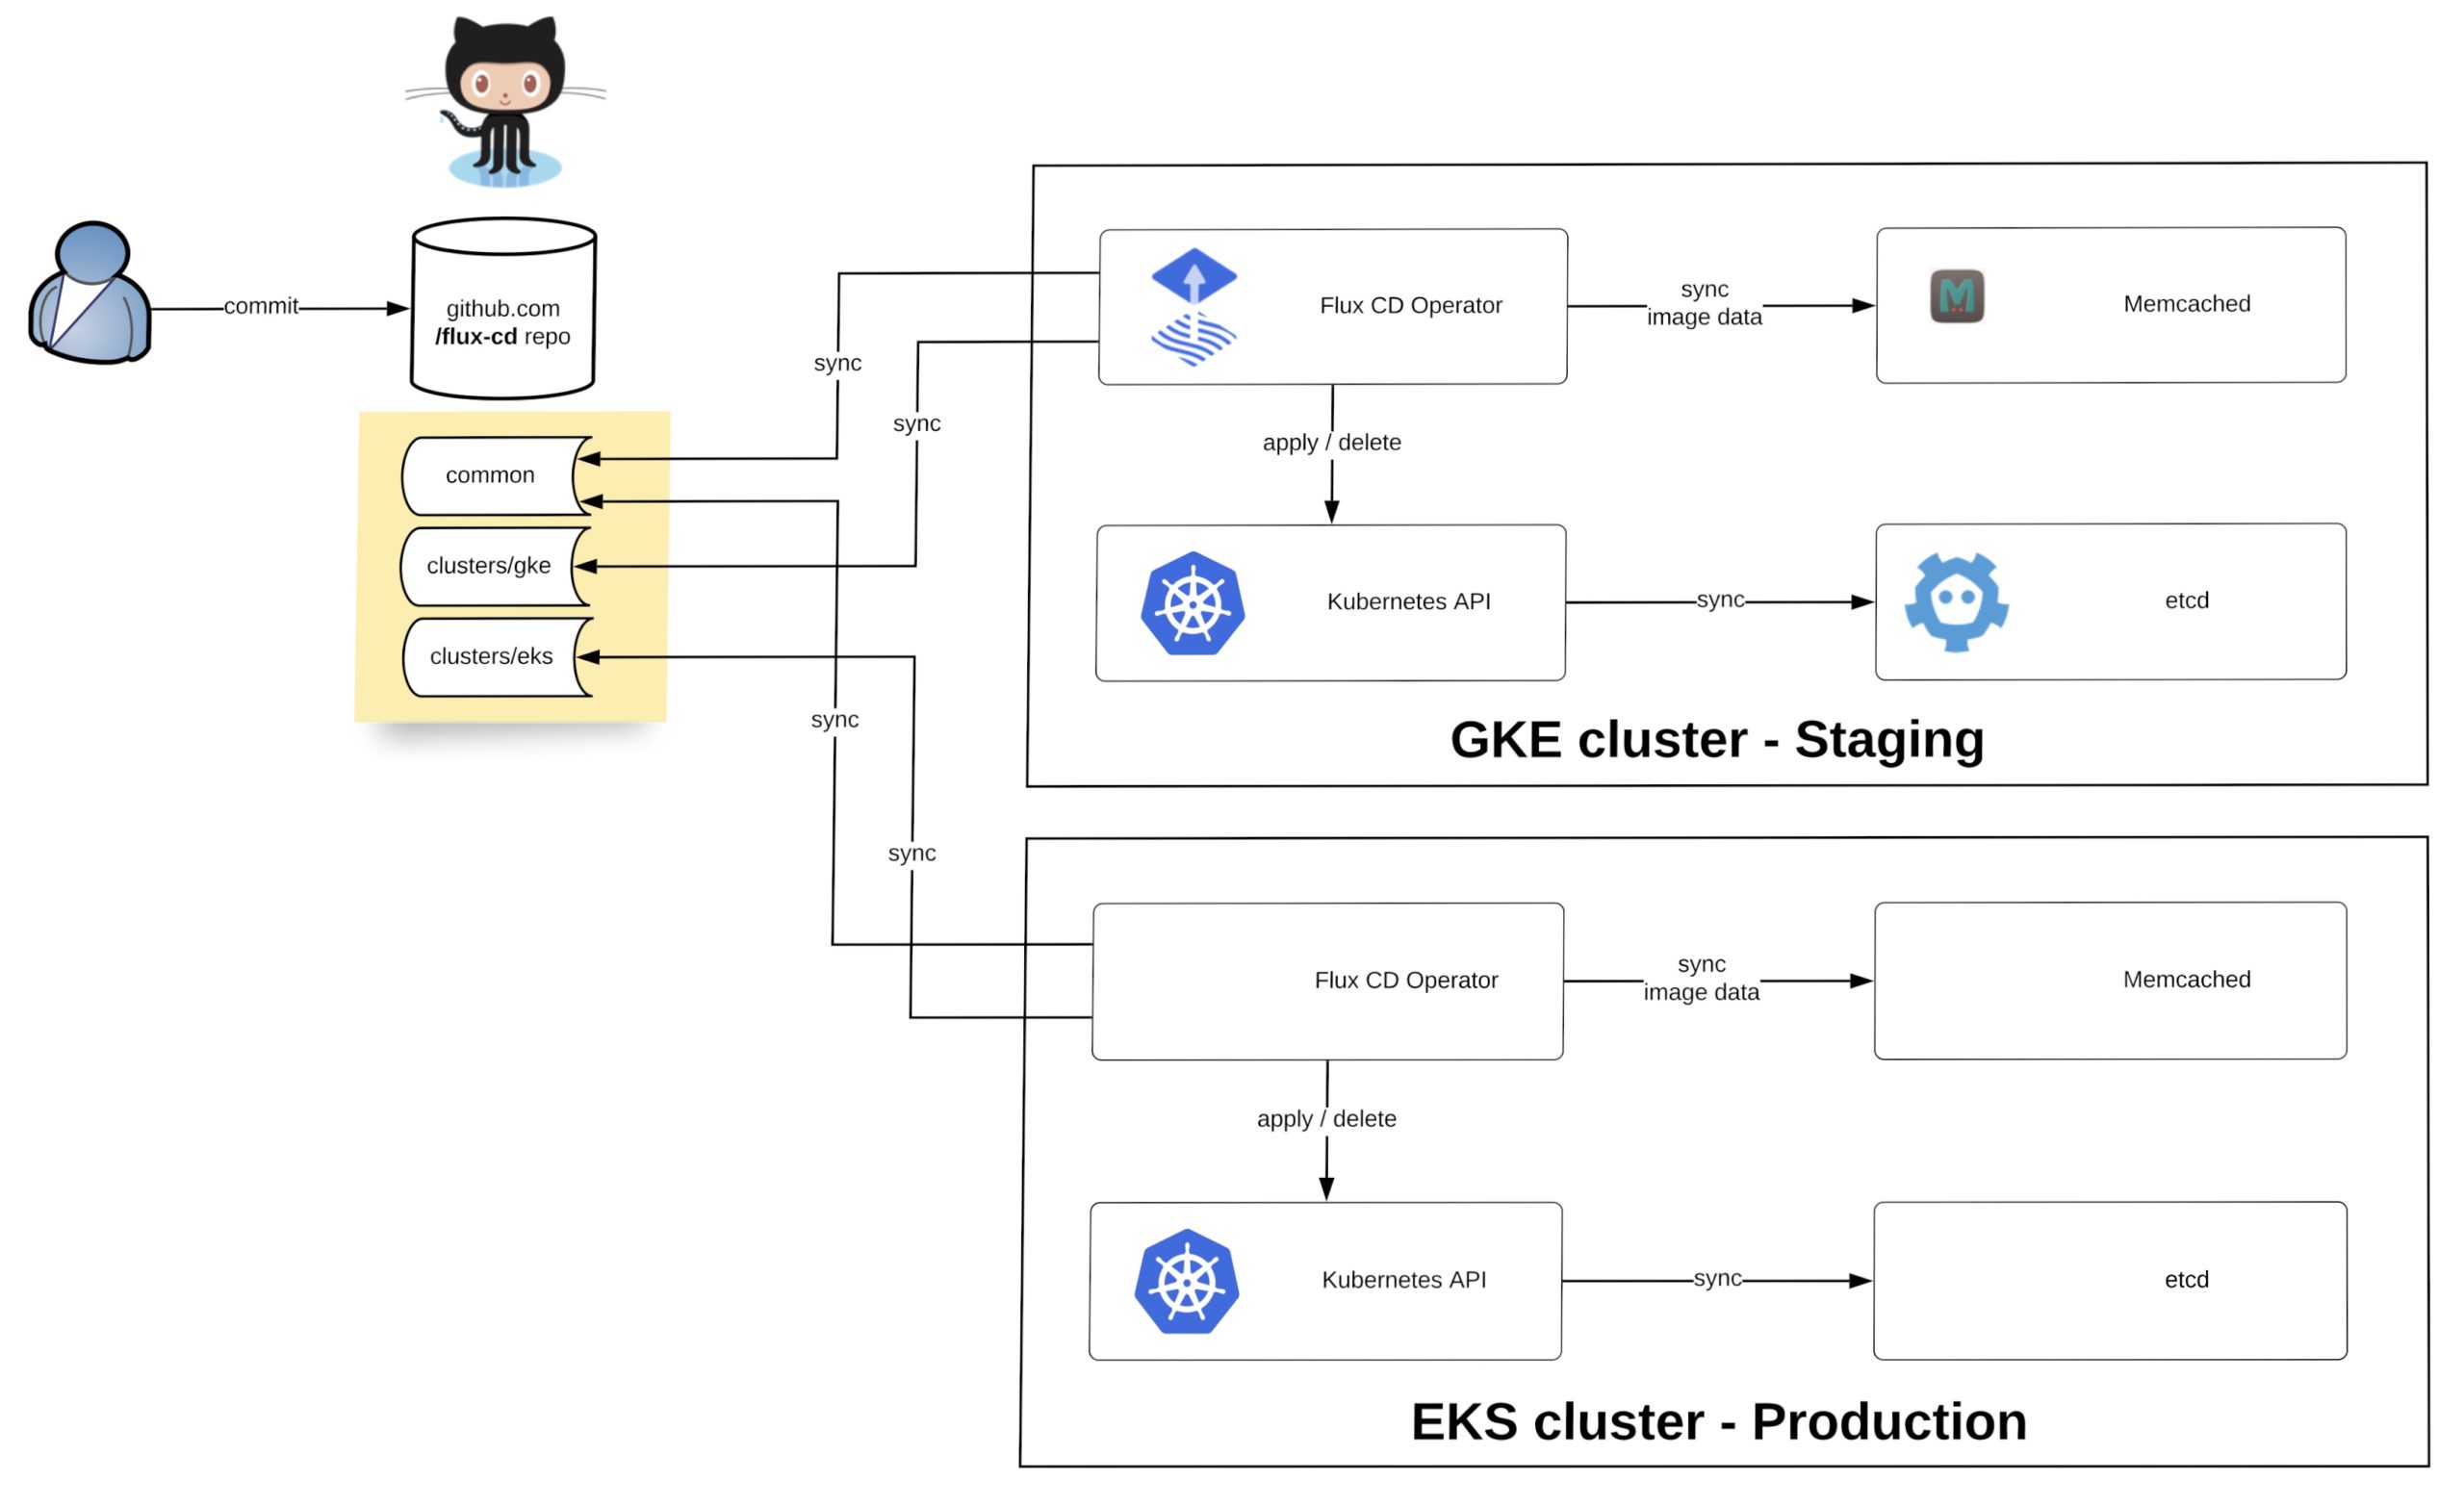
Flux can monitor container image and code repositories that you specify and trigger deployments to automatically change the configuration state of your Kubernetes cluster. The cluster configuration is centrally managed and stored in declarative form in Git, and there is no need for an administrator to manually apply manifests, the Flux operator synchronise to apply or delete the cluster configuration.

Before we start deploying the operator we need to install the fluxctl command-line utility and create the namespace:
sudo wget -O /usr/local/bin/fluxctl https://github.com/fluxcd/flux/releases/download/1.18.0/fluxctl_linux_amd64
sudo chmod 755 /usr/local/bin/fluxctl
kubectl create ns flux

Deploying the Flux operator is straight forward and requires a few options like git repository and git path. The path is important for my example because it tells the operator in which folder to look for manifests:

$ fluxctl install [email protected] [email protected]:berndonline/flux-cd.git --git-path=clusters/gke,common/stage --manifest-generation=true --git-branch=master --namespace=flux --registry-disable-scanning | kubectl apply -f -
deployment.apps/memcached created
service/memcached created
serviceaccount/flux created
clusterrole.rbac.authorization.k8s.io/flux created
clusterrolebinding.rbac.authorization.k8s.io/flux created
deployment.apps/flux created
secret/flux-git-deploy created

After you have applied the configuration, wait until the Flux pods are up and running:

$ kubectl get pods -n flux
NAME                       READY   STATUS    RESTARTS   AGE
flux-85cd9cd746-hnb4f      1/1     Running   0          74m
memcached-5dcd7579-d6vwh   1/1     Running   0          20h

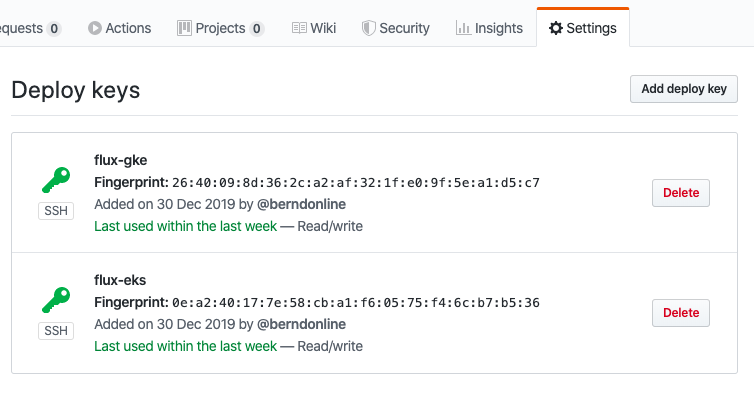
The last step is to get the Flux operator deploy keys and copy the output to add to your Git repository:

fluxctl identity --k8s-fwd-ns flux

Now you are ready to synchronise the Flux operator with the repository. By default Flux automatically synchronises every 5 minutes to apply configuration changes:
$ fluxctl sync --k8s-fwd-ns flux
Synchronizing with [email protected]:berndonline/flux-cd.git
Revision of master to apply is 726944d
Waiting for 726944d to be applied ...
Done.

You are able to list workloads which are managed by the Flux operator:

$ fluxctl list-workloads --k8s-fwd-ns=flux -a
WORKLOAD                             CONTAINER         IMAGE                            RELEASE  POLICY
default:deployment/hello-kubernetes  hello-kubernetes  paulbouwer/hello-kubernetes:1.5  ready    automated

How do we manage the configuration for multiple Kubernetes clusters?

I want to show you a simple example using Kustomize to manage multiple clusters across two environments (staging and production) with Flux. Basically you have a single repository and multiple clusters synchronising the configuration depending how you configure the –git-path variable of the Flux operator. The option –manifest-generation enables Kustomize for the operator and it is required to add a .flux.yaml to run Kustomize build on the cluster directories and to apply the generated manifests.

Let’s look at the repository file and folder structure. We have the base folder containing the common deployment configuration, the common folder with the environment separation for stage and prod overlays and the clusters folder which contains more cluster specific configuration:

├── .flux.yaml 
├── base
│   └── common
│       ├── deployment.yaml
│       ├── kustomization.yaml
│       ├── namespace.yaml
│       └── service.yaml
├── clusters
│   ├── eks
|   |   ├── eks-app1
│   │   |   ├── deployment.yaml
|   |   |   ├── kustomization.yaml
│   │   |   └── service.yaml
|   |   └── kustomization.yaml
│   ├── gke
|   |   ├── gke-app1
│   │   |   ├── deployment.yaml
|   |   |   ├── kustomization.yaml
│   │   |   └── service.yaml
|   |   ├── gke-app2
│   │   |   ├── deployment.yaml
|   |   |   ├── kustomization.yaml
│   │   |   └── service.yaml
|   |   └── kustomization.yaml
└── common
    ├── prod
    |   ├── prod.yaml
    |   └── kustomization.yaml
    └── stage
        ├──  team1
        |    ├── deployment.yaml
        |    ├── kustomization.yaml
        |    ├── namespace.yaml
        |    └── service.yaml
        ├── stage.yaml
        └── kustomization.yaml

If you are new to Kustomize I would recommend reading the article Kustomize – The right way to do templating in Kubernetes.

The last thing we need to do is to deploy the Flux operator to the two Kubernetes clusters. The only difference between both is the git-path variable which points the operator to the cluster and common directories were Kustomize applies the overlays based what is specified in kustomize.yaml. More details about the configuration you find in my example repository: https://github.com/berndonline/flux-cd

Flux config for Google GKE staging cluster:

fluxctl install [email protected] [email protected]:berndonline/flux-cd.git --git-path=clusters/gke,common/stage --manifest-generation=true --git-branch=master --namespace=flux | kubectl apply -f -

Flux config for Amazon EKS production cluster:

fluxctl install [email protected] [email protected]:berndonline/flux-cd.git --git-path=clusters/eks,common/prod --manifest-generation=true --git-branch=master --namespace=flux | kubectl apply -f -

After a few minutes the configuration is applied to the two clusters and you can validate the configuration.

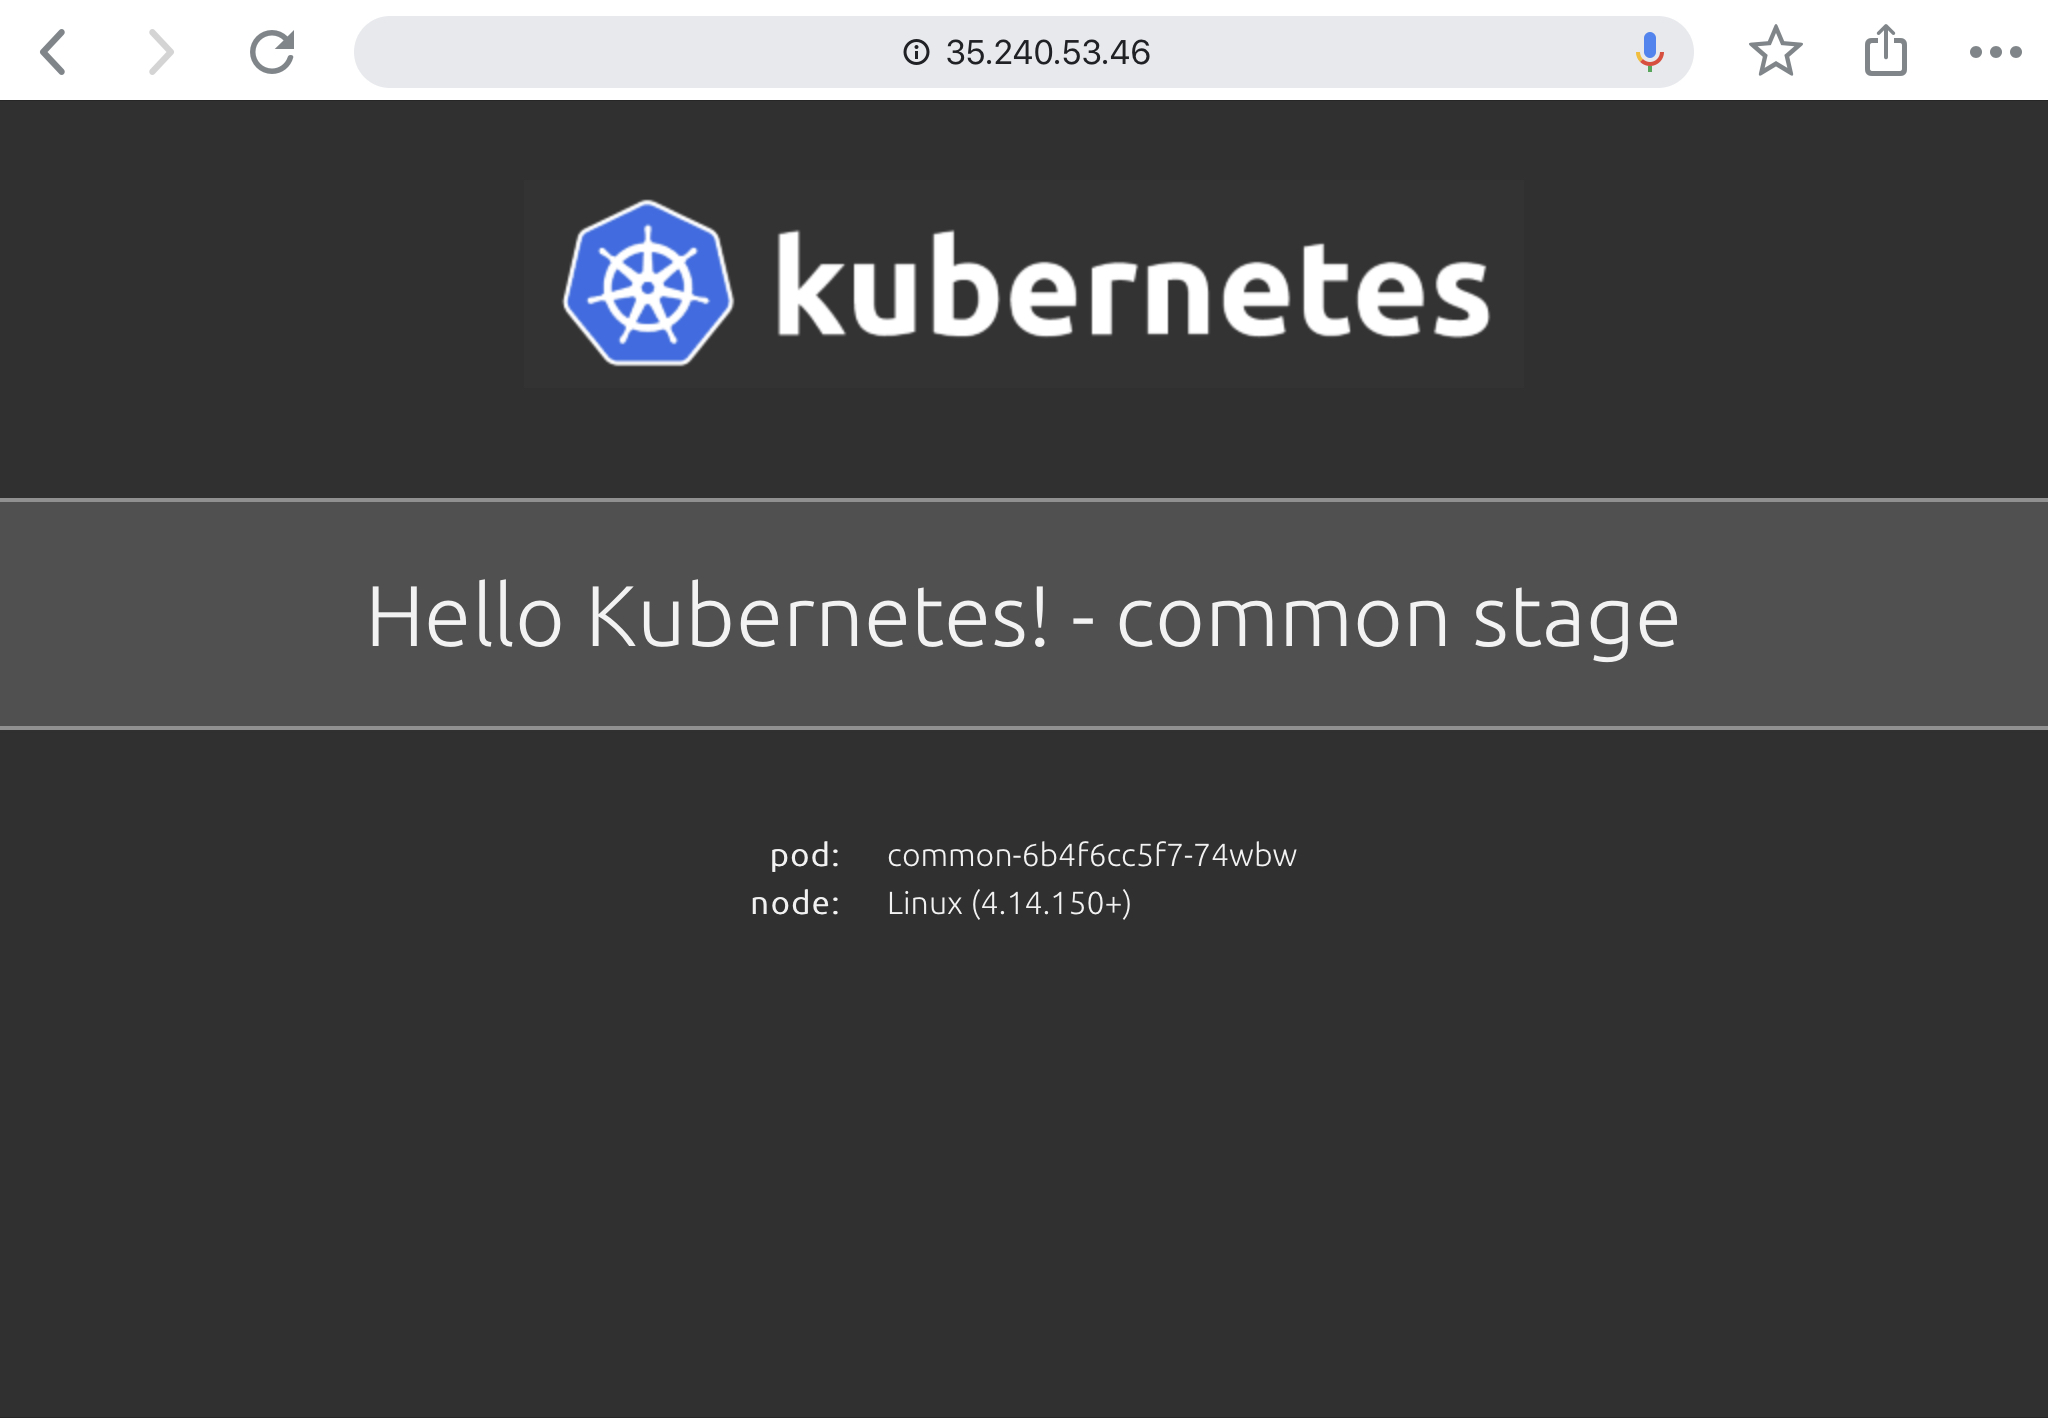
Google GKE stage workloads:

$ fluxctl list-workloads --k8s-fwd-ns=flux -a
WORKLOAD                   CONTAINER         IMAGE                            RELEASE  POLICY
common:deployment/common   hello-kubernetes  paulbouwer/hello-kubernetes:1.5  ready    automated
default:deployment/gke1    hello-kubernetes  paulbouwer/hello-kubernetes:1.5  ready    
default:deployment/gke2    hello-kubernetes  paulbouwer/hello-kubernetes:1.5  ready    
team1:deployment/team1     hello-kubernetes  paulbouwer/hello-kubernetes:1.5  ready
$ kubectl get svc --all-namespaces | grep LoadBalancer
common        common                 LoadBalancer   10.91.14.186   35.240.53.46     80:31537/TCP    16d
default       gke1                   LoadBalancer   10.91.7.169    35.195.241.46    80:30218/TCP    16d
default       gke2                   LoadBalancer   10.91.10.239   35.195.144.68    80:32589/TCP    16d
team1         team1                  LoadBalancer   10.91.1.178    104.199.107.56   80:31049/TCP    16d

GKE common stage application:

Amazon EKS prod workloads:

$ fluxctl list-workloads --k8s-fwd-ns=flux -a
WORKLOAD                          CONTAINER         IMAGE                                                                RELEASE  POLICY
common:deployment/common          hello-kubernetes  paulbouwer/hello-kubernetes:1.5                                      ready    automated
default:deployment/eks1           hello-kubernetes  paulbouwer/hello-kubernetes:1.5                                      ready
$ kubectl get svc --all-namespaces | grep LoadBalancer
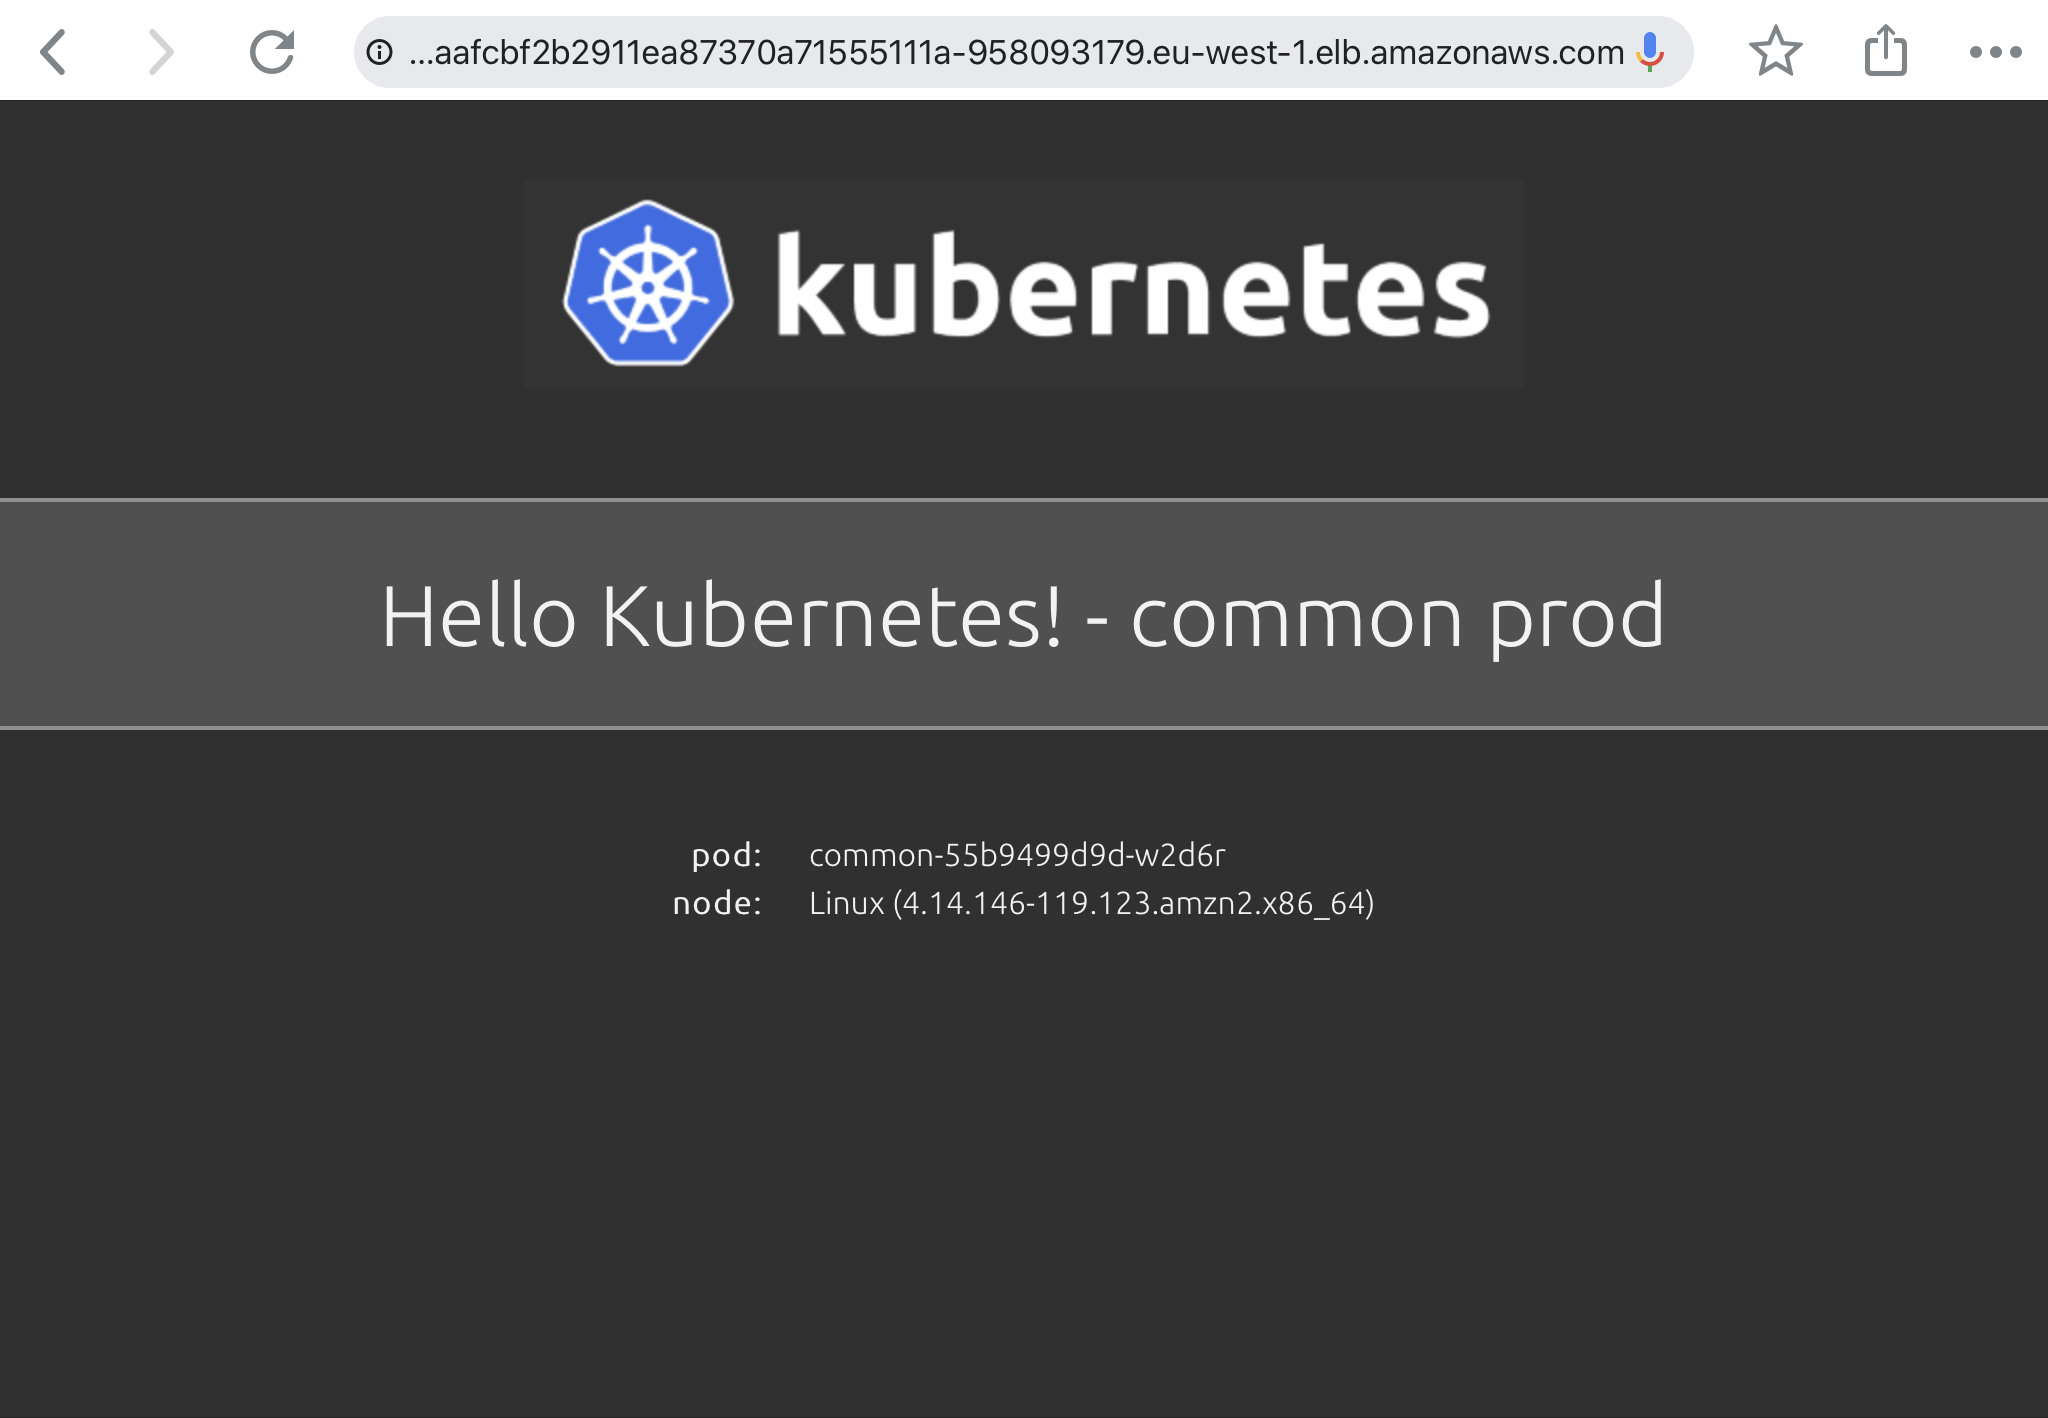
common        common       LoadBalancer   10.100.254.171   a4caafcbf2b2911ea87370a71555111a-958093179.eu-west-1.elb.amazonaws.com    80:32318/TCP    3m8s
default       eks1         LoadBalancer   10.100.170.10    a4caeada52b2911ea87370a71555111a-1261318311.eu-west-1.elb.amazonaws.com   80:32618/TCP    3m8s

EKS common prod application:

I hope this article is useful to get started with GitOps and the Flux operator. In the future, I would like to see Flux being able to watch git tags which will make it easier to promote changes and manage clusters with version tags.

For more technical information have a look at the Flux CD documentation.

Create and manage AWS EKS cluster using eksctl command-line

A few month back I stumbled across the Weave.works command-line tool eksctl.io to create and manage AWS EKS clusters. Amazon recently announced eksctl.io is the official command-line tool for managing AWS EKS clusters. It follows a similar approach what we have seen with the new openshift-installer to create an OpenShift 4 cluster or with the Google Cloud Shell to create a GKE cluster with a single command and I really like the simplicity of these tools.

Before we start creating a EKS cluster, see below the IAM user policy to set the required permissions for eksctl.

{
    "Version": "2012-10-17",
    "Statement": [
        {
            "Sid": "VisualEditor0",
            "Effect": "Allow",
            "Action": [
                "iam:CreateInstanceProfile",
                "iam:DeleteInstanceProfile",
                "iam:GetRole",
                "iam:GetInstanceProfile",
                "iam:RemoveRoleFromInstanceProfile",
                "iam:CreateRole",
                "iam:DeleteRole",
                "iam:AttachRolePolicy",
                "iam:PutRolePolicy",
                "iam:ListInstanceProfiles",
                "iam:AddRoleToInstanceProfile",
                "iam:ListInstanceProfilesForRole",
                "iam:PassRole",
                "iam:CreateServiceLinkedRole",
                "iam:DetachRolePolicy",
                "iam:DeleteRolePolicy",
                "iam:DeleteServiceLinkedRole",
                "ec2:DeleteInternetGateway",
                "iam:GetOpenIDConnectProvider",
                "iam:GetRolePolicy"
            ],
            "Resource": [
                "arn:aws:iam::552276840222:instance-profile/eksctl-*",
                "arn:aws:iam::552276840222:oidc-provider/oidc.eks*",
                "arn:aws:iam::552276840222:role/eksctl-*",
                "arn:aws:ec2:*:*:internet-gateway/*"
            ]
        },
        {
            "Sid": "VisualEditor1",
            "Effect": "Allow",
            "Action": [
                "ec2:AuthorizeSecurityGroupIngress",
                "ec2:DeleteSubnet",
                "ec2:AttachInternetGateway",
                "ec2:DeleteRouteTable",
                "ec2:AssociateRouteTable",
                "ec2:DescribeInternetGateways",
                "autoscaling:DescribeAutoScalingGroups",
                "ec2:CreateRoute",
                "ec2:CreateInternetGateway",
                "ec2:RevokeSecurityGroupEgress",
                "autoscaling:UpdateAutoScalingGroup",
                "ec2:DeleteInternetGateway",
                "ec2:DescribeKeyPairs",
                "ec2:DescribeRouteTables",
                "ec2:ImportKeyPair",
                "ec2:DescribeLaunchTemplates",
                "ec2:CreateTags",
                "ec2:CreateRouteTable",
                "ec2:RunInstances",
                "cloudformation:*",
                "ec2:DetachInternetGateway",
                "ec2:DisassociateRouteTable",
                "ec2:RevokeSecurityGroupIngress",
                "ec2:DescribeImageAttribute",
                "ec2:DeleteNatGateway",
                "autoscaling:DeleteAutoScalingGroup",
                "ec2:DeleteVpc",
                "ec2:CreateSubnet",
                "ec2:DescribeSubnets",
                "eks:*",
                "autoscaling:CreateAutoScalingGroup",
                "ec2:DescribeAddresses",
                "ec2:DeleteTags",
                "ec2:CreateNatGateway",
                "autoscaling:DescribeLaunchConfigurations",
                "ec2:CreateVpc",
                "ec2:DescribeVpcAttribute",
                "autoscaling:DescribeScalingActivities",
                "ec2:DescribeAvailabilityZones",
                "ec2:CreateSecurityGroup",
                "ec2:ModifyVpcAttribute",
                "ec2:ReleaseAddress",
                "ec2:AuthorizeSecurityGroupEgress",
                "ec2:DeleteLaunchTemplate",
                "ec2:DescribeTags",
                "ec2:DeleteRoute",
                "ec2:DescribeLaunchTemplateVersions",
                "elasticloadbalancing:*",
                "ec2:DescribeNatGateways",
                "ec2:AllocateAddress",
                "ec2:DescribeSecurityGroups",
                "autoscaling:CreateLaunchConfiguration",
                "ec2:DescribeImages",
                "ec2:CreateLaunchTemplate",
                "autoscaling:DeleteLaunchConfiguration",
                "iam:ListOpenIDConnectProviders",
                "ec2:DescribeVpcs",
                "ec2:DeleteSecurityGroup"
            ],
            "Resource": "*"
        }
    ]
}

Now let’s create the EKS cluster with the following command:

$ eksctl create cluster --name=cluster-1 --region=eu-west-1 --nodes=3 --auto-kubeconfig
[ℹ]  eksctl version 0.10.2
[ℹ]  using region eu-west-1
[ℹ]  setting availability zones to [eu-west-1a eu-west-1c eu-west-1b]
[ℹ]  subnets for eu-west-1a - public:192.168.0.0/19 private:192.168.96.0/19
[ℹ]  subnets for eu-west-1c - public:192.168.32.0/19 private:192.168.128.0/19
[ℹ]  subnets for eu-west-1b - public:192.168.64.0/19 private:192.168.160.0/19
[ℹ]  nodegroup "ng-b17ac84f" will use "ami-059c6874350e63ca9" [AmazonLinux2/1.14]
[ℹ]  using Kubernetes version 1.14
[ℹ]  creating EKS cluster "cluster-1" in "eu-west-1" region
[ℹ]  will create 2 separate CloudFormation stacks for cluster itself and the initial nodegroup
[ℹ]  if you encounter any issues, check CloudFormation console or try 'eksctl utils describe-stacks --region=eu-west-1 --cluster=cluster-1'
[ℹ]  CloudWatch logging will not be enabled for cluster "cluster-1" in "eu-west-1"
[ℹ]  you can enable it with 'eksctl utils update-cluster-logging --region=eu-west-1 --cluster=cluster-1'
[ℹ]  Kubernetes API endpoint access will use default of {publicAccess=true, privateAccess=false} for cluster "cluster-1" in "eu-west-1"
[ℹ]  2 sequential tasks: { create cluster control plane "cluster-1", create nodegroup "ng-b17ac84f" }
[ℹ]  building cluster stack "eksctl-cluster-1-cluster"
[ℹ]  deploying stack "eksctl-cluster-1-cluster"
[ℹ]  building nodegroup stack "eksctl-cluster-1-nodegroup-ng-b17ac84f"
[ℹ]  --nodes-min=3 was set automatically for nodegroup ng-b17ac84f
[ℹ]  --nodes-max=3 was set automatically for nodegroup ng-b17ac84f
[ℹ]  deploying stack "eksctl-cluster-1-nodegroup-ng-b17ac84f"
[✔]  all EKS cluster resources for "cluster-1" have been created
[✔]  saved kubeconfig as "/home/ubuntu/.kube/eksctl/clusters/cluster-1"
[ℹ]  adding identity "arn:aws:iam::xxxxxxxxxx:role/eksctl-cluster-1-nodegroup-ng-b17-NodeInstanceRole-1DK2K493T8OM7" to auth ConfigMap
[ℹ]  nodegroup "ng-b17ac84f" has 0 node(s)
[ℹ]  waiting for at least 3 node(s) to become ready in "ng-b17ac84f"
[ℹ]  nodegroup "ng-b17ac84f" has 3 node(s)
[ℹ]  node "ip-192-168-5-192.eu-west-1.compute.internal" is ready
[ℹ]  node "ip-192-168-62-86.eu-west-1.compute.internal" is ready
[ℹ]  node "ip-192-168-64-47.eu-west-1.compute.internal" is ready
[ℹ]  kubectl command should work with "/home/ubuntu/.kube/eksctl/clusters/cluster-1", try 'kubectl --kubeconfig=/home/ubuntu/.kube/eksctl/clusters/cluster-1 get nodes'
[✔]  EKS cluster "cluster-1" in "eu-west-1" region is ready

Alternatively there is the option to create the EKS cluster in an existing VPC without eksctl creating the full-stack, you are required to specify the subnet IDs for private and public subnets:

eksctl create cluster --name=cluster-1 --region=eu-west-1 --nodes=3 \
       --vpc-private-subnets=subnet-0ff156e0c4a6d300c,subnet-0426fb4a607393184,subnet-0426fb4a604827314 \
       --vpc-public-subnets=subnet-0153e560b3129a696,subnet-009fa0199ec203c37,subnet-0426fb4a412393184

The option –auto-kubeconfig stores the kubeconfig under the users home directory in ~/.kube/eksctl/clusters/<-cluster-name-> or you can obtain cluster credentials at any point in time with the following command:

$ eksctl utils write-kubeconfig --cluster=cluster-1
[ℹ]  eksctl version 0.10.2
[ℹ]  using region eu-west-1
[✔]  saved kubeconfig as "/home/ubuntu/.kube/config"

Using kubectl to connect and manage the EKS cluster:

$ kubectl get nodes
NAME                                          STATUS   ROLES    AGE     VERSION
ip-192-168-5-192.eu-west-1.compute.internal   Ready    <none>   3m42s   v1.14.7-eks-1861c5
ip-192-168-62-86.eu-west-1.compute.internal   Ready    <none>   3m43s   v1.14.7-eks-1861c5
ip-192-168-64-47.eu-west-1.compute.internal   Ready    <none>   3m41s   v1.14.7-eks-1861c5

You are able to view the created EKS clusters:

$ eksctl get clusters
NAME		REGION
cluster-1	eu-west-1

As easy it is to create an EKS cluster you can also delete the cluster with a single command:

$ eksctl delete cluster --name=cluster-1 --region=eu-west-1
[ℹ]  eksctl version 0.10.2
[ℹ]  using region eu-west-1
[ℹ]  deleting EKS cluster "cluster-1"
[✔]  kubeconfig has been updated
[ℹ]  cleaning up LoadBalancer services
[ℹ]  2 sequential tasks: { delete nodegroup "ng-b17ac84f", delete cluster control plane "cluster-1" [async] }
[ℹ]  will delete stack "eksctl-cluster-1-nodegroup-ng-b17ac84f"
[ℹ]  waiting for stack "eksctl-cluster-1-nodegroup-ng-b17ac84f" to get deleted
[ℹ]  will delete stack "eksctl-cluster-1-cluster"
[✔]  all cluster resources were deleted

I can only recommend checking out eksctl.io because it has lot of potentials and the move towards an GitOps model to manage EKS clusters in a declarative way using a cluster manifests or hopefully in the future an eksctld operator to do the job. RedHat is working on a similar tool for OpenShift 4 called OpenShift Hive which I will write about very soon.

Running Istio Service Mesh on Amazon EKS

I have not spend too much time with Istio in the last weeks but after my previous article about running Istio Service Mesh on OpenShift I wanted to do the same and deploy Istio Service Mesh on an Amazon EKS cluster. This time I did the recommended way of using a helm template to deploy Istio which is more flexible then the Ansible operator for the OpenShift deployment.

Once you have created your EKS cluster you can start, there are not many prerequisite for EKS so you can basically create the istio namespace and create a secret for Kiali, and start to deploy the helm template:

kubectl create namespace istio-system

USERNAME=$(echo -n 'admin' | base64)
PASSPHRASE=$(echo -n 'supersecretpassword!!' | base64)
NAMESPACE=istio-system

cat <<EOF | kubectl apply -n istio-system -f -
apiVersion: v1
kind: Secret
metadata:
  name: kiali
  namespace: $NAMESPACE
  labels:
    app: kiali
type: Opaque
data:
  username: $USERNAME
  passphrase: $PASSPHRASE
EOF

You then create the Custom Resource Definitions (CRDs) for Istio:

helm template istio-1.1.4/install/kubernetes/helm/istio-init --name istio-init --namespace istio-system | kubectl apply -f -  

# Check the created Istio CRDs 
kubectl get crds -n istio-system | grep 'istio.io\|certmanager.k8s.io' | wc -l

At this point you can deploy the main Istio Helm template. See the installation options for more detail about customizing the installation:

helm template istio-1.1.4/install/kubernetes/helm/istio --name istio --namespace istio-system  --set grafana.enabled=true --set tracing.enabled=true --set kiali.enabled=true --set kiali.dashboard.secretName=kiali --set kiali.dashboard.usernameKey=username --set kiali.dashboard.passphraseKey=passphrase | kubectl apply -f -
 
# Validate and see that all components start
kubectl get pods -n istio-system -w  

The Kiali service has the type clusterIP which we need to change to type LoadBalancer:

kubectl patch svc kiali -n istio-system --patch '{"spec": {"type": "LoadBalancer" }}'

# Get the create AWS ELB for the Kiali service
$ kubectl get svc kiali -n istio-system --no-headers | awk '{ print $4 }'
abbf8224773f111e99e8a066e034c3d4-78576474.eu-west-1.elb.amazonaws.com

Now we are able to access the Kiali dashboard and login with the credentials I have specified earlier in the Kiali secret.

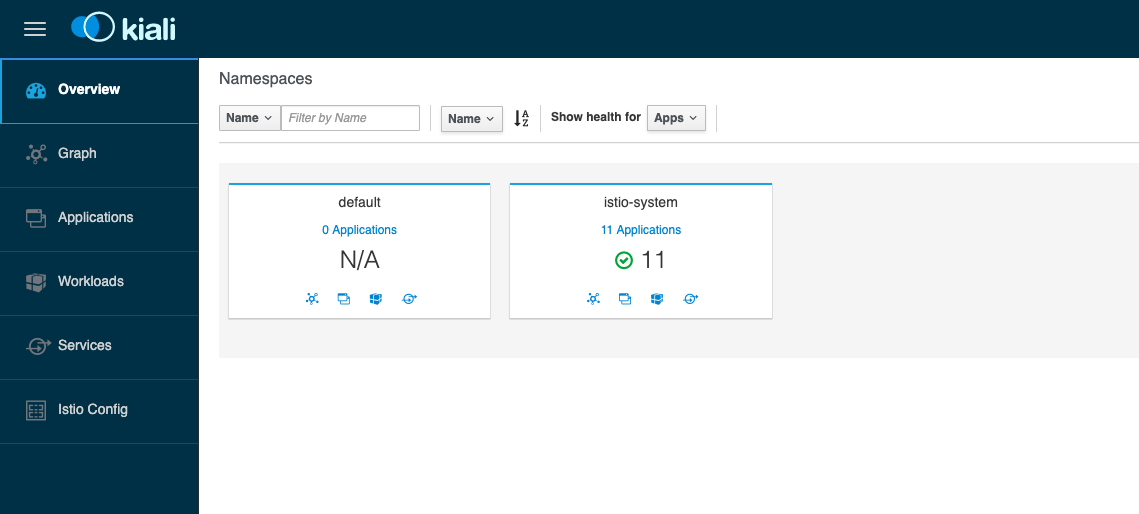
We didn’t deploy anything else yet so the default namespace is empty:

I recommend having a look at the Istio-Sidecar injection. If your istio-sidecar containers are not getting deployed you might forgot to allow TCP port 443 from your control-plane to worker nodes. Have a look at the Github issue about this: Admission control webhooks (e.g. sidecar injector) don’t work on EKS.

We can continue and deploy the Google Hipster Shop example.

# Label default namespace to inject Envoy sidecar
kubectl label namespace default istio-injection=enabled

# Check istio sidecar injector label
kubectl get namespace -L istio-injection

# Deploy Google hipster shop manifests
kubectl create -f https://raw.githubusercontent.com/berndonline/aws-eks-terraform/master/example/istio-hipster-shop.yml
kubectl create -f https://raw.githubusercontent.com/berndonline/aws-eks-terraform/master/example/istio-manifest.yml

# Wait a few minutes before deploying the load generator
kubectl create -f https://raw.githubusercontent.com/berndonline/aws-eks-terraform/master/example/istio-loadgenerator.yml

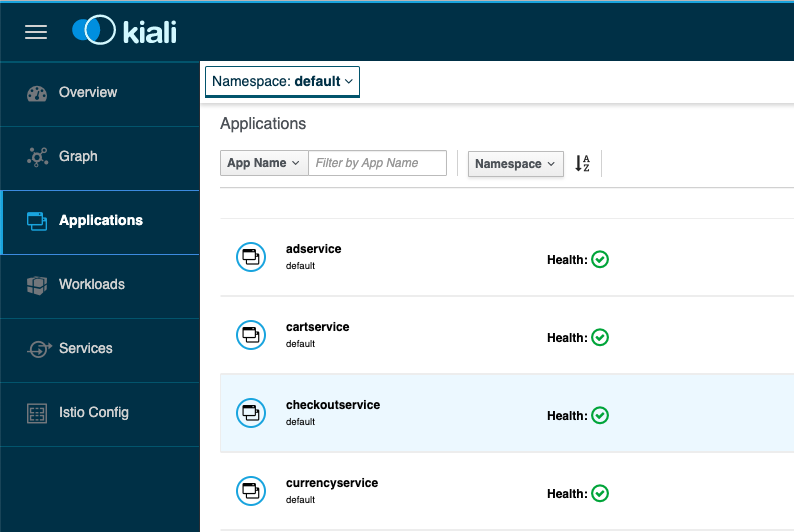
We can check again the Kiali dashboard once the application is deployed and healthy. If there are issues with the Envoy sidecar you will see a warning “Missing Sidecar”:

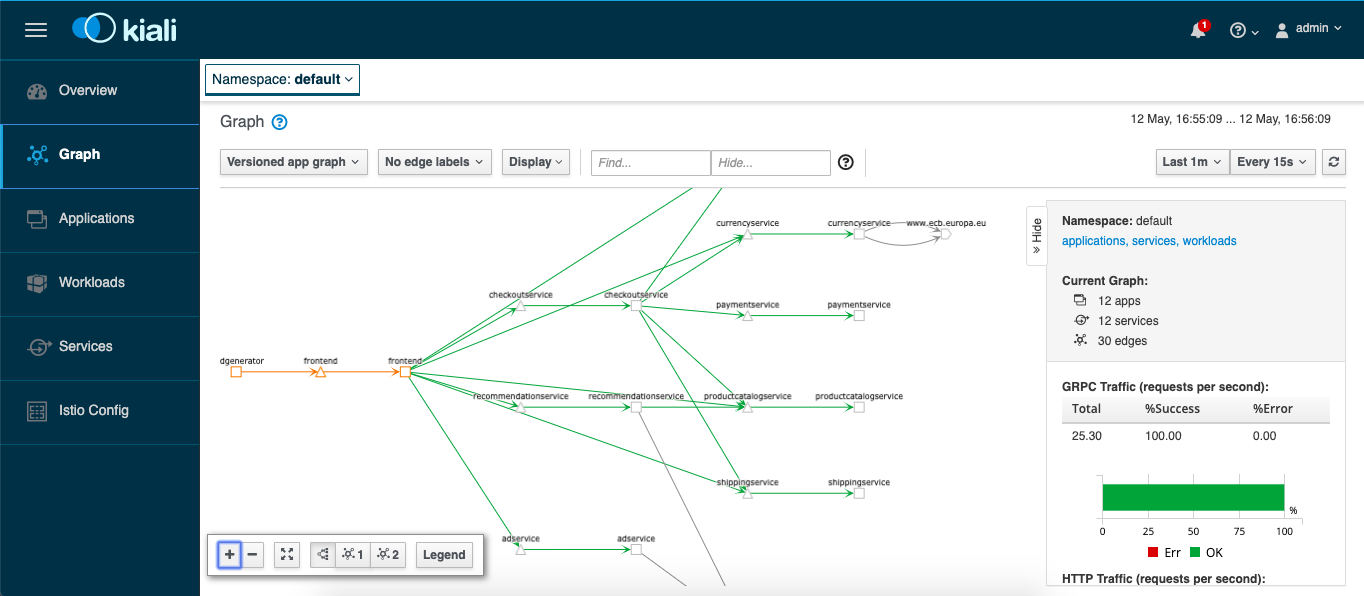
We are also able to see the graph which shows detailed traffic flows within the microservice application.

Let’s get the hostname for the istio-ingressgateway service and connect via the web browser:

$ kubectl get svc istio-ingressgateway -n istio-system --no-headers | awk '{ print $4 }'
a16f7090c74ca11e9a1fb02cd763ca9e-362893117.eu-west-1.elb.amazonaws.com

Before you destroy your EKS cluster you should remove all installed components because Kubernetes service type LoadBalancer created AWS ELBs which will not get deleted and stay behind when you delete the EKS cluster:

kubectl label namespace default istio-injection-
kubectl delete -f https://raw.githubusercontent.com/berndonline/aws-eks-terraform/master/example/istio-loadgenerator.yml
kubectl delete -f https://raw.githubusercontent.com/berndonline/aws-eks-terraform/master/example/istio-hipster-shop.yml
kubectl delete -f https://raw.githubusercontent.com/berndonline/aws-eks-terraform/master/example/istio-manifest.yml

Finally to remove Istio from EKS you run the same Helm template command but do kubectl delete:

helm template istio-1.1.4/install/kubernetes/helm/istio --name istio --namespace istio-system  --set grafana.enabled=true --set tracing.enabled=true --set kiali.enabled=true --set kiali.dashboard.secretName=kiali --set kiali.dashboard.usernameKey=username --set kiali.dashboard.passphraseKey=passphrase | kubectl delete -f -

Very simple to get started with Istio Service Mesh on EKS and if I find some time I will give the Istio Multicluster a try and see how this works to span Istio service mesh across multiple Kubernetes clusters.

Create Amazon EKS cluster using Terraform

I have found AWS EKS introduction on the HashiCorp learning portal and thought I’d give it a try and test the Amazon Elastic Kubernetes Services. Using cloud native container services like EKS is getting more popular and makes it easier for everyone running a Kubernetes cluster and start deploying container straight away without the overhead of maintaining and patching the control-plane and leave this to AWS.

Creating the EKS cluster is pretty easy by just running terraform apply. The only prerequisite is to have kubectl and AWS IAM authenticator installed. You find the terraform files on my repository https://github.com/berndonline/aws-eks-terraform

# Initializing and create EKS cluster
terraform init
terraform apply  

# Generate kubeconfig and configmap for adding worker nodes
terraform output kubeconfig > ./kubeconfig
terraform output config_map_aws_auth > ./config_map_aws_auth.yaml

# Apply configmap for worker nodes to join the cluster
export KUBECONFIG=./kubeconfig
kubectl apply -f ./config_map_aws_auth.yaml
kubectl get nodes --watch

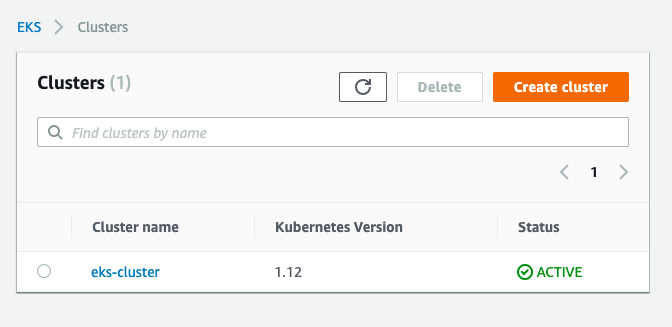
Let’s have a look at the AWS EKS console:

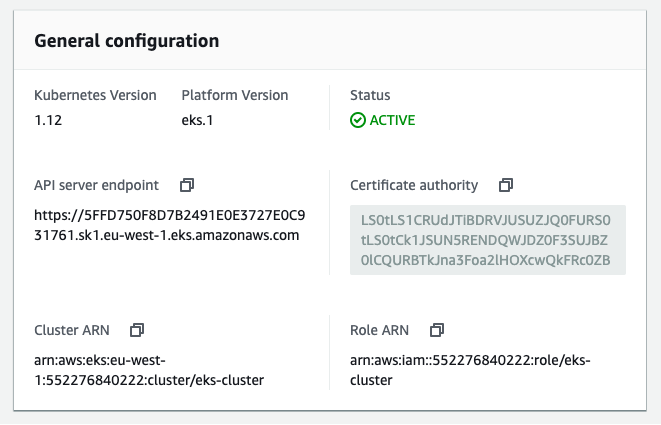
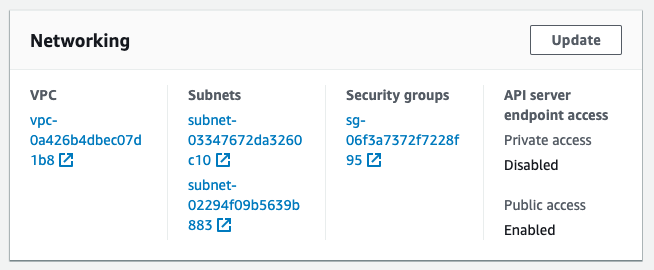
In the cluster details you see general information:

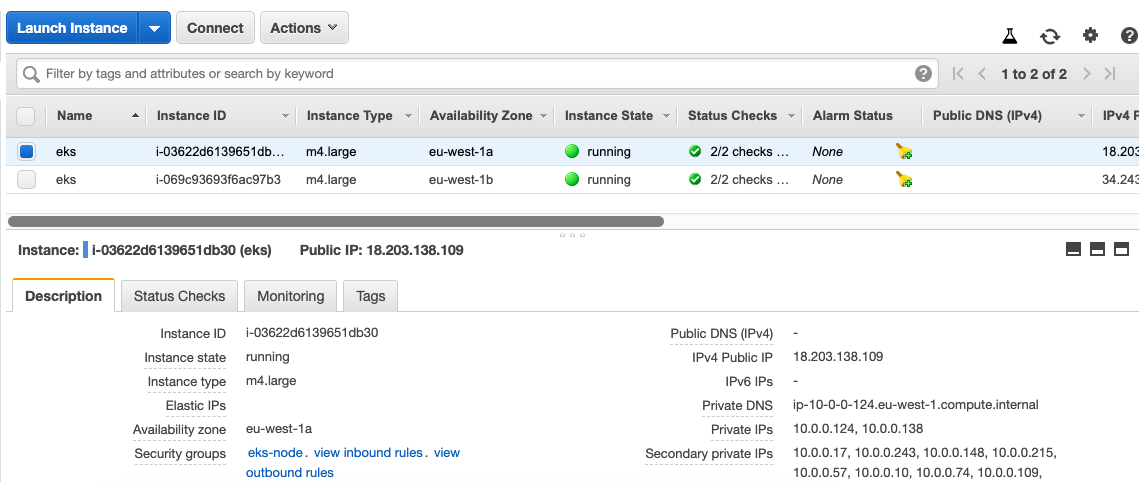
On the EC2 side you see two worker nodes as defined:

Now we can deploy an example application:

$ kubectl create -f example/hello-kubernetes.yml
service/hello-kubernetes created
deployment.apps/hello-kubernetes created
ingress.extensions/hello-ingress created

Checking that the pods are running and the correct resources are created:

$ kubectl get all
NAME                                   READY   STATUS    RESTARTS   AGE
pod/hello-kubernetes-b75555c67-4fhfn   1/1     Running   0          1m
pod/hello-kubernetes-b75555c67-pzmlw   1/1     Running   0          1m

NAME                       TYPE           CLUSTER-IP       EXTERNAL-IP                                                              PORT(S)        AGE
service/hello-kubernetes   LoadBalancer   172.20.108.223   ac1dc1ab84e5c11e9ab7e0211179d9b9-394134490.eu-west-1.elb.amazonaws.com   80:32043/TCP   1m
service/kubernetes         ClusterIP      172.20.0.1                                                                                443/TCP        26m

NAME                               DESIRED   CURRENT   UP-TO-DATE   AVAILABLE   AGE
deployment.apps/hello-kubernetes   2         2         2            2           1m

NAME                                         DESIRED   CURRENT   READY   AGE
replicaset.apps/hello-kubernetes-b75555c67   2         2         2       1m

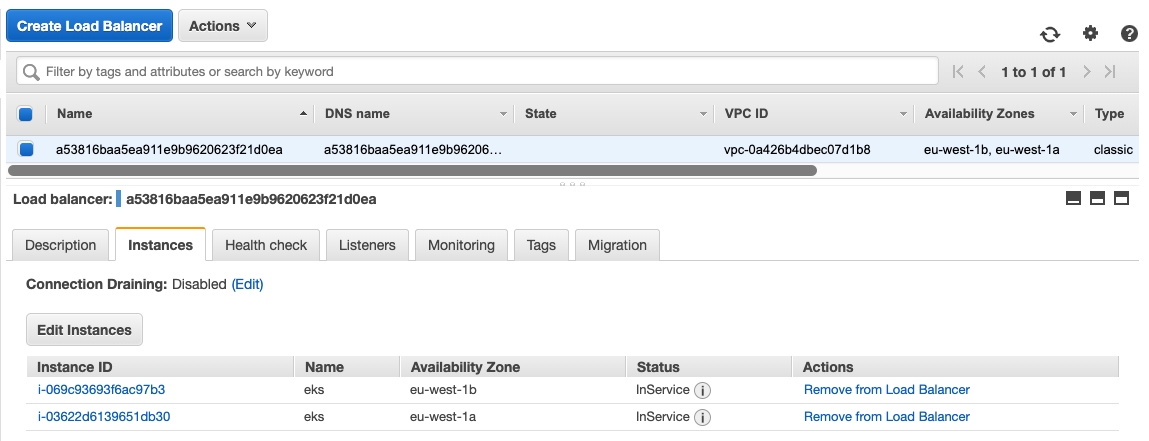
With the ingress service the EKS cluster is automatically creating an ELB load balancer and forward traffic to the two worker nodes:

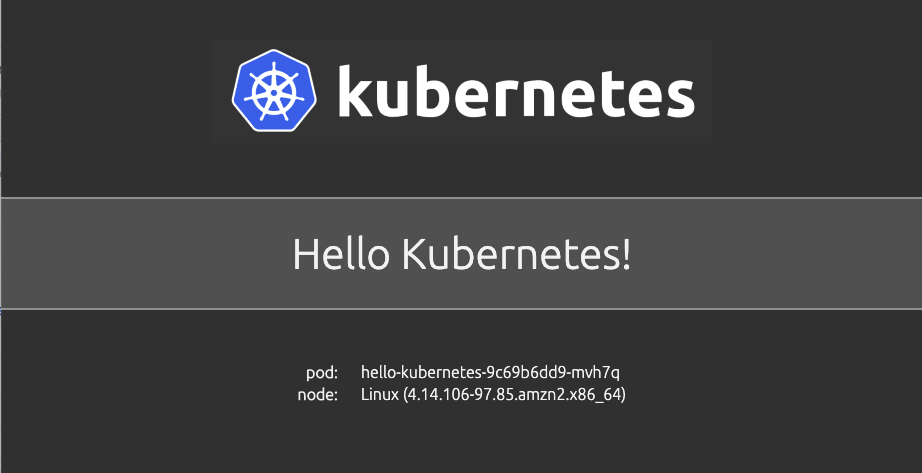
Example application:

I have used a very simple Jenkins pipeline to create the AWS EKS cluster:

pipeline {
    agent any
    environment {
        AWS_ACCESS_KEY_ID = credentials('AWS_ACCESS_KEY_ID')
        AWS_SECRET_ACCESS_KEY = credentials('AWS_SECRET_ACCESS_KEY')
    }
    stages {
        stage('prepare workspace') {
            steps {
                sh 'rm -rf *'
                git branch: 'master', url: 'https://github.com/berndonline/aws-eks-terraform.git'
                sh 'terraform init'
            }
        }
        stage('terraform apply') {
            steps {
                sh 'terraform apply -auto-approve'
                sh 'terraform output kubeconfig > ./kubeconfig'
                sh 'terraform output config_map_aws_auth > ./config_map_aws_auth.yaml'
                sh 'export KUBECONFIG=./kubeconfig'
            }
        }
        stage('add worker nodes') {
            steps {
                sh 'kubectl apply -f ./config_map_aws_auth.yaml --kubeconfig=./kubeconfig'
                sh 'sleep 60'
            }
        }
        stage('deploy example application') {
            steps {    
                sh 'kubectl apply -f ./example/hello-kubernetes.yml --kubeconfig=./kubeconfig'
                sh 'kubectl get all --kubeconfig=./kubeconfig'
            }
        }
        stage('Run terraform destroy') {
            steps {
                input 'Run terraform destroy?'
            }
        }
        stage('terraform destroy') {
            steps {
                sh 'kubectl delete -f ./example/hello-kubernetes.yml --kubeconfig=./kubeconfig'
                sh 'sleep 60'
                sh 'terraform destroy -force'
            }
        }
    }
}

I really like how easy and quick it is to create an AWS EKS cluster in less than 15 mins.