Create Amazon EKS cluster using Terraform

I have found AWS EKS introduction on the HashiCorp learning portal and thought I’d give it a try and test the Amazon Elastic Kubernetes Services. Using cloud native container services like EKS is getting more popular and makes it easier for everyone running a Kubernetes cluster and start deploying container straight away without the overhead of maintaining and patching the control-plane and leave this to AWS.

Creating the EKS cluster is pretty easy by just running terraform apply. The only prerequisite is to have kubectl and AWS IAM authenticator installed. You find the terraform files on my repository https://github.com/berndonline/aws-eks-terraform

# Initializing and create EKS cluster
terraform init
terraform apply  

# Generate kubeconfig and configmap for adding worker nodes
terraform output kubeconfig > ./kubeconfig
terraform output config_map_aws_auth > ./config_map_aws_auth.yaml

# Apply configmap for worker nodes to join the cluster
export KUBECONFIG=./kubeconfig
kubectl apply -f ./config_map_aws_auth.yaml
kubectl get nodes --watch

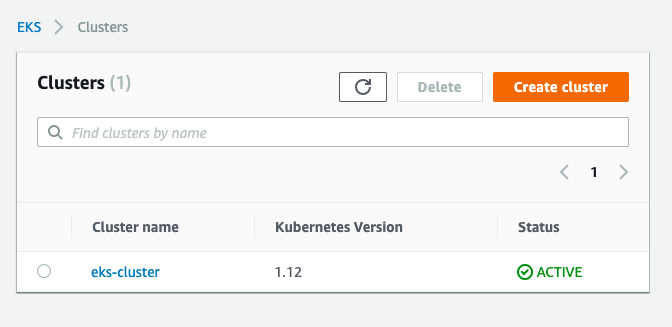
Let’s have a look at the AWS EKS console:

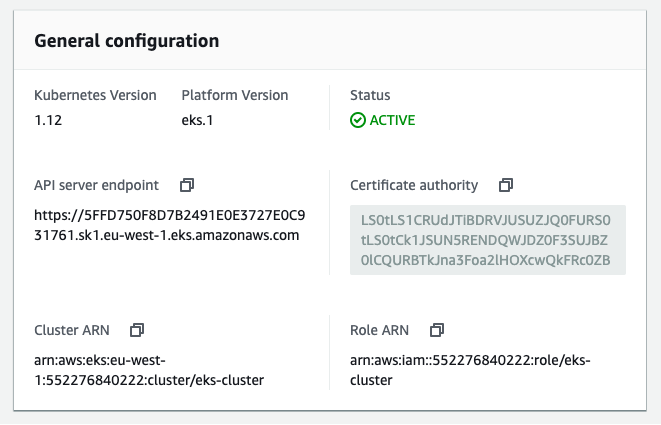
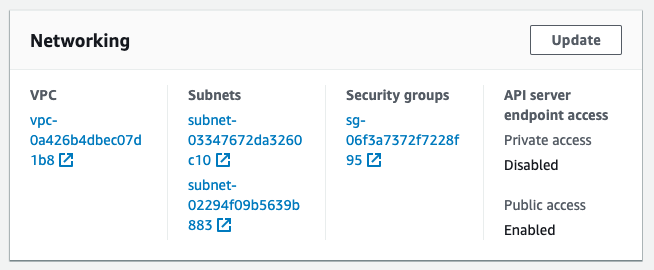
In the cluster details you see general information:

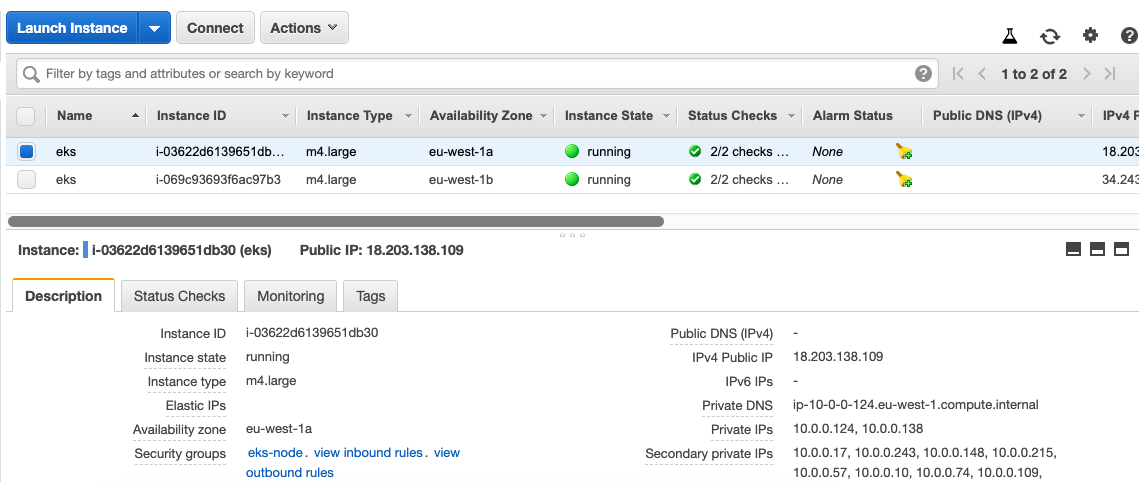
On the EC2 side you see two worker nodes as defined:

Now we can deploy an example application:

$ kubectl create -f example/hello-kubernetes.yml
service/hello-kubernetes created
deployment.apps/hello-kubernetes created
ingress.extensions/hello-ingress created

Checking that the pods are running and the correct resources are created:

$ kubectl get all
NAME                                   READY   STATUS    RESTARTS   AGE
pod/hello-kubernetes-b75555c67-4fhfn   1/1     Running   0          1m
pod/hello-kubernetes-b75555c67-pzmlw   1/1     Running   0          1m

NAME                       TYPE           CLUSTER-IP       EXTERNAL-IP                                                              PORT(S)        AGE
service/hello-kubernetes   LoadBalancer   172.20.108.223   ac1dc1ab84e5c11e9ab7e0211179d9b9-394134490.eu-west-1.elb.amazonaws.com   80:32043/TCP   1m
service/kubernetes         ClusterIP      172.20.0.1                                                                                443/TCP        26m

NAME                               DESIRED   CURRENT   UP-TO-DATE   AVAILABLE   AGE
deployment.apps/hello-kubernetes   2         2         2            2           1m

NAME                                         DESIRED   CURRENT   READY   AGE
replicaset.apps/hello-kubernetes-b75555c67   2         2         2       1m

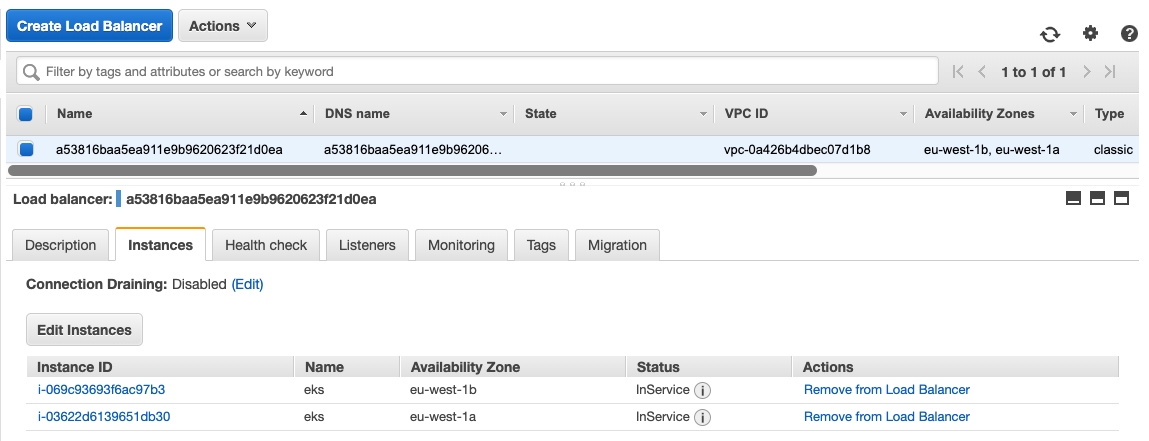
With the ingress service the EKS cluster is automatically creating an ELB load balancer and forward traffic to the two worker nodes:

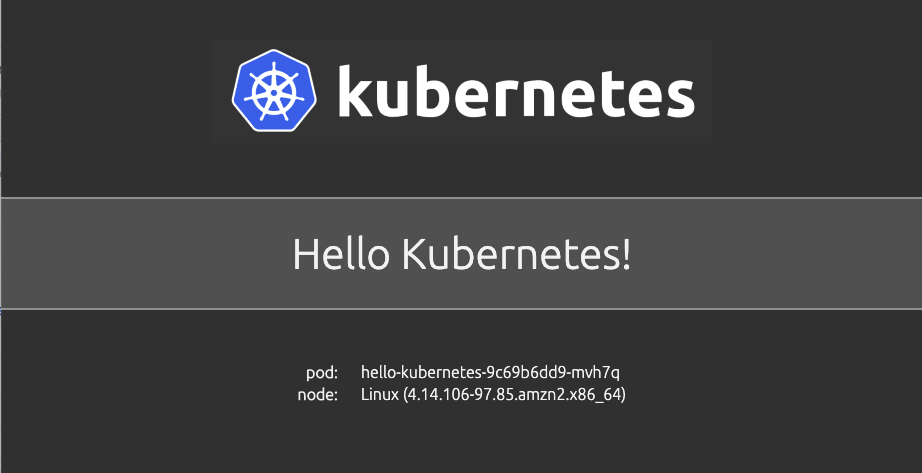
Example application:

I have used a very simple Jenkins pipeline to create the AWS EKS cluster:

pipeline {
    agent any
    environment {
        AWS_ACCESS_KEY_ID = credentials('AWS_ACCESS_KEY_ID')
        AWS_SECRET_ACCESS_KEY = credentials('AWS_SECRET_ACCESS_KEY')
    }
    stages {
        stage('prepare workspace') {
            steps {
                sh 'rm -rf *'
                git branch: 'master', url: 'https://github.com/berndonline/aws-eks-terraform.git'
                sh 'terraform init'
            }
        }
        stage('terraform apply') {
            steps {
                sh 'terraform apply -auto-approve'
                sh 'terraform output kubeconfig > ./kubeconfig'
                sh 'terraform output config_map_aws_auth > ./config_map_aws_auth.yaml'
                sh 'export KUBECONFIG=./kubeconfig'
            }
        }
        stage('add worker nodes') {
            steps {
                sh 'kubectl apply -f ./config_map_aws_auth.yaml --kubeconfig=./kubeconfig'
                sh 'sleep 60'
            }
        }
        stage('deploy example application') {
            steps {    
                sh 'kubectl apply -f ./example/hello-kubernetes.yml --kubeconfig=./kubeconfig'
                sh 'kubectl get all --kubeconfig=./kubeconfig'
            }
        }
        stage('Run terraform destroy') {
            steps {
                input 'Run terraform destroy?'
            }
        }
        stage('terraform destroy') {
            steps {
                sh 'kubectl delete -f ./example/hello-kubernetes.yml --kubeconfig=./kubeconfig'
                sh 'sleep 60'
                sh 'terraform destroy -force'
            }
        }
    }
}

I really like how easy and quick it is to create an AWS EKS cluster in less than 15 mins.

Getting started with OpenShift 4.0 Container Platform

I had a first look at OpenShift 4.0 and I wanted to share some information from what I have seen so far. The installation of the cluster is super easy and RedHat did a lot to improve the overall experience of the installation process to the previous OpenShift v3.x Ansible based installation and moving towards ephemeral cluster deployments.

There are a many changes under the hood and it’s not as obvious as Bootkube for the self-hosted/healing control-plane, MachineSets and the many internal operators to install and manage the OpenShift components ( api serverscheduler, controller manager, cluster-autoscalercluster-monitoringweb-consolednsingressnetworkingnode-tuning, and authentication ).

For the OpenShift 4.0 developer preview you need an RedHat account because you require a pull-secret for the cluster installation. For more information please visit: https://cloud.openshift.com/clusters/install

First we need to download the openshift-installer binary:

wget https://github.com/openshift/installer/releases/download/v0.16.1/openshift-install-linux-amd64
mv openshift-install-linux-amd64 openshift-install
chmod +x openshift-install

Then we create the install-configuration, it is required that you already have AWS account credentials and an Route53 DNS domain set-up:

$ ./openshift-install create install-config
INFO Platform aws
INFO AWS Access Key ID *********
INFO AWS Secret Access Key [? for help] *********
INFO Writing AWS credentials to "/home/centos/.aws/credentials" (https://docs.aws.amazon.com/cli/latest/userguide/cli-configure-files.html)
INFO Region eu-west-1
INFO Base Domain paas.domain.com
INFO Cluster Name cluster1
INFO Pull Secret [? for help] *********

Let’s look at the install-config.yaml

apiVersion: v1beta4
baseDomain: paas.domain.com
compute:
- name: worker
  platform: {}
  replicas: 3
controlPlane:
  name: master
  platform: {}
  replicas: 3
metadata:
  creationTimestamp: null
  name: ew1
networking:
  clusterNetwork:
  - cidr: 10.128.0.0/14
    hostPrefix: 23
  machineCIDR: 10.0.0.0/16
  networkType: OpenShiftSDN
  serviceNetwork:
  - 172.30.0.0/16
platform:
  aws:
    region: eu-west-1
pullSecret: '{"auths":{...}'

Now we can continue to create the OpenShift v4 cluster which takes around 30mins to complete. At the end of the openshift-installer you see the auto-generate credentials to connect to the cluster:

$ ./openshift-install create cluster
INFO Consuming "Install Config" from target directory
INFO Creating infrastructure resources...
INFO Waiting up to 30m0s for the Kubernetes API at https://api.cluster1.paas.domain.com:6443...
INFO API v1.12.4+0ba401e up
INFO Waiting up to 30m0s for the bootstrap-complete event...
INFO Destroying the bootstrap resources...
INFO Waiting up to 30m0s for the cluster at https://api.cluster1.paas.domain.com:6443 to initialize...
INFO Waiting up to 10m0s for the openshift-console route to be created...
INFO Install complete!
INFO Run 'export KUBECONFIG=/home/centos/auth/kubeconfig' to manage the cluster with 'oc', the OpenShift CLI.
INFO The cluster is ready when 'oc login -u kubeadmin -p jMTSJ-F6KYy-mVVZ4-QVNPP' succeeds (wait a few minutes).
INFO Access the OpenShift web-console here: https://console-openshift-console.apps.cluster1.paas.domain.com
INFO Login to the console with user: kubeadmin, password: jMTSJ-F6KYy-mVVZ4-QVNPP

The web-console has a very clean new design which I really like in addition to all the great improvements.

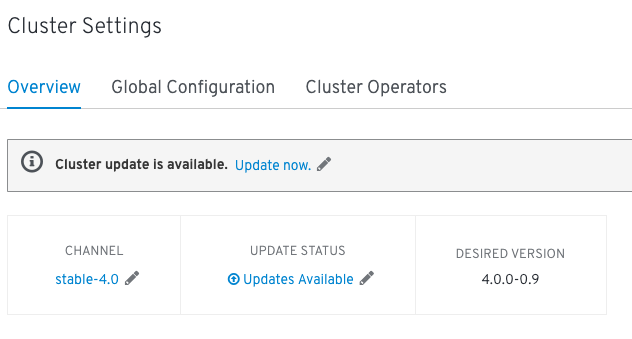
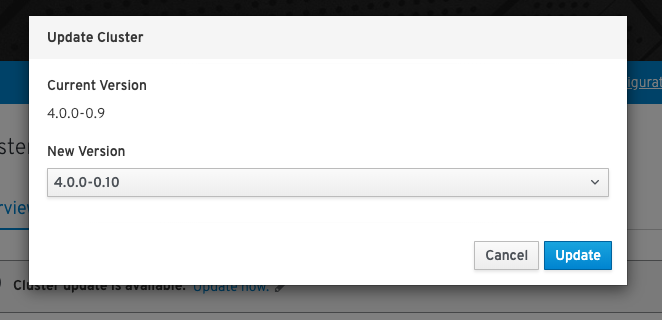
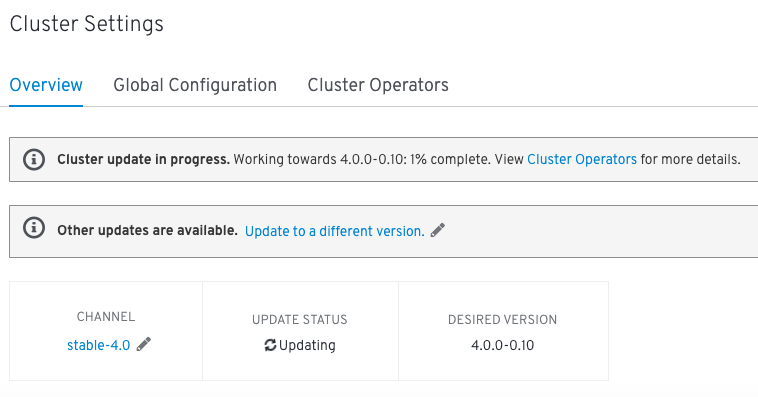
Under administration -> cluster settings you can explore the new auto-upgrade functionality of OpenShift 4.0:

You choose the new version to upgrade and everything else happens in the background which is a massive improvement to OpenShift v3.x where you had to run the ansible installer for this.

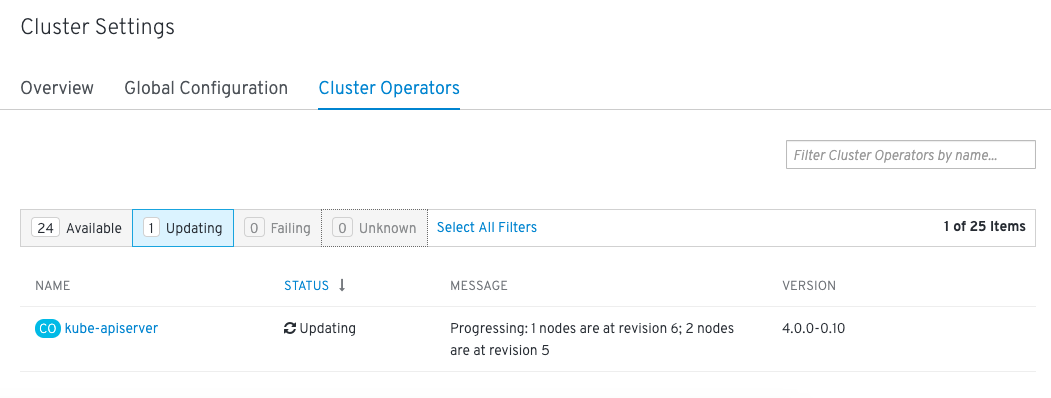
In the background the cluster operator upgrades the different platform components one by one.

Slowly you will see that the components move to the new build version.

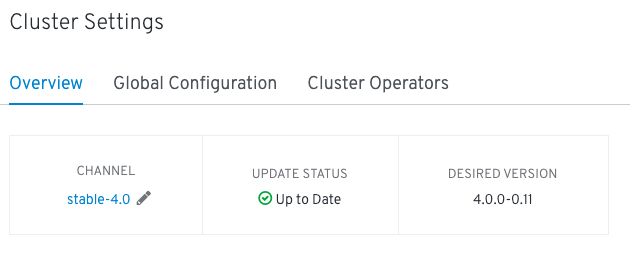
Finished cluster upgrade:

You can only upgrade from one version 4.0.0-0.9 to the next version 4.0.0-0.10. It is not possible to upgrade and go straight from x-0.9 to x-0.11.

But let’s deploy the Google Hipster Shop example and expose the frontend-external service for some more testing:

oc login -u kubeadmin -p jMTSJ-F6KYy-mVVZ4-QVNPP https://api.cluster1.paas.domain.com:6443 --insecure-skip-tls-verify=true
oc new-project myproject
oc create -f https://raw.githubusercontent.com/berndonline/openshift-ansible/master/examples/hipster-shop.yml
oc expose svc frontend-external

Getting the hostname for the exposed service:

$ oc get route
NAME                HOST/PORT                                                   PATH      SERVICES            PORT      TERMINATION   WILDCARD
frontend-external   frontend-external-myproject.apps.cluster1.paas.domain.com             frontend-external   http                    None

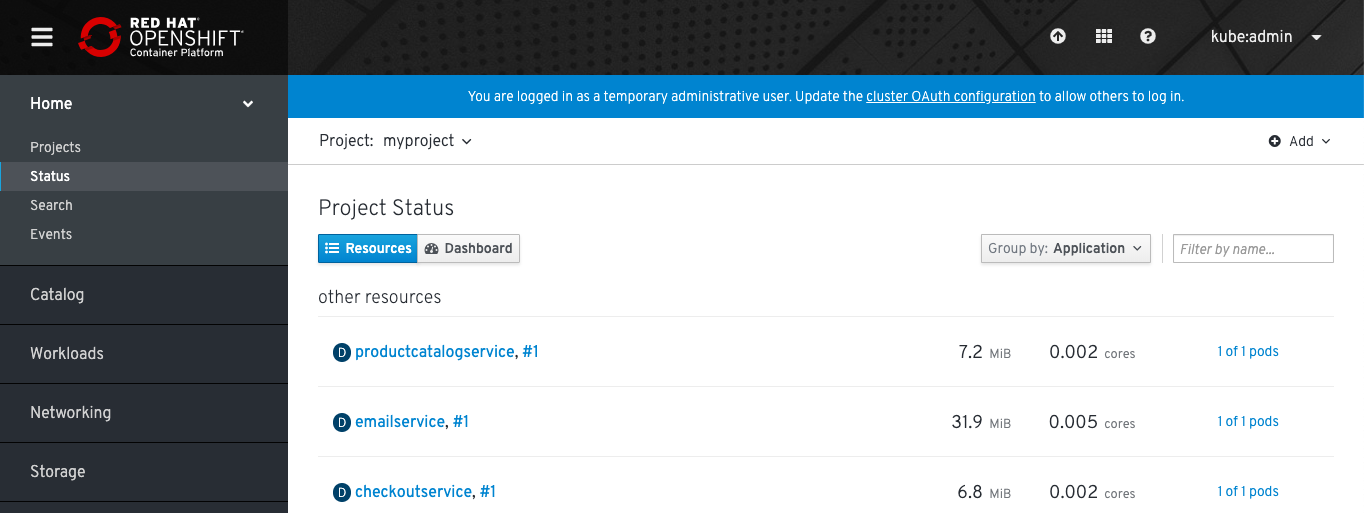
Use the browser to connect to our Hipster Shop:

It’s also very easy to destroy the cluster as it is to create it, as you seen previously:

$ ./openshift-install destroy cluster
INFO Disassociated                                 arn="arn:aws:ec2:eu-west-1:552276840222:route-table/rtb-083e2da5d1183efa7" id=rtbassoc-01d27db162fa45402
INFO Disassociated                                 arn="arn:aws:ec2:eu-west-1:552276840222:route-table/rtb-083e2da5d1183efa7" id=rtbassoc-057f593640067efc0
INFO Disassociated                                 arn="arn:aws:ec2:eu-west-1:552276840222:route-table/rtb-083e2da5d1183efa7" id=rtbassoc-05e821b451bead18f
INFO Disassociated                                 IAM instance profile="arn:aws:iam::552276840222:instance-profile/ocp4-bgx4c-worker-profile" arn="arn:aws:ec2:eu-west-1:552276840222:instance/i-0f64a911b1ffa3eff" id=i-0f64a911b1ffa3eff name=ocp4-bgx4c-worker-profile role=ocp4-bgx4c-worker-role
INFO Deleted                                       IAM instance profile="arn:aws:iam::552276840222:instance-profile/ocp4-bgx4c-worker-profile" arn="arn:aws:ec2:eu-west-1:552276840222:instance/i-0f64a911b1ffa3eff" id=i-0f64a911b1ffa3eff name=0xc00090f9a8
INFO Deleted                                       arn="arn:aws:ec2:eu-west-1:552276840222:instance/i-0f64a911b1ffa3eff" id=i-0f64a911b1ffa3eff
INFO Deleted                                       arn="arn:aws:ec2:eu-west-1:552276840222:instance/i-00b5eedc186ba26a7" id=i-00b5eedc186ba26a7
...
INFO Deleted                                       arn="arn:aws:ec2:eu-west-1:552276840222:security-group/sg-016d4c7d435a1c97f" id=sg-016d4c7d435a1c97f
INFO Deleted                                       arn="arn:aws:ec2:eu-west-1:552276840222:subnet/subnet-076348368858e9a82" id=subnet-076348368858e9a82
INFO Deleted                                       arn="arn:aws:ec2:eu-west-1:552276840222:vpc/vpc-00c611ae1b9b8e10a" id=vpc-00c611ae1b9b8e10a
INFO Deleted                                       arn="arn:aws:ec2:eu-west-1:552276840222:dhcp-options/dopt-0ce8b6a1c31e0ceac" id=dopt-0ce8b6a1c31e0ceac

The install experience is great for OpenShift 4.0 which makes it very easy for everyone to create and get started quickly with an enterprise container platform. From the operational perspective I still need to see how to run the new platform because all the operators are great and makes it an easy to use cluster but what happens when one of the operators goes rogue and debugging this I am most interested in.

Over the coming weeks I will look into more detail around OpenShift 4.0 and the different new features, I am especially interested in Service Mesh.

Typhoon Kubernetes Distribution

I stumbled across a very interesting Kubernetes distribution called Typhoon which runs a self-hosted control-plane using Bootkube running on CoreOS. Typhoon uses Terraform to deploy the required instances on various cloud providers or on bare-metal servers. I really like the concept of a minimal Kubernetes distribution and a simple bootstrap to deploy a full featured cluster in a few minutes. Check out the official Typhoon website or their Github repository for more information.

To install Typhoon I followed the documentation, everything is pretty simple with a bit of Terraform knowledge. Here’s my Github repository with my cluster configuration: https://github.com/berndonline/typhoon-kubernetes/tree/aws

Before you start you need to install Terraform v0.11.x and terraform-provider-ct, and setup a AWS Route53 domain for the Kubernetes cluster.

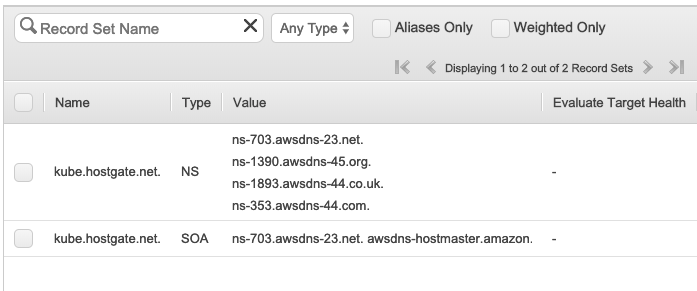
I created a new subdomain on Route53 and configured delegation on CloudFlare for the domain.

Let’s checkout the configuration, first the cluster.tf which I have modified slightly because I use Jenkins to deploy the Kubernetes cluster.

module "aws-cluster" {
  source = "git::https://github.com/poseidon/typhoon//aws/container-linux/kubernetes?ref=v1.13.3"

  providers = {
    aws = "aws.default"
    local = "local.default"
    null = "null.default"
    template = "template.default"
    tls = "tls.default"
  }

  # AWS
  cluster_name = "typhoon"
  dns_zone     = "${var.dns}"
  dns_zone_id  = "${var.dns_id}"

  # configuration
  ssh_authorized_key = "${var.ssh_key}"
  asset_dir          = "./.secrets/clusters/typhoon"

  # optional
  worker_count = 2
  worker_type  = "t3.small"
}

In the provider.tf I have only added S3 to be used for the Terraform backend state but otherwise I’ve left the defaults.

provider "aws" {
  version = "~> 1.13.0"
  alias   = "default"

  region  = "eu-west-1"
}

terraform {
  backend "s3" {
    bucket = "techbloc-terraform-data"
    key    = "openshift-311"
    region = "eu-west-1"
  }
}

...

I added a variables.tf file for the DNS and SSH variables.

variable "dns" {
}
variable "dns_id" {
}
variable "ssh_key" {
}

Let’s have a quick look at my simple Jenkins pipeline to deploy Typhoon Kubernetes. Apart from installing Kubernetes I am deploying the Nginx Ingress controller and  Heapster addons for the cluster. I’ve also added an example application I have used previously after deploying the cluster.

pipeline {
    agent any
    environment {
        AWS_ACCESS_KEY_ID = credentials('AWS_ACCESS_KEY_ID')
        AWS_SECRET_ACCESS_KEY = credentials('AWS_SECRET_ACCESS_KEY')
        TF_VAR_dns = credentials('TF_VAR_dns')
        TF_VAR_dns_id = credentials('TF_VAR_dns_id')
        TF_VAR_ssh_key = credentials('TF_VAR_ssh_key')
    }
    stages {
        stage('Prepare workspace') {
            steps {
                sh 'rm -rf *'
                git branch: 'aws', url: 'https://github.com/berndonline/typhoon-kubernetes.git'
                sh 'terraform init'
            }
        }
        stage('terraform apply') {
            steps {
                sshagent (credentials: ['fcdca8fa-aab9-3846-832f-4756392b7e2c']) {
                    sh 'terraform apply -auto-approve'
                    sh 'sleep 30'
                }
            }
        }
        stage('deploy nginx-ingress and heapster') {
            steps {    
                sh 'kubectl apply -R -f ./nginx-ingress/ --kubeconfig=./.secrets/clusters/typhoon/auth/kubeconfig'
                sh 'kubectl apply -R -f ./heapster/ --kubeconfig=./.secrets/clusters/typhoon/auth/kubeconfig'
                sh 'sleep 30'
            }
        }
        stage('deploy example application') {
            steps {    
                sh 'kubectl apply -f ./example/hello-kubernetes.yml --kubeconfig=./.secrets/clusters/typhoon/auth/kubeconfig'
            }
        }
        stage('Run terraform destroy') {
            steps {
                input 'Run terraform destroy?'
            }
        }
        stage('terraform destroy') {
            steps {
                sshagent (credentials: ['fcdca8fa-aab9-3846-832f-4756392b7e2c']) {
                    sh 'terraform destroy -force'
                }
            }
        }
    }
}

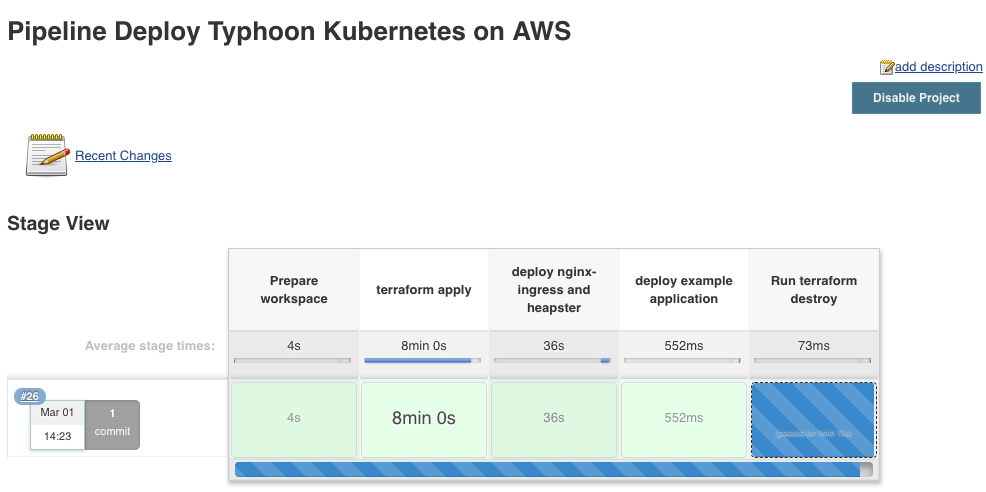
Let’s start the Jenkins pipeline:

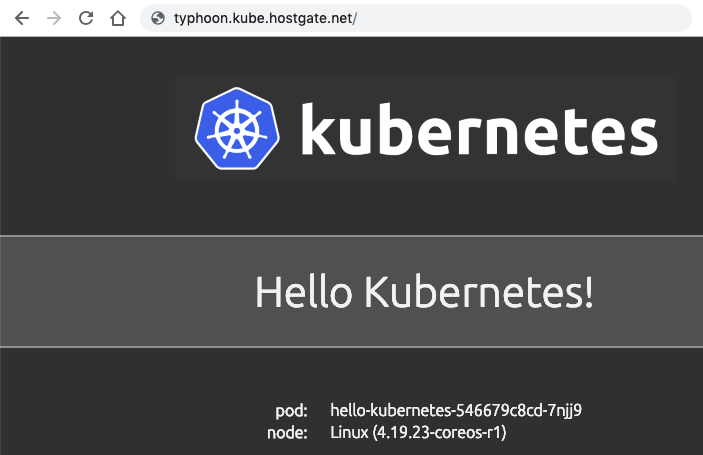
Let’s check if I can access the hello-kubernetes application. For everyone who is interested, this is the link to the Github repository for the hello-kubernetes example application I have used.

I really like the Typhoon Kubernetes distribution and the work that went into it to create a easy way for everyone to install a Kubernetes cluster and start using it in a few minutes. I also find the way they’ve used Terraform and Bootkube to deploy the platform on CoreOS very inspiring and it gave me some ideas how I can make use of it for production clusters.

I actually like CoreOS and the easy bootstrapping with Terraform and Bootkube which I have not used before, I’ve always deployed OpenShift/Kubernetes on either RedHat or CentOS with Ansible, and find it a very interesting way to deploy a Kubernetes platform.

How to backup OpenShift with Heptio Velero(Ark)

I have found an interesting open source tool called Heptio Velero previously known as Heptio Ark which is able to backup Kubernetes and OpenShift container platforms. The tool mainly does this via the API and backup namespace objects and additionally is able to create snapshots for PVs on Azure, AWS and GCP.

The user uses the ark command line utility to create and restore backups.

The installation on Velero is super simple, just follow the steps below:

# Download and extract the latest Velero release from github
wget https://github.com/heptio/velero/releases/download/v0.10.1/ark-v0.10.1-linux-amd64.tar.gz
tar -xzf ark-v0.10.1-linux-amd64.tar.gz -c ./velero/

# Move the ark binary to somewhere in your PATH
mv ./velero/ark /usr/sbin/

# The last two commands create namespace and applies configuration
oc create -f ./velero/config/common/00-prereqs.yaml
oc create -f ./velero/config/minio/

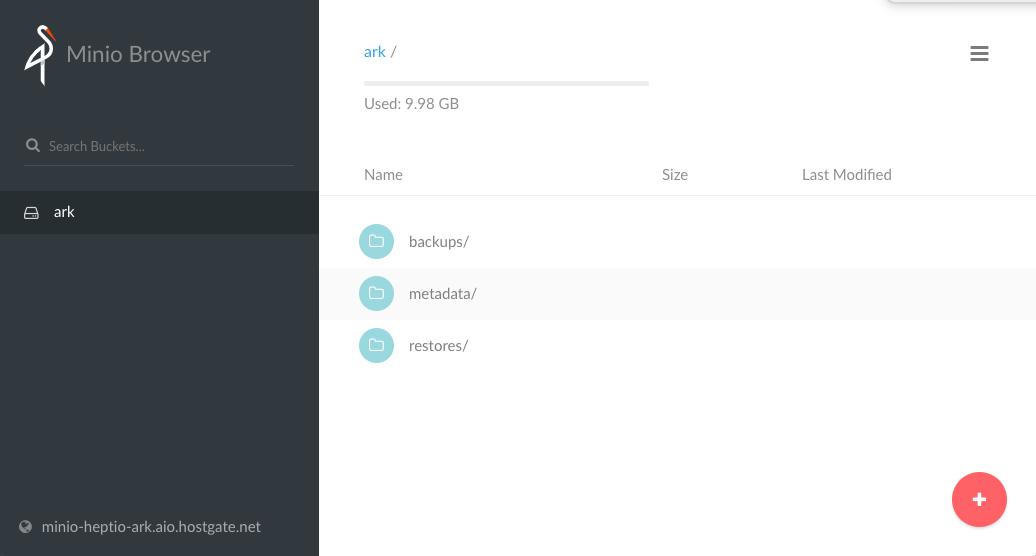
You can expose Minio to access the web console from the outside.

# Create route
oc expose service minio

# View access and secret key to login via the web console
oc describe deployment.apps/minio | grep -i Environment -A2
    Environment:
      MINIO_ACCESS_KEY:  minio
      MINIO_SECRET_KEY:  minio123

Here a few command options on how to backup objects:

# Create a backup for any object that matches the app=pod label selector:
ark backup create <backup-name> --selector <key>=<value> 

# Alternatively if you want to backup all objects except those matching the label backup=ignore:
ark backup create <backup-name> --selector 'backup notin (ignore)'

# Create regularly scheduled backups based on a cron expression using the app=pod label selector:
ark schedule create <backup-name> --schedule="0 1 * * *" --selector <key>=<value>

# Create a backup for a namespace:
ark backup create <backup-name> --include-namespaces <namespace-name>

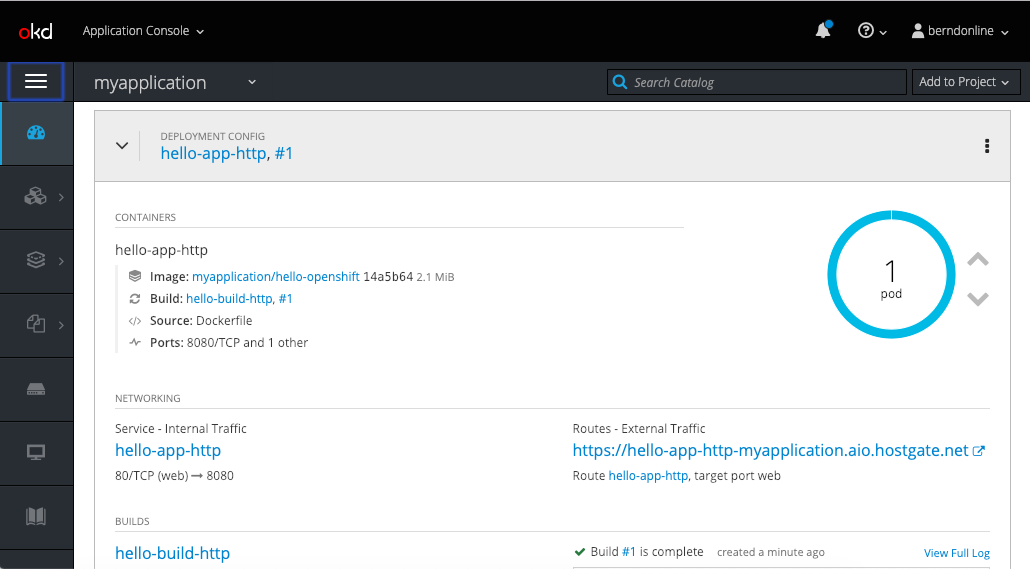
Let’s do a backup and restore tests; I have created a new OpenShift project with a simple hello-openshift build- and deployment-config:

[root@master1 ~]# ark backup create mybackup --include-namespaces myapplication
Backup request "mybackup" submitted successfully.
Run `ark backup describe mybackup` or `ark backup logs mybackup` for more details.
[root@master1 ~]# ark backup get
NAME          STATUS      CREATED                         EXPIRES   STORAGE LOCATION   SELECTOR
mybackup      Completed   2019-02-08 17:14:09 +0000 UTC   29d       default            

Once the backup has completed we can delete the project.

[root@master1 ~]# oc delete project myapplication
project.project.openshift.io "myapplication" deleted

Now let’s restore the project namespace from the previous created backup:

[root@master1 ~]# ark restore create --from-backup mybackup
Restore request "mybackup-20190208171745" submitted successfully.
Run `ark restore describe mybackup-20190208171745` or `ark restore logs mybackup-20190208171745` for more details.
[root@master1 ~]# ark restore get
NAME                         BACKUP        STATUS       WARNINGS   ERRORS    CREATED                         SELECTOR
mybackup-20190208171745      mybackup      InProgress   0          0         2019-02-08 17:17:45 +0000 UTC   
[root@master1 ~]# ark restore get
NAME                         BACKUP        STATUS      WARNINGS   ERRORS    CREATED                         SELECTOR
mybackup-20190208171745      mybackup      Completed   1          0         2019-02-08 17:17:45 +0000 UTC   

The project is back in the state it was when we created the backup.

[root@master1 ~]# oc get pods
NAME                     READY     STATUS    RESTARTS   AGE
hello-app-http-1-qn8jj   1/1       Running   0          2m
[root@master1 ~]# curl -k --insecure https://hello-app-http-myapplication.aio.hostgate.net/
Hello OpenShift!

There are a few issues around the restore which I have seen and I want to explain, I’m not sure if these are related to OpenShift in general or just the latest 3.11 version. The secrets for the builder account are missing or didn’t restore correctly and cannot be used.

[root@master1 ~]# oc get build
NAME                 TYPE      FROM         STATUS                               STARTED   DURATION
hello-build-http-1   Docker    Dockerfile   New (CannotRetrieveServiceAccount)
hello-build-http-2   Docker    Dockerfile   New
[root@master1 ~]# oc get events | grep Failed
1m          1m           2         hello-build-http.15816e39eefb637d         BuildConfig                                     Warning   BuildConfigInstantiateFailed   buildconfig-controller                                error instantiating Build from BuildConfig myapplication/hello-build-http (0): Error resolving ImageStreamTag hello-openshift-source:latest in namespace myapplication: imagestreams.image.openshift.io "hello-openshift-source" not found
1m          1m           6         hello-build-http.15816e39f446207f         BuildConfig                                     Warning   BuildConfigInstantiateFailed   buildconfig-controller                                error instantiating Build from BuildConfig myapplication/hello-build-http (0): Error resolving ImageStreamTag hello-openshift-source:latest in namespace myapplication: unable to find latest tagged image
1m          1m           1         hello-build-http.15816e3a49f21411         BuildConfig                                     Warning   BuildConfigInstantiateFailed   buildconfig-controller                                error instantiating Build from BuildConfig myapplication/hello-build-http (0): builds.build.openshift.io "hello-build-http-1" already exists
[root@master1 ~]# oc get secrets | grep builder
builder-token-5q646        kubernetes.io/service-account-token   4         5m

# OR
[root@master1 ~]# oc get build
NAME                 TYPE      FROM         STATUS                        STARTED   DURATION
hello-build-http-1   Docker    Dockerfile   Pending (MissingPushSecret)
hello-build-http-2   Docker    Dockerfile   New
[root@master1 ~]# oc get events | grep FailedMount
15m         19m          10        hello-build-http-1-build.15816cc22f35795c   Pod                                             Warning   FailedMount                    kubelet, ip-172-26-12-32.eu-west-1.compute.internal   MountVolume.SetUp failed for volume "builder-dockercfg-k55f6-push" : secrets "builder-dockercfg-k55f6" not found
15m         17m          2         hello-build-http-1-build.15816cdec9dc561a   Pod                                             Warning   FailedMount                    kubelet, ip-172-26-12-32.eu-west-1.compute.internal   Unable to mount volumes for pod "hello-build-http-1-build_myapplication(4c2f1113-2bb5-11e9-8a6b-0a007934f01e)": timeout expired waiting for volumes to attach or mount for pod "myapplication"/"hello-build-http-1-build". list of unmounted volumes=[builder-dockercfg-k55f6-push]. list of unattached volumes=[buildworkdir docker-socket crio-socket builder-dockercfg-k55f6-push builder-dockercfg-m6d2v-pull builder-token-sjvw5]
13m         13m          1         hello-build-http-1-build.15816d1e3e65ad2a   Pod                                             Warning   FailedMount                    kubelet, ip-172-26-12-32.eu-west-1.compute.internal   Unable to mount volumes for pod "hello-build-http-1-build_myapplication(4c2f1113-2bb5-11e9-8a6b-0a007934f01e)": timeout expired waiting for volumes to attach or mount for pod "myapplication"/"hello-build-http-1-build". list of unmounted volumes=[buildworkdir docker-socket crio-socket builder-dockercfg-k55f6-push builder-dockercfg-m6d2v-pull builder-token-sjvw5]. list of unattached volumes=[buildworkdir docker-socket crio-socket builder-dockercfg-k55f6-push builder-dockercfg-m6d2v-pull builder-token-sjvw5]
[root@master1 ~]# oc get secrets | grep builder
NAME                       TYPE                                  DATA      AGE
builder-dockercfg-m6d2v    kubernetes.io/dockercfg               1         5m
builder-token-4chx4        kubernetes.io/service-account-token   4         5m
builder-token-sjvw5        kubernetes.io/service-account-token   4         5m

The deployment config seems to be disconnected and doesn’t know the state of the running pod:

[root@ip-172-26-12-32 ~]# oc get dc
NAME             REVISION   DESIRED   CURRENT   TRIGGERED BY
hello-app-http   0          1         0         config,image(hello-openshift:latest)
[root@ip-172-26-12-32 ~]#

Here are the steps to recover out of this situation:

# First cancel all builds - the restore seems to have triggered a new build:
[root@master1 ~]# oc cancel-build $(oc get build --no-headers | awk '{ print $1 }')
build.build.openshift.io/hello-build-http-1 marked for cancellation, waiting to be cancelled
build.build.openshift.io/hello-build-http-2 marked for cancellation, waiting to be cancelled
build.build.openshift.io/hello-build-http-1 cancelled
build.build.openshift.io/hello-build-http-2 cancelled

# Delete all builds otherwise you will get later a problem because of duplicate name:
[root@master1 ~]# oc delete build $(oc get build --no-headers | awk '{ print $1 }')
build.build.openshift.io "hello-build-http-1" deleted
build.build.openshift.io "hello-build-http-2" deleted

# Delete the project builder account - this triggers openshift to re-create the builder
[root@master1 ~]# oc delete sa builder
serviceaccount "builder" deleted
[root@master1 ~]# oc get secrets | grep builder
builder-dockercfg-vwckw    kubernetes.io/dockercfg               1         24s
builder-token-dpgj9        kubernetes.io/service-account-token   4         24s
builder-token-lt7z2        kubernetes.io/service-account-token   4         24s

# Start the build and afterwards do a rollout for the deployment config:
[root@master1 ~]# oc start-build hello-build-http
build.build.openshift.io/hello-build-http-3 started
[root@master1 ~]# oc rollout latest dc/hello-app-http
deploymentconfig.apps.openshift.io/hello-app-http rolled out

After doing all this your build- and deployment-config is back synchronised.

[root@master1 ~]# oc get dc
NAME             REVISION   DESIRED   CURRENT   TRIGGERED BY
hello-app-http   3          1         1         config,image(hello-openshift:latest)

My feedback about Heptio Velero(Ark); apart from the restore issues with the build- and deployment-config, I find the tool great especially in scenarios where I accidently deleted a namespace or for DR where I need to recover a whole cluster. What makes the tool worth it, is actually the possibility to create snapshots from PV disks on your cloud provider.

Check out the official documentation from Heptio for more information and if you like this article please leave a comment.

OpenShift Infra node “Not Ready” running Avi Service Engine

I had to troubleshoot an interesting issue with OpenShift Infra nodes suddenly going into “Not Ready” state during an OpenShift upgrade or not registering on Master nodes after a re-install of OpenShift cluster. On the Infra nodes Avi Service Engines were running for ingress traffic. The problem was not very obvious and RedHat and Avi Networks were not able to identify the issue.

Here the output of oc get nodes:

[root@master01 ~]# oc get nodes -o wide --show-labels | grep 'region=infra'
infra01   NotReady                   1d        v1.7.6+a08f5eeb62           Red Hat Enterprise Linux Server 7.6 (Maipo)   3.10.0-693.11.6.el7.x86_64   beta.kubernetes.io/arch=amd64,beta.kubernetes.io/instance-type=Standard_D8_v3,beta.kubernetes.io/os=linux,failure-domain.beta.kubernetes.io/region=uksouth,failure-domain.beta.kubernetes.io/zone=1,kubernetes.io/hostname=infra01,logging-infra-fluentd=true,purpose=infra,region=infra,zone=1
infra02   NotReady                   1d        v1.7.6+a08f5eeb62           Red Hat Enterprise Linux Server 7.6 (Maipo)   3.10.0-693.11.6.el7.x86_64   beta.kubernetes.io/arch=amd64,beta.kubernetes.io/instance-type=Standard_D8_v3,beta.kubernetes.io/os=linux,failure-domain.beta.kubernetes.io/region=uksouth,failure-domain.beta.kubernetes.io/zone=1,kubernetes.io/hostname=infra02,logging-infra-fluentd=true,purpose=infra,region=infra,zone=0
infra03   NotReady                   1d        v1.7.6+a08f5eeb62           Red Hat Enterprise Linux Server 7.6 (Maipo)   3.10.0-693.11.6.el7.x86_64   beta.kubernetes.io/arch=amd64,beta.kubernetes.io/instance-type=Standard_D8_v3,beta.kubernetes.io/os=linux,failure-domain.beta.kubernetes.io/region=uksouth,failure-domain.beta.kubernetes.io/zone=0,kubernetes.io/hostname=infra03,logging-infra-fluentd=true,purpose=infra,region=infra,zone=2
[root@master01 ~]#

On the Infra node itself you could see that the atomic node service had successfully started but I saw a very strange error message from the kubelet not being able to synchronise the pod:

I1206 14:52:28.115735   21690 cloud_request_manager.go:89] Requesting node addresses from cloud provider for node "infra01"
I1206 14:52:28.170366   21690 cloud_request_manager.go:108] Node addresses from cloud provider for node "infra01" collected
E1206 14:52:28.533560   21690 eviction_manager.go:238] eviction manager: unexpected err: failed GetNode: node 'infra01' not found
I1206 14:52:32.840769   21690 kubelet.go:1808] skipping pod synchronization - [Kubelet failed to get node info: failed to get zone from cloud provider: Get http://169.254.169.254/metadata/v1/InstanceInfo: dial tcp 169.254.169.254:80: getsockopt: no route to host]
I1206 14:52:37.841235   21690 kubelet.go:1808] skipping pod synchronization - [Kubelet failed to get node info: failed to get zone from cloud provider: Get http://169.254.169.254/metadata/v1/InstanceInfo: dial tcp 169.254.169.254:80: getsockopt: no route to host]
I1206 14:52:38.170604   21690 cloud_request_manager.go:89] Requesting node addresses from cloud provider for node "infra01"
I1206 14:52:38.222439   21690 cloud_request_manager.go:108] Node addresses from cloud provider for node "infra01" collected
E1206 14:52:38.545991   21690 eviction_manager.go:238] eviction manager: unexpected err: failed GetNode: node 'infra01' not found
I1206 14:52:42.841547   21690 kubelet.go:1808] skipping pod synchronization - [Kubelet failed to get node info: failed to get zone from cloud provider: Get http://169.254.169.254/metadata/v1/InstanceInfo: dial tcp 169.254.169.254:80: getsockopt: no route to host]
I1206 14:52:47.841819   21690 kubelet.go:1808] skipping pod synchronization - [Kubelet failed to get node info: failed to get zone from cloud provider: Get http://169.254.169.254/metadata/v1/InstanceInfo: dial tcp 169.254.169.254:80: getsockopt: no route to host]

Even stranger is that the kubelet was not able to get the metadata information of the Azure Cloud provider with the fault domain in which the instance is running.

About the “no route to host” error I thought this must be a network issue and that I could reproduce this with a simple curl command:

[root@infra01 ~]# curl -v http://169.254.169.254/metadata/v1/InstanceInfo
* About to connect() to 169.254.169.254 port 80 (#0)
*   Trying 169.254.169.254...
* No route to host
* Failed connect to 169.254.169.254:80; No route to host
* Closing connection 0
curl: (7) Failed connect to 169.254.169.254:80; No route to host
[root@infra01 ~]#

The routing table on the node looked fine and theoretically forwarded the traffic to the default gateway in the subnet.

[root@infra01 ~]# ip route show
default via 10.1.1.1 dev eth0
10.1.1.0/27 dev eth0 proto kernel scope link src 10.1.1.10 
10.128.0.0/15 dev tun0 scope link
10.128.0.0/15 dev tun0
168.63.129.16 via 10.1.1.1 dev eth0 proto static
169.254.0.0/16 dev eth0 scope link metric 1002
169.254.169.254 via 10.1.1.1 dev eth0 proto static
172.17.0.0/16 via 172.17.0.1 dev docker0
172.18.0.0/16 dev bravi proto kernel scope link src 172.18.0.1
[root@infra01 ~]#

What was a bit strange when I used tracepath was that the packets weren’t forwarded to the default gateway but instead forwarded to the node itself:

[root@infra01 ~]# tracepath 169.254.169.254
1?: [LOCALHOST]                                         pmtu 1500
1:  infra01                                     3006.801ms !H
    Resume: pmtu 1500

Same with traceroute or ping output:

[root@infra01 ~]# traceroute 169.254.169.254
traceroute to 169.254.169.254 (169.254.169.254), 30 hops max, 60 byte packets
1  infra01 (172.18.0.1)  1178.146 ms !H  1178.104 ms !H  1178.057 ms !H
[root@infra01 ~]# ping 169.254.169.254
PING 169.254.169.254 (169.254.169.254) 56(84) bytes of data.
From 172.18.0.1 icmp_seq=1 Destination Host Unreachable
From 172.18.0.1 icmp_seq=2 Destination Host Unreachable
From 172.18.0.1 icmp_seq=3 Destination Host Unreachable
From 172.18.0.1 icmp_seq=4 Destination Host Unreachable
^C
--- 169.254.169.254 ping statistics ---
5 packets transmitted, 0 received, +4 errors, 100% packet loss, time 4000ms
pipe 4

What was very obvious was that the packets were forwarded to the bravi bridge 172.18.0.0/16 which is owned by the Avi Service Engine on the Infra node:

...
44: bravi: <NO-CARRIER,BROADCAST,MULTICAST,UP> mtu 1500 qdisc noqueue state DOWN qlen 1000
   link/ether 00:00:00:00:00:01 brd ff:ff:ff:ff:ff:ff
   inet 172.18.0.1/16 scope global bravi
      valid_lft forever preferred_lft forever
   inet6 fe80::200:ff:fe00:1/64 scope link
      valid_lft forever preferred_lft forever
45: bravi-tap: <BROADCAST,MULTICAST> mtu 1500 qdisc noop master bravi state DOWN qlen 1000
   link/ether 00:00:00:00:00:01 brd ff:ff:ff:ff:ff:ff
...

Here is the article about how Avi SE are integrated into the OpenShift SDN. Avi uses PBR (policy based routing) to forward external ingress traffic to the Service Engine.

I have turned off the bravi bridge because PBR could be bypassing the routing table for traffic to the 169.254.169.254.

[root@infra01 ~]# ip link set bravi down

Traffic is now exiting the Infra node:

[root@infra01 ~]# traceroute 169.254.169.254
traceroute to 169.254.169.254 (169.254.169.254), 30 hops max, 60 byte packets
1  * * *
2  * * *
3  * * *
4  * * *
5  * * *
6  *^C
[root@infra01 ~]#

And the Infra node was able to collect metadata information:

[root@infra01 ~]# curl -v http://169.254.169.254/metadata/v1/InstanceInfo
* About to connect() to 169.254.169.254 port 80 (#0)
*   Trying 169.254.169.254...
* Connected to 169.254.169.254 (169.254.169.254) port 80 (#0)
GET /metadata/v1/InstanceInfo HTTP/1.1
User-Agent: curl/7.29.0
Host: 169.254.169.254
Accept: */*

< HTTP/1.1 200 OK
< Content-Type: text/json; charset=utf-8
< Server: Microsoft-IIS/10.0
< Date: Thu, 06 Dec 2018 13:53:16 GMT
< Content-Length: 43
<
* Connection #0 to host 169.254.169.254 left intact
{"ID":"_infra01","UD":"4","FD":"0"}
[root@infra01 ~]#

Simple restart of the atomic node service to trigger the master registration:

[root@infra01 ~]# systemctl restart atomic-openshift-node

The logs showed that the kubelet successfully got zone information

Dec 07 16:03:21 infra01 atomic-openshift-node[36736]: I1207 16:03:21.341611   36813 kubelet_node_status.go:270] Setting node annotation to enable volume controller attach/detach
Dec 07 16:03:21 infra01 atomic-openshift-node[36736]: I1207 16:03:21.414847   36813 kubelet_node_status.go:326] Adding node label from cloud provider: beta.kubernetes.io/instance-type=Standard_D8_
Dec 07 16:03:21 infra01 atomic-openshift-node[36736]: I1207 16:03:21.414881   36813 kubelet_node_status.go:337] Adding node label from cloud provider: failure-domain.beta.kubernetes.io/zone=0
Dec 07 16:03:21 infra01 atomic-openshift-node[36736]: I1207 16:03:21.414890   36813 kubelet_node_status.go:341] Adding node label from cloud provider: failure-domain.beta.kubernetes.io/region=ukso
Dec 07 16:03:21 infra01 atomic-openshift-node[36736]: I1207 16:03:21.414966   36813 kubelet_node_status.go:488] Using Node Hostname from cloudprovider: "infra01"
Dec 07 16:03:21 infra01 atomic-openshift-node[36736]: I1207 16:03:21.420823   36813 kubelet_node_status.go:437] Recording NodeHasSufficientDisk event message for node infra01
Dec 07 16:03:21 infra01 atomic-openshift-node[36736]: I1207 16:03:21.420907   36813 kubelet_node_status.go:437] Recording NodeHasSufficientMemory event message for node infra01
Dec 07 16:03:21 infra01 atomic-openshift-node[36736]: I1207 16:03:21.423139   36813 kubelet_node_status.go:437] Recording NodeHasNoDiskPressure event message for node infra01
Dec 07 16:03:21 infra01 atomic-openshift-node[36736]: I1207 16:03:21.423235   36813 kubelet_node_status.go:82] Attempting to register node infra01
Dec 07 16:03:21 infra01 atomic-openshift-node[36736]: I1207 16:03:21.435412   36813 kubelet_node_status.go:85] Successfully registered node infra01
Dec 07 16:03:21 infra01 atomic-openshift-node[36736]: I1207 16:03:21.437308   36813 kubelet_node_status.go:488] Using Node Hostname from cloudprovider: "infra01"
Dec 07 16:03:21 infra01 atomic-openshift-node[36736]: I1207 16:03:21.441482   36813 manager.go:311] Recovery completed

The Infra node successfully registered again the OpenShift master and the node went into “Ready”:

[root@master01 ~]# oc get nodes -o wide --show-labels | grep 'region=infra'
infra01   Ready                      40s       v1.7.6+a08f5eeb62           Red Hat Enterprise Linux Server 7.6 (Maipo)   3.10.0-693.11.6.el7.x86_64   beta.kubernetes.io/arch=amd64,beta.kubernetes.io/instance-type=Standard_D8_v3,beta.kubernetes.io/os=linux,failure-domain.beta.kubernetes.io/region=uksouth,failure-domain.beta.kubernetes.io/zone=0,kubernetes.io/hostname=infra01,logging-infra-fluentd=true,purpose=infra,region=infra,zone=1
infra02   Ready                      1d        v1.7.6+a08f5eeb62           Red Hat Enterprise Linux Server 7.6 (Maipo)   3.10.0-693.11.6.el7.x86_64   beta.kubernetes.io/arch=amd64,beta.kubernetes.io/instance-type=Standard_D8_v3,beta.kubernetes.io/os=linux,failure-domain.beta.kubernetes.io/region=uksouth,failure-domain.beta.kubernetes.io/zone=1,kubernetes.io/hostname=infra02,logging-infra-fluentd=true,purpose=infra,region=infra,zone=0
infra03   Ready                      1d        v1.7.6+a08f5eeb62           Red Hat Enterprise Linux Server 7.6 (Maipo)   3.10.0-693.11.6.el7.x86_64   beta.kubernetes.io/arch=amd64,beta.kubernetes.io/instance-type=Standard_D8_v3,beta.kubernetes.io/os=linux,failure-domain.beta.kubernetes.io/region=uksouth,failure-domain.beta.kubernetes.io/zone=0,kubernetes.io/hostname=infra03,logging-infra-fluentd=true,purpose=infra,region=infra,zone=2
[root@master01 ~]#

In the end, the root cause was the Avi East West subnet range which was set to 169.254.0.0/16 on the Avi controller nodes. Even the East West communication was deactivated on Avi, because kube_proxy was used, which made the Avi controller configure PBR on the bravi bridge for the 169.254.0.0/16 subnet range. This subnet range was previously used on all the on-prem datacenters and never caused issues since moving to cloud because the 169.254.169.254 is commonly used on cloud provider for instances to collect metadata information.