OpenShift Hive – Deploy Single Node (All-in-One) OKD Cluster on AWS

The concept of a single-node or All-in-One OpenShift / Kubernetes cluster isn’t something new, years ago when I was working with OpenShift 3 and before that with native Kubernetes, we were using single-node clusters as ephemeral development environment, integrations testing for pull-request or platform releases. It was only annoying because this required complex Jenkins pipelines, provision the node first, then install prerequisites and run the openshift-ansible installer playbook. Not always reliable and not a great experience but it done the job.

This is possible as well with the new OpenShift/OKD 4 version and with the help from OpenShift Hive. The experience is more reliable and quicker than previously and I don’t need to worry about de-provisioning, I will let Hive delete the cluster after a few hours automatically.

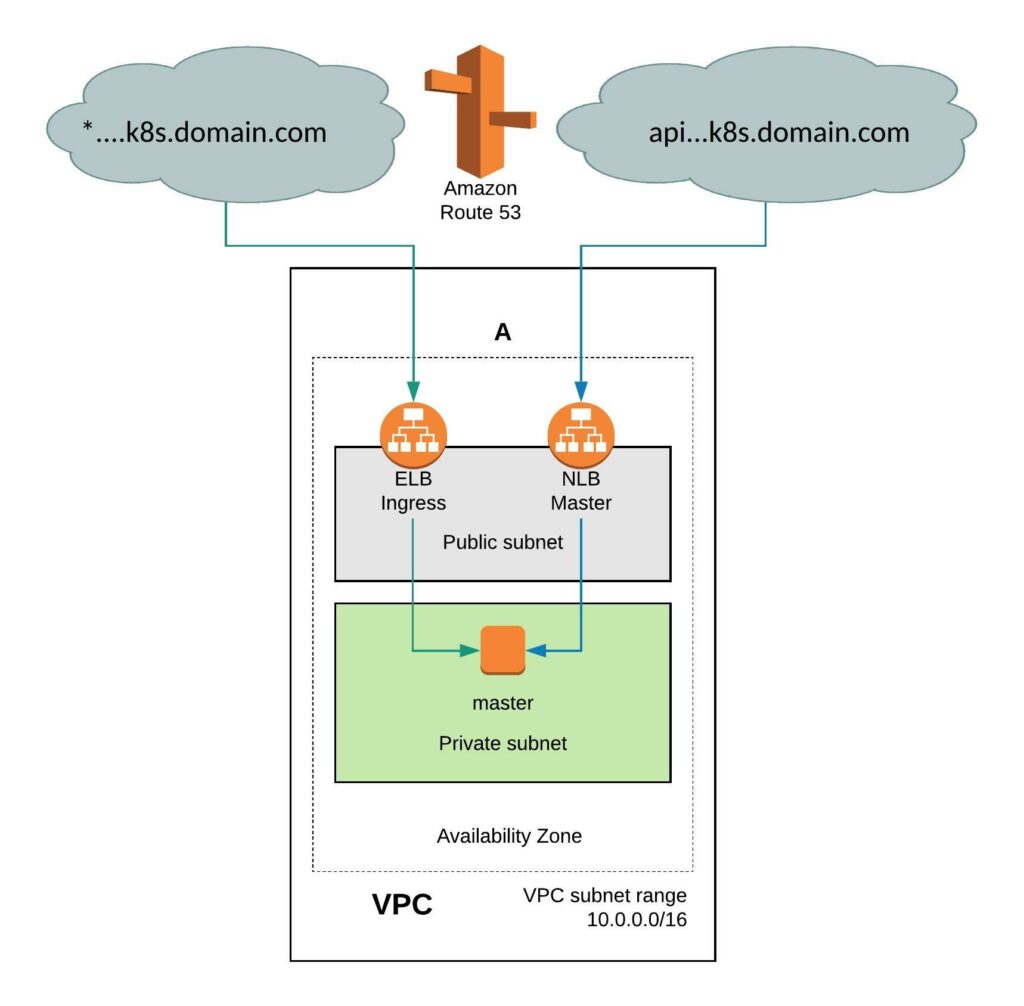
It requires a few simple modifications in the install-config. You need to add the Availability Zone you want where the instance will be created. When doing this the VPC will only have two subnets, one public and one private subnet in eu-west-1. You can also install the single-node cluster into an existing VPC you just have to specify subnet ids. Change the compute worker node replicas zero and control-plane replicas to one. Make sure to have an instance size with enough CPU and memory for all OpenShift components because they need to fit onto the single node. The rest of the install-config is pretty much standard.

---
apiVersion: v1
baseDomain: k8s.domain.com
compute:
- name: worker
  platform:
    aws:
      zones:
      - eu-west-1a
      rootVolume:
        iops: 100
        size: 22
        type: gp2
      type: r4.xlarge
  replicas: 0
controlPlane:
  name: master
  platform:
    aws:
      zones:
      - eu-west-1a
      rootVolume:
        iops: 100
        size: 22
        type: gp2
      type: r5.2xlarge
  replicas: 1
metadata:
  creationTimestamp: null
  name: okd-aio
networking:
  clusterNetwork:
  - cidr: 10.128.0.0/14
    hostPrefix: 23
  machineCIDR: 10.0.0.0/16
  networkType: OpenShiftSDN
  serviceNetwork:
  - 172.30.0.0/16
platform:
  aws:
    region: eu-west-1
pullSecret: ""
sshKey: ""

Create a new install-config secret for the cluster.

kubectl create secret generic install-config-aio -n okd --from-file=install-config.yaml=./install-config-aio.yaml

We will be using OpenShift Hive for the cluster deployment because the provision is more simplified and Hive can also apply any configuration using SyncSets or SelectorSyncSets which is needed. Add the annotation hive.openshift.io/delete-after: “2h” and Hive will automatically delete the cluster after 4 hours.

---
apiVersion: hive.openshift.io/v1
kind: ClusterDeployment
metadata:
  creationTimestamp: null
  annotations:
    hive.openshift.io/delete-after: "2h"
  name: okd-aio 
  namespace: okd
spec:
  baseDomain: k8s.domain.com
  clusterName: okd-aio
  controlPlaneConfig:
    servingCertificates: {}
  installed: false
  platform:
    aws:
      credentialsSecretRef:
        name: aws-creds
      region: eu-west-1
  provisioning:
    releaseImage: quay.io/openshift/okd:4.5.0-0.okd-2020-07-14-153706-ga
    installConfigSecretRef:
      name: install-config-aio
  pullSecretRef:
    name: pull-secret
  sshKey:
    name: ssh-key
status:
  clusterVersionStatus:
    availableUpdates: null
    desired:
      force: false
      image: ""
      version: ""
    observedGeneration: 0
    versionHash: ""

Apply the cluster deployment to your clusters namespace.

kubectl apply -f  ./clusterdeployment-aio.yaml

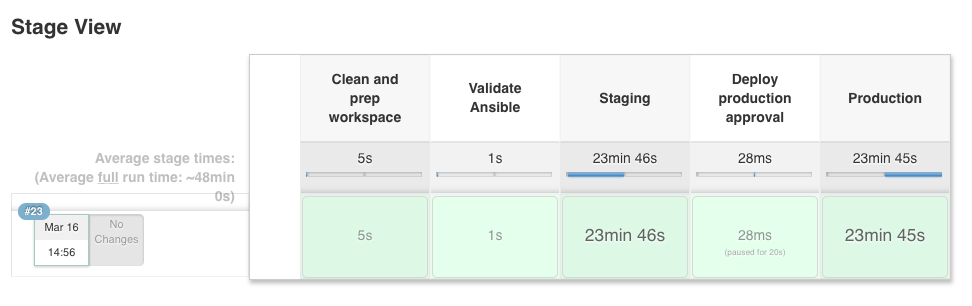
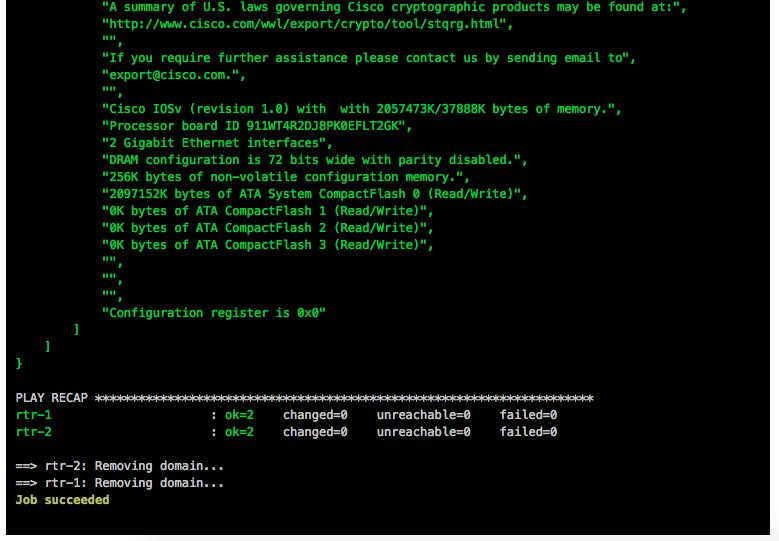
This is slightly faster than provision 6 nodes cluster and will take around 30mins until your ephemeral test cluster is ready to use.

Getting started with Jenkins for Network Automation

As I have mentioned my previous post about Getting started with Gitlab-CI for Network Automation, Jenkins is another continuous integration pipelining tool you can use for network automation. Have a look about how to install Jenkins: https://wiki.jenkins.io/display/JENKINS/Installing+Jenkins+on+Ubuntu

To use the Jenkins with Vagrant and KVM (libvirt) there are a few changes needed on the linux server similar with the Gitlab-Runner. The Jenkins user account needs to be able to control KVM and you need to install the vagrant-libvirt plugin:

usermod -aG libvirtd jenkins
sudo su jenkins
vagrant plugin install vagrant-libvirt

Optional: you may need to copy custom Vagrant boxes into the users vagrant folder ‘/var/lib/jenkins/.vagrant.d/boxes/*’. Note that the Jenkins home directory is not located under /home.

Now lets start configuring a Jenkins CI-pipeline, click on ‘New item’:

This creates an empty pipeline where you need to add the different stages  of what needs to be executed:

Below is an example Jenkins pipeline script which is very similar to the Gitlab-CI pipeline I have used with my Cumulus Linux Lab in the past.

pipeline {
    agent any
    stages {
        stage('Clean and prep workspace') {
            steps {
                sh 'rm -r *'
                git 'https://github.com/berndonline/cumulus-lab-provision'
                sh 'git clone --origin master https://github.com/berndonline/cumulus-lab-vagrant'
            }
        }
        stage('Validate Ansible') {
            steps {
                sh 'bash ./linter.sh'
            }
        }
        stage('Staging') {
            steps {
                sh 'cd ./cumulus-lab-vagrant/ && ./vagrant_create.sh'
                sh 'cd ./cumulus-lab-vagrant/ && bash ../staging.sh'
            }
        }
        stage('Deploy production approval') {
            steps {
                input 'Deploy to prod?'
            }
        }
        stage('Production') {
            steps {
                sh 'cd ./cumulus-lab-vagrant/ && ./vagrant_create.sh'
                sh 'cd ./cumulus-lab-vagrant/ && bash ../production.sh'
            }
        }
    }
}

Let’s run the build pipeline:

The stages get executed one by one and, as you can see below, the production stage has an manual approval build-in that nothing gets deployed to production without someone to approve before, for a controlled production deployment:

Finished pipeline:

This is just a simple example of a network automation pipeline, this can of course be more complex if needed. It should just help you a bit on how to start using Jenkins for network automation.

Please share your feedback and leave a comment.

Getting started with Gitlab-CI for Network Automation

Ken Murphy from networkautomationblog.com asked me to do a more detailed post about how to setup Gitlab-Runner on your local server to use with Gitlab-CI. I will not get into too much detail about the installation because Gitlab has a very detailed information about it which you can find here: https://docs.gitlab.com/runner/install/linux-repository.html

Once the Gitlab Runner is installed on your server you need to configure and register the runner with your Gitlab repo. If you are interested in information about this, you can find the documentation here: https://docs.gitlab.com/runner/register/ but lets continue with how to register the runner.

In your project go to ‘Settings -> CI / CD’ to find the registration token:

It is important to disable the shared runners:

Now let’s register the gitlab runner:

berndonline@lab ~ # sudo gitlab-runner register
Running in system-mode.

Please enter the gitlab-ci coordinator URL (e.g. https://gitlab.com/):
https://gitlab.com
Please enter the gitlab-ci token for this runner:
xxxxxxxxx
Please enter the gitlab-ci description for this runner:
[lab]:
Please enter the gitlab-ci tags for this runner (comma separated):
lab
Whether to run untagged builds [true/false]:
[false]: true
Whether to lock the Runner to current project [true/false]:
[true]: false
Registering runner... succeeded                     runner=xxxxx
Please enter the executor: docker-ssh, parallels, ssh, virtualbox, kubernetes, docker, shell, docker+machine, docker-ssh+machine:
shell
Runner registered successfully. Feel free to start it, but if it's running already the config should be automatically reloaded!
berndonline@lab ~ #

You will find the main configuration file under /etc/gitlab-runner/config.toml.

When everything goes well the runner is registered and active, and ready to apply the CI pipeline what is defined in the .gitlab-ci.yml.

To use the runner with Vagrant and KVM (libvirt) there are a few changes needed on the linux server itself, first the gitlab-runner user account needs to be able to control KVM, second the vagrant-libvirt plugin needs to be installed:

usermod -aG libvirtd gitlab-runner
sudo su gitlab-runner
vagrant plugin install vagrant-libvirt

Optional: you may need to copy custom Vagrant boxes into the users vagrant folder ‘/home/gitlab-runner/.vagrant.d/boxes/*’.

Here the example from my Cumulus CI-pipeline .gitlab-ci.yml that I have already shared in my other blog post about Continuous Integration and Delivery for Networking with Cumulus Linux:

---
stages:
    - validate ansible
    - staging
    - production
validate:
    stage: validate ansible
    script:
        - bash ./linter.sh
staging:
    before_script:
        - git clone https://github.com/berndonline/cumulus-lab-vagrant.git
        - cd cumulus-lab-vagrant/
        - python ./topology_converter.py ./topology-production.dot
          -p libvirt --ansible-hostfile
    stage: staging
    script:
        - bash ../staging.sh
production:
    before_script:
        - git clone https://github.com/berndonline/cumulus-lab-vagrant.git
        - cd cumulus-lab-vagrant/
        - python ./topology_converter.py ./topology-production.dot
          -p libvirt --ansible-hostfile
    stage: production
    when: manual
    script:
        - bash ../production.sh
    only:
        - master

The next step is the staging.sh shell script which boots up the vagrant instances and executes the Ansible playbooks. It is better to use a script and report the exit state so that if something goes wrong the Vagrant instances are correctly destroyed.

#!/bin/bash

EXIT=0
vagrant up mgmt-1 --color <<< 'mgmt-1 boot' || EXIT=$?
vagrant up netq-1 --color <<< 'netq-1 boot' || EXIT=$?
sleep 300
vagrant up spine-1 --color <<< 'spine-1 boot' || EXIT=$?
vagrant up spine-2 --color <<< 'spine-2 boot' || EXIT=$?
sleep 60
vagrant up edge-1 --color <<< 'edge-1 boot' || EXIT=$?
vagrant up edge-2 --color <<< 'edge-2 boot' || EXIT=$?
sleep 60
vagrant up leaf-1 --color <<< 'leaf-1 boot' || EXIT=$?
vagrant up leaf-2 --color <<< 'leaf-2 boot' || EXIT=$?
vagrant up leaf-3 --color <<< 'leaf-3 boot' || EXIT=$?
vagrant up leaf-4 --color <<< 'leaf-4 boot' || EXIT=$?
vagrant up leaf-5 --color <<< 'leaf-5 boot' || EXIT=$?
vagrant up leaf-6 --color <<< 'leaf-6 boot' || EXIT=$?
sleep 60
vagrant up server-1 --color <<< 'server-1 boot' || EXIT=$?
vagrant up server-2 --color <<< 'server-2 boot' || EXIT=$?
vagrant up server-3 --color <<< 'server-3 boot' || EXIT=$?
vagrant up server-4 --color <<< 'server-4 boot' || EXIT=$?
vagrant up server-5 --color <<< 'server-5 boot' || EXIT=$?
vagrant up server-6 --color <<< 'server-6 boot' || EXIT=$?
sleep 60
export ANSIBLE_FORCE_COLOR=true
ansible-playbook ./helper_scripts/configure_servers.yml <<< 'ansible playbook' || EXIT=$?
ansible-playbook ../site.yml <<< 'ansible playbook' || EXIT=$?
sleep 60
ansible-playbook ../icmp_check.yml <<< 'icmp check' || EXIT=$?
vagrant destroy -f
echo $EXIT
exit $EXIT

Basically any change in the repository triggers the .gitlab-ci.yml and executes the pipeline; starting with the stage validating the Ansible syntax:

Continue with staging the configuration and deploying to production. The production stage is a manual trigger to have a controlled deployment:

In one of my next posts I will explain how to use Jenkins instead of Gitlab-CI for Network Automation. Jenkins is very similar to the runner but more flexible with what you can do with it.

Leave a comment

Ansible Playbook for Cisco ASAv Firewall Topology

More about Ansible network automation with Cisco ASAv and continuous integration testing like in my previous posts using Vagrant and Gitlab-CI.

Network overview:

Here’s my Github repository where you can find the complete Ansible Playbook: https://github.com/berndonline/asa-lab-provision

Automating firewall configuration is not that easy and can get very complicated because you have different objects, access-lists and service policies to configure which all together makes the playbook complex rather than simple.

What you won’t find in my playbook is how to automate the cluster deployment because this wasn’t possible in my scenario using ASAv and Vagrant. I didn’t have physical Cisco ASA firewall on hand to do this but I might add this later in the coming months.

Let’s look at the different variable files I created; first the host_vars for asa-1.yml which is very similar to a Cisco router:

---

hostname: asa-1
domain_name: lab.local

interfaces:
  0/0:
    alias: connection rtr-1 inside
    nameif: inside
    security_level: 100
    address: 10.0.255.1
    mask: 255.255.255.0

  0/1:
    alias: connection rtr-2 outside
    nameif: outside
    security_level: 0
    address: 217.100.100.1
    mask: 255.255.255.0

routes:
  - route outside 0.0.0.0 0.0.0.0 217.100.100.254 1

I then use multiple files in group_vars for objects.ymlobject-groups.ymlaccess-lists.yml and nat.yml to configure specific firewall settings.

Roles:

  • Hostname: The task in main.yml uses the Ansible module asa_config and configures hostname and domain name.
  • Interfaces:  This role uses the Ansible module asa_config to deploy the template interfaces.j2 to configure the interfaces. In the main.yml is a second task to enable the interfaces when the previous template applied the configuration.
  • Routing: Similar to the interfaces role and uses also the asa_config module to deploy the template routing.j2 for the static routes
  • Objects: The first task in main.yml loads the objects.yml from group_vars, the second task deploys the template objects.j2.
  • Object-Groups: Uses same tasks in main.yml and template object-groups.j2 like the objects role but the commands are slightly different.
  • Access-Lists: One of the more complicated roles I needed to work on, in the main.yml are multiple tasks to load variables like in the previous roles, then runs a task to clear access-lists if the variable “override_acl” from access-lists.yml group_vars is set to “true” otherwise it skips the next tasks. When the variable are set to true and the access-lists are cleared it then writes new access-lists using the Ansible module asa_acl and finishes with a task to assigning the newly created access-lists to the interfaces.
  • NAT: This role is again similar to the objects role using a task main.yml to load variable file and deploys the template nat.j2. The NAT role uses object nat and only works if you created the object before in the objects group_vars.
  • Policy-Framework: Multiple tasks in main.yml first clears global policy and policy maps and afterwards recreates them. Similar approach like the access lists to keep it consistent.

Main Ansible Playbook site.yml

---

- hosts: asa-1

  connection: local
  user: vagrant
  gather_facts: 'no'

  roles:
    - hostname
    - interfaces
    - routing
    - objects
    - object-groups
    - access-lists
    - nat
    - policy-framework

When a change triggers the gitlab-ci pipeline it spins up the Vagrant instances and executes the main Ansible Playbook. After the Vagrant instances are booted, first the two router rtr-1 and rtr-2 need to be configured with cisco_router_config.yml, then afterwards the main site.yml will be run.

Once the main playbook finishes for the Cisco ASA a last connectivity check will be execute using the playbook asa_check_icmp.yml. Just a simple ping to see if the base configuration is applied correctly.

If everything goes well, like in this example, the job is successful:

I will continue to improve the Playbook and the CICD pipeline so come back later to check it out.

Leave a comment

Continuous Integration and Delivery for Networking with Cisco devices

This post is about continuous integration and continuous delivery (CICD) for Cisco devices and how to use network simulation to test automation before deploying this to production environments. That was one of the main reasons for me to use Vagrant for simulating the network because the virtual environment can be created on-demand and thrown away after the scripts run successful. Please read before my post about Cisco network simulation using Vagrant: Cisco IOSv and XE network simulation using Vagrant and Cisco ASAv network simulation using Vagrant.

Same like in my first post about Continuous Integration and Delivery for Networking with Cumulus Linux, I am using Gitlab.com and their Gitlab-runner for the continuous integration and delivery (CICD) pipeline.

  • You need to register your Gitlab-runner with the Gitlab repository:

  • The next step is to create your .gitlab-ci.yml which defines your CI-pipeline.
---
stages:
    - validate ansible
    - staging iosv
    - staging iosxe
validate:
    stage: validate ansible
    script:
        - bash ./linter.sh
staging_iosv:
    before_script:
        - git clone https://github.com/berndonline/cisco-lab-vagrant.git
        - cd cisco-lab-vagrant/
        - cp Vagrantfile-IOSv Vagrantfile
    stage: staging iosv
    script:
        - bash ../staging.sh
staging_iosxe:
    before_script:
        - git clone https://github.com/berndonline/cisco-lab-vagrant.git
        - cd cisco-lab-vagrant/
        - cp Vagrantfile-IOSXE Vagrantfile
    stage: staging iosxe
    script:
        - bash ../staging.sh

I clone the cisco vagrant lab which I use to spin-up a virtual staging environment and run the Ansible playbook against the virtual lab. The stages IOSv and IOSXE are just examples in my case depending what Cisco IOS versions you want to test.

The production stage would be similar to staging only that you run the Ansible playbook against your physical environment.

  • Basically any commit or merge in the Gitlab repo triggers the pipeline which is defined in the gitlab-ci.

  • The first stage is only to validate that the YAML files have the correct syntax.

  • Here the details of a job and when everything goes well the job succeeded.

This is an easy way to test your Ansible playbooks against a virtual Cisco environment before deploying this to a production system.

Here again my two repositories I use:

https://github.com/berndonline/cisco-lab-vagrant

https://github.com/berndonline/cisco-lab-provision

Read my new posts about Ansible Playbook for Cisco ASAv Firewall Topology or Ansible Playbook for Cisco BGP Routing Topology.