Continuous Integration and Delivery for Networking with Cisco devices

This post is about continuous integration and continuous delivery (CICD) for Cisco devices and how to use network simulation to test automation before deploying this to production environments. That was one of the main reasons for me to use Vagrant for simulating the network because the virtual environment can be created on-demand and thrown away after the scripts run successful. Please read before my post about Cisco network simulation using Vagrant: Cisco IOSv and XE network simulation using Vagrant and Cisco ASAv network simulation using Vagrant.

Same like in my first post about Continuous Integration and Delivery for Networking with Cumulus Linux, I am using Gitlab.com and their Gitlab-runner for the continuous integration and delivery (CICD) pipeline.

  • You need to register your Gitlab-runner with the Gitlab repository:

  • The next step is to create your .gitlab-ci.yml which defines your CI-pipeline.
---
stages:
    - validate ansible
    - staging iosv
    - staging iosxe
validate:
    stage: validate ansible
    script:
        - bash ./linter.sh
staging_iosv:
    before_script:
        - git clone https://github.com/berndonline/cisco-lab-vagrant.git
        - cd cisco-lab-vagrant/
        - cp Vagrantfile-IOSv Vagrantfile
    stage: staging iosv
    script:
        - bash ../staging.sh
staging_iosxe:
    before_script:
        - git clone https://github.com/berndonline/cisco-lab-vagrant.git
        - cd cisco-lab-vagrant/
        - cp Vagrantfile-IOSXE Vagrantfile
    stage: staging iosxe
    script:
        - bash ../staging.sh

I clone the cisco vagrant lab which I use to spin-up a virtual staging environment and run the Ansible playbook against the virtual lab. The stages IOSv and IOSXE are just examples in my case depending what Cisco IOS versions you want to test.

The production stage would be similar to staging only that you run the Ansible playbook against your physical environment.

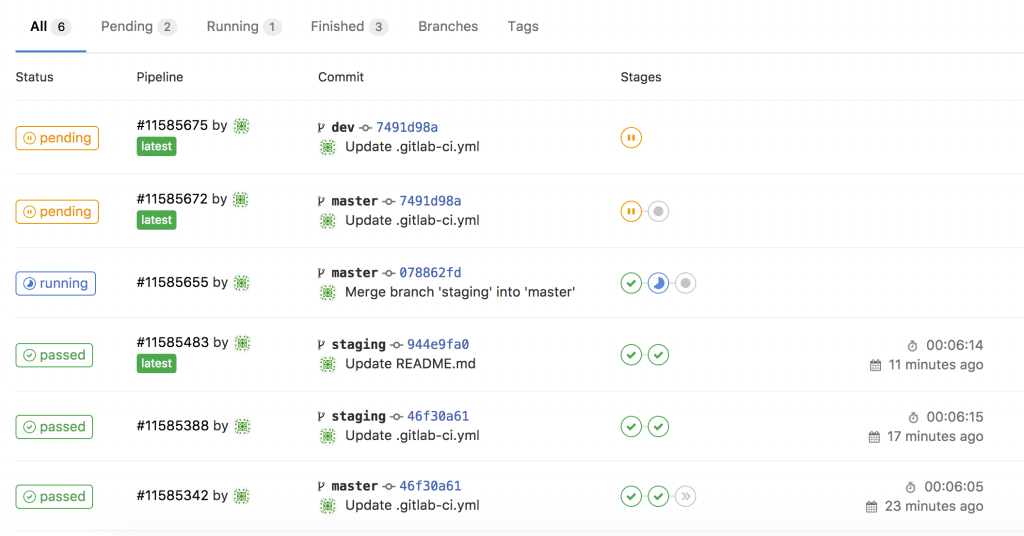
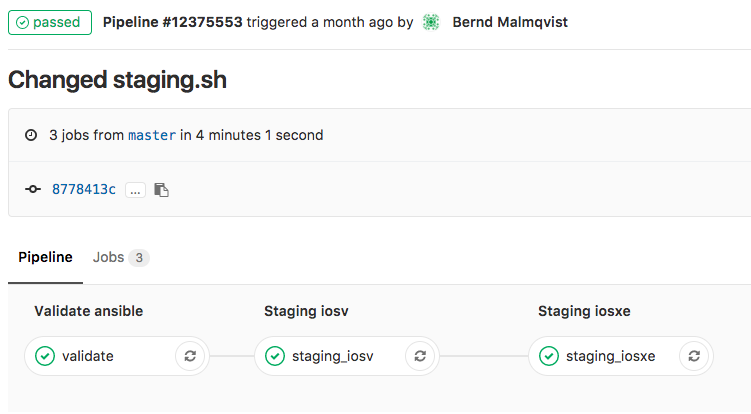
  • Basically any commit or merge in the Gitlab repo triggers the pipeline which is defined in the gitlab-ci.

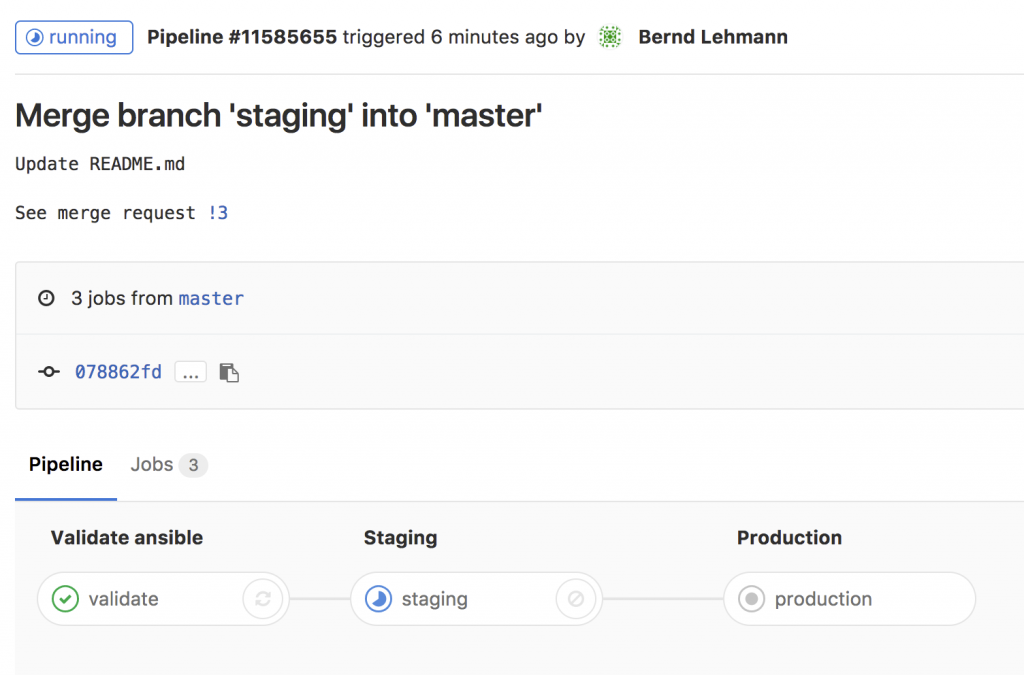
  • The first stage is only to validate that the YAML files have the correct syntax.
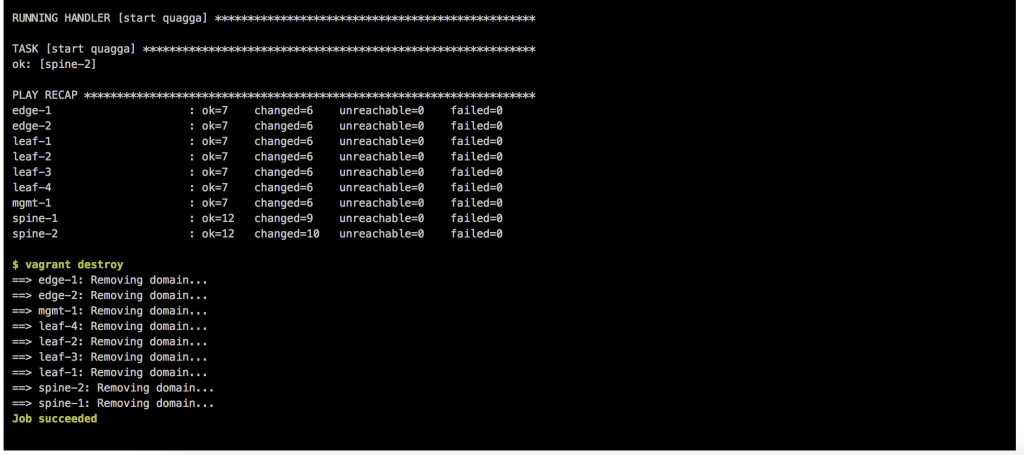
  • Here the details of a job and when everything goes well the job succeeded.
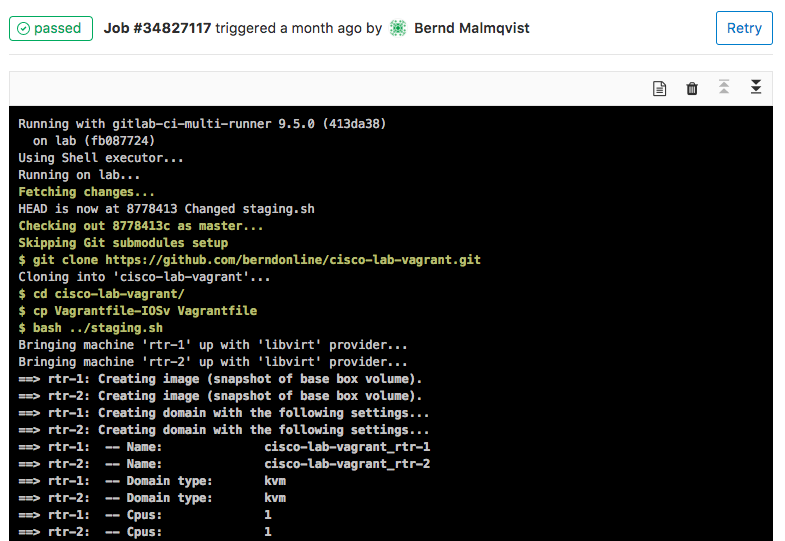
This is an easy way to test your Ansible playbooks against a virtual Cisco environment before deploying this to a production system.

Here again my two repositories I use:

https://github.com/berndonline/cisco-lab-vagrant

https://github.com/berndonline/cisco-lab-provision

Read my new posts about Ansible Playbook for Cisco ASAv Firewall Topology or Ansible Playbook for Cisco BGP Routing Topology.

Continuous Integration and Delivery for Networking with Cumulus Linux

Continuous Integration – Continuous Delivery (CICD) is becoming more and more popular for network automation but the problem is how to validate your scripts and stage the configuration because you don’t want to deploy untested code to a production system. Especially in networking that could be pretty destructive if you made a mistake which could cause a loss in connectivity.

I spend some days working on a Cumulus Linux lab using Vagrant which I use to stage configuration. You find the basic Ansible playbook and the gitlab-ci configuration for the Cumulus lab in my Github repo: cumulus-lab-provision

For the continuous integration and delivery (CI/CD) pipeline I am using Gitlab.com and their Gitlab-runner which is running on my server. I will not get into too much detail what is needed on the server, basically it runs vargant, libvirt (kvm), virtualbox, ansible and the gitlab-runner.

  • You need to register your Gitlab-runner with the Gitlab repository.

  • The next step is to create your .gitlab-ci.yml which defines your CI-pipeline.
---
stages:
    - validate ansible
    - staging
    - production
validate:
    stage: validate ansible
    script:
        - bash ./linter.sh
staging:
    before_script:
        - git clone https://github.com/berndonline/cumulus-lab-vagrant.git
        - cd cumulus-lab-vagrant/
        - python ./topology_converter.py ./topology-staging.dot
          -p libvirt --ansible-hostfile
    stage: staging
    script:
        - bash ../staging.sh
production:
    before_script:
        - git clone https://github.com/berndonline/cumulus-lab-vagrant.git
        - cd cumulus-lab-vagrant/
        - python ./topology_converter.py ./topology-production.dot
          -p libvirt --ansible-hostfile
    stage: production
    when: manual
    script:
        - bash ../production.sh
    only:
        - master

In the gitlab-ci you see that I clone the cumulus vagrant lab which I use to spin-up a virtual staging environment and run the Ansible playbook against the virtual lab. The production stage is in my example also a vagrant environment because I had no physical switches for testing.

  • Basically any commit or merge in the Gitlab repo triggers the pipeline which I define in the gitlab-ci.

  • You can see the details in the running job. The first stage is only to validate that the YAML files have the correct syntax.

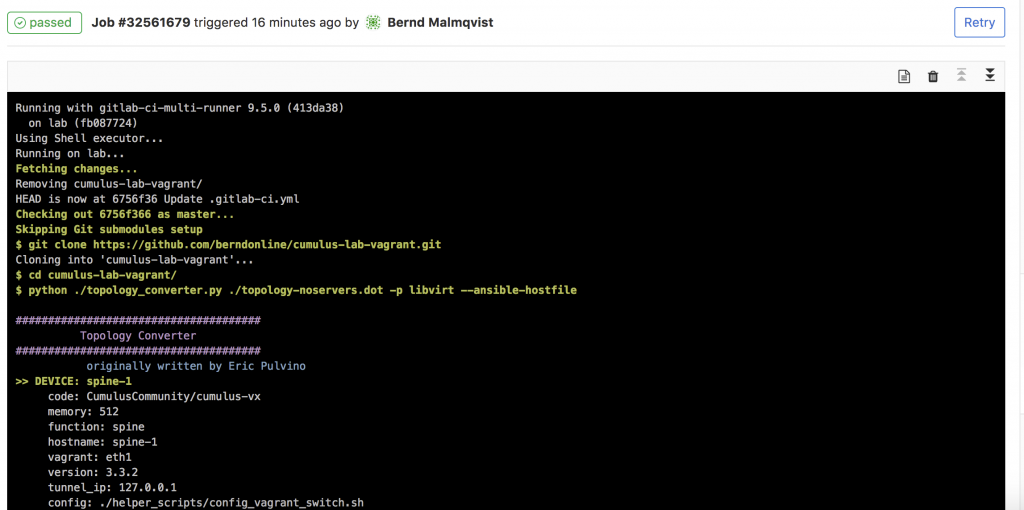
  • Here the details of the running job of staging and when everything goes well the job succeeded.
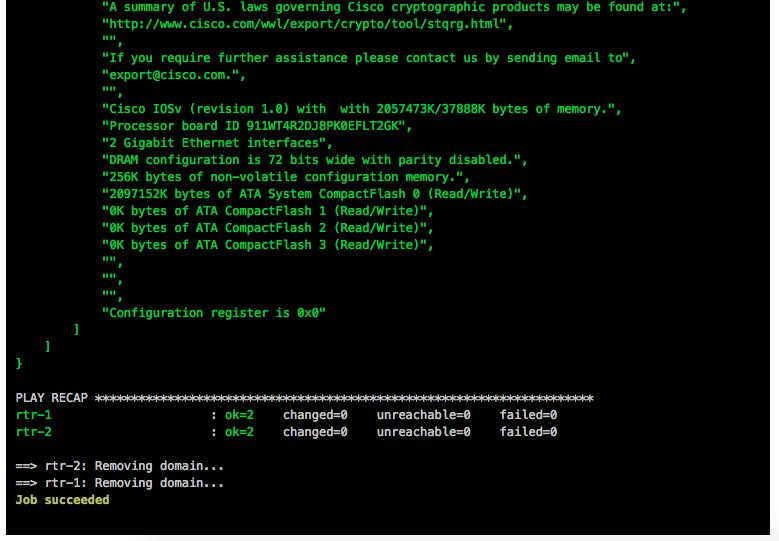
  • The last stage is production which needs to be triggered manually.

  • After the changes run through all defined stages you see that you successfully validate, staged and deployed your configuration to a cumulus production system.

This is a complete different way of working for a network engineer but the way it goes in fully automated datacenter network environments. It gets very powerful when you combine this with the Cumulus NetQ server to validate the state of your switch fabric after you run changes in production.

The next topic I am working on, is using Cumulus NetQ to validate configuration changes.

Here again my two repositories I use:

https://github.com/berndonline/cumulus-lab-vagrant

https://github.com/berndonline/cumulus-lab-provision

Read my new posts about an Ansible Playbook for Cumulus Linux BGP IP-Fabric and Cumulus NetQ Validation and BGP EVPN and VXLAN with Cumulus Linux.