Running Istio Service Mesh on Amazon EKS

I have not spend too much time with Istio in the last weeks but after my previous article about running Istio Service Mesh on OpenShift I wanted to do the same and deploy Istio Service Mesh on an Amazon EKS cluster. This time I did the recommended way of using a helm template to deploy Istio which is more flexible then the Ansible operator for the OpenShift deployment.

Once you have created your EKS cluster you can start, there are not many prerequisite for EKS so you can basically create the istio namespace and create a secret for Kiali, and start to deploy the helm template:

kubectl create namespace istio-system

USERNAME=$(echo -n 'admin' | base64)
PASSPHRASE=$(echo -n 'supersecretpassword!!' | base64)
NAMESPACE=istio-system

cat <<EOF | kubectl apply -n istio-system -f -
apiVersion: v1
kind: Secret
metadata:
  name: kiali
  namespace: $NAMESPACE
  labels:
    app: kiali
type: Opaque
data:
  username: $USERNAME
  passphrase: $PASSPHRASE
EOF

You then create the Custom Resource Definitions (CRDs) for Istio:

helm template istio-1.1.4/install/kubernetes/helm/istio-init --name istio-init --namespace istio-system | kubectl apply -f -  

# Check the created Istio CRDs 
kubectl get crds -n istio-system | grep 'istio.io\|certmanager.k8s.io' | wc -l

At this point you can deploy the main Istio Helm template. See the installation options for more detail about customizing the installation:

helm template istio-1.1.4/install/kubernetes/helm/istio --name istio --namespace istio-system  --set grafana.enabled=true --set tracing.enabled=true --set kiali.enabled=true --set kiali.dashboard.secretName=kiali --set kiali.dashboard.usernameKey=username --set kiali.dashboard.passphraseKey=passphrase | kubectl apply -f -
 
# Validate and see that all components start
kubectl get pods -n istio-system -w  

The Kiali service has the type clusterIP which we need to change to type LoadBalancer:

kubectl patch svc kiali -n istio-system --patch '{"spec": {"type": "LoadBalancer" }}'

# Get the create AWS ELB for the Kiali service
$ kubectl get svc kiali -n istio-system --no-headers | awk '{ print $4 }'
abbf8224773f111e99e8a066e034c3d4-78576474.eu-west-1.elb.amazonaws.com

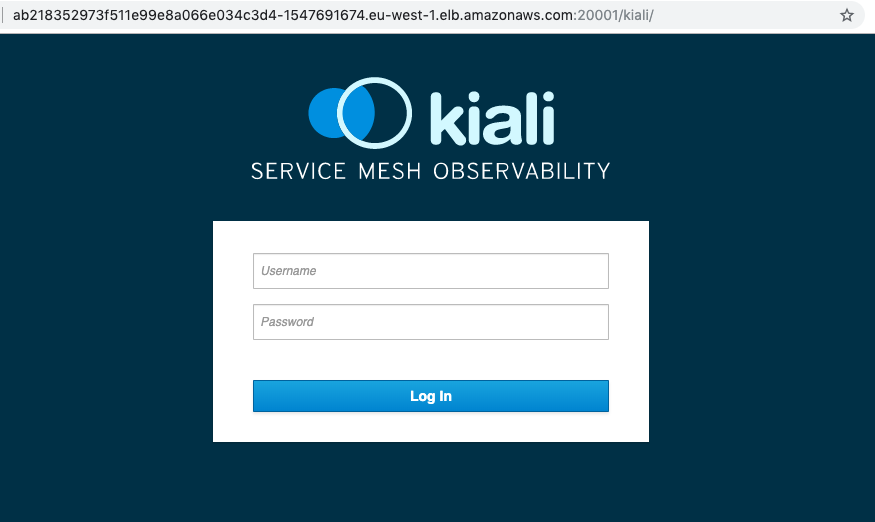
Now we are able to access the Kiali dashboard and login with the credentials I have specified earlier in the Kiali secret.
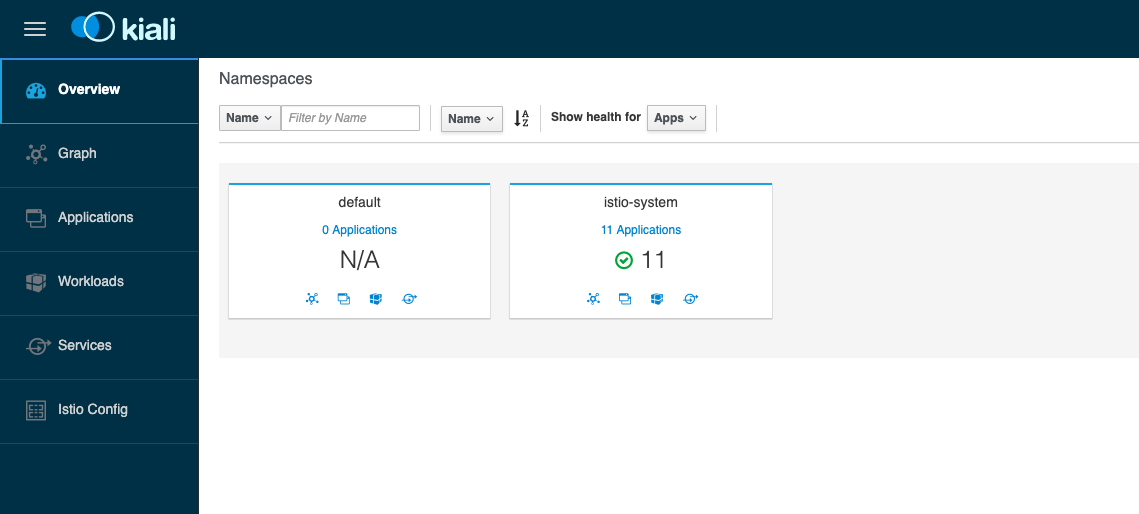
We didn’t deploy anything else yet so the default namespace is empty:
I recommend having a look at the Istio-Sidecar injection. If your istio-sidecar containers are not getting deployed you might forgot to allow TCP port 443 from your control-plane to worker nodes. Have a look at the Github issue about this: Admission control webhooks (e.g. sidecar injector) don’t work on EKS.

We can continue and deploy the Google Hipster Shop example.

# Label default namespace to inject Envoy sidecar
kubectl label namespace default istio-injection=enabled

# Check istio sidecar injector label
kubectl get namespace -L istio-injection

# Deploy Google hipster shop manifests
kubectl create -f https://raw.githubusercontent.com/berndonline/aws-eks-terraform/master/example/istio-hipster-shop.yml
kubectl create -f https://raw.githubusercontent.com/berndonline/aws-eks-terraform/master/example/istio-manifest.yml

# Wait a few minutes before deploying the load generator
kubectl create -f https://raw.githubusercontent.com/berndonline/aws-eks-terraform/master/example/istio-loadgenerator.yml

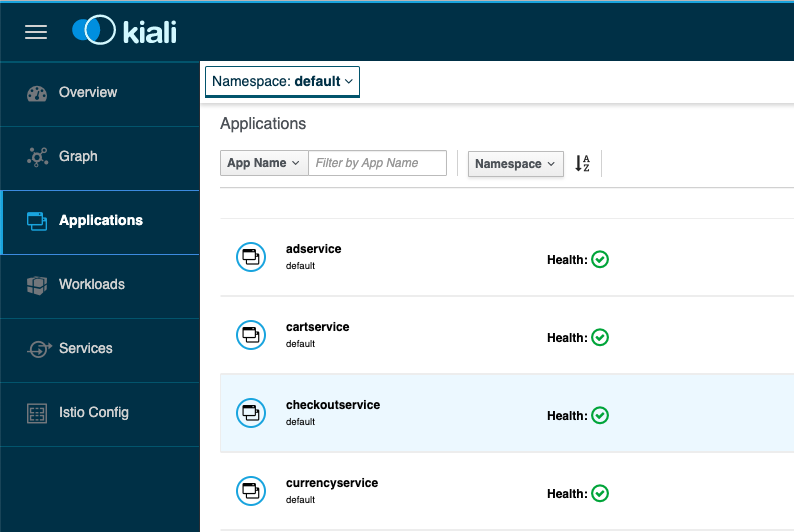
We can check again the Kiali dashboard once the application is deployed and healthy. If there are issues with the Envoy sidecar you will see a warning “Missing Sidecar”:
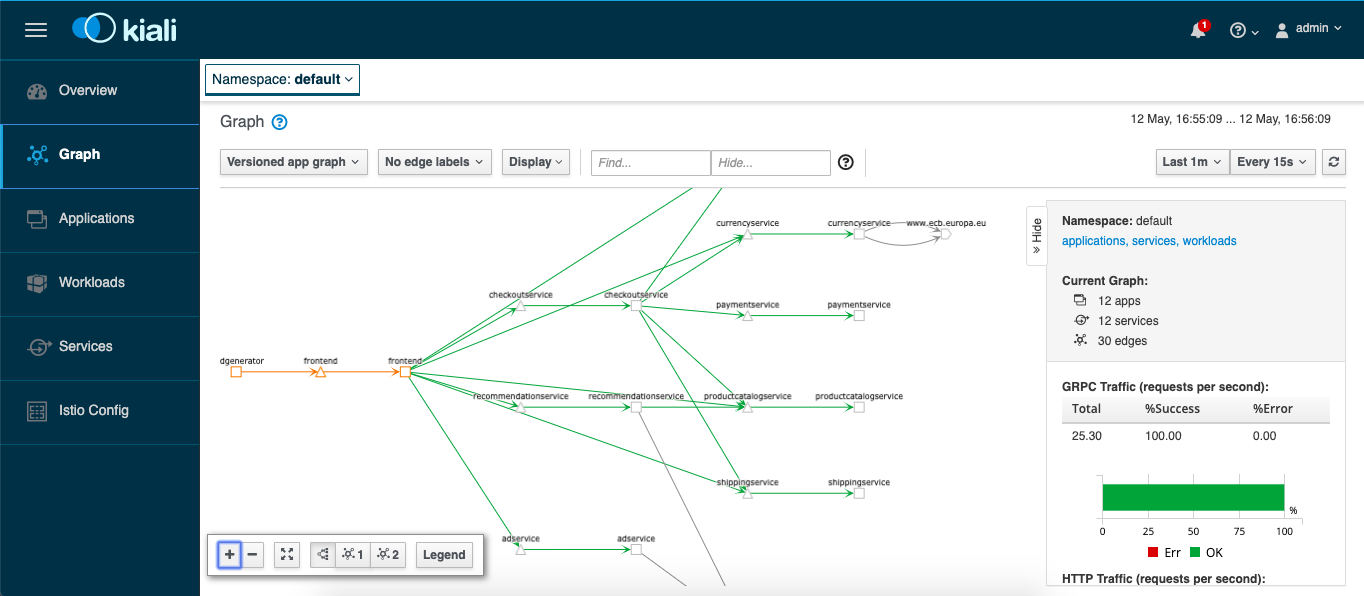
We are also able to see the graph which shows detailed traffic flows within the microservice application.
Let’s get the hostname for the istio-ingressgateway service and connect via the web browser:

$ kubectl get svc istio-ingressgateway -n istio-system --no-headers | awk '{ print $4 }'
a16f7090c74ca11e9a1fb02cd763ca9e-362893117.eu-west-1.elb.amazonaws.com

Before you destroy your EKS cluster you should remove all installed components because Kubernetes service type LoadBalancer created AWS ELBs which will not get deleted and stay behind when you delete the EKS cluster:

kubectl label namespace default istio-injection-
kubectl delete -f https://raw.githubusercontent.com/berndonline/aws-eks-terraform/master/example/istio-loadgenerator.yml
kubectl delete -f https://raw.githubusercontent.com/berndonline/aws-eks-terraform/master/example/istio-hipster-shop.yml
kubectl delete -f https://raw.githubusercontent.com/berndonline/aws-eks-terraform/master/example/istio-manifest.yml

Finally to remove Istio from EKS you run the same Helm template command but do kubectl delete:

helm template istio-1.1.4/install/kubernetes/helm/istio --name istio --namespace istio-system  --set grafana.enabled=true --set tracing.enabled=true --set kiali.enabled=true --set kiali.dashboard.secretName=kiali --set kiali.dashboard.usernameKey=username --set kiali.dashboard.passphraseKey=passphrase | kubectl delete -f -

Very simple to get started with Istio Service Mesh on EKS and if I find some time I will give the Istio Multicluster a try and see how this works to span Istio service mesh across multiple Kubernetes clusters.
Running Istio Service Mesh on OpenShift

In the Kubernetes/OpenShift community everyone is talking about Istio service mesh, so I wanted to share my experience about the installation and running a sample microservice application with Istio on OpenShift 3.11 and 4.0. Service mesh on OpenShift is still at least a few month away from being available generally to run in production but this gives you the possibility to start testing and exploring Istio. I have found good documentation about installing Istio on OCP and OKD have a look for more information.

To install Istio on OpenShift 3.11 you need to apply the node and master prerequisites you see below; for OpenShift 4.0 and above you can skip these steps and go directly to the istio-operator installation:

sudo bash -c 'cat << EOF > /etc/origin/master/master-config.patch
admissionConfig:
  pluginConfig:
    MutatingAdmissionWebhook:
      configuration:
        apiVersion: apiserver.config.k8s.io/v1alpha1
        kubeConfigFile: /dev/null
        kind: WebhookAdmission
    ValidatingAdmissionWebhook:
      configuration:
        apiVersion: apiserver.config.k8s.io/v1alpha1
        kubeConfigFile: /dev/null
        kind: WebhookAdmission
EOF'
        
sudo cp -p /etc/origin/master/master-config.yaml /etc/origin/master/master-config.yaml.prepatch
sudo bash -c 'oc ex config patch /etc/origin/master/master-config.yaml.prepatch -p "$(cat /etc/origin/master/master-config.patch)" > /etc/origin/master/master-config.yaml'
sudo su -
master-restart api
master-restart controllers
exit       

sudo bash -c 'cat << EOF > /etc/sysctl.d/99-elasticsearch.conf 
vm.max_map_count = 262144
EOF'

sudo sysctl vm.max_map_count=262144

The Istio installation is straight forward by starting first to install the istio-operator:

oc new-project istio-operator
oc new-app -f https://raw.githubusercontent.com/Maistra/openshift-ansible/maistra-0.9/istio/istio_community_operator_template.yaml --param=OPENSHIFT_ISTIO_MASTER_PUBLIC_URL=<-master-public-hostname->

Verify the operator deployment:

oc logs -n istio-operator $(oc -n istio-operator get pods -l name=istio-operator --output=jsonpath={.items..metadata.name})

Once the operator is running we can start deploying Istio components by creating a custom resource:

cat << EOF >  ./istio-installation.yaml
apiVersion: "istio.openshift.com/v1alpha1"
kind: "Installation"
metadata:
  name: "istio-installation"
  namespace: istio-operator
EOF

oc create -n istio-operator -f ./istio-installation.yaml

Check and watch the Istio installation progress which might take a while to complete:

oc get pods -n istio-system -w

# The installation of the core components is finished when you see:
...
openshift-ansible-istio-installer-job-cnw72   0/1       Completed   0         4m

Afterwards, to finish off the Istio installation, we need to install the Kiali web console:

bash <(curl -L https://git.io/getLatestKialiOperator)
oc get route -n istio-system -l app=kiali

Verifying that all Istio components are running:

$ oc get pods -n istio-system
NAME                                          READY     STATUS      RESTARTS   AGE
elasticsearch-0                               1/1       Running     0          9m
grafana-74b5796d94-4ll5d                      1/1       Running     0          9m
istio-citadel-db879c7f8-kfxfk                 1/1       Running     0          11m
istio-egressgateway-6d78858d89-58lsd          1/1       Running     0          11m
istio-galley-6ff54d9586-8r7cl                 1/1       Running     0          11m
istio-ingressgateway-5dcf9fdf4b-4fjj5         1/1       Running     0          11m
istio-pilot-7ccf64f659-ghh7d                  2/2       Running     0          11m
istio-policy-6c86656499-v45zr                 2/2       Running     3          11m
istio-sidecar-injector-6f696b8495-8qqjt       1/1       Running     0          11m
istio-telemetry-686f78b66b-v7ljf              2/2       Running     3          11m
jaeger-agent-k4tpz                            1/1       Running     0          9m
jaeger-collector-64bc5678dd-wlknc             1/1       Running     0          9m
jaeger-query-776d4d754b-8z47d                 1/1       Running     0          9m
kiali-5fd946b855-7lw2h                        1/1       Running     0          2m
openshift-ansible-istio-installer-job-cnw72   0/1       Completed   0          13m
prometheus-75b849445c-l7rlr                   1/1       Running     0          11m

Let’s start to deploy the microservice application example by using the Google Hipster Shop, it contains multiple microservices which is great to test with Istio:

# Create new project
oc new-project hipster-shop

# Set permissions to allow Istio to deploy the Envoy-Proxy side-car container
oc adm policy add-scc-to-user anyuid -z default -n hipster-shop
oc adm policy add-scc-to-user privileged -z default -n hipster-shop

# Create Hipster Shop deployments and Istio services
oc create -f https://raw.githubusercontent.com/berndonline/openshift-ansible/master/examples/istio-hipster-shop.yml
oc create -f https://raw.githubusercontent.com/berndonline/openshift-ansible/master/examples/istio-manifest.yml

# Wait and check that all pods are running before creating the load generator
oc get pods -n hipster-shop -w

# Create load generator deployment
oc create -f https://raw.githubusercontent.com/berndonline/openshift-ansible/master/examples/istio-loadgenerator.yml

As you see below each pod has a sidecar container with the Istio Envoy proxy which handles pod traffic:

[centos@ip-172-26-1-167 ~]$ oc get pods
NAME                                     READY     STATUS    RESTARTS   AGE
adservice-7894dbfd8c-g4m9v               2/2       Running   0          49m
cartservice-758d66c648-79fj4             2/2       Running   4          49m
checkoutservice-7b9dc8b755-h2b2v         2/2       Running   0          49m
currencyservice-7b5c5f48fc-gtm9x         2/2       Running   0          49m
emailservice-79578566bb-jvwbw            2/2       Running   0          49m
frontend-6497c5f748-5fc4f                2/2       Running   0          49m
loadgenerator-764c5547fc-sw6mg           2/2       Running   0          40m
paymentservice-6b989d657c-klp4d          2/2       Running   0          49m
productcatalogservice-5bfbf4c77c-cw676   2/2       Running   0          49m
recommendationservice-c947d84b5-svbk8    2/2       Running   0          49m
redis-cart-79d84748cf-cvg86              2/2       Running   0          49m
shippingservice-6ccb7d8ff7-66v8m         2/2       Running   0          49m
[centos@ip-172-26-1-167 ~]$

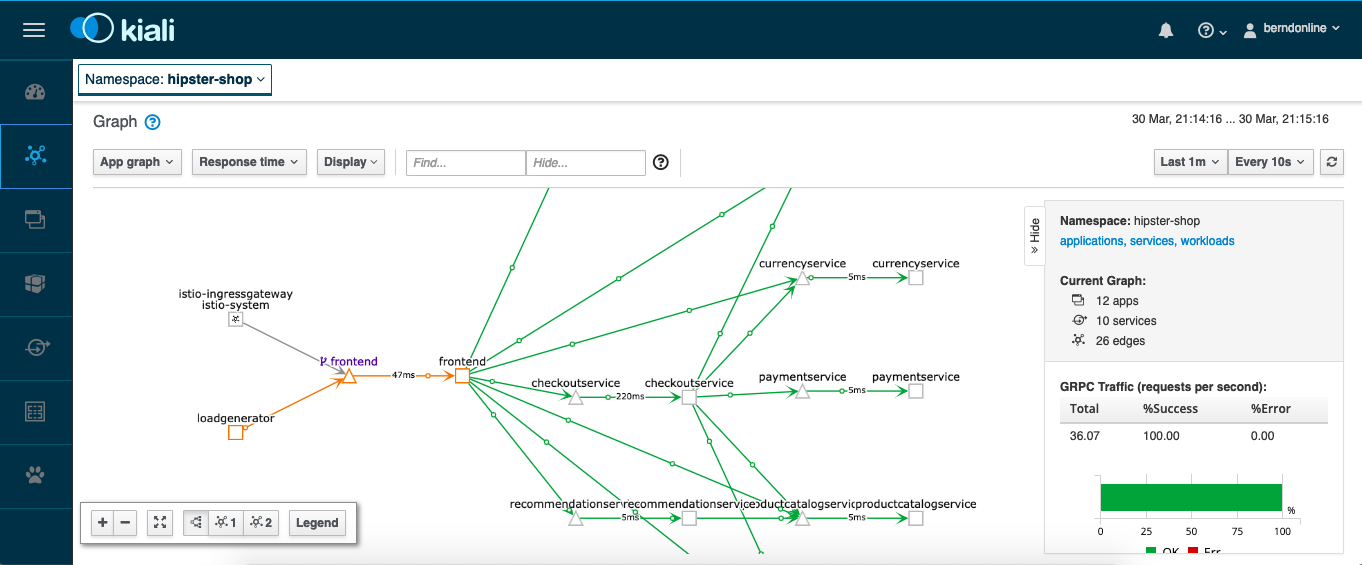
The Kiali web console answers the question about what microservices are part of the service mesh and how are they connected which gives you a great level of detail about the traffic flows:

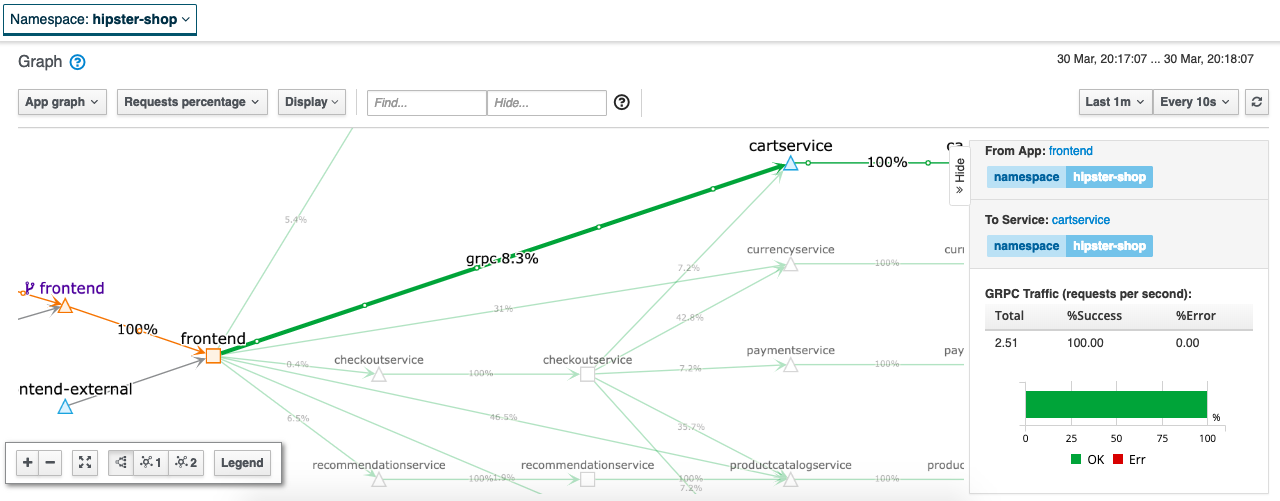
Detailed traffic flow view:

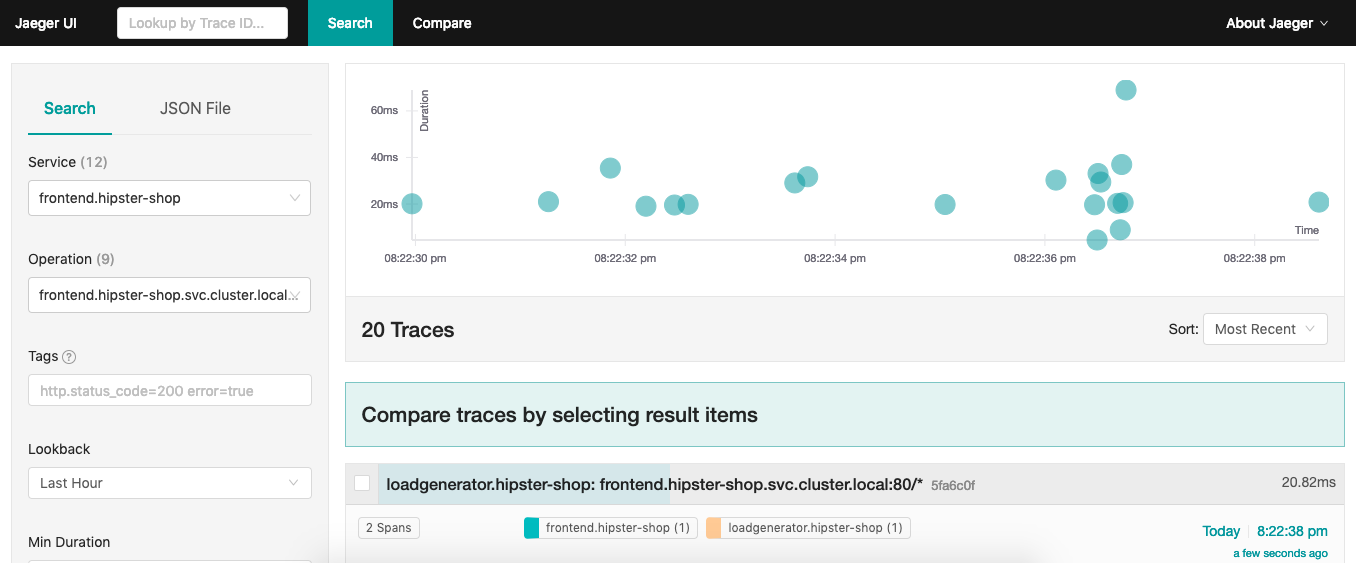
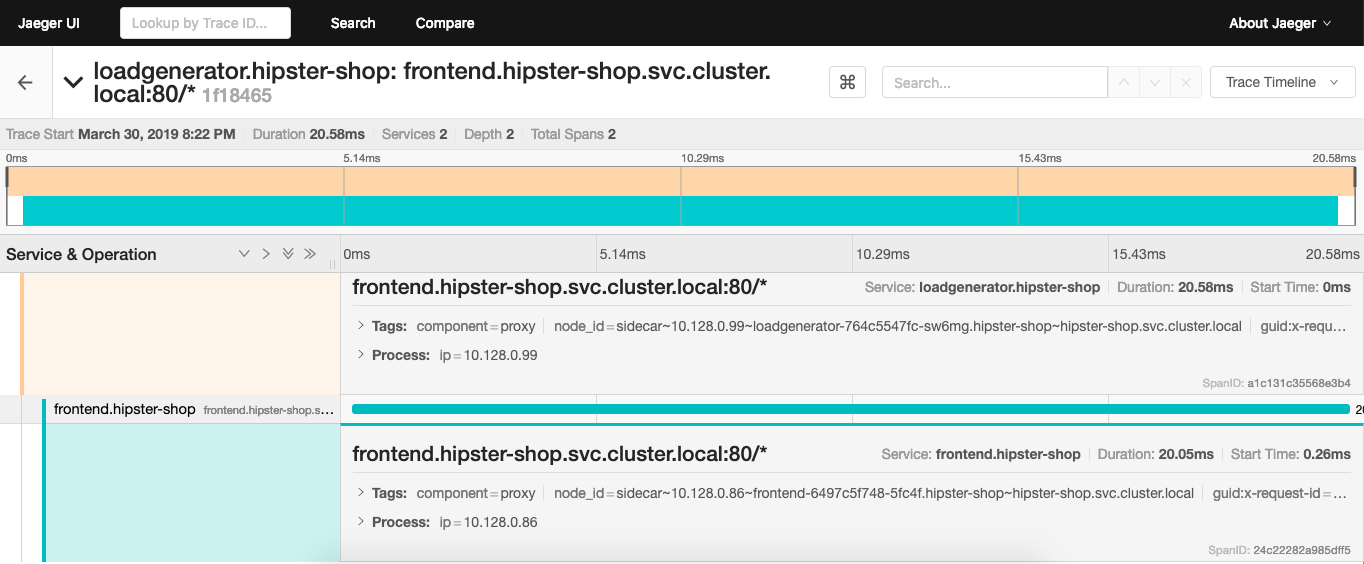
The Isito installation comes with Jaeger which is an open source tracing tool to monitor and troubleshoot transactions:

Enough about this, lets connect to our cool Hipster Shop and happy shopping:

Additionally there is another example, the Istio Bookinfo if you want to try something smaller and less complex:

oc new-project myproject

oc adm policy add-scc-to-user anyuid -z default -n myproject
oc adm policy add-scc-to-user privileged -z default -n myproject

oc apply -n myproject -f https://raw.githubusercontent.com/Maistra/bookinfo/master/bookinfo.yaml
oc apply -n myproject -f https://raw.githubusercontent.com/Maistra/bookinfo/master/bookinfo-gateway.yaml
export GATEWAY_URL=$(oc get route -n istio-system istio-ingressgateway -o jsonpath='{.spec.host}')
curl -o /dev/null -s -w "%{http_code}\n" http://$GATEWAY_URL/productpage

curl -o destination-rule-all.yaml https://raw.githubusercontent.com/istio/istio/release-1.0/samples/bookinfo/networking/destination-rule-all.yaml
oc apply -f destination-rule-all.yaml

curl -o destination-rule-all-mtls.yaml https://raw.githubusercontent.com/istio/istio/release-1.0/samples/bookinfo/networking/destination-rule-all-mtls.yaml
oc apply -f destination-rule-all-mtls.yaml

oc get destinationrules -o yaml

I hope this is a useful article for getting started with Istio service mesh on OpenShift.