Build Ansible Tower Container

After creating my Jenkins container I thought it would be fun to run Ansible Tower in a container so I created a simple Dockerfile. First you need find out the latest Ansible Tower version: https://releases.ansible.com/ansible-tower/setup/ and update the version variable in the Dockerfile.

Here is my Dockerfile:

...
ARG ANSIBLE_TOWER_VER=3.3.1-1
...

The passwords can be changed in the inventory file:

...
[all:vars]
admin_password='<-your-password->'
...
pg_password='<-your-password->'
...
rabbitmq_password='<-your-password->'
...

Let’s start by building the container:

git clone https://github.com/berndonline/ansible-tower-docker.git && cd ansible-tower-docker/
docker build -t berndonline/ansible-tower .

The docker build will take a few minutes, just wait and look out for errors you might have in the build:

berndonline@lab:~$ git clone https://github.com/berndonline/ansible-tower-docker.git
Cloning into 'ansible-tower-docker'...
remote: Enumerating objects: 17, done.
remote: Counting objects: 100% (17/17), done.
remote: Compressing objects: 100% (11/11), done.
remote: Total 17 (delta 4), reused 14 (delta 4), pack-reused 0
Unpacking objects: 100% (17/17), done.
berndonline@lab:~$ cd ansible-tower-docker/
berndonline@lab:~/ansible-tower-docker$ docker build -t berndonline/ansible-tower .
Sending build context to Docker daemon  87.04kB
Step 1/31 : FROM ubuntu:16.04
16.04: Pulling from library/ubuntu
7b8b6451c85f: Pull complete
ab4d1096d9ba: Pull complete
e6797d1788ac: Pull complete
e25c5c290bde: Pull complete
Digest: sha256:e547ecaba7d078800c358082088e6cc710c3affd1b975601792ec701c80cdd39
Status: Downloaded newer image for ubuntu:16.04
 ---> a51debf7e1eb
Step 2/31 : USER root
 ---> Running in cf5d606130cc
Removing intermediate container cf5d606130cc
 ---> d5b11ed84885
Step 3/31 : WORKDIR /opt
 ---> Running in 1e6703cec6db
Removing intermediate container 1e6703cec6db
 ---> 045cf04ebc1d
Step 4/31 : ARG ANSIBLE_TOWER_VER=3.3.1-1
 ---> Running in 6d65bfe370d4
Removing intermediate container 6d65bfe370d4
 ---> d75c246c3a5c
Step 5/31 : ARG PG_DATA=/var/lib/postgresql/9.6/main
 ---> Running in e8856051aa92
Removing intermediate container e8856051aa92
 ---> 02e6d7593df8

...

PLAY [Install Tower isolated node(s)] ******************************************
skipping: no hosts matched

PLAY RECAP *********************************************************************
localhost                  : ok=125  changed=64   unreachable=0    failed=0

The setup process completed successfully.
Setup log saved to /var/log/tower/setup-2018-11-21-20:21:37.log
Removing intermediate container ad6401292444
 ---> 8f1eb28f16cb
Step 27/31 : ADD entrypoint.sh /entrypoint.sh
 ---> 8503e666ce9c
Step 28/31 : RUN chmod +x /entrypoint.sh
 ---> Running in 8b5ca24a320a
Removing intermediate container 8b5ca24a320a
 ---> 60810dc2a4e3
Step 29/31 : VOLUME ["${PG_DATA}", "${AWX_PROJECTS}","/certs"]
 ---> Running in d836e5455bd5
Removing intermediate container d836e5455bd5
 ---> 3968430a1814
Step 30/31 : EXPOSE 80
 ---> Running in 9a72815e365b
Removing intermediate container 9a72815e365b
 ---> 3613ced2a80c
Step 31/31 : ENTRYPOINT ["/entrypoint.sh", "ansible-tower"]
 ---> Running in 4611a90aff1a
Removing intermediate container 4611a90aff1a
 ---> ce89ea0753d4
Successfully built ce89ea0753d4
Successfully tagged berndonline/ansible-tower:latest

Continue to create a Docker Volume container to store the Postgres database:

sudo docker create -v /var/lib/postgresql/9.6/main --name tower-data berndonline/ansible-tower /bin/true

Start the Ansible Tower Docker container:

sudo docker run -d -p 32456:80 --volumes-from tower-data --name ansible-tower --privileged --restart berndonline/ansible-tower

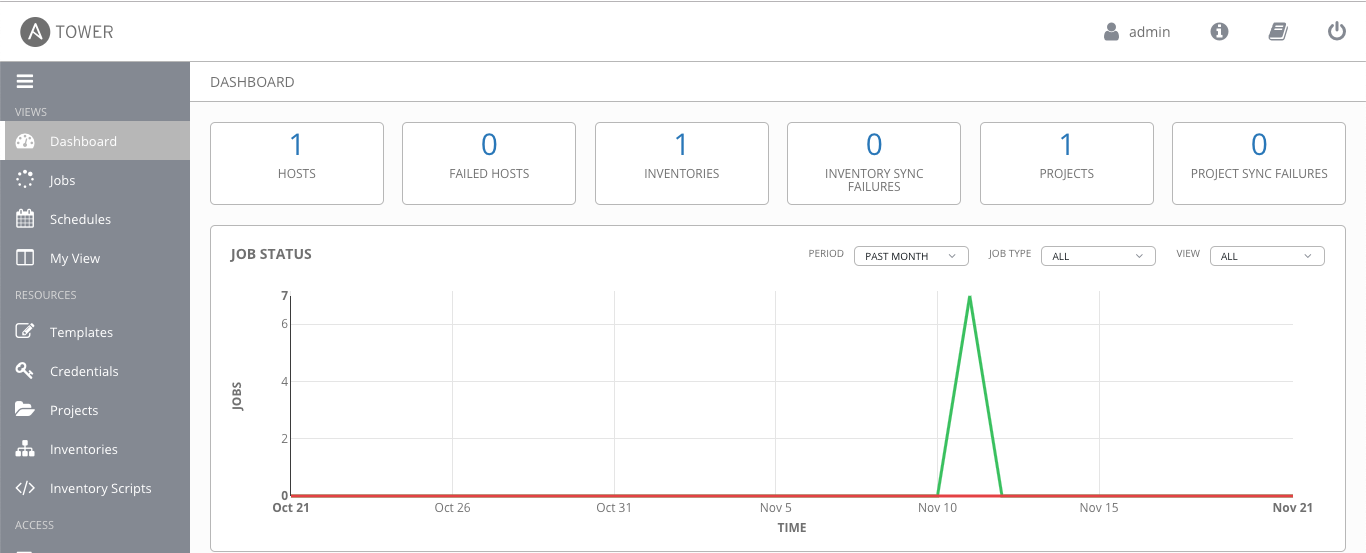
Afterwards you can connect to http://<your-ip-address>:32456/ and import your Tower license. Ansible provides a free 10 node license which you can request here: https://www.ansible.com/license.

The Ansible Tower playbook installs an Nginx reverse proxy and you can enable SSL by setting the variable nginx_disable_https to false in the inventory file, and publish the container via 443 instead of 80.

Please share your feedback and leave a comment.

Build Jenkins Container with Terraform and Ansible

I thought it might be interesting to show how to build a Docker container running Jenkins and tools like Terraform and Ansible. I am planning to use a Jenkins pipeline to deploy my OpenShift 3.11 example on AWS using Terraform and Ansible but more about this in the next post.

I am using the source Dockerfile from Jenkins and modified it, and added Ansible and Terraform: https://github.com/jenkinsci/docker. Below you see a few variables you might need to change depending on the version you are trying to use or where to place the volume mount. Have a look here for the latest Jenkins version: https://updates.jenkins-ci.org/download/war/.

Here is my Dockerfile:

...
ARG JENKINS_HOME=/var/jenkins_home
...
ENV TERRAFORM_VERSION=0.11.10
... 
ARG JENKINS_VERSION=2.151
ENV JENKINS_VERSION $JENKINS_VERSION
...
ARG JENKINS_SHA=a4335cc626c1f64da61a20174af654283d171b255a928bbacb6402a315e213d7
...

Let’s start and clone my Jenkins Docker repository  and run docker build:

git clone https://github.com/berndonline/jenkins-docker.git && cd ./jenkins-docker/
docker build -t berndonline/jenkins .

The docker build will take a few minutes, just wait and look out for error you might have with the build:

berndonline@lab:~/jenkins-docker$ docker build -t berndonline/jenkins .
Sending build context to Docker daemon  141.3kB
Step 1/51 : FROM openjdk:8-jdk
8-jdk: Pulling from library/openjdk
54f7e8ac135a: Pull complete
d6341e30912f: Pull complete
087a57faf949: Pull complete
5d71636fb824: Pull complete
9da6b28682cf: Pull complete
203f1094a1e2: Pull complete
ee38d9f85cf6: Pull complete
7f692fae02b6: Pull complete
eaa976dc543c: Pull complete
Digest: sha256:94bbc3357f995dd37986d8da0f079a9cd4b99969a3c729bad90f92782853dea7
Status: Downloaded newer image for openjdk:8-jdk
 ---> c14ba9d23b3a
Step 2/51 : USER root
 ---> Running in c78f75ca3d5a
Removing intermediate container c78f75ca3d5a
 ---> f2c6bb7538ea
Step 3/51 : RUN apt-get update && apt-get install -y git curl && rm -rf /var/lib/apt/lists/*
 ---> Running in 4cc857e12f50
Ign:1 http://deb.debian.org/debian stretch InRelease
Get:2 http://security.debian.org/debian-security stretch/updates InRelease [94.3 kB]
Get:3 http://deb.debian.org/debian stretch-updates InRelease [91.0 kB]
Get:4 http://deb.debian.org/debian stretch Release [118 kB]
Get:5 http://security.debian.org/debian-security stretch/updates/main amd64 Packages [459 kB]
Get:6 http://deb.debian.org/debian stretch Release.gpg [2434 B]
Get:7 http://deb.debian.org/debian stretch-updates/main amd64 Packages [5152 B]
Get:8 http://deb.debian.org/debian stretch/main amd64 Packages [7089 kB]
Fetched 7859 kB in 1s (5540 kB/s)
Reading package lists...
Building dependency tree...

...

Step 49/51 : ENTRYPOINT ["/sbin/tini", "--", "/usr/local/bin/jenkins.sh"]
 ---> Running in 28da7c4bf90a
Removing intermediate container 28da7c4bf90a
 ---> f380f1a6f06f
Step 50/51 : COPY plugins.sh /usr/local/bin/plugins.sh
 ---> 82871f0df0dc
Step 51/51 : COPY install-plugins.sh /usr/local/bin/install-plugins.sh
 ---> feea9853af70
Successfully built feea9853af70
Successfully tagged berndonline/jenkins:latest
berndonline@lab:~/jenkins-docker$

The Docker container is successfully build:

berndonline@lab:~/jenkins-docker$ docker images
REPOSITORY                  TAG                 IMAGE ID            CREATED             SIZE
berndonline/jenkins         latest              cd1742c317fa        6 days ago          1.28GB

Let’s start the Docker container:

docker run -d -v /var/jenkins_home:/var/jenkins_home -p 32771:8080 -p 32770:50000 berndonline/jenkins

Quick check that the container is successfully created:

berndonline@lab:~/jenkins-docker$ docker ps
CONTAINER ID        IMAGE                 COMMAND                  CREATED             STATUS              PORTS                                               NAMES
7073fa9c0cd4        berndonline/jenkins   "/sbin/tini -- /usr/…"   5 days ago          Up 7 seconds        0.0.0.0:32771->8080/tcp, 0.0.0.0:32770->50000/tcp   jenkins

Afterwards you can connect to http://<your-ip-address>:32771/ and do the initial Jenkins configuration, like changing admin password and install needed plugins. I recommend putting an Nginx reverse proxy with SSL infront to secure Jenkins properly.

So what about updates or changing the configuration? – Pretty easy; because we are using a Docker bind mount to /var/jenkins_home/, all the Jenkins related data is stored on the local file system of your server and you can re-create or re-build the container at anytime.

I hope you like this article about how to create your down Jenkins Docker container. In my next post I will create a very simple Jenkins pipeline to deploy OpenShift 3.11 on AWS using Terraform.

Please share your feedback and leave a comment.

Getting started with OpenShift Container Platform

In the recent month I have spend a lot of time around networking and automation but I want to shift more towards running modern container platforms like Kubernetes or OpenShift which both are using networking services and as I have shared in one of my previous article about AVI software load balancer, it all fits nicely into networking in my opinion.

But before we start, please have a look at my previous article about Deploying OpenShift Origin Cluster using Ansible to create a small OpenShift platform for testing.

Create a bash completion file for oc commands:

[root@origin-master ~]# oc completion bash > /etc/bash_completion.d/oc
[root@origin-master ~]# . /etc/bash_completion.d/oc
  • Let’s start and login to OpenShift as a normal user account
[root@origin-master ~]# oc login https://console.lab.hostgate.net:8443/
The server is using a certificate that does not match its hostname: x509: certificate is valid for lab.hostgate.net, not console.lab.hostgate.net
You can bypass the certificate check, but any data you send to the server could be intercepted by others.
Use insecure connections? (y/n): y

Authentication required for https://console.lab.hostgate.net:8443 (openshift)
Username: demo
Password:
Login successful.

[root@origin-master ~]#

Instead of username and password use token which you can get from the web console:

oc login https://console.lab.hostgate.net:8443 --token=***hash token***
  • Now create the project where we want to run our web application:
[root@origin-master ~]# oc new-project webapp
Now using project "webapp" on server "https://console.lab.hostgate.net:8443".

You can add applications to this project with the 'new-app' command. For example, try:

    oc new-app centos/ruby-22-centos7~https://github.com/openshift/ruby-ex.git

to build a new example application in Ruby.
[root@origin-master ~]#

Afterwards we need to create a build configuration, in my example we use an external Dockerfile without starting the build directly:

[root@origin-master ~]#  oc new-build --name webapp-build --binary
warning: Cannot find git. Ensure that it is installed and in your path. Git is required to work with git repositories.
    * A Docker build using binary input will be created
      * The resulting image will be pushed to image stream "webapp-build:latest"
      * A binary build was created, use 'start-build --from-dir' to trigger a new build

--> Creating resources with label build=webapp-build ...
    imagestream "webapp-build" created
    buildconfig "webapp-build" created
--> Success
[root@origin-master ~]#

Create Dockerfile:

[root@origin-master ~]# vi Dockerfile

Copy and paste the line below into the Dockerfile:

FROM openshift/hello-openshift

Let’s continue and start the build from the Dockerfile we specified previously

[root@origin-master ~]#  oc start-build webapp-build --from-file=Dockerfile --follow
Uploading file "Dockerfile" as binary input for the build ...
build "webapp-build-1" started
Receiving source from STDIN as file Dockerfile
Pulling image openshift/hello-openshift ...
Step 1/3 : FROM openshift/hello-openshift
 ---> 7af3297a3fb4
Step 2/3 : ENV "OPENSHIFT_BUILD_NAME" "webapp-build-1" "OPENSHIFT_BUILD_NAMESPACE" "webapp"
 ---> Running in 422f63f69364
 ---> 2cd93085ec93
Removing intermediate container 422f63f69364
Step 3/3 : LABEL "io.openshift.build.name" "webapp-build-1" "io.openshift.build.namespace" "webapp"
 ---> Running in 0c3e6cce6f0b
 ---> cf178dda8238
Removing intermediate container 0c3e6cce6f0b
Successfully built cf178dda8238
Pushing image docker-registry.default.svc:5000/webapp/webapp-build:latest ...
Push successful
[root@origin-master ~]#

Alternatively you can directly inject the Dockerfile options in a single command and the build would start immediately:

[root@origin-master ~]#  oc new-build --name webapp-build -D $'FROM openshift/hello-openshift'
  • Create the web application
[root@origin-master ~]# oc new-app webapp-build
warning: Cannot find git. Ensure that it is installed and in your path. Git is required to work with git repositories.
--> Found image cf178dd (4 minutes old) in image stream "webapp/webapp-build" under tag "latest" for "webapp-build"

    * This image will be deployed in deployment config "webapp-build"
    * Ports 8080/tcp, 8888/tcp will be load balanced by service "webapp-build"
      * Other containers can access this service through the hostname "webapp-build"

--> Creating resources ...
    deploymentconfig "webapp-build" created
    service "webapp-build" created
--> Success
    Application is not exposed. You can expose services to the outside world by executing one or more of the commands below:
     'oc expose svc/webapp-build'
    Run 'oc status' to view your app.
[root@origin-master ~]#

As you see below, we are currently running a single pod:

[root@origin-master ~]#  oc get pod -o wide
NAME                   READY     STATUS      RESTARTS   AGE       IP            NODE
webapp-build-1-build   0/1       Completed   0          8m        10.131.0.27   origin-node-1
webapp-build-1-znk98   1/1       Running     0          3m        10.131.0.29   origin-node-1
[root@origin-master ~]#

Let’s check out endpoints and services:

[root@origin-master ~]# oc get ep
NAME           ENDPOINTS                           AGE
webapp-build   10.131.0.29:8080,10.131.0.29:8888   1m
[root@origin-master ~]# oc get svc
NAME           CLUSTER-IP     EXTERNAL-IP   PORT(S)             AGE
webapp-build   172.30.64.97           8080/TCP,8888/TCP   1m
[root@origin-master ~]#

Running a single pod is not great for redundancy, let’s scale out:

[root@origin-master ~]# oc scale --replicas=5 dc/webapp-build
deploymentconfig "webapp-build" scaled
[root@origin-master ~]#  oc get pod -o wide
NAME                   READY     STATUS      RESTARTS   AGE       IP            NODE
webapp-build-1-4fb98   1/1       Running     0          15s       10.130.0.47   origin-node-2
webapp-build-1-build   0/1       Completed   0          9m        10.131.0.27   origin-node-1
webapp-build-1-dw6ww   1/1       Running     0          15s       10.131.0.30   origin-node-1
webapp-build-1-lswhg   1/1       Running     0          15s       10.131.0.31   origin-node-1
webapp-build-1-z4nk9   1/1       Running     0          15s       10.130.0.46   origin-node-2
webapp-build-1-znk98   1/1       Running     0          4m        10.131.0.29   origin-node-1
[root@origin-master ~]#

We can check our endpoints and services again, and see that we have more endpoints and still one service:

[root@origin-master ~]# oc get ep
NAME           ENDPOINTS                                                        AGE
webapp-build   10.130.0.46:8080,10.130.0.47:8080,10.131.0.29:8080 + 7 more...   4m
[root@origin-master ~]# oc get svc
NAME           CLUSTER-IP     EXTERNAL-IP   PORT(S)             AGE
webapp-build   172.30.64.97           8080/TCP,8888/TCP   4m
[root@origin-master ~]#

OpenShift uses an internal DNS service called SkyDNS to expose services for internal communication:

[root@origin-master ~]# dig webapp-build.webapp.svc.cluster.local

; <<>> DiG 9.9.4-RedHat-9.9.4-61.el7 <<>> webapp-build.webapp.svc.cluster.local
;; global options: +cmd
;; Got answer:
;; ->>HEADER<<- opcode: QUERY, status: NOERROR, id: 20933
;; flags: qr aa rd ra; QUERY: 1, ANSWER: 1, AUTHORITY: 0, ADDITIONAL: 0

;; QUESTION SECTION:
;webapp-build.webapp.svc.cluster.local. IN A

;; ANSWER SECTION:
webapp-build.webapp.svc.cluster.local. 30 IN A	172.30.64.97

;; Query time: 1 msec
;; SERVER: 10.255.1.214#53(10.255.1.214)
;; WHEN: Sat Jun 30 08:58:19 UTC 2018
;; MSG SIZE  rcvd: 71

[root@origin-master ~]#
  • Let’s expose our web application so that it is accessible from the outside world:
[root@origin-master ~]# oc expose svc webapp-build
route "webapp-build" exposed
[root@origin-master ~]#

Connect with a browser to the URL you see under routes:

Modify the WebApp and inject variables via a config map into our application:

[root@origin-master ~]# oc create configmap webapp-map --from-literal=RESPONSE="My first OpenShift WebApp"
configmap "webapp-map" created
[root@origin-master ~]#

Afterwards we need to add the previously created config map to our environment

[root@origin-master ~]# oc env dc/webapp-build --from=configmap/webapp-map
deploymentconfig "webapp-build" updated
[root@origin-master ~]#

Now when we check our web application again you see that the new variables are injected into the pod and displayed:

I will share more about running OpenShift Container Platform and my experience in the coming month. I hope you find this article useful and please share your feedback and leave a comment.