Getting started with OpenShift Hive

If you don’t know OpenShift Hive I recommend having a look at the video of my talk at RedHat OpenShift Commons about OpenShift Hive where I also talk about how you can provision and manage the lifecycle of OpenShift 4 clusters using the Kubernetes API and the OpenShift Hive operator.

The Hive operator has three main components the admission controller,  the Hive controller and the Hive operator itself. For more information about the Hive architecture visit the Hive docs:
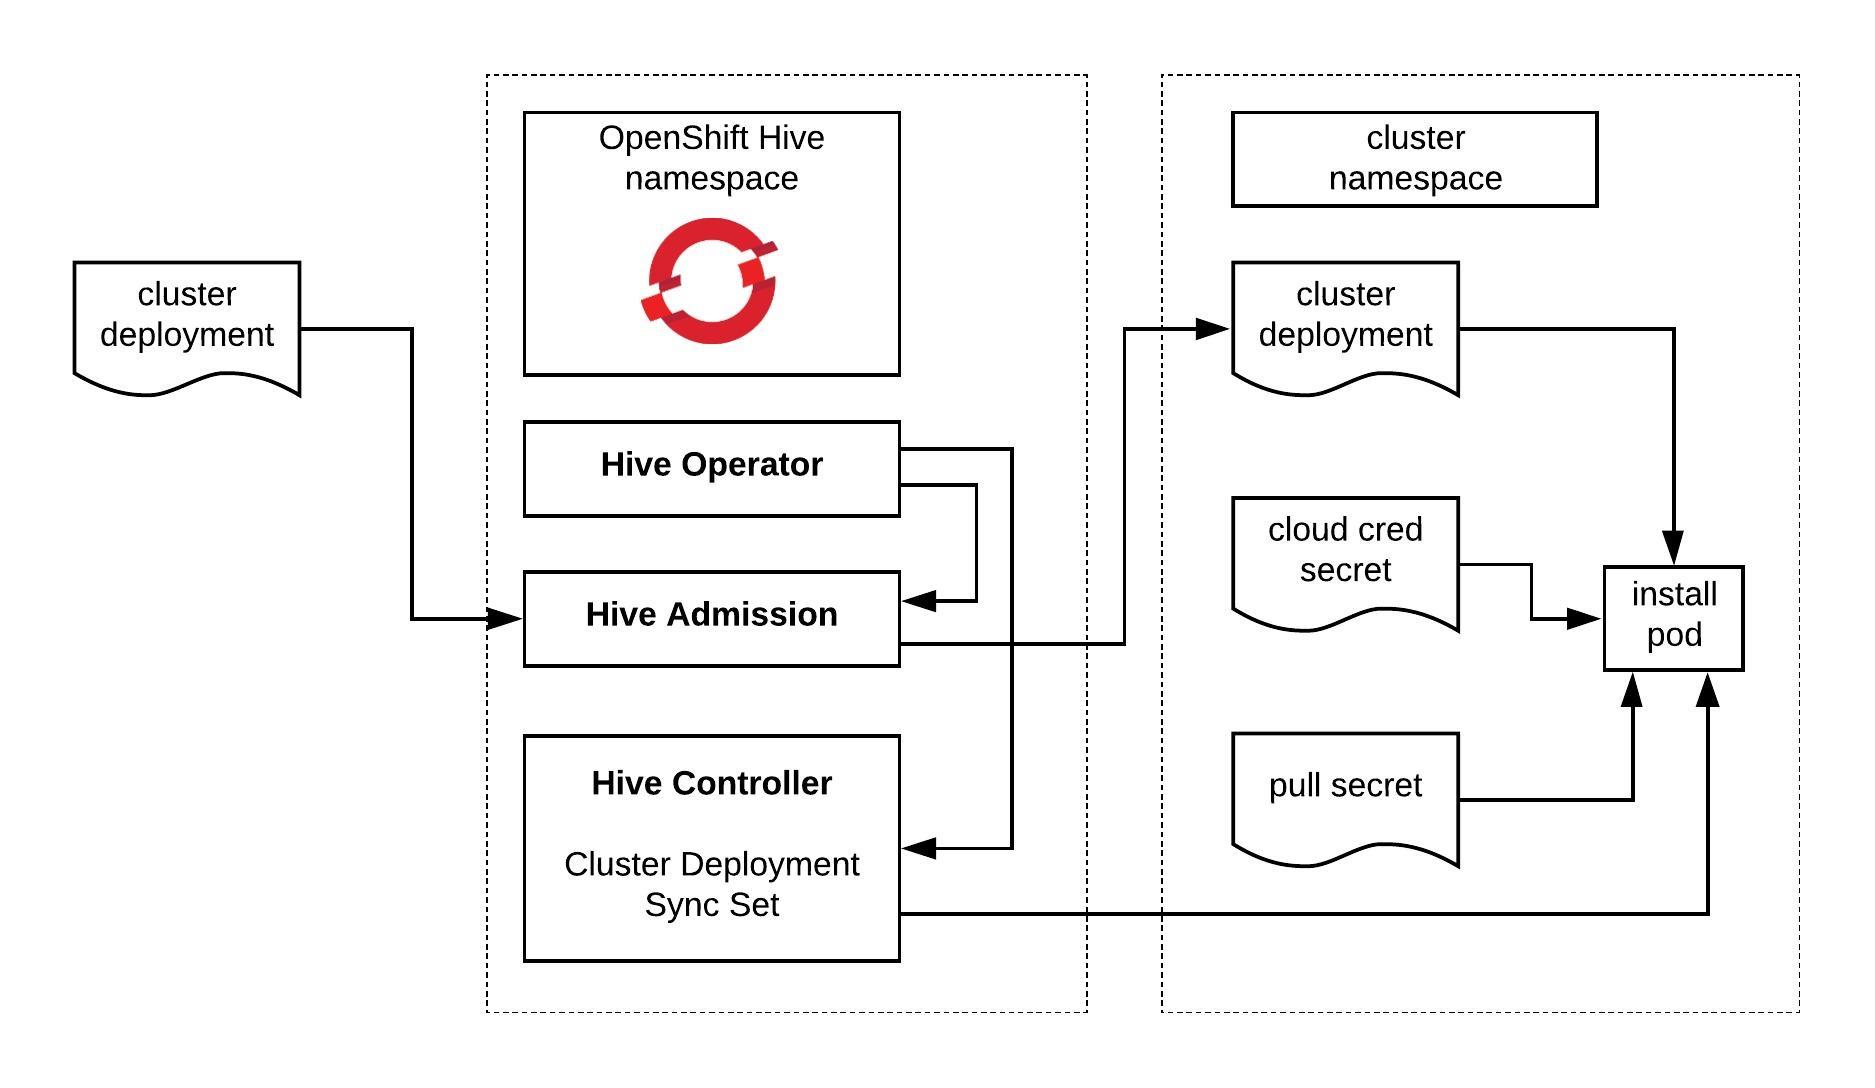
You can use an OpenShift or native Kubernetes cluster to run the operator, in my case I use a EKS cluster. Let’s go through the prerequisites which are required to generate the manifests and the hiveutil:

$ curl -s "https://raw.githubusercontent.com/\
> kubernetes-sigs/kustomize/master/hack/install_kustomize.sh"  | bash
$ sudo mv ./kustomize /usr/bin/
$ wget https://dl.google.com/go/go1.13.3.linux-amd64.tar.gz
$ tar -xvf go1.13.3.linux-amd64.tar.gz
$ sudo mv go /usr/local

To setup the Go environment copy the content below and add to your .profile:

export GOPATH="${HOME}/.go"
export PATH="$PATH:/usr/local/go/bin"
export PATH="$PATH:${GOPATH}/bin:${GOROOT}/bin"

Continue with installing the Go dependencies and clone the OpenShift Hive Github repository:

$ mkdir -p ~/.go/src/github.com/openshift/
$ go get github.com/golang/mock/mockgen
$ go get github.com/golang/mock/gomock
$ go get github.com/cloudflare/cfssl/cmd/cfssl
$ go get github.com/cloudflare/cfssl/cmd/cfssljson
$ cd ~/.go/src/github.com/openshift/
$ git clone https://github.com/openshift/hive.git
$ cd hive/
$ git checkout remotes/origin/master

Before we run make deploy I would recommend modifying the Makefile that we only generate the Hive manifests without deploying them to Kubernetes:

$ sed -i -e 's#oc apply -f config/crds# #' -e 's#kustomize build overlays/deploy | oc apply -f -#kustomize build overlays/deploy > hive.yaml#' Makefile
$ make deploy
# The apis-path is explicitly specified so that CRDs are not created for v1alpha1
go run tools/vendor/sigs.k8s.io/controller-tools/cmd/controller-gen/main.go crd --apis-path=pkg/apis/hive/v1
CRD files generated, files can be found under path /home/ubuntu/.go/src/github.com/openshift/hive/config/crds.
go generate ./pkg/... ./cmd/...
hack/update-bindata.sh
# Deploy the operator manifests:
mkdir -p overlays/deploy
cp overlays/template/kustomization.yaml overlays/deploy
cd overlays/deploy && kustomize edit set image registry.svc.ci.openshift.org/openshift/hive-v4.0:hive=registry.svc.ci.openshift.org/openshift/hivev1:hive
kustomize build overlays/deploy > hive.yaml
rm -rf overlays/deploy

Quick look at the content of the hive.yaml manifest:

$ cat hive.yaml
apiVersion: v1
kind: Namespace
metadata:
  name: hive
---
apiVersion: v1
kind: ServiceAccount
metadata:
  name: hive-operator
  namespace: hive

...

---
apiVersion: apps/v1
kind: Deployment
metadata:
  labels:
    control-plane: hive-operator
    controller-tools.k8s.io: "1.0"
  name: hive-operator
  namespace: hive
spec:
  replicas: 1
  revisionHistoryLimit: 4
  selector:
    matchLabels:
      control-plane: hive-operator
      controller-tools.k8s.io: "1.0"
  template:
    metadata:
      labels:
        control-plane: hive-operator
        controller-tools.k8s.io: "1.0"
    spec:
      containers:
      - command:
        - /opt/services/hive-operator
        - --log-level
        - info
        env:
        - name: CLI_CACHE_DIR
          value: /var/cache/kubectl
        image: registry.svc.ci.openshift.org/openshift/hive-v4.0:hive
        imagePullPolicy: Always
        livenessProbe:
          failureThreshold: 1
          httpGet:
            path: /debug/health
            port: 8080
          initialDelaySeconds: 10
          periodSeconds: 10
        name: hive-operator
        resources:
          requests:
            cpu: 100m
            memory: 256Mi
        volumeMounts:
        - mountPath: /var/cache/kubectl
          name: kubectl-cache
      serviceAccountName: hive-operator
      terminationGracePeriodSeconds: 10
      volumes:
      - emptyDir: {}
        name: kubectl-cache

Now we can apply the Hive custom resource definition (crds):

$ kubectl apply -f ./config/crds/
customresourcedefinition.apiextensions.k8s.io/checkpoints.hive.openshift.io created
customresourcedefinition.apiextensions.k8s.io/clusterdeployments.hive.openshift.io created
customresourcedefinition.apiextensions.k8s.io/clusterdeprovisions.hive.openshift.io created
customresourcedefinition.apiextensions.k8s.io/clusterimagesets.hive.openshift.io created
customresourcedefinition.apiextensions.k8s.io/clusterprovisions.hive.openshift.io created
customresourcedefinition.apiextensions.k8s.io/clusterstates.hive.openshift.io created
customresourcedefinition.apiextensions.k8s.io/dnszones.hive.openshift.io created
customresourcedefinition.apiextensions.k8s.io/hiveconfigs.hive.openshift.io created
customresourcedefinition.apiextensions.k8s.io/machinepools.hive.openshift.io created
customresourcedefinition.apiextensions.k8s.io/selectorsyncidentityproviders.hive.openshift.io created
customresourcedefinition.apiextensions.k8s.io/selectorsyncsets.hive.openshift.io created
customresourcedefinition.apiextensions.k8s.io/syncidentityproviders.hive.openshift.io created
customresourcedefinition.apiextensions.k8s.io/syncsets.hive.openshift.io created
customresourcedefinition.apiextensions.k8s.io/syncsetinstances.hive.openshift.io created

And continue to apply the hive.yaml manifest for deploying the OpenShift Hive operator and its components:

$ kubectl apply -f hive.yaml
namespace/hive created
serviceaccount/hive-operator created
clusterrole.rbac.authorization.k8s.io/hive-frontend created
clusterrole.rbac.authorization.k8s.io/hive-operator-role created
clusterrole.rbac.authorization.k8s.io/manager-role created
clusterrole.rbac.authorization.k8s.io/system:openshift:hive:hiveadmission created
rolebinding.rbac.authorization.k8s.io/extension-server-authentication-reader-hiveadmission created
clusterrolebinding.rbac.authorization.k8s.io/auth-delegator-hiveadmission created
clusterrolebinding.rbac.authorization.k8s.io/hive-frontend created
clusterrolebinding.rbac.authorization.k8s.io/hive-operator-rolebinding created
clusterrolebinding.rbac.authorization.k8s.io/hiveadmission-hive-hiveadmission created
clusterrolebinding.rbac.authorization.k8s.io/hiveapi-cluster-admin created
clusterrolebinding.rbac.authorization.k8s.io/manager-rolebinding created
deployment.apps/hive-operator created

For the Hive admission controller you need to generate a SSL certifcate:

$ ./hack/hiveadmission-dev-cert.sh
~/Dropbox/hive/hiveadmission-certs ~/Dropbox/hive
2020/02/03 22:17:30 [INFO] generate received request
2020/02/03 22:17:30 [INFO] received CSR
2020/02/03 22:17:30 [INFO] generating key: ecdsa-256
2020/02/03 22:17:30 [INFO] encoded CSR
certificatesigningrequest.certificates.k8s.io/hiveadmission.hive configured
certificatesigningrequest.certificates.k8s.io/hiveadmission.hive approved
-----BEGIN CERTIFICATE-----
MIICaDCCAVCgAwIBAgIQHvvDPncIWHRcnDzzoWGjQDANBgkqhkiG9w0BAQsFADAv
MS0wKwYDVQQDEyRiOTk2MzhhNS04OWQyLTRhZTAtYjI4Ny1iMWIwOGNmOGYyYjAw
HhcNMjAwMjAzMjIxNTA3WhcNMjUwMjAxMjIxNTA3WjAhMR8wHQYDVQQDExZoaXZl
YWRtaXNzaW9uLmhpdmUuc3ZjMFkwEwYHKoZIzj0CAQYIKoZIzj0DAQcDQgAEea4N
UPbvzM3VdtOkdJ7lBytekRTvwGMqs9HgG14CtqCVCOFq8f+BeqqyrRbJsX83iBfn
gMc54moElb5kIQNjraNZMFcwDAYDVR0TAQH/BAIwADBHBgNVHREEQDA+ghZoaXZl
YWRtaXNzaW9uLmhpdmUuc3ZjgiRoaXZlYWRtaXNzaW9uLmhpdmUuc3ZjLmNsdXN0
ZXIubG9jYWwwDQYJKoZIhvcNAQELBQADggEBADhgT3tNnFs6hBIZFfWmoESe6nnZ
fy9GmlmF9qEBo8FZSk/LYvV0peOdgNZCHqsT2zaJjxULqzQ4zfSb/koYpxeS4+Bf
xwgHzIB/ylzf54wVkILWUFK3GnYepG5dzTXS7VHc4uiNJe0Hwc5JI4HBj7XdL3C7
cbPm7T2cBJi2jscoCWELWo/0hDxkcqZR7rdeltQQ+Uhz87LhTTqlknAMFzL7tM/+
pJePZMQgH97vANsbk97bCFzRZ4eABYSiN0iAB8GQM5M+vK33ZGSVQDJPKQQYH6th
Kzi9wrWEeyEtaWozD5poo9s/dxaLxFAdPDICkPB2yr5QZB+NuDgA+8IYffo=
-----END CERTIFICATE-----
secret/hiveadmission-serving-cert created
~/Dropbox/hive

Afterwards we can check if all the pods are running, this might take a few seconds:

$ kubectl get pods -n hive
NAME                                READY   STATUS    RESTARTS   AGE
hive-controllers-7c6ccc84b9-q7k7m   1/1     Running   0          31s
hive-operator-f9f4447fd-jbmkh       1/1     Running   0          55s
hiveadmission-6766c5bc6f-9667g      1/1     Running   0          27s
hiveadmission-6766c5bc6f-gvvlq      1/1     Running   0          27s

The Hive operator is successfully installed on your Kubernetes cluster but we are not finished yet. To create the required Cluster Deployment manifests we need to generate the hiveutil binary:

$ make hiveutil
go generate ./pkg/... ./cmd/...
hack/update-bindata.sh
go build -o bin/hiveutil github.com/openshift/hive/contrib/cmd/hiveutil

To generate Hive Cluster Deployment manifests just run the following hiveutil command below, I output the definition with -o into yaml:

$ bin/hiveutil create-cluster --base-domain=mydomain.example.com --cloud=aws mycluster -o yaml
apiVersion: v1
items:
- apiVersion: hive.openshift.io/v1
  kind: ClusterImageSet
  metadata:
    creationTimestamp: null
    name: mycluster-imageset
  spec:
    releaseImage: quay.io/openshift-release-dev/ocp-release:4.3.2-x86_64
  status: {}
- apiVersion: v1
  kind: Secret
  metadata:
    creationTimestamp: null
    name: mycluster-aws-creds
  stringData:
    aws_access_key_id: <-YOUR-AWS-ACCESS-KEY->
    aws_secret_access_key: <-YOUR-AWS-SECRET-KEY->
  type: Opaque
- apiVersion: v1
  data:
    install-config.yaml: <-BASE64-ENCODED-OPENSHIFT4-INSTALL-CONFIG->
  kind: Secret
  metadata:
    creationTimestamp: null
    name: mycluster-install-config
  type: Opaque
- apiVersion: hive.openshift.io/v1
  kind: ClusterDeployment
  metadata:
    creationTimestamp: null
    name: mycluster
  spec:
    baseDomain: mydomain.example.com
    clusterName: mycluster
    controlPlaneConfig:
      servingCertificates: {}
    installed: false
    platform:
      aws:
        credentialsSecretRef:
          name: mycluster-aws-creds
        region: us-east-1
    provisioning:
      imageSetRef:
        name: mycluster-imageset
      installConfigSecretRef:
        name: mycluster-install-config
  status:
    clusterVersionStatus:
      availableUpdates: null
      desired:
        force: false
        image: ""
        version: ""
      observedGeneration: 0
      versionHash: ""
- apiVersion: hive.openshift.io/v1
  kind: MachinePool
  metadata:
    creationTimestamp: null
    name: mycluster-worker
  spec:
    clusterDeploymentRef:
      name: mycluster
    name: worker
    platform:
      aws:
        rootVolume:
          iops: 100
          size: 22
          type: gp2
        type: m4.xlarge
    replicas: 3
  status:
    replicas: 0
kind: List
metadata: {}

I hope this post is useful in getting you started with OpenShift Hive. In my next article I will go through the details of the OpenShift 4 cluster deployment with Hive.

Read my new article about OpenShift / OKD 4.x Cluster Deployment using OpenShift Hive

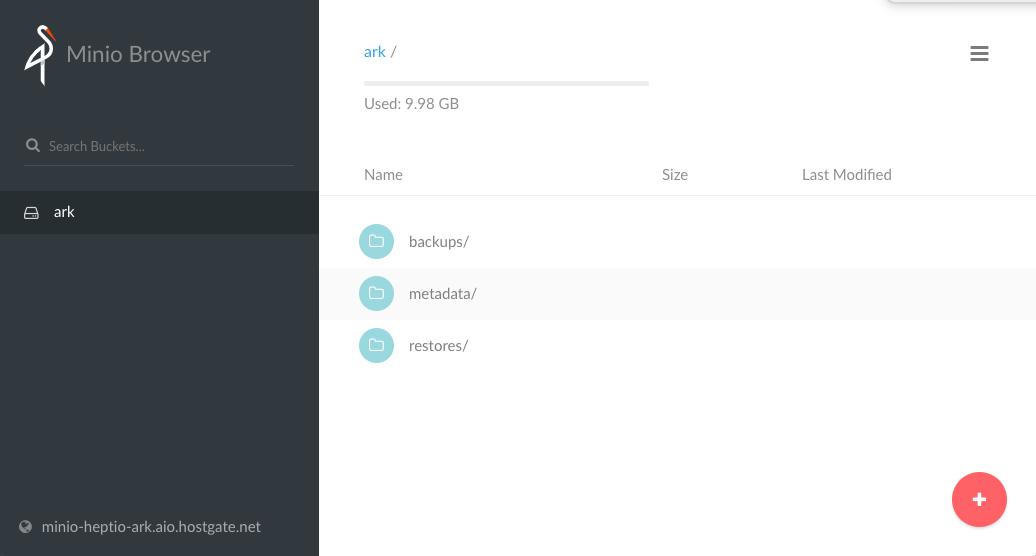
How to backup OpenShift with Heptio Velero(Ark)

I have found an interesting open source tool called Heptio Velero previously known as Heptio Ark which is able to backup Kubernetes and OpenShift container platforms. The tool mainly does this via the API and backup namespace objects and additionally is able to create snapshots for PVs on Azure, AWS and GCP.

The user uses the ark command line utility to create and restore backups.

The installation on Velero is super simple, just follow the steps below:

# Download and extract the latest Velero release from github
wget https://github.com/heptio/velero/releases/download/v0.10.1/ark-v0.10.1-linux-amd64.tar.gz
tar -xzf ark-v0.10.1-linux-amd64.tar.gz -c ./velero/

# Move the ark binary to somewhere in your PATH
mv ./velero/ark /usr/sbin/

# The last two commands create namespace and applies configuration
oc create -f ./velero/config/common/00-prereqs.yaml
oc create -f ./velero/config/minio/

You can expose Minio to access the web console from the outside.

# Create route
oc expose service minio

# View access and secret key to login via the web console
oc describe deployment.apps/minio | grep -i Environment -A2
    Environment:
      MINIO_ACCESS_KEY:  minio
      MINIO_SECRET_KEY:  minio123

Here a few command options on how to backup objects:

# Create a backup for any object that matches the app=pod label selector:
ark backup create <backup-name> --selector <key>=<value> 

# Alternatively if you want to backup all objects except those matching the label backup=ignore:
ark backup create <backup-name> --selector 'backup notin (ignore)'

# Create regularly scheduled backups based on a cron expression using the app=pod label selector:
ark schedule create <backup-name> --schedule="0 1 * * *" --selector <key>=<value>

# Create a backup for a namespace:
ark backup create <backup-name> --include-namespaces <namespace-name>

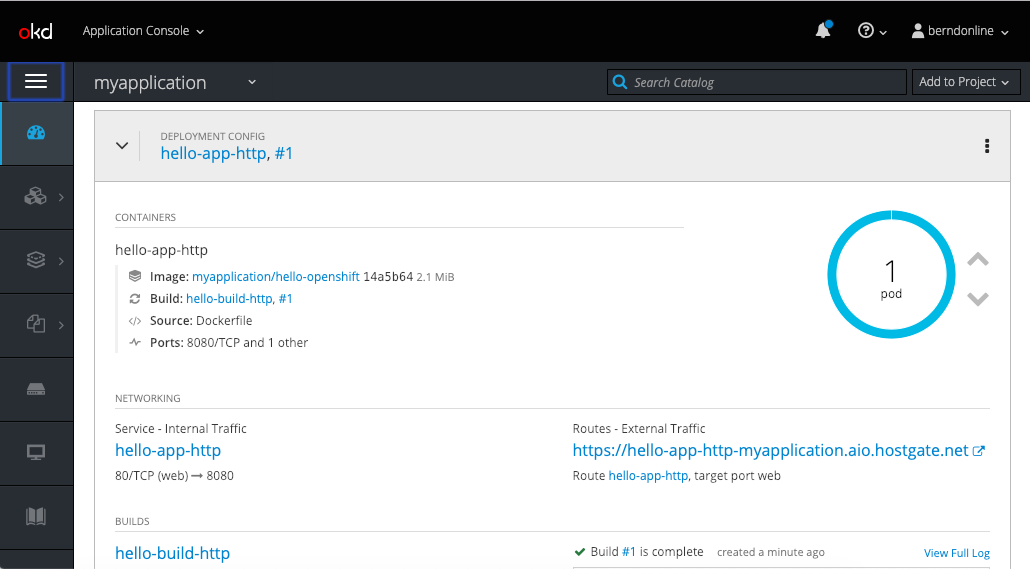
Let’s do a backup and restore tests; I have created a new OpenShift project with a simple hello-openshift build- and deployment-config:

[root@master1 ~]# ark backup create mybackup --include-namespaces myapplication
Backup request "mybackup" submitted successfully.
Run `ark backup describe mybackup` or `ark backup logs mybackup` for more details.
[root@master1 ~]# ark backup get
NAME          STATUS      CREATED                         EXPIRES   STORAGE LOCATION   SELECTOR
mybackup      Completed   2019-02-08 17:14:09 +0000 UTC   29d       default            

Once the backup has completed we can delete the project.

[root@master1 ~]# oc delete project myapplication
project.project.openshift.io "myapplication" deleted

Now let’s restore the project namespace from the previous created backup:

[root@master1 ~]# ark restore create --from-backup mybackup
Restore request "mybackup-20190208171745" submitted successfully.
Run `ark restore describe mybackup-20190208171745` or `ark restore logs mybackup-20190208171745` for more details.
[root@master1 ~]# ark restore get
NAME                         BACKUP        STATUS       WARNINGS   ERRORS    CREATED                         SELECTOR
mybackup-20190208171745      mybackup      InProgress   0          0         2019-02-08 17:17:45 +0000 UTC   
[root@master1 ~]# ark restore get
NAME                         BACKUP        STATUS      WARNINGS   ERRORS    CREATED                         SELECTOR
mybackup-20190208171745      mybackup      Completed   1          0         2019-02-08 17:17:45 +0000 UTC   

The project is back in the state it was when we created the backup.

[root@master1 ~]# oc get pods
NAME                     READY     STATUS    RESTARTS   AGE
hello-app-http-1-qn8jj   1/1       Running   0          2m
[root@master1 ~]# curl -k --insecure https://hello-app-http-myapplication.aio.hostgate.net/
Hello OpenShift!

There are a few issues around the restore which I have seen and I want to explain, I’m not sure if these are related to OpenShift in general or just the latest 3.11 version. The secrets for the builder account are missing or didn’t restore correctly and cannot be used.

[root@master1 ~]# oc get build
NAME                 TYPE      FROM         STATUS                               STARTED   DURATION
hello-build-http-1   Docker    Dockerfile   New (CannotRetrieveServiceAccount)
hello-build-http-2   Docker    Dockerfile   New
[root@master1 ~]# oc get events | grep Failed
1m          1m           2         hello-build-http.15816e39eefb637d         BuildConfig                                     Warning   BuildConfigInstantiateFailed   buildconfig-controller                                error instantiating Build from BuildConfig myapplication/hello-build-http (0): Error resolving ImageStreamTag hello-openshift-source:latest in namespace myapplication: imagestreams.image.openshift.io "hello-openshift-source" not found
1m          1m           6         hello-build-http.15816e39f446207f         BuildConfig                                     Warning   BuildConfigInstantiateFailed   buildconfig-controller                                error instantiating Build from BuildConfig myapplication/hello-build-http (0): Error resolving ImageStreamTag hello-openshift-source:latest in namespace myapplication: unable to find latest tagged image
1m          1m           1         hello-build-http.15816e3a49f21411         BuildConfig                                     Warning   BuildConfigInstantiateFailed   buildconfig-controller                                error instantiating Build from BuildConfig myapplication/hello-build-http (0): builds.build.openshift.io "hello-build-http-1" already exists
[root@master1 ~]# oc get secrets | grep builder
builder-token-5q646        kubernetes.io/service-account-token   4         5m

# OR
[root@master1 ~]# oc get build
NAME                 TYPE      FROM         STATUS                        STARTED   DURATION
hello-build-http-1   Docker    Dockerfile   Pending (MissingPushSecret)
hello-build-http-2   Docker    Dockerfile   New
[root@master1 ~]# oc get events | grep FailedMount
15m         19m          10        hello-build-http-1-build.15816cc22f35795c   Pod                                             Warning   FailedMount                    kubelet, ip-172-26-12-32.eu-west-1.compute.internal   MountVolume.SetUp failed for volume "builder-dockercfg-k55f6-push" : secrets "builder-dockercfg-k55f6" not found
15m         17m          2         hello-build-http-1-build.15816cdec9dc561a   Pod                                             Warning   FailedMount                    kubelet, ip-172-26-12-32.eu-west-1.compute.internal   Unable to mount volumes for pod "hello-build-http-1-build_myapplication(4c2f1113-2bb5-11e9-8a6b-0a007934f01e)": timeout expired waiting for volumes to attach or mount for pod "myapplication"/"hello-build-http-1-build". list of unmounted volumes=[builder-dockercfg-k55f6-push]. list of unattached volumes=[buildworkdir docker-socket crio-socket builder-dockercfg-k55f6-push builder-dockercfg-m6d2v-pull builder-token-sjvw5]
13m         13m          1         hello-build-http-1-build.15816d1e3e65ad2a   Pod                                             Warning   FailedMount                    kubelet, ip-172-26-12-32.eu-west-1.compute.internal   Unable to mount volumes for pod "hello-build-http-1-build_myapplication(4c2f1113-2bb5-11e9-8a6b-0a007934f01e)": timeout expired waiting for volumes to attach or mount for pod "myapplication"/"hello-build-http-1-build". list of unmounted volumes=[buildworkdir docker-socket crio-socket builder-dockercfg-k55f6-push builder-dockercfg-m6d2v-pull builder-token-sjvw5]. list of unattached volumes=[buildworkdir docker-socket crio-socket builder-dockercfg-k55f6-push builder-dockercfg-m6d2v-pull builder-token-sjvw5]
[root@master1 ~]# oc get secrets | grep builder
NAME                       TYPE                                  DATA      AGE
builder-dockercfg-m6d2v    kubernetes.io/dockercfg               1         5m
builder-token-4chx4        kubernetes.io/service-account-token   4         5m
builder-token-sjvw5        kubernetes.io/service-account-token   4         5m

The deployment config seems to be disconnected and doesn’t know the state of the running pod:

[root@ip-172-26-12-32 ~]# oc get dc
NAME             REVISION   DESIRED   CURRENT   TRIGGERED BY
hello-app-http   0          1         0         config,image(hello-openshift:latest)
[root@ip-172-26-12-32 ~]#

Here are the steps to recover out of this situation:

# First cancel all builds - the restore seems to have triggered a new build:
[root@master1 ~]# oc cancel-build $(oc get build --no-headers | awk '{ print $1 }')
build.build.openshift.io/hello-build-http-1 marked for cancellation, waiting to be cancelled
build.build.openshift.io/hello-build-http-2 marked for cancellation, waiting to be cancelled
build.build.openshift.io/hello-build-http-1 cancelled
build.build.openshift.io/hello-build-http-2 cancelled

# Delete all builds otherwise you will get later a problem because of duplicate name:
[root@master1 ~]# oc delete build $(oc get build --no-headers | awk '{ print $1 }')
build.build.openshift.io "hello-build-http-1" deleted
build.build.openshift.io "hello-build-http-2" deleted

# Delete the project builder account - this triggers openshift to re-create the builder
[root@master1 ~]# oc delete sa builder
serviceaccount "builder" deleted
[root@master1 ~]# oc get secrets | grep builder
builder-dockercfg-vwckw    kubernetes.io/dockercfg               1         24s
builder-token-dpgj9        kubernetes.io/service-account-token   4         24s
builder-token-lt7z2        kubernetes.io/service-account-token   4         24s

# Start the build and afterwards do a rollout for the deployment config:
[root@master1 ~]# oc start-build hello-build-http
build.build.openshift.io/hello-build-http-3 started
[root@master1 ~]# oc rollout latest dc/hello-app-http
deploymentconfig.apps.openshift.io/hello-app-http rolled out

After doing all this your build- and deployment-config is back synchronised.

[root@master1 ~]# oc get dc
NAME             REVISION   DESIRED   CURRENT   TRIGGERED BY
hello-app-http   3          1         1         config,image(hello-openshift:latest)

My feedback about Heptio Velero(Ark); apart from the restore issues with the build- and deployment-config, I find the tool great especially in scenarios where I accidently deleted a namespace or for DR where I need to recover a whole cluster. What makes the tool worth it, is actually the possibility to create snapshots from PV disks on your cloud provider.

Check out the official documentation from Heptio for more information and if you like this article please leave a comment.

How to display OpenShift/Kubernetes namespace on bash prompt

Very short but useful post about how to display the current Kubernetes namespace on the bash command prompt. I got used add an -n <namespace-name> when I execute an oc command but it is still very useful to get the current namespace displayed on the command prompt especially when troubleshooting issues to not get lost in the different platform namespaces.

Create new file ~/.oc-prompt.sh in your users home folder.

#!/bin/bash
__oc_ps1()
{
    # Get current context
    CONTEXT=$(cat ~/.kube/config 2>/dev/null| grep -o '^current-context: [^/]*' | cut -d' ' -f2)

    if [ -n "$CONTEXT" ]; then
        echo "(ocp:${CONTEXT})"
    fi
}

Add the following lines at the end of the ~/.bashrc and re-connect your terminal session.

NORMAL="\[\033[00m\]"
BLUE="\[\033[01;34m\]"
YELLOW="\[\e[1;33m\]"
GREEN="\[\e[1;32m\]"

export PS1="${BLUE}\W ${GREEN}\u${YELLOW}\$(__oc_ps1)${NORMAL} \$ "
source ~/.oc-prompt.sh

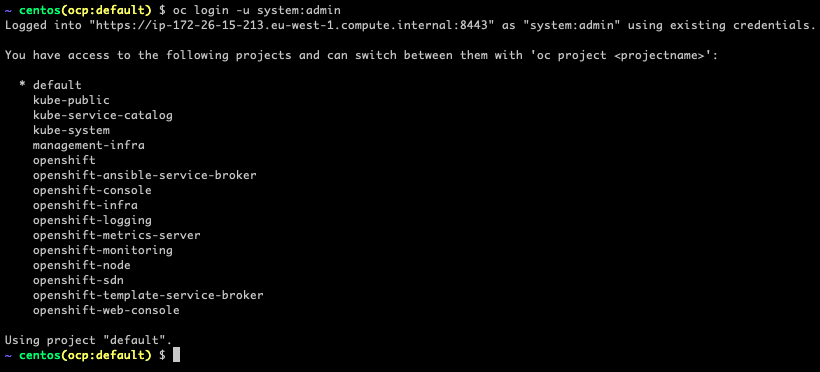
The example bash prompt showing the current OpenShift/Kubernetes namespace:

Very useful when you need to administrate a cluster with multiple namespace.

Host and Container Monitoring with SysDig

After my previous articles about troubleshooting and to validate OpenShift using Ansible, I wanted to continue and show how SysDig is helping you to identify potentials issues on your nodes or container platform before they occur.

The open source version is a simple but very powerful tool to inspect your linux host via the command line but it has no capabilities to centrally monitor or store capture information. The enterprise version provides these capabilities like a web console and centrally stores metrics, it is also able to trigger remote captures without the need to connect to the host.

Sysdig Open Source

Let’s install sysdig open source, here the official SysDig installation guide.

# Host install
curl -s https://s3.amazonaws.com/download.draios.com/stable/install-sysdig | sudo bash

# Alternatively the container based install
yum -y install kernel-devel-$(uname -r)
docker pull sysdig/sysdig
docker run -i -t --name sysdig --privileged -v /var/run/docker.sock:/host/var/run/docker.sock -v /dev:/host/dev -v /proc:/host/proc:ro -v /boot:/host/boot:ro -v /lib/modules:/host/lib/modules:ro -v /usr:/host/usr:ro sysdig/sysdig

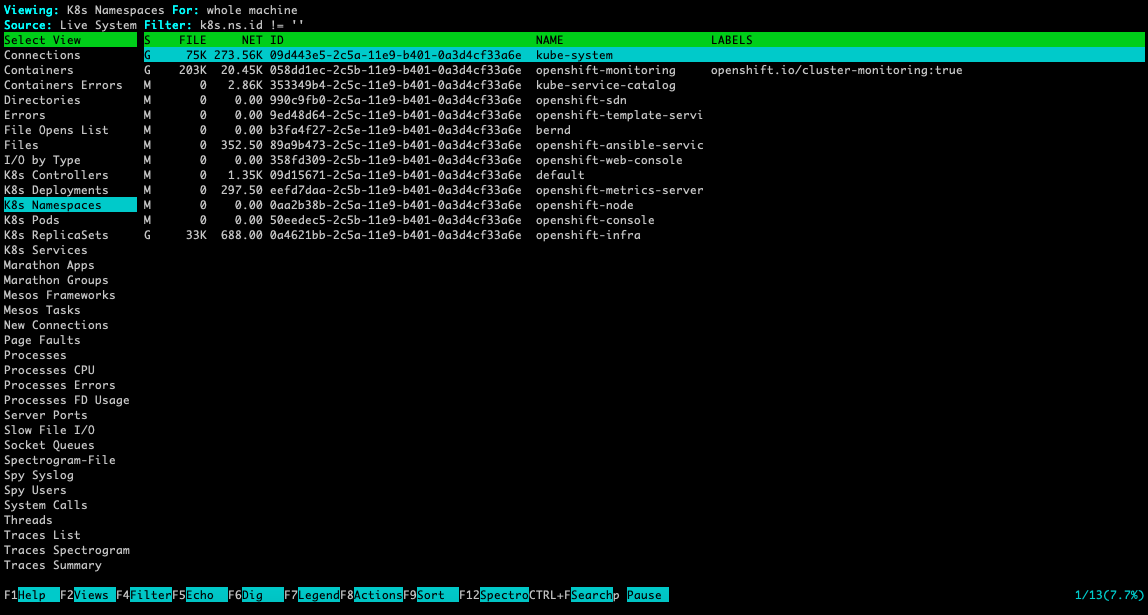
The csysdig command is nice and user friendly menu driven interface to see real-time system call information of your host. To collect information from Kubernetes or OpenShift please use the option [-kK] like seen in the example below:

csysdig -k https://localhost:8443 -K /etc/origin/master/admin.crt:/etc/origin/master/admin.key

For more information about how to use csysdig please have a look at the manual or watch the short Youtube video.

The main sysdig command is showing output directly in the terminal session and you are able to apply filters (chisels) to more granularly see the system calls. Like with csysdig, the option [-kK] enabled Kubernetes integration:

sysdig -k https://localhost:8443 -K /etc/origin/master/admin.crt:/etc/origin/master/admin.key

Here some useful commands to inspect Kubernetes or OpenShift events:

# Monitor Kubernetes namespace ip communication:
sudo sysdig -A -s8192 "fd.type in (ipv4, ipv6) and (k8s.ns.name=<-NAMESPACE-NAME->)" -k https://localhost:8443 -K /etc/origin/master/admin.crt:/e/origin/master/admin.key

# Monitor namespace and pod name, the 2nd command filters to only show GET requests:
sudo sysdig -A -s8192 "fd.type in (ipv4, ipv6) and (k8s.ns.name=<-NAMESPACE-NAME-> and k8s.pod.name=<-POD-NAME->)" -k https://localhost:8443 -K /etc/origin/master/admin.crt:/etc/origin/master/admin.key
sudo sysdig -A -s8192 "fd.type in (ipv4, ipv6) and (k8s.ns.name=<-NAMESPACE-NAME-> and k8s.pod.name=<-POD-NAME->) and evt.buffer contai GET" -k https://localhost:8443 -K /etc/origin/master/admin.crt:/etc/origin/master/admin.key 

# Monitor ns and pod names and apply chisel echo_fds:
sudo sysdig -A -s8192 "fd.type in (ipv4, ipv6) and (k8s.ns.name=<-NAMESPACE-NAME-> and k8s.pod.name=<-POD-NAME->)" -c echo_fds -k https://localhost:8443 -K /etc/origin/master/admin.crt:/etc/origin/master/admin.key

SysDig example

This capture is an http request between an busybox pod (name: busybox-2-hjhq8 ip: 10.128.0.81) via service (name: hello-app-http ip: 172.30.43.111) to the hello-openshift pod (name: hello-app-http-1-8v57x ip: 10.128.0.77) in the namespace myproject. I use a simple “wget -S –spider http://hello-app-http/” to simulate the request:

# Command to capture ip communication in myproject namespace including dnsmasq and wget processes:
sudo sysdig -s2000 -A -pk "fd.type in (ipv4, ipv6) and (k8s.ns.name=myproject or proc.name=dnsmasq) or proc.name=wget" -k https://localhost:8443 -K /etc/origin/master/admin.crt:/etc/origin/master/admin.key

# Output:
70739 19:36:51.401062017 1 busybox-2-hjhq8 (4d84d98d46f1) wget (84856:26) < socket fd=3(<4>)
70741 19:36:51.401062878 1 busybox-2-hjhq8 (4d84d98d46f1) wget (84856:26) > connect fd=3(<4>)
70748 19:36:51.401072194 1 busybox-2-hjhq8 (4d84d98d46f1) wget (84856:26) < connect res=0 tuple=10.128.0.81:44993->172.26.11.254:53
70749 19:36:51.401074599 1 busybox-2-hjhq8 (4d84d98d46f1) wget (84856:26) > sendto fd=3(<4u>10.128.0.81:44993->172.26.11.254:53) size=60 tuple=NULL
71083 19:36:51.401575859 0  (host) dnsmasq (20933:20933) > recvmsg fd=6(<4u>172.26.11.254:53)
71087 19:36:51.401582008 0  (host) dnsmasq (20933:20933) < recvmsg res=60 size=60 data= hello-app-httpmyprojectsvcclusterlocal tuple=10.128.0.81:44993->172.26.11.254:53
71088 19:36:51.401584101 0  (host) dnsmasq (20933:20933) > ioctl fd=6(<4u>10.128.0.81:44993->172.26.11.254:53) request=8910 argument=7FFE208E30C0
71089 19:36:51.401586692 0  (host) dnsmasq (20933:20933) < ioctl res=0
71108 19:36:51.401623408 0  (host) dnsmasq (20933:20933) < socket fd=58(<4>)
71109 19:36:51.401624563 0  (host) dnsmasq (20933:20933) > fcntl fd=58(<4>) cmd=4(F_GETFL)
71110 19:36:51.401625584 0  (host) dnsmasq (20933:20933) < fcntl res=2(/dev/null)
71111 19:36:51.401626259 0  (host) dnsmasq (20933:20933) > fcntl fd=58(<4>) cmd=5(F_SETFL)
71112 19:36:51.401626825 0  (host) dnsmasq (20933:20933) < fcntl res=0(/dev/null)
71113 19:36:51.401627787 0  (host) dnsmasq (20933:20933) > bind fd=58(<4>)
71129 19:36:51.401680355 0  (host) dnsmasq (20933:20933) < bind res=0 addr=0.0.0.0:22969
71130 19:36:51.401681698 0  (host) dnsmasq (20933:20933) > sendto fd=58(<4u>0.0.0.0:22969) size=60 tuple=0.0.0.0:22969->127.0.0.1:53
71131 19:36:51.401715726 0  (host) dnsmasq (20933:20933) < sendto res=60 data=
hello-app-httpmyprojectsvcclusterlocal
71469 19:36:51.402632442 1  (host) dnsmasq (20933:20933) > recvfrom fd=58(<4u>127.0.0.1:53->127.0.0.1:22969) size=5131
71474 19:36:51.402636604 1  (host) dnsmasq (20933:20933) < recvfrom res=114 data=
hello-app-httpmyprojectsvcclusterlocal)<*nsdns)
hostmaster)\`tp :< tuple=127.0.0.1:53->0.0.0.0:22969
71479 19:36:51.402643363 1  (host) dnsmasq (20933:20933) > sendmsg fd=6(<4u>10.128.0.81:44993->172.26.11.254:53) size=114 tuple=172.26.11.254:53->10.128.0.81:44993
71492 19:36:51.402666311 1  (host) dnsmasq (20933:20933) < sendmsg res=114 data=
hello-app-httpmyprojectsvcclusterlocal)<*nsdns)
hostmaster)\`tp :<
71493 19:36:51.402668199 1  (host) dnsmasq (20933:20933) > close fd=58(<4u>127.0.0.1:53->127.0.0.1:22969)
71494 19:36:51.402669009 1  (host) dnsmasq (20933:20933) < close res=0
80786 19:36:51.430143868 1 busybox-2-hjhq8 (4d84d98d46f1) wget (84856:26) < sendto res=60 data= hello-app-httpmyprojectsvcclusterlocal 80793 19:36:51.430153453 1 busybox-2-hjhq8 (4d84d98d46f1) wget (84856:26) > recvfrom fd=3(<4u>10.128.0.81:44993->172.26.11.254:53) size=512
80794 19:36:51.430158626 1 busybox-2-hjhq8 (4d84d98d46f1) wget (84856:26) < recvfrom res=114 data=
hello-app-httpmyprojectsvcclusterlocal)<*nsdns)
hostmaster)\`tp :< tuple=NULL 80795 19:36:51.430160257 1 busybox-2-hjhq8 (4d84d98d46f1) wget (84856:26) > close fd=3(<4u>10.128.0.81:44993->172.26.11.254:53)
80796 19:36:51.430161712 1 busybox-2-hjhq8 (4d84d98d46f1) wget (84856:26) < close res=0
80835 19:36:51.430260103 1 busybox-2-hjhq8 (4d84d98d46f1) wget (84856:26) < socket fd=3(<4>)
80838 19:36:51.430261013 1 busybox-2-hjhq8 (4d84d98d46f1) wget (84856:26) > connect fd=3(<4>)
80840 19:36:51.430269080 1 busybox-2-hjhq8 (4d84d98d46f1) wget (84856:26) < connect res=0 tuple=10.128.0.81:41405->172.26.11.254:53
80841 19:36:51.430271011 1 busybox-2-hjhq8 (4d84d98d46f1) wget (84856:26) > sendto fd=3(<4u>10.128.0.81:41405->172.26.11.254:53) size=60 tuple=NULL
80874 19:36:51.430433333 1  (host) dnsmasq (20933:20933) > recvmsg fd=6(<4u>10.128.0.81:44993->172.26.11.254:53)
80879 19:36:51.430439631 1  (host) dnsmasq (20933:20933) < recvmsg res=60 size=60 data= hello-app-httpmyprojectsvcclusterlocal tuple=10.128.0.81:41405->172.26.11.254:53
80881 19:36:51.430454839 1  (host) dnsmasq (20933:20933) > ioctl fd=6(<4u>10.128.0.81:41405->172.26.11.254:53) request=8910 argument=7FFE208E30C0
80885 19:36:51.430457716 1  (host) dnsmasq (20933:20933) < ioctl res=0
80895 19:36:51.430493317 1  (host) dnsmasq (20933:20933) < socket fd=58(<4>)
80896 19:36:51.430494522 1  (host) dnsmasq (20933:20933) > fcntl fd=58(<4>) cmd=4(F_GETFL)
80897 19:36:51.430495527 1  (host) dnsmasq (20933:20933) < fcntl res=2(/dev/null)
80898 19:36:51.430496189 1  (host) dnsmasq (20933:20933) > fcntl fd=58(<4>) cmd=5(F_SETFL)
80899 19:36:51.430496769 1  (host) dnsmasq (20933:20933) < fcntl res=0(/dev/null)
80900 19:36:51.430497538 1  (host) dnsmasq (20933:20933) > bind fd=58(<4>)
80913 19:36:51.430551876 1  (host) dnsmasq (20933:20933) < bind res=0 addr=0.0.0.0:64640
80914 19:36:51.430553226 1  (host) dnsmasq (20933:20933) > sendto fd=58(<4u>0.0.0.0:64640) size=60 tuple=0.0.0.0:64640->127.0.0.1:53
80922 19:36:51.430581962 1  (host) dnsmasq (20933:20933) < sendto res=60 data=
:=hello-app-httpmyprojectsvcclusterlocal
81032 19:36:51.430806106 1  (host) dnsmasq (20933:20933) > recvfrom fd=58(<4u>127.0.0.1:53->127.0.0.1:64640) size=5131
81035 19:36:51.430809074 1  (host) dnsmasq (20933:20933) < recvfrom res=76 data= :=hello-app-httpmyprojectsvcclusterlocal+o tuple=127.0.0.1:53->0.0.0.0:64640
81040 19:36:51.430818116 1  (host) dnsmasq (20933:20933) > sendmsg fd=6(<4u>10.128.0.81:41405->172.26.11.254:53) size=76 tuple=172.26.11.254:53->10.128.0.81:41405
81051 19:36:51.430840305 1  (host) dnsmasq (20933:20933) < sendmsg res=76 data=
hello-app-httpmyprojectsvcclusterlocal+o
81052 19:36:51.430842129 1  (host) dnsmasq (20933:20933) > close fd=58(<4u>127.0.0.1:53->127.0.0.1:64640)
81053 19:36:51.430842956 1  (host) dnsmasq (20933:20933) < close res=0
84676 19:36:51.436248790 1 busybox-2-hjhq8 (4d84d98d46f1) wget (84856:26) < sendto res=60 data= hello-app-httpmyprojectsvcclusterlocal 84683 19:36:51.436254334 1 busybox-2-hjhq8 (4d84d98d46f1) wget (84856:26) > recvfrom fd=3(<4u>10.128.0.81:41405->172.26.11.254:53) size=512
84684 19:36:51.436256892 1 busybox-2-hjhq8 (4d84d98d46f1) wget (84856:26) < recvfrom res=76 data= hello-app-httpmyprojectsvcclusterlocal+o tuple=NULL 84685 19:36:51.436264998 1 busybox-2-hjhq8 (4d84d98d46f1) wget (84856:26) > close fd=3(<4u>10.128.0.81:41405->172.26.11.254:53)
84686 19:36:51.436265743 1 busybox-2-hjhq8 (4d84d98d46f1) wget (84856:26) < close res=0
85420 19:36:51.437492301 1 busybox-2-hjhq8 (4d84d98d46f1) wget (84856:26) < socket fd=3(<4>)
85421 19:36:51.437493337 1 busybox-2-hjhq8 (4d84d98d46f1) wget (84856:26) > connect fd=3(<4>)
86222 19:36:51.438494771 1 busybox-2-hjhq8 (4d84d98d46f1) wget (84856:26) < connect res=0 tuple=10.128.0.81:39656->172.30.43.111:80
86226 19:36:51.438497506 1 busybox-2-hjhq8 (4d84d98d46f1) wget (84856:26) > fcntl fd=3(<4t>10.128.0.81:39656->172.30.43.111:80) cmd=4(F_GETFL)
86228 19:36:51.438498484 1 busybox-2-hjhq8 (4d84d98d46f1) wget (84856:26) < fcntl res=2(/dev/pts/1)
86229 19:36:51.438499943 1 busybox-2-hjhq8 (4d84d98d46f1) wget (84856:26) > ioctl fd=3(<4t>10.128.0.81:39656->172.30.43.111:80) request=5401 argument=7FFDBF5E434C
86233 19:36:51.438501658 1 busybox-2-hjhq8 (4d84d98d46f1) wget (84856:26) < ioctl res=-25(ENOTTY) 86242 19:36:51.438509833 1 busybox-2-hjhq8 (4d84d98d46f1) wget (84856:26) > write fd=3(<4t>10.128.0.81:39656->172.30.43.111:80) size=105
86285 19:36:51.438557309 1 busybox-2-hjhq8 (4d84d98d46f1) wget (84856:26) < write res=105 data= GET / HTTP/1.1 Host: hello-app-http.myproject.svc.cluster.local User-Agent: Wget Connection: close 86291 19:36:51.438561615 1 busybox-2-hjhq8 (4d84d98d46f1) wget (84856:26) > read fd=3(<4t>10.128.0.81:39656->172.30.43.111:80) size=4096
107714 19:36:51.478518400 0 hello-app-http-1-8v57x (5145dc0ea61e) hello-openshift (11185:7) < accept fd=6(<4t>10.128.0.81:39656->10.128.0.77:8080) tuple=10.128.0.81:39656->10.128.0.77:8080 queuepct=0 queuelen=0 queuemax=128
107772 19:36:51.478636516 0 hello-app-http-1-8v57x (5145dc0ea61e) hello-openshift (11185:7) > read fd=6(<4t>10.128.0.81:39656->10.128.0.77:8080) size=4096
107773 19:36:51.478640241 0 hello-app-http-1-8v57x (5145dc0ea61e) hello-openshift (11185:7) < read res=105 data= GET / HTTP/1.1 Host: hello-app-http.myproject.svc.cluster.local User-Agent: Wget Connection: close 107857 19:36:51.478817861 0 hello-app-http-1-8v57x (5145dc0ea61e) hello-openshift (11185:7) > write fd=6(<4t>10.128.0.81:39656->10.128.0.77:8080) size=153
107869 19:36:51.478870349 0 hello-app-http-1-8v57x (5145dc0ea61e) hello-openshift (11185:7) < write res=153 data= HTTP/1.1 200 OK Date: Sun, 10 Feb 2019 19:36:51 GMT Content-Length: 17 Content-Type: text/plain; charset=utf-8 Connection: close Hello OpenShift! 107886 19:36:51.478892928 0 hello-app-http-1-8v57x (5145dc0ea61e) hello-openshift (11185:7) > close fd=6(<4t>10.128.0.81:39656->10.128.0.77:8080)
107887 19:36:51.478893676 0 hello-app-http-1-8v57x (5145dc0ea61e) hello-openshift (11185:7) < close res=0
107899 19:36:51.478998208 0 busybox-2-hjhq8 (4d84d98d46f1) wget (84856:26) < read res=153 data= HTTP/1.1 200 OK Date: Sun, 10 Feb 2019 19:36:51 GMT Content-Length: 17 Content-Type: text/plain; charset=utf-8 Connection: close Hello OpenShift! 108908 19:36:51.480114626 0 busybox-2-hjhq8 (4d84d98d46f1) wget (84856:26) > close fd=3(<4t>10.128.0.81:39656->172.30.43.111:80)
108910 19:36:51.480115482 0 busybox-2-hjhq8 (4d84d98d46f1) wget (84856:26) < close res=0
112966 19:36:51.488041049 0 hello-app-http-1-8v57x (5145dc0ea61e) hello-openshift (11183:6) < accept fd=6(<4t>10.128.0.1:55052->10.128.0.77:8080) tuple=10.128.0.1:55052->10.128.0.77:8080 queuepct=0 queuelen=0 queuemax=128
113001 19:36:51.488096304 0 hello-app-http-1-8v57x (5145dc0ea61e) hello-openshift (11183:6) > read fd=6(<4t>10.128.0.1:55052->10.128.0.77:8080) size=4096
113002 19:36:51.488098693 0 hello-app-http-1-8v57x (5145dc0ea61e) hello-openshift (11183:6) < read res=0 data= 113005 19:36:51.488105730 0 hello-app-http-1-8v57x (5145dc0ea61e) hello-openshift (11183:6) > close fd=6(<4t>10.128.0.1:55052->10.128.0.77:8080)
113006 19:36:51.488106302 0 hello-app-http-1-8v57x (5145dc0ea61e) hello-openshift (11183:6) < close res=0

Below a list of some more useful sysdig cli examples:

# Sysdig Chisels and Filters:
sudo sysdig -cl

# To find out more information about a particular chisel:
sudo sysdig -i lscontainers

# To view a list of available field classes, fields and their description:
sudo sysdig -l

# Create and write sysdig trace files, 2nd option sets byte limit for trace file:
sudo sysdig -w mytrace.scap
sudo sysdig -s 8192 -w trace.scap 

# Read sysdig trace files, 2nd option read and filter based on proc.name:
sudo sysdig -r trace.scap
sudo sysdig -r trace.scap proc.name=dnsmasq

# Monitor linux processes:
sudo sysdig -c ps

# Monitor linux processes by CPU utilisation:
sudo sysdig -c topprocs_cpu

# Monitor network connections:
sudo sysdig -c netstat
sudo sysdig -c topconns
sudo sysdig -c topprocs_net

# Monitor system file i/o:
sudo sysdig -c echo_fds
sudo sysdig -c topprocs_file

# Troubleshoot system performance:
sudo sysdig -c bottlenecks

# Monitor process execution time
sudo sysdig -c proc_exec_time 

# Monitor network i/o performance
sudo sysdig -c netlower 1

# Watch log entries
sudo sysdig -c spy_logs

# Monitor http requests:
sudo sysdig -c httplog    
sudo sysdig -c httptop [Print Top HTTP Requests] 

SysDig Monitor Enterprise

The paid enterprise version provides a web console to centrally access metrics and events from your fleet of monitored nodes.

You can run SysDig enterprise directly on OpenShift as DaemonSet and deploy the agent to all nodes in the cluster. For more detailed information about Kubernetes or OpenShift installation, read the official documentation.

oc adm new-project sysdig-agent --node-selector='app=sysdig-agent'
oc project sysdig-agent
oc label node --all "app=sysdig-agent"
oc create serviceaccount sysdig-agent
oc adm policy add-scc-to-user privileged -n sysdig-agent -z sysdig-agent
oc adm policy add-cluster-role-to-user cluster-reader -n sysdig-agent -z sysdig-agent

wget https://raw.githubusercontent.com/draios/sysdig-cloud-scripts/master/agent_deploy/kubernetes/sysdig-agent-daemonset-v2.yaml
wget https://raw.githubusercontent.com/draios/sysdig-cloud-scripts/master/agent_deploy/kubernetes/sysdig-agent-configmap.yaml
oc create secret generic sysdig-agent --from-literal=access-key=<-YOUR-ACCESS-KEY->

# Edit sysdig-agent-daemonset-v2.yaml to uncomment the line: serviceAccount: sysdig-agent and edit sysdig-agent-configmap.yaml to uncomment the line: new_k8s: true
# This allows kube-state-metrics to be automatically detected, monitored, and displayed in Sysdig Monitor. 
# Edit sysdig-agent-configmap.yaml to uncomment the line: k8s_cluster_name: and add your cluster name.

oc create -f sysdig-agent-daemonset-v2.yaml
oc create -f sysdig-agent-configmap.yaml

SysDig is a great tool to monitor and even further provides you the possibility to troubleshoot in depth your linux hosts and container platforms.

Build Ansible Tower Container

After creating my Jenkins container I thought it would be fun to run Ansible Tower in a container so I created a simple Dockerfile. First you need find out the latest Ansible Tower version: https://releases.ansible.com/ansible-tower/setup/ and update the version variable in the Dockerfile.

Here is my Dockerfile:

...
ARG ANSIBLE_TOWER_VER=3.3.1-1
...

The passwords can be changed in the inventory file:

...
[all:vars]
admin_password='<-your-password->'
...
pg_password='<-your-password->'
...
rabbitmq_password='<-your-password->'
...

Let’s start by building the container:

git clone https://github.com/berndonline/ansible-tower-docker.git && cd ansible-tower-docker/
docker build -t berndonline/ansible-tower .

The docker build will take a few minutes, just wait and look out for errors you might have in the build:

berndonline@lab:~$ git clone https://github.com/berndonline/ansible-tower-docker.git
Cloning into 'ansible-tower-docker'...
remote: Enumerating objects: 17, done.
remote: Counting objects: 100% (17/17), done.
remote: Compressing objects: 100% (11/11), done.
remote: Total 17 (delta 4), reused 14 (delta 4), pack-reused 0
Unpacking objects: 100% (17/17), done.
berndonline@lab:~$ cd ansible-tower-docker/
berndonline@lab:~/ansible-tower-docker$ docker build -t berndonline/ansible-tower .
Sending build context to Docker daemon  87.04kB
Step 1/31 : FROM ubuntu:16.04
16.04: Pulling from library/ubuntu
7b8b6451c85f: Pull complete
ab4d1096d9ba: Pull complete
e6797d1788ac: Pull complete
e25c5c290bde: Pull complete
Digest: sha256:e547ecaba7d078800c358082088e6cc710c3affd1b975601792ec701c80cdd39
Status: Downloaded newer image for ubuntu:16.04
 ---> a51debf7e1eb
Step 2/31 : USER root
 ---> Running in cf5d606130cc
Removing intermediate container cf5d606130cc
 ---> d5b11ed84885
Step 3/31 : WORKDIR /opt
 ---> Running in 1e6703cec6db
Removing intermediate container 1e6703cec6db
 ---> 045cf04ebc1d
Step 4/31 : ARG ANSIBLE_TOWER_VER=3.3.1-1
 ---> Running in 6d65bfe370d4
Removing intermediate container 6d65bfe370d4
 ---> d75c246c3a5c
Step 5/31 : ARG PG_DATA=/var/lib/postgresql/9.6/main
 ---> Running in e8856051aa92
Removing intermediate container e8856051aa92
 ---> 02e6d7593df8

...

PLAY [Install Tower isolated node(s)] ******************************************
skipping: no hosts matched

PLAY RECAP *********************************************************************
localhost                  : ok=125  changed=64   unreachable=0    failed=0

The setup process completed successfully.
Setup log saved to /var/log/tower/setup-2018-11-21-20:21:37.log
Removing intermediate container ad6401292444
 ---> 8f1eb28f16cb
Step 27/31 : ADD entrypoint.sh /entrypoint.sh
 ---> 8503e666ce9c
Step 28/31 : RUN chmod +x /entrypoint.sh
 ---> Running in 8b5ca24a320a
Removing intermediate container 8b5ca24a320a
 ---> 60810dc2a4e3
Step 29/31 : VOLUME ["${PG_DATA}", "${AWX_PROJECTS}","/certs"]
 ---> Running in d836e5455bd5
Removing intermediate container d836e5455bd5
 ---> 3968430a1814
Step 30/31 : EXPOSE 80
 ---> Running in 9a72815e365b
Removing intermediate container 9a72815e365b
 ---> 3613ced2a80c
Step 31/31 : ENTRYPOINT ["/entrypoint.sh", "ansible-tower"]
 ---> Running in 4611a90aff1a
Removing intermediate container 4611a90aff1a
 ---> ce89ea0753d4
Successfully built ce89ea0753d4
Successfully tagged berndonline/ansible-tower:latest

Continue to create a Docker Volume container to store the Postgres database:

sudo docker create -v /var/lib/postgresql/9.6/main --name tower-data berndonline/ansible-tower /bin/true

Start the Ansible Tower Docker container:

sudo docker run -d -p 32456:80 --volumes-from tower-data --name ansible-tower --privileged --restart berndonline/ansible-tower

Afterwards you can connect to http://<your-ip-address>:32456/ and import your Tower license. Ansible provides a free 10 node license which you can request here: https://www.ansible.com/license.

The Ansible Tower playbook installs an Nginx reverse proxy and you can enable SSL by setting the variable nginx_disable_https to false in the inventory file, and publish the container via 443 instead of 80.

Please share your feedback and leave a comment.