Synchronize Cluster Configuration using OpenShift Hive – SyncSets and SelectorSyncSets

It has been some time since my last post but I want to continue my OpenShift Hive article series about Getting started with OpenShift Hive and how to Deploy OpenShift/OKD 4.x clusters using Hive. In this blog post I want to explain how you can use Hive to synchronise cluster configuration using SyncSets. There are two different types of SyncSets, the SyncSet (namespaced custom resource), which you assign to a specific cluster name in the Cluster Deployment Reference, and a SelectorSyncSet (cluster-wide custom resource) using the Cluster Deployment Selector, which uses a label selector to apply configuration to a set of clusters matching the label across cluster namespaces.

Let’s look at the first example of a SyncSet (namespaced resource), which you can see in the example below. In the clusterDeploymentRefs you need to match a cluster name which is created in the same namespace where you create the SyncSet. In SyncSet there are sections where you can create resources or apply patches to a cluster. The last section is secretReference which you use to apply secrets to a cluster without having them in clear text written in the SyncSet:

apiVersion: hive.openshift.io/v1
kind: SyncSet
metadata:
  name: example-syncset
  namespace: okd
spec:
  clusterDeploymentRefs:
  - name: okd
  resources:
  - apiVersion: v1
    kind: Namespace
    metadata:
      name: myproject
  patches:
  - kind: Config
    apiVersion: imageregistry.operator.openshift.io/v1
    name: cluster
    applyMode: AlwaysApply
    patch: |-
      { "spec": { "defaultRoute": true }}
    patchType: merge
  secretReferences:
  - source:
      name: mysecret
      namespace: okd
    target:
      name: mysecret
      namespace: myproject

The second SyncSet example for an SelectorSyncSet (cluster-wide resource) is very similar to the previous example but more flexible because you can use a label selector clusterDeploymentSelector and the configuration can be applied to multiple clusters matching the label across cluster namespaces. Great use-case for common or environment configuration which is the same for all OpenShift clusters:

---
apiVersion: hive.openshift.io/v1
kind: SelectorSyncSet
metadata:
  name: mygroup
spec:
  resources:
  - apiVersion: v1
    kind: Namespace
    metadata:
      name: myproject
  resourceApplyMode: Sync
  clusterDeploymentSelector:
    matchLabels:
      cluster-group: okd

The problem with SyncSets is that they can get pretty large and it is complicated to write them by yourself depending on the size of configuration. My colleague Matt wrote a syncset generator which solves the problem and automatically generates a  SelectorSyncSet, please checkout his github repository:

$ wget -O syncset-gen https://github.com/matt-simons/syncset-gen/releases/download/v0.5/syncset-gen_linux_amd64 && chmod +x ./syncset-gen
$ sudo mv ./syncset-gen /usr/bin/
$ syncset-gen view -h
Parses a manifest directory and prints a SyncSet/SelectorSyncSet representation of the objects it contains.

Usage:
  ss view [flags]

Flags:
  -c, --cluster-name string   The cluster name used to match the SyncSet to a Cluster
  -h, --help                  help for view
  -p, --patches string        The directory of patch manifest files to use
  -r, --resources string      The directory of resource manifest files to use
  -s, --selector string       The selector key/value pair used to match the SelectorSyncSet to Cluster(s)

Next we need a repository to store the configuration for the OpenShift/OKD clusters. Below you can see a very simple example. The ./config folder contains common configuration which is using a SelectorSyncSet with a clusterDeploymentSelector:

$ tree
.
└── config
    ├── patch
    │   └── cluster-version.yaml
    └── resource
        └── namespace.yaml

To generate a SelectorSyncSet from the ./config folder, run the syncset-gen and the following command options:

$ syncset-gen view okd-cluster-group-selectorsyncset --selector cluster-group/okd -p ./config/patch/ -r ./config/resource/
{
    "kind": "SelectorSyncSet",
    "apiVersion": "hive.openshift.io/v1",
    "metadata": {
        "name": "okd-cluster-group-selectorsyncset",
        "creationTimestamp": null,
        "labels": {
            "generated": "true"
        }
    },
    "spec": {
        "resources": [
            {
                "apiVersion": "v1",
                "kind": "Namespace",
                "metadata": {
                    "name": "myproject"
                }
            }
        ],
        "resourceApplyMode": "Sync",
        "patches": [
            {
                "apiVersion": "config.openshift.io/v1",
                "kind": "ClusterVersion",
                "name": "version",
                "patch": "{\"spec\": {\"channel\": \"stable-4.3\",\"desiredUpdate\": {\"version\": \"4.3.0\", \"image\": \"quay.io/openshift-release-dev/ocp-release@sha256:3a516480dfd68e0f87f702b4d7bdd6f6a0acfdac5cd2e9767b838ceede34d70d\"}}}",
                "patchType": "merge"
            },
            {
                "apiVersion": "rbac.authorization.k8s.io/v1",
                "kind": "ClusterRoleBinding",
                "name": "self-provisioners",
                "patch": "{\"subjects\": null}",
                "patchType": "merge"
            }
        ],
        "clusterDeploymentSelector": {
            "matchExpressions": [
                {
                    "key": "cluster-group/okd",
                    "operator": "Exists"
                }
            ]
        }
    },
    "status": {}
}

To debug SyncSets use the below command in the cluster deployment namespace which can give you a status of whether the configuration has successfully applied or if it has failed to apply:

$ oc get syncsetinstance -n <namespace>
$ oc get syncsetinstances <synsetinstance name> -o yaml

I hope this was useful to get you started using OpenShift Hive and SyncSets to apply configuration to OpenShift/OKD clusters. More information about SyncSets can be found in the OpenShift Hive repository.

OpenShift / OKD 4.x Cluster Deployment using OpenShift Hive

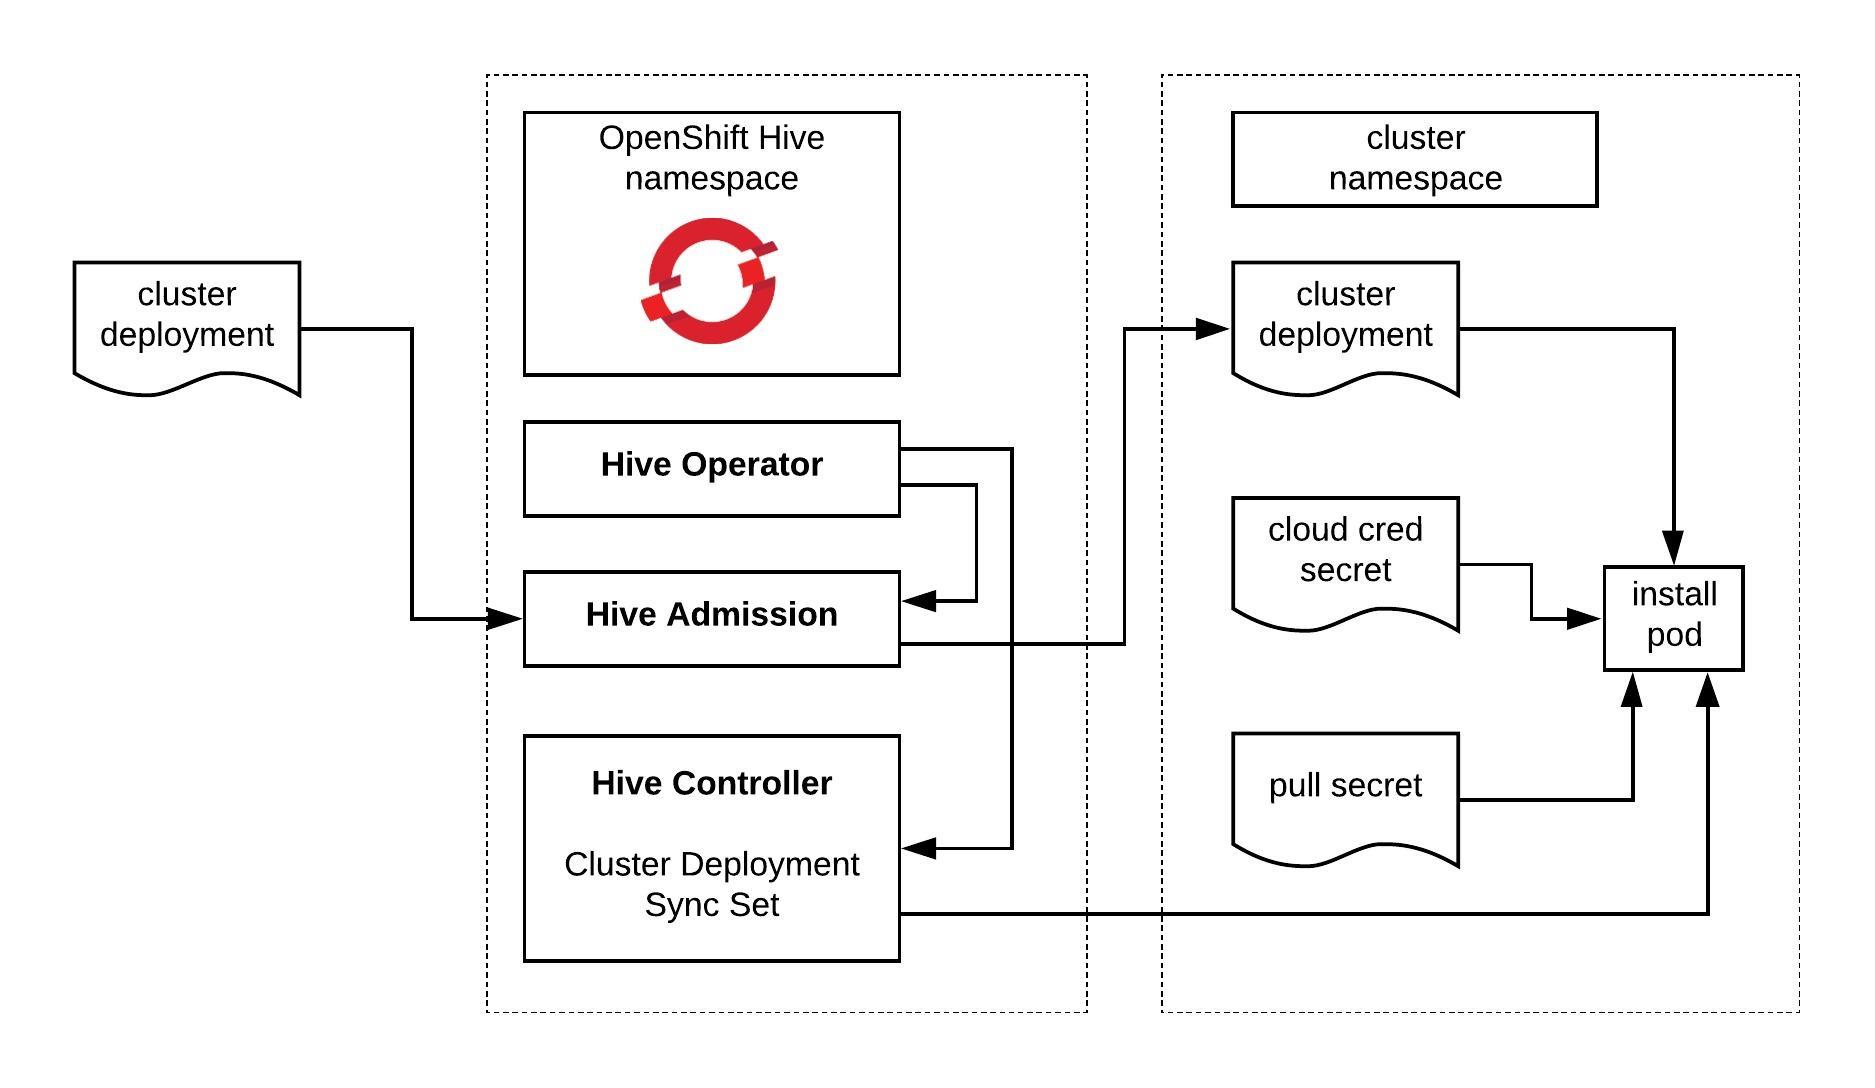
Before you continue to deploy an OpenShift or OKD cluster please check out my other posts about OpenShift Hive – API driven OpenShift cluster provisioning and management operator and Getting started with OpenShift Hive  because you need a running OpenShift Hive operator.

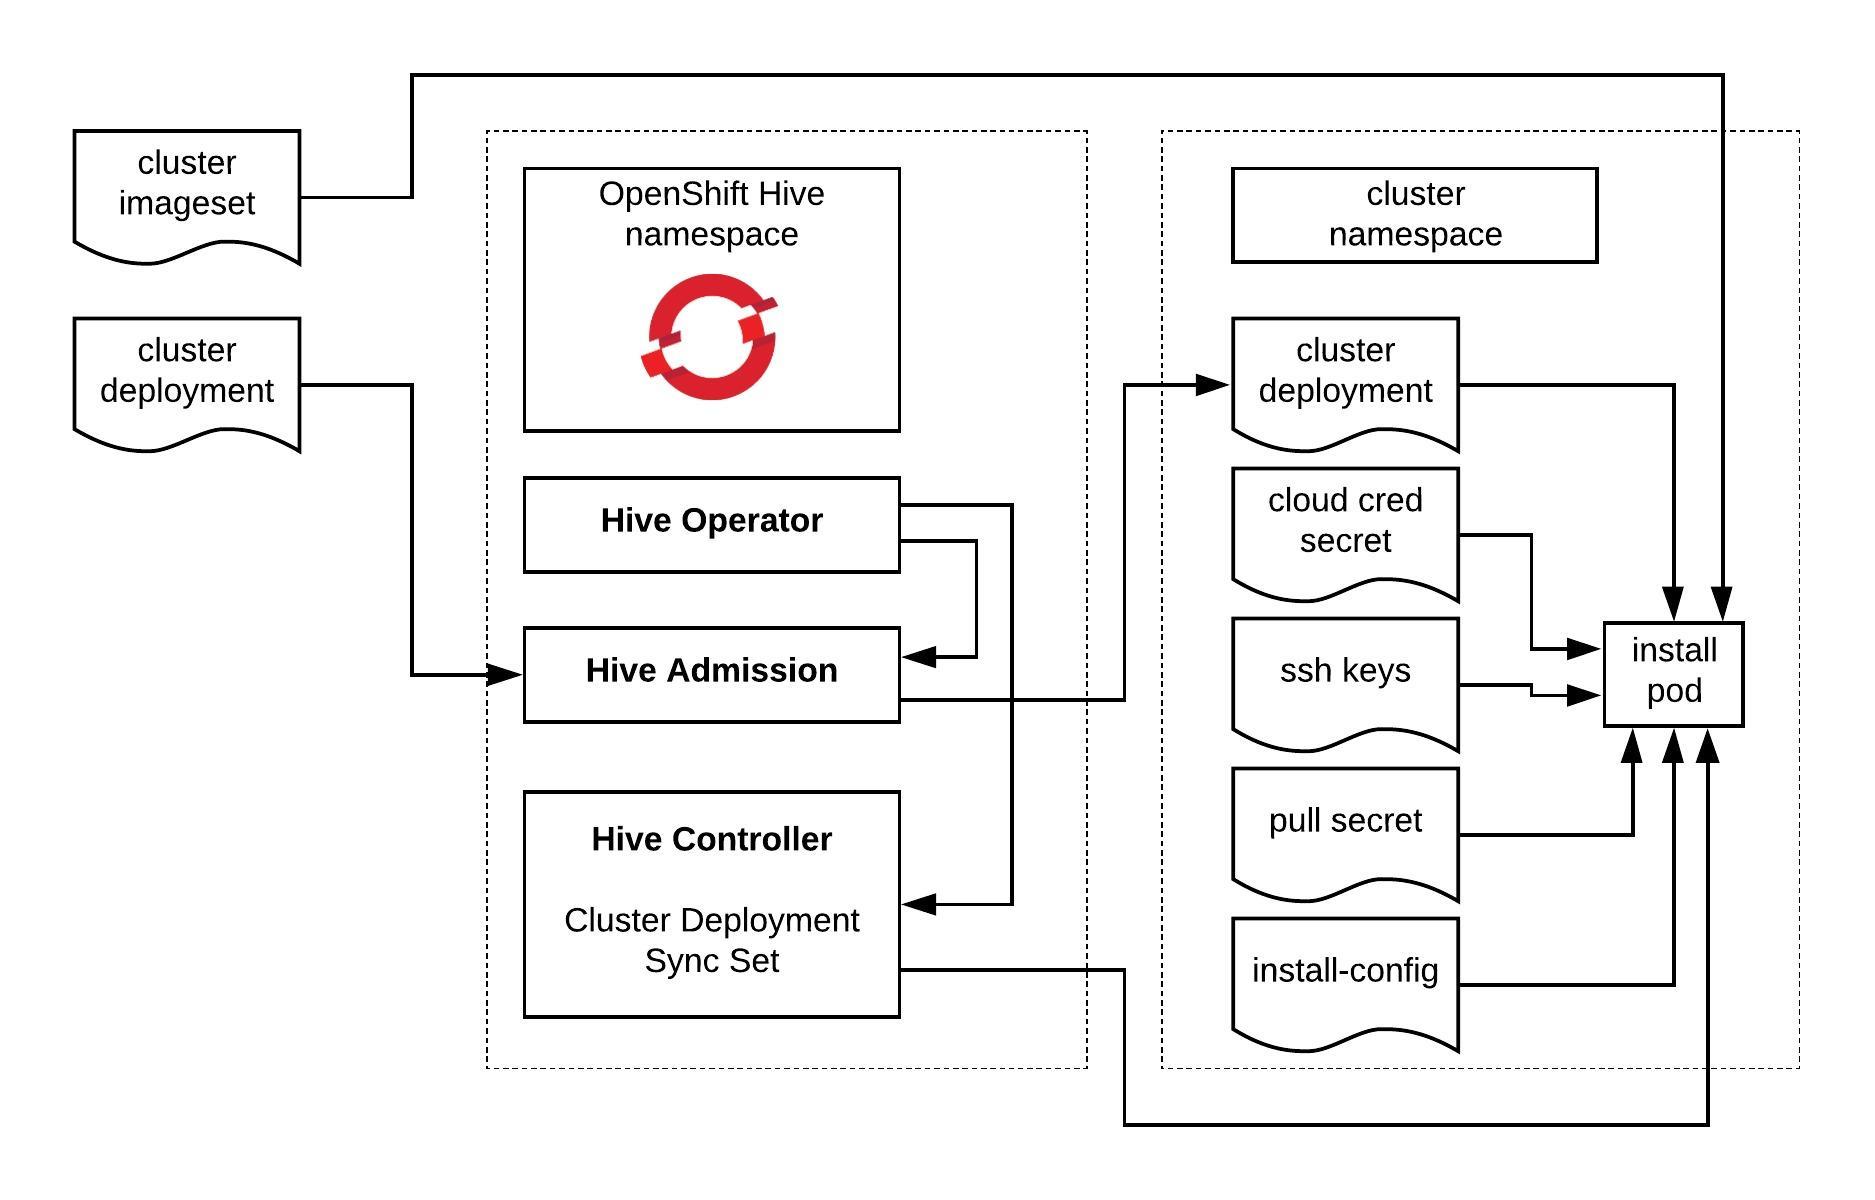
To install the OKD (OpenShift Origin Community Distribution) version we need a few things beforehand: a cluster namespace, AWS credentials, SSH keys, image pull secret, install-config, cluster image version and cluster deployment.

Let’s start to create the cluster namespace:

cat <<EOF | kubectl apply -f -
---
apiVersion: v1
kind: Namespace
metadata:
  name: okd

Create a secret with your ssh key:

$ kubectl create secret generic ssh-key -n okd --from-file=ssh-privatekey=/home/ubuntu/.ssh/id_rsa --from-file=ssh-publickey=/home/ubuntu/.ssh/id_rsa.pub

Create the AWS credential secret:

$ kubectl create secret generic aws-creds -n okd --from-literal=aws_secret_access_key=$AWS_SECRET_ACCESS_KEY --from-literal=aws_access_key_id=$AWS_ACCESS_KEY_ID

Create an image pull secret, this is not important for installing a OKD 4.x cluster but needs to be present otherwise Hive will not start the cluster deployment. If you have an RedHat Enterprise subscription for OpenShift then you need to add here your RedHat image pull secret:

$ kubectl create secret generic pull-secret -n okd --from-file=.dockerconfigjson=/home/ubuntu/.docker/config.json --type=kubernetes.io/dockerconfigjson 

Create a install-config.yaml for the cluster deployment and modify to your needs:

---
apiVersion: v1
baseDomain: kube.domain.com
compute:
- name: worker
  platform:
    aws:
      rootVolume:
        iops: 100
        size: 22
        type: gp2
      type: m4.xlarge
  replicas: 3
controlPlane:
  name: master
  platform:
    aws:
      rootVolume:
        iops: 100
        size: 22
        type: gp2
      type: m4.xlarge
replicas: 3
metadata:
  creationTimestamp: null
  name: okd
networking:
  clusterNetwork:
  - cidr: 10.128.0.0/14
    hostPrefix: 23
  machineCIDR: 10.0.0.0/16
  networkType: OpenShiftSDN
  serviceNetwork:
  - 172.30.0.0/16
platform:
  aws:
    region: eu-west-1
pullSecret: ""
sshKey: ""

Create the install-config secret for the cluster deployment:

$ kubectl create secret generic install-config -n okd --from-file=install-config.yaml=./install-config.yaml

Create the ClusterImageSet for OKD. In my example I am using the latest OKD 4.4.0 release. More information about the available OKD release versions you find here: https://origin-release.svc.ci.openshift.org/

cat <<EOF | kubectl apply -f -
---
apiVersion: hive.openshift.io/v1
kind: ClusterImageSet
metadata:
  name: okd-4-4-0-imageset
spec:
  releaseImage: registry.svc.ci.openshift.org/origin/release:4.4.0-0.okd-2020-02-18-212654
EOF 

Below is an example of a RedHat Enterprise OpenShift 4 ClusterImageSet:

---
apiVersion: hive.openshift.io/v1
kind: ClusterImageSet
metadata:
  name: openshift-4-3-0-imageset
spec:
  releaseImage: quay.io/openshift-release-dev/ocp-release:4.3.0-x86_64

For Hive to start with the cluster deployment, we need to modify the manifest below and add the references to the previous created secrets, install-config and cluster imageset version:

cat <<EOF | kubectl apply -f -
---
apiVersion: hive.openshift.io/v1
kind: ClusterDeployment
metadata:
  creationTimestamp: null
  name: okd
  namespace: okd
spec:
  baseDomain: kube.domain.com
  clusterName: okd
  controlPlaneConfig:
    servingCertificates: {}
  installed: false
  platform:
    aws:
      credentialsSecretRef:
        name: aws-creds
      region: eu-west-1
  provisioning:
    imageSetRef:
      name: okd-4-4-0-imageset
    installConfigSecretRef:
      name: install-config 
  pullSecretRef:
    name: pull-secret
  sshKey:
    name: ssh-key
status:
  clusterVersionStatus:
    availableUpdates: null
    desired:
      force: false
      image: ""
      version: ""
    observedGeneration: 0
    versionHash: ""
EOF

Once you submitted the ClusterDeployment manifest, the Hive operator will start to deploy the cluster straightaway:

$ kubectl get clusterdeployments.hive.openshift.io -n okd
NAME   CLUSTERNAME   CLUSTERTYPE   BASEDOMAIN          INSTALLED   INFRAID     AGE
okd    okd                         kube.domain.com     false       okd-jcdkd   107s

Hive will create the provision (install) pod for the cluster deployment and inject the installer configuration:

$ kubectl get pods -n okd
NAME                          READY   STATUS    RESTARTS   AGE
okd-0-tbm9t-provision-c5hpf   1/3     Running   0          57s

You can view the logs to check the progress of the cluster deployment. You will see the terraform output for creating the infrastructure resources and feedback from the installer about the installation progress. At the end you will see when the installation completed successfully:

$ kubectl logs okd-0-tbm9t-provision-c5hpf -n okd -c hive -f
...
time="2020-02-23T13:31:41Z" level=debug msg="module.dns.aws_route53_zone.int: Creating..."
time="2020-02-23T13:31:42Z" level=debug msg="aws_ami_copy.main: Still creating... [3m40s elapsed]"
time="2020-02-23T13:31:51Z" level=debug msg="module.dns.aws_route53_zone.int: Still creating... [10s elapsed]"
time="2020-02-23T13:31:52Z" level=debug msg="aws_ami_copy.main: Still creating... [3m50s elapsed]"
time="2020-02-23T13:32:01Z" level=debug msg="module.dns.aws_route53_zone.int: Still creating... [20s elapsed]"
time="2020-02-23T13:32:02Z" level=debug msg="aws_ami_copy.main: Still creating... [4m0s elapsed]"
time="2020-02-23T13:32:11Z" level=debug msg="module.dns.aws_route53_zone.int: Still creating... [30s elapsed]"
time="2020-02-23T13:32:12Z" level=debug msg="aws_ami_copy.main: Still creating... [4m10s elapsed]"
time="2020-02-23T13:32:21Z" level=debug msg="module.dns.aws_route53_zone.int: Still creating... [40s elapsed]"
time="2020-02-23T13:32:22Z" level=debug msg="aws_ami_copy.main: Still creating... [4m20s elapsed]"
time="2020-02-23T13:32:31Z" level=debug msg="module.dns.aws_route53_zone.int: Still creating... [50s elapsed]"
time="2020-02-23T13:32:32Z" level=debug msg="aws_ami_copy.main: Still creating... [4m30s elapsed]"
time="2020-02-23T13:32:41Z" level=debug msg="module.dns.aws_route53_zone.int: Still creating... [1m0s elapsed]"
time="2020-02-23T13:32:41Z" level=debug msg="module.dns.aws_route53_zone.int: Creation complete after 1m0s [id=Z10411051RAEUMMAUH39E]"
time="2020-02-23T13:32:41Z" level=debug msg="module.dns.aws_route53_record.etcd_a_nodes[0]: Creating..."
time="2020-02-23T13:32:41Z" level=debug msg="module.dns.aws_route53_record.api_internal: Creating..."
time="2020-02-23T13:32:41Z" level=debug msg="module.dns.aws_route53_record.api_external_internal_zone: Creating..."
time="2020-02-23T13:32:41Z" level=debug msg="module.dns.aws_route53_record.etcd_a_nodes[2]: Creating..."
time="2020-02-23T13:32:41Z" level=debug msg="module.dns.aws_route53_record.etcd_a_nodes[1]: Creating..."
time="2020-02-23T13:32:42Z" level=debug msg="aws_ami_copy.main: Still creating... [4m40s elapsed]"
time="2020-02-23T13:32:51Z" level=debug msg="module.dns.aws_route53_record.etcd_a_nodes[0]: Still creating... [10s elapsed]"
time="2020-02-23T13:32:51Z" level=debug msg="module.dns.aws_route53_record.api_internal: Still creating... [10s elapsed]"
time="2020-02-23T13:32:51Z" level=debug msg="module.dns.aws_route53_record.api_external_internal_zone: Still creating... [10s elapsed]"
time="2020-02-23T13:32:51Z" level=debug msg="module.dns.aws_route53_record.etcd_a_nodes[2]: Still creating... [10s elapsed]"
time="2020-02-23T13:32:51Z" level=debug msg="module.dns.aws_route53_record.etcd_a_nodes[1]: Still creating... [10s elapsed]"
time="2020-02-23T13:32:52Z" level=debug msg="aws_ami_copy.main: Still creating... [4m50s elapsed]"
...
time="2020-02-23T13:34:43Z" level=debug msg="Apply complete! Resources: 123 added, 0 changed, 0 destroyed."
time="2020-02-23T13:34:43Z" level=debug msg="OpenShift Installer unreleased-master-2446-gc108297de972e1a6a5fb502a7668079d16e501f9-dirty"
time="2020-02-23T13:34:43Z" level=debug msg="Built from commit c108297de972e1a6a5fb502a7668079d16e501f9"
time="2020-02-23T13:34:43Z" level=info msg="Waiting up to 20m0s for the Kubernetes API at https://api.okd.kube.domain.com:6443..."
time="2020-02-23T13:35:13Z" level=debug msg="Still waiting for the Kubernetes API: Get https://api.okd.kube.domain.com:6443/version?timeout=32s: dial tcp 52.17.210.160:6443: connect: connection refused"
time="2020-02-23T13:35:50Z" level=debug msg="Still waiting for the Kubernetes API: Get https://api.okd.kube.domain.com:6443/version?timeout=32s: dial tcp 52.211.227.216:6443: connect: connection refused"
time="2020-02-23T13:36:20Z" level=debug msg="Still waiting for the Kubernetes API: Get https://api.okd.kube.domain.com:6443/version?timeout=32s: dial tcp 52.17.210.160:6443: connect: connection refused"
time="2020-02-23T13:36:51Z" level=debug msg="Still waiting for the Kubernetes API: Get https://api.okd.kube.domain.com:6443/version?timeout=32s: dial tcp 52.211.227.216:6443: connect: connection refused"
time="2020-02-23T13:37:58Z" level=debug msg="Still waiting for the Kubernetes API: Get https://api.okd.kube.domain.com:6443/version?timeout=32s: dial tcp 52.211.227.216:6443: connect: connection refused"
time="2020-02-23T13:38:00Z" level=debug msg="Still waiting for the Kubernetes API: the server could not find the requested resource"
time="2020-02-23T13:38:30Z" level=debug msg="Still waiting for the Kubernetes API: the server could not find the requested resource"
time="2020-02-23T13:38:58Z" level=debug msg="Still waiting for the Kubernetes API: Get https://api.okd.kube.domain.com:6443/version?timeout=32s: dial tcp 52.211.227.216:6443: connect: connection refused"
time="2020-02-23T13:39:28Z" level=debug msg="Still waiting for the Kubernetes API: Get https://api.okd.kube.domain.com:6443/version?timeout=32s: dial tcp 63.35.50.149:6443: connect: connection refused"
time="2020-02-23T13:39:36Z" level=info msg="API v1.17.1 up"
time="2020-02-23T13:39:36Z" level=info msg="Waiting up to 40m0s for bootstrapping to complete..."
...
time="2020-02-23T13:55:14Z" level=debug msg="Still waiting for the cluster to initialize: Working towards 4.4.0-0.okd-2020-02-18-212654: 97% complete"
time="2020-02-23T13:55:24Z" level=debug msg="Still waiting for the cluster to initialize: Working towards 4.4.0-0.okd-2020-02-18-212654: 99% complete"
time="2020-02-23T13:57:39Z" level=debug msg="Still waiting for the cluster to initialize: Working towards 4.4.0-0.okd-2020-02-18-212654: 99% complete, waiting on authentication, console, monitoring"
time="2020-02-23T13:58:54Z" level=debug msg="Still waiting for the cluster to initialize: Working towards 4.4.0-0.okd-2020-02-18-212654: 99% complete"
time="2020-02-23T14:01:40Z" level=debug msg="Still waiting for the cluster to initialize: Working towards 4.4.0-0.okd-2020-02-18-212654: 100% complete, waiting on authentication"
time="2020-02-23T14:03:24Z" level=debug msg="Cluster is initialized"
time="2020-02-23T14:03:24Z" level=info msg="Waiting up to 10m0s for the openshift-console route to be created..."
time="2020-02-23T14:03:24Z" level=debug msg="Route found in openshift-console namespace: console"
time="2020-02-23T14:03:24Z" level=debug msg="Route found in openshift-console namespace: downloads"
time="2020-02-23T14:03:24Z" level=debug msg="OpenShift console route is created"
time="2020-02-23T14:03:24Z" level=info msg="Install complete!"
time="2020-02-23T14:03:24Z" level=info msg="To access the cluster as the system:admin user when using 'oc', run 'export KUBECONFIG=/output/auth/kubeconfig'"
time="2020-02-23T14:03:24Z" level=info msg="Access the OpenShift web-console here: https://console-openshift-console.apps.okd.kube.domain.com"
REDACTED LINE OF OUTPUT
time="2020-02-23T14:03:25Z" level=info msg="command completed successfully" installID=jcdkd
time="2020-02-23T14:03:25Z" level=info msg="saving installer output" installID=jcdkd
time="2020-02-23T14:03:25Z" level=debug msg="installer console log: level=info msg=\"Credentials loaded from default AWS environment variables\"\nlevel=info msg=\"Consuming Install Config from target directory\"\nlevel=warning msg=\"Found override for release image. Please be warned, this is not advised\"\nlevel=info msg=\"Consuming Master Machines from target directory\"\nlevel=info msg=\"Consuming Common Manifests from target directory\"\nlevel=info msg=\"Consuming OpenShift Install from target directory\"\nlevel=info msg=\"Consuming Worker Machines from target directory\"\nlevel=info msg=\"Consuming Openshift Manifests from target directory\"\nlevel=info msg=\"Consuming Master Ignition Config from target directory\"\nlevel=info msg=\"Consuming Worker Ignition Config from target directory\"\nlevel=info msg=\"Consuming Bootstrap Ignition Config from target directory\"\nlevel=info msg=\"Creating infrastructure resources...\"\nlevel=info msg=\"Waiting up to 20m0s for the Kubernetes API at https://api.okd.kube.domain.com:6443...\"\nlevel=info msg=\"API v1.17.1 up\"\nlevel=info msg=\"Waiting up to 40m0s for bootstrapping to complete...\"\nlevel=info msg=\"Destroying the bootstrap resources...\"\nlevel=error\nlevel=error msg=\"Warning: Resource targeting is in effect\"\nlevel=error\nlevel=error msg=\"You are creating a plan with the -target option, which means that the result\"\nlevel=error msg=\"of this plan may not represent all of the changes requested by the current\"\nlevel=error msg=configuration.\nlevel=error msg=\"\\t\\t\"\nlevel=error msg=\"The -target option is not for routine use, and is provided only for\"\nlevel=error msg=\"exceptional situations such as recovering from errors or mistakes, or when\"\nlevel=error msg=\"Terraform specifically suggests to use it as part of an error message.\"\nlevel=error\nlevel=error\nlevel=error msg=\"Warning: Applied changes may be incomplete\"\nlevel=error\nlevel=error msg=\"The plan was created with the -target option in effect, so some changes\"\nlevel=error msg=\"requested in the configuration may have been ignored and the output values may\"\nlevel=error msg=\"not be fully updated. Run the following command to verify that no other\"\nlevel=error msg=\"changes are pending:\"\nlevel=error msg=\"    terraform plan\"\nlevel=error msg=\"\\t\"\nlevel=error msg=\"Note that the -target option is not suitable for routine use, and is provided\"\nlevel=error msg=\"only for exceptional situations such as recovering from errors or mistakes, or\"\nlevel=error msg=\"when Terraform specifically suggests to use it as part of an error message.\"\nlevel=error\nlevel=info msg=\"Waiting up to 30m0s for the cluster at https://api.okd.kube.domain.com:6443 to initialize...\"\nlevel=info msg=\"Waiting up to 10m0s for the openshift-console route to be created...\"\nlevel=info msg=\"Install complete!\"\nlevel=info msg=\"To access the cluster as the system:admin user when using 'oc', run 'export KUBECONFIG=/output/auth/kubeconfig'\"\nlevel=info msg=\"Access the OpenShift web-console here: https://console-openshift-console.apps.okd.kube.domain.com\"\nREDACTED LINE OF OUTPUT\n" installID=vxghr9br
time="2020-02-23T14:03:25Z" level=info msg="install completed successfully" installID=jcdkd

After the installation of the cluster deployment has finished, the Installed value is set to True:

$ kubectl get clusterdeployments.hive.openshift.io  -n okd
NAME   CLUSTERNAME   CLUSTERTYPE   BASEDOMAIN          INSTALLED   INFRAID      AGE
okd    okd                         kube.domain.com     true        okd-jcdkd    54m

At this point you can start using the platform by getting the login credentials from the cluster credential secret Hive created during the installation:

$ kubectl get secrets -n okd okd-0-tbm9t-admin-password -o jsonpath='{.data.username}' | base64 -d
kubeadmin
$ kubectl get secrets -n okd okd-0-tbm9t-admin-password -o jsonpath='{.data.password}' | base64 -d
2T38d-aETpX-dj2YU-UBN4a

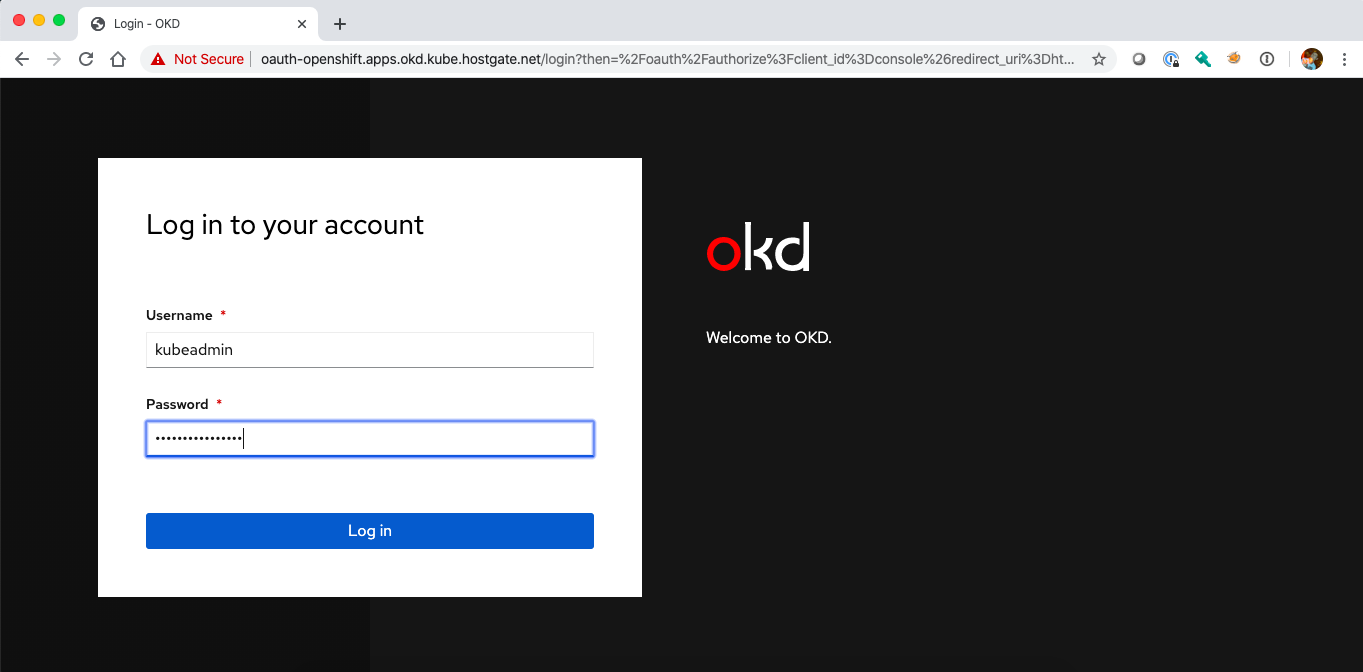
Log in via the command-line or the web console:

To delete the cluster simply delete the ClusterDeployment resources which initiates a cluster deprovision and will delete all related AWS resources. If the deprovision gets stuck, manually delete the uninstall finalizer allowing the cluster deployment to be deleted, but note that this may leave artifacts in your AWS account:

$ kubectl delete clusterdeployments.hive.openshift.io okd -n okd --wait=false
clusterdeployment.hive.openshift.io "okd" deleted

Please visit the OpenShift Hive documentation for more information about using Hive.

In the next article I will explain how you can use OpenShift Hive to create, update, delete, patch cluster resources using SyncSets.

Getting started with OpenShift Hive

If you don’t know OpenShift Hive I recommend having a look at the video of my talk at RedHat OpenShift Commons about OpenShift Hive where I also talk about how you can provision and manage the lifecycle of OpenShift 4 clusters using the Kubernetes API and the OpenShift Hive operator.

The Hive operator has three main components the admission controller,  the Hive controller and the Hive operator itself. For more information about the Hive architecture visit the Hive docs:

You can use an OpenShift or native Kubernetes cluster to run the operator, in my case I use a EKS cluster. Let’s go through the prerequisites which are required to generate the manifests and the hiveutil:

$ curl -s "https://raw.githubusercontent.com/\
> kubernetes-sigs/kustomize/master/hack/install_kustomize.sh"  | bash
$ sudo mv ./kustomize /usr/bin/
$ wget https://dl.google.com/go/go1.13.3.linux-amd64.tar.gz
$ tar -xvf go1.13.3.linux-amd64.tar.gz
$ sudo mv go /usr/local

To setup the Go environment copy the content below and add to your .profile:

export GOPATH="${HOME}/.go"
export PATH="$PATH:/usr/local/go/bin"
export PATH="$PATH:${GOPATH}/bin:${GOROOT}/bin"

Continue with installing the Go dependencies and clone the OpenShift Hive Github repository:

$ mkdir -p ~/.go/src/github.com/openshift/
$ go get github.com/golang/mock/mockgen
$ go get github.com/golang/mock/gomock
$ go get github.com/cloudflare/cfssl/cmd/cfssl
$ go get github.com/cloudflare/cfssl/cmd/cfssljson
$ cd ~/.go/src/github.com/openshift/
$ git clone https://github.com/openshift/hive.git
$ cd hive/
$ git checkout remotes/origin/master

Before we run make deploy I would recommend modifying the Makefile that we only generate the Hive manifests without deploying them to Kubernetes:

$ sed -i -e 's#oc apply -f config/crds# #' -e 's#kustomize build overlays/deploy | oc apply -f -#kustomize build overlays/deploy > hive.yaml#' Makefile
$ make deploy
# The apis-path is explicitly specified so that CRDs are not created for v1alpha1
go run tools/vendor/sigs.k8s.io/controller-tools/cmd/controller-gen/main.go crd --apis-path=pkg/apis/hive/v1
CRD files generated, files can be found under path /home/ubuntu/.go/src/github.com/openshift/hive/config/crds.
go generate ./pkg/... ./cmd/...
hack/update-bindata.sh
# Deploy the operator manifests:
mkdir -p overlays/deploy
cp overlays/template/kustomization.yaml overlays/deploy
cd overlays/deploy && kustomize edit set image registry.svc.ci.openshift.org/openshift/hive-v4.0:hive=registry.svc.ci.openshift.org/openshift/hivev1:hive
kustomize build overlays/deploy > hive.yaml
rm -rf overlays/deploy

Quick look at the content of the hive.yaml manifest:

$ cat hive.yaml
apiVersion: v1
kind: Namespace
metadata:
  name: hive
---
apiVersion: v1
kind: ServiceAccount
metadata:
  name: hive-operator
  namespace: hive

...

---
apiVersion: apps/v1
kind: Deployment
metadata:
  labels:
    control-plane: hive-operator
    controller-tools.k8s.io: "1.0"
  name: hive-operator
  namespace: hive
spec:
  replicas: 1
  revisionHistoryLimit: 4
  selector:
    matchLabels:
      control-plane: hive-operator
      controller-tools.k8s.io: "1.0"
  template:
    metadata:
      labels:
        control-plane: hive-operator
        controller-tools.k8s.io: "1.0"
    spec:
      containers:
      - command:
        - /opt/services/hive-operator
        - --log-level
        - info
        env:
        - name: CLI_CACHE_DIR
          value: /var/cache/kubectl
        image: registry.svc.ci.openshift.org/openshift/hive-v4.0:hive
        imagePullPolicy: Always
        livenessProbe:
          failureThreshold: 1
          httpGet:
            path: /debug/health
            port: 8080
          initialDelaySeconds: 10
          periodSeconds: 10
        name: hive-operator
        resources:
          requests:
            cpu: 100m
            memory: 256Mi
        volumeMounts:
        - mountPath: /var/cache/kubectl
          name: kubectl-cache
      serviceAccountName: hive-operator
      terminationGracePeriodSeconds: 10
      volumes:
      - emptyDir: {}
        name: kubectl-cache

Now we can apply the Hive custom resource definition (crds):

$ kubectl apply -f ./config/crds/
customresourcedefinition.apiextensions.k8s.io/checkpoints.hive.openshift.io created
customresourcedefinition.apiextensions.k8s.io/clusterdeployments.hive.openshift.io created
customresourcedefinition.apiextensions.k8s.io/clusterdeprovisions.hive.openshift.io created
customresourcedefinition.apiextensions.k8s.io/clusterimagesets.hive.openshift.io created
customresourcedefinition.apiextensions.k8s.io/clusterprovisions.hive.openshift.io created
customresourcedefinition.apiextensions.k8s.io/clusterstates.hive.openshift.io created
customresourcedefinition.apiextensions.k8s.io/dnszones.hive.openshift.io created
customresourcedefinition.apiextensions.k8s.io/hiveconfigs.hive.openshift.io created
customresourcedefinition.apiextensions.k8s.io/machinepools.hive.openshift.io created
customresourcedefinition.apiextensions.k8s.io/selectorsyncidentityproviders.hive.openshift.io created
customresourcedefinition.apiextensions.k8s.io/selectorsyncsets.hive.openshift.io created
customresourcedefinition.apiextensions.k8s.io/syncidentityproviders.hive.openshift.io created
customresourcedefinition.apiextensions.k8s.io/syncsets.hive.openshift.io created
customresourcedefinition.apiextensions.k8s.io/syncsetinstances.hive.openshift.io created

And continue to apply the hive.yaml manifest for deploying the OpenShift Hive operator and its components:

$ kubectl apply -f hive.yaml
namespace/hive created
serviceaccount/hive-operator created
clusterrole.rbac.authorization.k8s.io/hive-frontend created
clusterrole.rbac.authorization.k8s.io/hive-operator-role created
clusterrole.rbac.authorization.k8s.io/manager-role created
clusterrole.rbac.authorization.k8s.io/system:openshift:hive:hiveadmission created
rolebinding.rbac.authorization.k8s.io/extension-server-authentication-reader-hiveadmission created
clusterrolebinding.rbac.authorization.k8s.io/auth-delegator-hiveadmission created
clusterrolebinding.rbac.authorization.k8s.io/hive-frontend created
clusterrolebinding.rbac.authorization.k8s.io/hive-operator-rolebinding created
clusterrolebinding.rbac.authorization.k8s.io/hiveadmission-hive-hiveadmission created
clusterrolebinding.rbac.authorization.k8s.io/hiveapi-cluster-admin created
clusterrolebinding.rbac.authorization.k8s.io/manager-rolebinding created
deployment.apps/hive-operator created

For the Hive admission controller you need to generate a SSL certifcate:

$ ./hack/hiveadmission-dev-cert.sh
~/Dropbox/hive/hiveadmission-certs ~/Dropbox/hive
2020/02/03 22:17:30 [INFO] generate received request
2020/02/03 22:17:30 [INFO] received CSR
2020/02/03 22:17:30 [INFO] generating key: ecdsa-256
2020/02/03 22:17:30 [INFO] encoded CSR
certificatesigningrequest.certificates.k8s.io/hiveadmission.hive configured
certificatesigningrequest.certificates.k8s.io/hiveadmission.hive approved
-----BEGIN CERTIFICATE-----
MIICaDCCAVCgAwIBAgIQHvvDPncIWHRcnDzzoWGjQDANBgkqhkiG9w0BAQsFADAv
MS0wKwYDVQQDEyRiOTk2MzhhNS04OWQyLTRhZTAtYjI4Ny1iMWIwOGNmOGYyYjAw
HhcNMjAwMjAzMjIxNTA3WhcNMjUwMjAxMjIxNTA3WjAhMR8wHQYDVQQDExZoaXZl
YWRtaXNzaW9uLmhpdmUuc3ZjMFkwEwYHKoZIzj0CAQYIKoZIzj0DAQcDQgAEea4N
UPbvzM3VdtOkdJ7lBytekRTvwGMqs9HgG14CtqCVCOFq8f+BeqqyrRbJsX83iBfn
gMc54moElb5kIQNjraNZMFcwDAYDVR0TAQH/BAIwADBHBgNVHREEQDA+ghZoaXZl
YWRtaXNzaW9uLmhpdmUuc3ZjgiRoaXZlYWRtaXNzaW9uLmhpdmUuc3ZjLmNsdXN0
ZXIubG9jYWwwDQYJKoZIhvcNAQELBQADggEBADhgT3tNnFs6hBIZFfWmoESe6nnZ
fy9GmlmF9qEBo8FZSk/LYvV0peOdgNZCHqsT2zaJjxULqzQ4zfSb/koYpxeS4+Bf
xwgHzIB/ylzf54wVkILWUFK3GnYepG5dzTXS7VHc4uiNJe0Hwc5JI4HBj7XdL3C7
cbPm7T2cBJi2jscoCWELWo/0hDxkcqZR7rdeltQQ+Uhz87LhTTqlknAMFzL7tM/+
pJePZMQgH97vANsbk97bCFzRZ4eABYSiN0iAB8GQM5M+vK33ZGSVQDJPKQQYH6th
Kzi9wrWEeyEtaWozD5poo9s/dxaLxFAdPDICkPB2yr5QZB+NuDgA+8IYffo=
-----END CERTIFICATE-----
secret/hiveadmission-serving-cert created
~/Dropbox/hive

Afterwards we can check if all the pods are running, this might take a few seconds:

$ kubectl get pods -n hive
NAME                                READY   STATUS    RESTARTS   AGE
hive-controllers-7c6ccc84b9-q7k7m   1/1     Running   0          31s
hive-operator-f9f4447fd-jbmkh       1/1     Running   0          55s
hiveadmission-6766c5bc6f-9667g      1/1     Running   0          27s
hiveadmission-6766c5bc6f-gvvlq      1/1     Running   0          27s

The Hive operator is successfully installed on your Kubernetes cluster but we are not finished yet. To create the required Cluster Deployment manifests we need to generate the hiveutil binary:

$ make hiveutil
go generate ./pkg/... ./cmd/...
hack/update-bindata.sh
go build -o bin/hiveutil github.com/openshift/hive/contrib/cmd/hiveutil

To generate Hive Cluster Deployment manifests just run the following hiveutil command below, I output the definition with -o into yaml:

$ bin/hiveutil create-cluster --base-domain=mydomain.example.com --cloud=aws mycluster -o yaml
apiVersion: v1
items:
- apiVersion: hive.openshift.io/v1
  kind: ClusterImageSet
  metadata:
    creationTimestamp: null
    name: mycluster-imageset
  spec:
    releaseImage: quay.io/openshift-release-dev/ocp-release:4.3.2-x86_64
  status: {}
- apiVersion: v1
  kind: Secret
  metadata:
    creationTimestamp: null
    name: mycluster-aws-creds
  stringData:
    aws_access_key_id: <-YOUR-AWS-ACCESS-KEY->
    aws_secret_access_key: <-YOUR-AWS-SECRET-KEY->
  type: Opaque
- apiVersion: v1
  data:
    install-config.yaml: <-BASE64-ENCODED-OPENSHIFT4-INSTALL-CONFIG->
  kind: Secret
  metadata:
    creationTimestamp: null
    name: mycluster-install-config
  type: Opaque
- apiVersion: hive.openshift.io/v1
  kind: ClusterDeployment
  metadata:
    creationTimestamp: null
    name: mycluster
  spec:
    baseDomain: mydomain.example.com
    clusterName: mycluster
    controlPlaneConfig:
      servingCertificates: {}
    installed: false
    platform:
      aws:
        credentialsSecretRef:
          name: mycluster-aws-creds
        region: us-east-1
    provisioning:
      imageSetRef:
        name: mycluster-imageset
      installConfigSecretRef:
        name: mycluster-install-config
  status:
    clusterVersionStatus:
      availableUpdates: null
      desired:
        force: false
        image: ""
        version: ""
      observedGeneration: 0
      versionHash: ""
- apiVersion: hive.openshift.io/v1
  kind: MachinePool
  metadata:
    creationTimestamp: null
    name: mycluster-worker
  spec:
    clusterDeploymentRef:
      name: mycluster
    name: worker
    platform:
      aws:
        rootVolume:
          iops: 100
          size: 22
          type: gp2
        type: m4.xlarge
    replicas: 3
  status:
    replicas: 0
kind: List
metadata: {}

I hope this post is useful in getting you started with OpenShift Hive. In my next article I will go through the details of the OpenShift 4 cluster deployment with Hive.

Read my new article about OpenShift / OKD 4.x Cluster Deployment using OpenShift Hive

OpenShift Hive – API driven OpenShift cluster provisioning and management operator

RedHat invited me and my colleague Matt to speak at RedHat OpenShift Commons in London about the API driven OpenShift cluster provisioning and management operator called OpenShift Hive. We have been using OpenShift Hive for the past few months to provision and manage the OpenShift 4 estate across multiple environments. Below the video recording of our talk at OpenShift Commons London:

The Hive operator requires to run on a separate Kubernetes cluster to centrally provision and manage the OpenShift 4 clusters. With Hive you can manage hundreds of cluster deployments and configuration with a single operator. There is nothing required on the OpenShift 4 clusters itself, Hive only requires access to the cluster API:

The ClusterDeployment custom resource is the definition for the cluster specs, similar to the openshift-installer install-config where you define cluster specifications, cloud credential and image pull secrets. Below is an example of the ClusterDeployment manifest:

---
apiVersion: hive.openshift.io/v1
kind: ClusterDeployment
metadata:
  name: mycluster
  namespace: mynamespace
spec:
  baseDomain: hive.example.com
  clusterName: mycluster
  platform:
    aws:
      credentialsSecretRef:
        name: mycluster-aws-creds
      region: eu-west-1
  provisioning:
    imageSetRef:
      name: openshift-v4.3.0
    installConfigSecretRef:
      name: mycluster-install-config
    sshPrivateKeySecretRef:
      name: mycluster-ssh-key
  pullSecretRef:
    name: mycluster-pull-secret

The SyncSet custom resource is defining the configuration and is able to regularly reconcile the manifests to keep all clusters synchronised. With SyncSets you can apply resources and patches as you see in the example below:

---
apiVersion: hive.openshift.io/v1
kind: SyncSet
metadata:
  name: mygroup
spec:
  clusterDeploymentRefs:
  - name: ClusterName
  resourceApplyMode: Upsert
  resources:
  - apiVersion: user.openshift.io/v1
    kind: Group
    metadata:
      name: mygroup
    users:
    - myuser
  patches:
  - kind: ConfigMap
    apiVersion: v1
    name: foo
    namespace: default
    patch: |-
      { "data": { "foo": "new-bar" } }
    patchType: merge
  secretReferences:
  - source:
      name: ad-bind-password
      namespace: default
    target:
      name: ad-bind-password
      namespace: openshift-config

Depending of the amount of resource and patches you want to apply, a SyncSet can get pretty large and is not very easy to manage. My colleague Matt wrote a SyncSet Generator, please check this Github repository.

In one of my next articles I will go into more detail on how to deploy OpenShift Hive and I’ll provide more examples of how to use ClusterDeployment and SyncSets. In the meantime please check out the OpenShift Hive repository for more details, additionally here are links to the Hive documentation on using Hive and Syncsets.

Read my new article about installing OpenShift Hive.

Using Operator Lifecycle Manager and create custom Operator Catalog for Kubernetes

In the beginning of 2019 RedHat announced the launch of the OperatorHub.io and a lot of things have happened since then; OpenShift version 4 got released which is fully managed by Kubernetes operators and other vendors started to release their own operators to deploy their applications to Kubernetes. Even creating your own operators is becoming more popular and state-of-the-art if you run your own Kubernetes clusters.

I want to go into the details of how the Operator Lifecycle Manager (OLM) works and how you can create your own operator Catalog Server and use with Kubernetes to install operators but before we start let’s look how this works. The OLM is responsible for installing and managing the lifecycle of Kubernetes operators and uses a CatalogSource from which it installs the operators.

We should start by creating our own Catalog Server which is straightforward: we need to clone the community-operator repository and build a new catalog-server container image. If you would like to modify which operators should be in the catalog just delete the operators in the ./upstream-community-operators/ folder or add your own operators, in my example I only want to keep the SysDig operator:

git clone https://github.com/operator-framework/community-operators
cd community-operators/
rm ci.Dockerfile
mv upstream.Dockerfile Dockerfile
cd upstream-community-operators/
rm -rfv !("sysdig")
cd ..

Now we can build the new catalog container image and push to the registry:

$ docker build . --rm -t berndonline/catalog-server
Sending build context to Docker daemon  23.34MB
Step 1/10 : FROM quay.io/operator-framework/upstream-registry-builder:v1.3.0 as builder
 ---> e08ceacda476
Step 2/10 : COPY upstream-community-operators manifests
 ---> 9e4b4e98a968
Step 3/10 : RUN ./bin/initializer -o ./bundles.db
 ---> Running in b11415b71497
time="2020-01-11T15:14:02Z" level=info msg="loading Bundles" dir=manifests
time="2020-01-11T15:14:02Z" level=info msg=directory dir=manifests file=manifests load=bundles
time="2020-01-11T15:14:02Z" level=info msg=directory dir=manifests file=sysdig load=bundles
time="2020-01-11T15:14:02Z" level=info msg=directory dir=manifests file=1.4.0 load=bundles
time="2020-01-11T15:14:02Z" level=info msg="found csv, loading bundle" dir=manifests file=sysdig-operator.v1.4.0.clusterserviceversion.yaml load=bundles
time="2020-01-11T15:14:02Z" level=info msg="loading bundle file" dir=manifests file=sysdig-operator.v1.4.0.clusterserviceversion.yaml load=bundle
time="2020-01-11T15:14:02Z" level=info msg="loading bundle file" dir=manifests file=sysdigagents.sysdig.com.crd.yaml load=bundle
time="2020-01-11T15:14:02Z" level=info msg=directory dir=manifests file=1.4.7 load=bundles
time="2020-01-11T15:14:02Z" level=info msg="found csv, loading bundle" dir=manifests file=sysdig-operator.v1.4.7.clusterserviceversion.yaml load=bundles
time="2020-01-11T15:14:02Z" level=info msg="loading bundle file" dir=manifests file=sysdig-operator.v1.4.7.clusterserviceversion.yaml load=bundle
time="2020-01-11T15:14:02Z" level=info msg="loading bundle file" dir=manifests file=sysdigagents.sysdig.com.crd.yaml load=bundle
time="2020-01-11T15:14:02Z" level=info msg="loading Packages and Entries" dir=manifests
time="2020-01-11T15:14:02Z" level=info msg=directory dir=manifests file=manifests load=package
time="2020-01-11T15:14:02Z" level=info msg=directory dir=manifests file=sysdig load=package
time="2020-01-11T15:14:02Z" level=info msg=directory dir=manifests file=1.4.0 load=package
time="2020-01-11T15:14:02Z" level=info msg=directory dir=manifests file=1.4.7 load=package
Removing intermediate container b11415b71497
 ---> d3e1417fd1ee
Step 4/10 : FROM scratch
 --->
Step 5/10 : COPY --from=builder /build/bundles.db /bundles.db
 ---> 32c4b0ba7422
Step 6/10 : COPY --from=builder /build/bin/registry-server /registry-server
 ---> 5607183f50e7
Step 7/10 : COPY --from=builder /bin/grpc_health_probe /bin/grpc_health_probe
 ---> 6e612705cab1
Step 8/10 : EXPOSE 50051
 ---> Running in 5930349a782e
Removing intermediate container 5930349a782e
 ---> 2a0e6d01f7f5
Step 9/10 : ENTRYPOINT ["/registry-server"]
 ---> Running in 1daf50f151ae
Removing intermediate container 1daf50f151ae
 ---> 9fe3fed7cc2a
Step 10/10 : CMD ["--database", "/bundles.db"]
 ---> Running in 154a8d3bb346
Removing intermediate container 154a8d3bb346
 ---> f4d99376cbef
Successfully built f4d99376cbef
Successfully tagged berndonline/catalog-server:latest
$ docker push berndonline/catalog-server
The push refers to repository [docker.io/berndonline/catalog-server]
0516ee590bf5: Pushed
3bbd78f51bb3: Pushed
e4bd72ca23da: Pushed
latest: digest: sha256:b2251ebb6049a1ea994fd710c9182c89866255011ee50fd2a6eeb55c6de2fa21 size: 947

Next we need to install the Operator Lifecycle Manager, go to the release page in Github and install the latest version. First this will add the Custom Resource Definitions for OLM and afterwards deploys the required OLM operator resources:

kubectl apply -f https://github.com/operator-framework/operator-lifecycle-manager/releases/download/0.13.0/crds.yaml
kubectl apply -f https://github.com/operator-framework/operator-lifecycle-manager/releases/download/0.13.0/olm.yaml

Next we need to add the new CatalogSource and delete the default OperatorHub one to limit which operator can be installed:

cat <<EOF | kubectl apply -n olm -f -
---
apiVersion: operators.coreos.com/v1alpha1
kind: CatalogSource
metadata:
  name: custom-catalog
  namespace: olm
spec:
  sourceType: grpc
  image: docker.io/berndonline/catalog-server:latest
  displayName: Custom Operators
  publisher: techbloc.net
EOF

kubectl delete catalogsource operatorhubio-catalog -n olm

Do a quick check to make sure that the OLM components are running, you will see a pod with the custom-catalog which we previously created:

$ kubectl get pods -n olm
NAME                               READY   STATUS    RESTARTS   AGE
catalog-operator-5bdf7fc7b-wcbcs   1/1     Running   0          100s
custom-catalog-4hrbg               1/1     Running   0          32s
olm-operator-5ff565fcfc-2j9gt      1/1     Running   0          100s
packageserver-7fcbddc745-6s666     1/1     Running   0          88s
packageserver-7fcbddc745-jkfxs     1/1     Running   0          88s

Now we can look for the available operator manifests and see that our Custom Operator catalog only has the SysDig operator available:

$ kubectl get packagemanifests
NAME     CATALOG            AGE
sysdig   Custom Operators   36s

To install the SysDig operator we need to create the namespace, the operator group and the subscription which will instruct OLM to install the SysDig operator:

cat <<EOF | kubectl apply -f -
---
apiVersion: v1
kind: Namespace
metadata:
  name: sysdig
---
apiVersion: operators.coreos.com/v1alpha2
kind: OperatorGroup
metadata:
  name: operatorgroup
  namespace: sysdig
spec:
  targetNamespaces:
  - sysdig
---
apiVersion: operators.coreos.com/v1alpha1
kind: Subscription
metadata:
  name: sysdig
  namespace: sysdig
spec:
  channel: stable
  name: sysdig
  source: custom-catalog
  sourceNamespace: olm
EOF

At the end we need to check if the OLM installed the SysDig operator:

# Check that the subscription is created
$ kubectl get sub -n sysdig
NAME     PACKAGE   SOURCE           CHANNEL
sysdig   sysdig    custom-catalog   stable

# Check that OLM created an InstallPlan for installing the operator
$ kubectl get ip -n sysdig
NAME            CSV                      APPROVAL    APPROVED
install-sf6dl   sysdig-operator.v1.4.7   Automatic   true

# Check that the InstallPlan created the Cluster Service Version and installed the operator
$ kubectl get csv -n sysdig
NAME                     DISPLAY                 VERSION   REPLACES                 PHASE
sysdig-operator.v1.4.7   Sysdig Agent Operator   1.4.7     sysdig-operator.v1.4.0   Succeeded

# Check that the SysDig operator is running
$ kubectl get pod -n sysdig
NAME                               READY   STATUS    RESTARTS   AGE
sysdig-operator-74c9f665d9-bb8l9   1/1     Running   0          46s

Now you can install the SysDig agent by adding the following custom resource:

cat <<EOF | kubectl apply -f -
---
apiVersion: sysdig.com/v1alpha1
kind: SysdigAgent
metadata:
  name: agent
  namespace: sysdig
spec:
  ebpf:
    enabled: true
  secure:
    enabled: true
  sysdig:
    accessKey: XXXXXXX
EOF

To delete the SysDig operator just delete the namespace or run the following commands to delete subscription, operator group and cluster service version:

kubectl delete sub sysdig -n sysdig
kubectl delete operatorgroup operatorgroup -n sysdig
kubectl delete csv sysdig-operator.v1.4.7 -n sysdig

Thinking ahead you can let the Flux-CD operator manage all the resources and only use GitOps to apply cluster configuration:

I hope this article is interesting and useful, if you want to read more information about the Operator Lifecycle Manager please read the olm-book which has some useful information.