Something completely different to my more network related posts, this time it is about Platform as a Service with OpenShift Origin. There is a big push for containerized platform services from development.
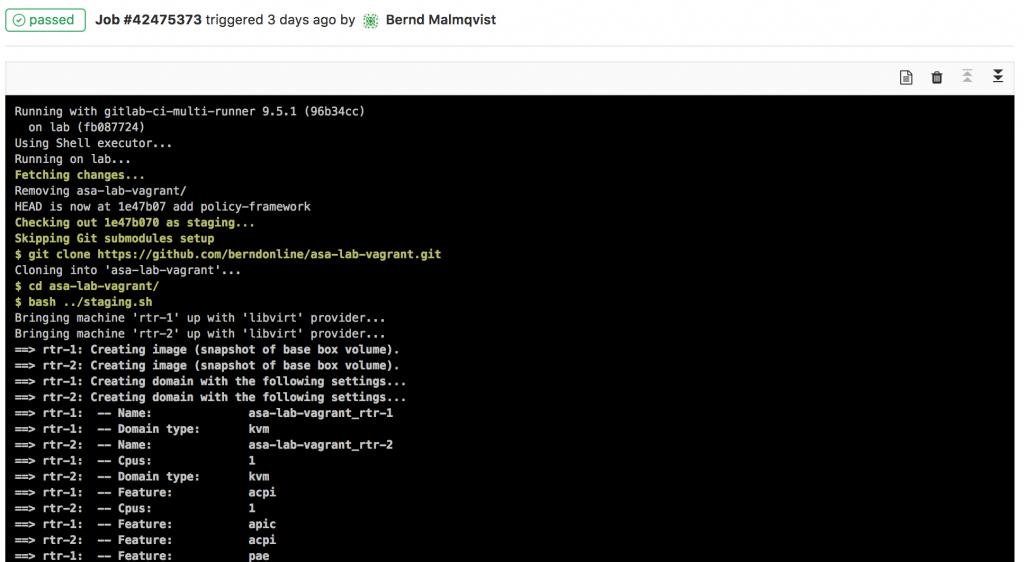
I was testing the official OpenShift Origin Ansible Playbook to install a small 5 node cluster and created an OpenShift Vagrant environment for this.
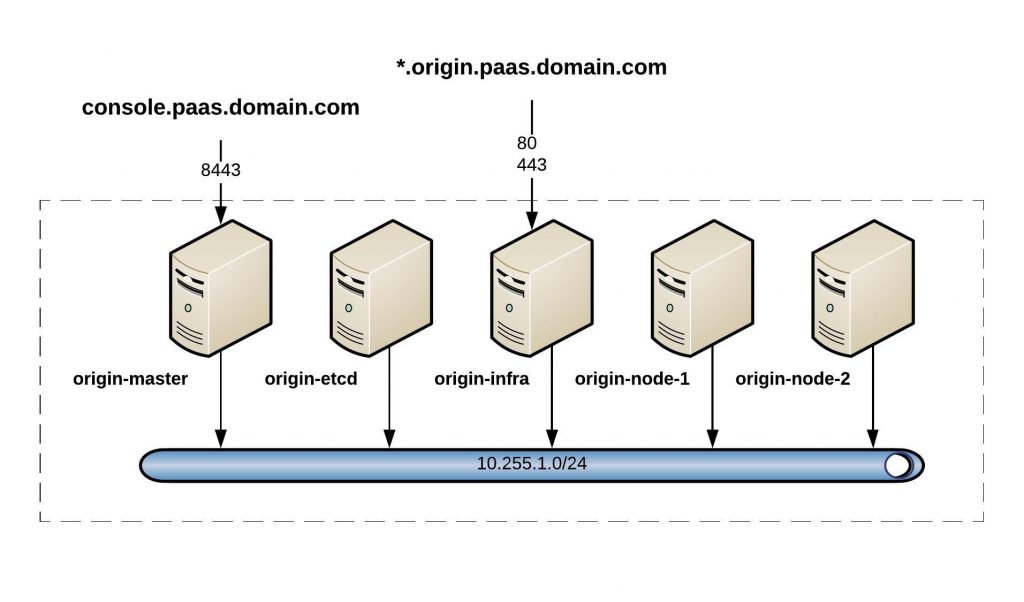
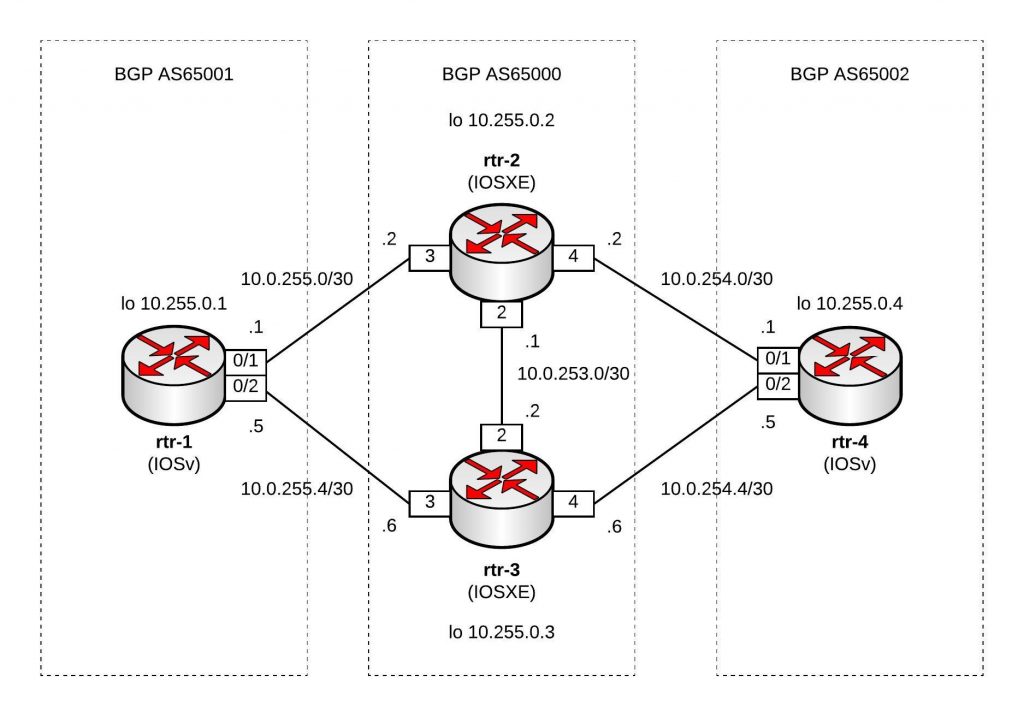
Cluster overview:
I recommend having a look at the official RedHat OpenShift documentation to understand the architecture because it is quite a complex platform.
As a pre-requisite, you need to install the vagrant hostmanager because Openshift needs to resolve hostnames and I don’t want to install a separate DNS server. Here you find more information: https://github.com/devopsgroup-io/vagrant-hostmanager
vagrant plugin install vagrant-hostmanager

sudo bash -c 'cat << EOF > /etc/sudoers.d/vagrant_hostmanager2
Cmnd_Alias VAGRANT_HOSTMANAGER_UPDATE = /bin/cp <your-home-folder>/.vagrant.d/tmp/hosts.local /etc/hosts
%sudo ALL=(root) NOPASSWD: VAGRANT_HOSTMANAGER_UPDATE
EOF'
Next, clone my Vagrant repository and the official OpenShift Origin ansible:
git clone [email protected]:berndonline/openshift-origin-vagrant.git
git clone [email protected]:openshift/openshift-ansible.git
Let’s start first by booting the OpenShift vagrant environment:
cd openshift-origin-vagrant/
./vagrant_up.sh
The vagrant host manager will update dynamically the /etc/hosts file on both the Guest and the Host machine:
...
## vagrant-hostmanager-start id: 55ed9acf-25e9-4b19-bfab-e0812a292dc0
10.255.1.81	origin-master

10.255.1.231	origin-etcd

10.255.1.182	origin-infra

10.255.1.72	origin-node-1

10.255.1.145	origin-node-2

## vagrant-hostmanager-end
...
Let’s have a quick look at the OpenShift inventory file. This has settings for the different node types and custom OpenShift and Vagrant variables. You need to modify a few things like public hostname and default subdomain:
OSEv3:children]
masters
nodes
etcd

[OSEv3:vars]
ansible_ssh_user=vagrant
ansible_become=yes

deployment_type=origin
openshift_release=v3.7.0
containerized=true
openshift_install_examples=true
enable_excluders=false
openshift_check_min_host_memory_gb=4
openshift_disable_check=docker_image_availability,docker_storage,disk_availability

# use htpasswd authentication with demo/demo
openshift_master_identity_providers=[{'name': 'htpasswd_auth', 'login': 'true', 'challenge': 'true', 'kind': 'HTPasswdPasswordIdentityProvider', 'filename': '/etc/origin/master/htpasswd'}]
openshift_master_htpasswd_users={'demo': '$apr1$.MaA77kd$Rlnn6RXq9kCjnEfh5I3w/.'}

# put the router on dedicated infra node
openshift_hosted_router_selector='region=infra'
openshift_master_default_subdomain=origin.paas.domain.com

# put the image registry on dedicated infra node
openshift_hosted_registry_selector='region=infra'

# project pods should be placed on primary nodes
osm_default_node_selector='region=primary'

# Vagrant variables
ansible_port='22'
ansible_user='vagrant'
ansible_ssh_private_key_file='/home/berndonline/.vagrant.d/insecure_private_key'

[masters]
origin-master  openshift_public_hostname="console.paas.domain.com"

[etcd]
origin-etcd

[nodes]
# master needs to be included in the node to be configured in the SDN
origin-master
origin-infra openshift_node_labels="{'region': 'infra', 'zone': 'default'}"
origin-node-[1:2] openshift_node_labels="{'region': 'primary', 'zone': 'default'}"
Now that we are ready, we need to check out the latest release and execute the Ansible Playbook:
cd openshift-ansible/
git checkout release-3.7
ansible-playbook ./playbooks/byo/config.yml -i ../openshift-origin-vagrant/inventory
The playbook takes forever to run, so do something else for the next 10 to 15 mins.
...

PLAY RECAP **********************************************************************************************************************************************************
localhost                  : ok=13   changed=0    unreachable=0    failed=0
origin-etcd                : ok=147  changed=47   unreachable=0    failed=0
origin-infra               : ok=202  changed=61   unreachable=0    failed=0
origin-master              : ok=561  changed=224  unreachable=0    failed=0
origin-node                : ok=201  changed=61   unreachable=0    failed=0


INSTALLER STATUS ****************************************************************************************************************************************************
Initialization             : Complete
Health Check               : Complete
etcd Install               : Complete
Master Install             : Complete
Master Additional Install  : Complete
Node Install               : Complete
Hosted Install             : Complete
Service Catalog Install    : Complete

Sunday 21 January 2018  20:55:16 +0100 (0:00:00.011)       0:11:56.549 ********
===============================================================================
etcd : Pull etcd container ---------------------------------------------------------------------------------------------------------------------------------- 79.51s
openshift_hosted : Ensure OpenShift pod correctly rolls out (best-effort today) ----------------------------------------------------------------------------- 31.54s
openshift_node : Pre-pull node image when containerized ----------------------------------------------------------------------------------------------------- 31.28s
template_service_broker : Verify that TSB is running -------------------------------------------------------------------------------------------------------- 30.87s
docker : Install Docker ------------------------------------------------------------------------------------------------------------------------------------- 30.41s
docker : Install Docker ------------------------------------------------------------------------------------------------------------------------------------- 26.32s
openshift_cli : Pull CLI Image ------------------------------------------------------------------------------------------------------------------------------ 23.03s
openshift_service_catalog : wait for api server to be ready ------------------------------------------------------------------------------------------------- 21.32s
openshift_hosted : Ensure OpenShift pod correctly rolls out (best-effort today) ----------------------------------------------------------------------------- 16.27s
restart master api ------------------------------------------------------------------------------------------------------------------------------------------ 10.69s
restart master controllers ---------------------------------------------------------------------------------------------------------------------------------- 10.62s
openshift_node : Start and enable node ---------------------------------------------------------------------------------------------------------------------- 10.42s
openshift_node : Start and enable node ---------------------------------------------------------------------------------------------------------------------- 10.30s
openshift_master : Start and enable master api on first master ---------------------------------------------------------------------------------------------- 10.21s
openshift_master : Start and enable master controller service ----------------------------------------------------------------------------------------------- 10.19s
os_firewall : Install iptables packages --------------------------------------------------------------------------------------------------------------------- 10.15s
os_firewall : Wait 10 seconds after disabling firewalld ----------------------------------------------------------------------------------------------------- 10.07s
os_firewall : need to pause here, otherwise the iptables service starting can sometimes cause ssh to fail --------------------------------------------------- 10.05s
openshift_node : Pre-pull node image when containerized ------------------------------------------------------------------------------------------------------ 7.85s
openshift_service_catalog : oc_process ----------------------------------------------------------------------------------------------------------------------- 7.44s
To publish both the openshift_public_hostname and openshift_master_default_subdomain, I have a Nginx reverse proxy running and publish 8443 from the origin-master and 80, 443 from the origin-infra nodes.
Here a Nginx example:
server {
  listen 8443 ssl;
  listen [::]:8443 ssl;
  server_name console.paas.domain.com;

  ssl on;
  ssl_certificate /etc/nginx/ssl/paas.domain.com-cert.pem;
  ssl_certificate_key /etc/nginx/ssl/paas.domain.com-key.pem;

  access_log  /var/log/nginx/openshift-console_access.log;
  error_log   /var/log/nginx/openshift-console_error.log;

location / {
  proxy_pass https://10.255.1.81:8443;
  proxy_http_version 1.1;
  proxy_set_header Upgrade $http_upgrade;
  proxy_set_header Connection 'upgrade';
  proxy_set_header Host $host;
  proxy_cache_bypass $http_upgrade;

  }
}
I will try to write more about OpenShift and Platform as a Service and how to deploy small applications like WordPress.
Have fun testing OpenShift and please share your feedback.


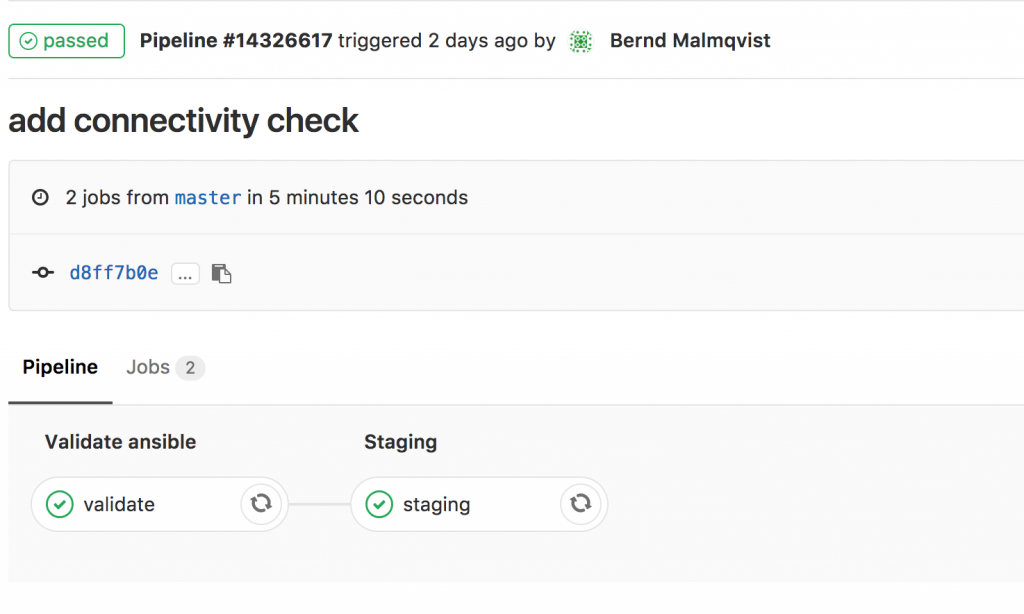 I will continue to improve the Playbook and the CICD pipeline so come back later to check it out.