Cumulus Linux Snapshot Rollback

After my first post about Cumulus Linux non-disruptive upgrade procedure on MLAG pairs here the rollback procedure which is good to know in case you need to revert a snapshot after an unsuccessful software upgrade or bigger configuration change which went wrong.

To back out from an upgrade, you can roll back the state of your switch (software and configuration) to an earlier snapshot.

The rollback is for sure disruptive!

The Rollback will revert the entire system except for logs and home directories. So any configuration changes made after the upgrade will also be reverted and lost.

To create a custom snapshot use the following command, otherwise during the software upgrade an snapshot is created automatically.

cumulus@switch:~$ sudo snapper create -d SNAPSHOT_NAME

To rollback a snapshot perform the following steps on each switch. View the list of snapshots on the switch using the following command

sudo snapper list

You will see output similar to the following:

cumulus@switch:~$ sudo snapper list
Type   | #  | Pre # | Date                            | User | Cleanup | Description                            | Userdata    
-------+----+-------+---------------------------------+------+---------+----------------------------------------+--------------
single | 0  |       |                                 | root |         | current                                |             
single | 1  |       | Sat 24 Sep 2016 01:45:36 AM UTC | root |         | first root filesystem                  |             
pre    | 20 |       | Thu 01 Dec 2016 01:43:29 AM UTC | root | number  | nclu pre  'net commit' (user cumulus)  |             
post   | 21 | 20    | Thu 01 Dec 2016 01:43:31 AM UTC | root | number  | nclu post 'net commit' (user cumulus)  |             
pre    | 22 |       | Thu 01 Dec 2016 01:44:18 AM UTC | root | number  | nclu pre  '20 rollback' (user cumulus) |             
post   | 23 | 22    | Thu 01 Dec 2016 01:44:18 AM UTC | root | number  | nclu post '20 rollback' (user cumulus) |             
single | 26 |       | Thu 01 Dec 2016 11:23:06 PM UTC | root |         | test_snapshot                          |             
pre    | 29 |       | Thu 01 Dec 2016 11:55:16 PM UTC | root | number  | pre-apt                                | important=yes
post   | 30 | 29    | Thu 01 Dec 2016 11:55:21 PM UTC | root | number  | post-apt                               | important=yes

You want to locate the “pre-apt” snapshot that corresponds to the date and time of the upgrade.  Once you have identified the snapshot, note the number from the second column of the table (#).

Determine the number on each switch and don’t assume the number is the same on both switches if you need to rollback.

For doing a rollback use the following command

sudo snapper rollback NUMBER#

You will see the following output:

cumulus@switch:~$ sudo snapper rollback 29
Creating read-only snapshot of current system. (Snapshot 31.)
Creating read-write snapshot of snapshot 29. (Snapshot 32.)
Setting default subvolume to snapshot 32.
cumulus@switch:~$

Note the snapshot number 31. reported for the “read-only snapshot of the current system”.   You can use this to revert the rollback if needed.

Reboot the system with the command

sudo reboot

More information you can find in the Cumulus Linux documentation:

https://docs.cumulusnetworks.com/display/DOCS/Using+Snapshots

VMware NSX-T 2.0 First Impression

Over the past two days I spend some time with VMware NSX-T 2.0 which has multi-hypervisor (KVM and ESXi) support, and is for containerised platform environments like Kubernetes and RedHat OpenShift. VMware has as well an NSX-T cloud version which can run in Amazon AWS and Google cloud services.

First big change is the new HTML5 web client which looks nice and clean, the menu structure is different to NSX-V for vSphere which you have to get used to first. NSX-V will also get the new HTML5 web clients soon I have heard:

VMware did quite a few changes in NSX-T, they moved over to Geneve and replaced the VXLAN encapsulation which is currently used in NSX-V. That makes it impossible at the moment to connect NSX-V and NSX-T because of the different overlay technologies.

Routing works different to the previous NSX for vSphere version having Tier 0 (edge/aggregation) and Tier 1 (tenant) routers. Previously in NSX-V you used Edge appliances as tenant router which is now replace with Tier 1 distributed routing. On the Tier 1 tenant router you don’t need to configure BGP anymore, you just specify to advertise connected routes, the connection between Tier 1 and Tier 0 also pushed down the default gateway.

The Edge appliance can be deployed as virtual machine or on Bare-Metal servers which makes the Transport Zoning different to NSX-V because Edge appliances need to be part of Transport Zones to connect to the overlay and physical VLAN:

On the Edge itself you have two functions, Distributed Routing (DR) for stateless forwarding and Service Routing (SR) for stateful forwarding like NAT:

Load balancing is currently missing  in the Edge appliance but this is coming in one of the next releases for NSX-T.

Here a network design with Tier 0 and Tier 1 routing in NSX-T:

I will write another post in the coming weeks about the detailed routing configuration in NSX-T. I am also curious to integrate Kubernetes in NSX-T to try out the integration for containerise platform environments.

Continuous Integration and Delivery for Networking with Cisco devices

This post is about continuous integration and continuous delivery (CICD) for Cisco devices and how to use network simulation to test automation before deploying this to production environments. That was one of the main reasons for me to use Vagrant for simulating the network because the virtual environment can be created on-demand and thrown away after the scripts run successful. Please read before my post about Cisco network simulation using Vagrant: Cisco IOSv and XE network simulation using Vagrant and Cisco ASAv network simulation using Vagrant.

Same like in my first post about Continuous Integration and Delivery for Networking with Cumulus Linux, I am using Gitlab.com and their Gitlab-runner for the continuous integration and delivery (CICD) pipeline.

  • You need to register your Gitlab-runner with the Gitlab repository:

  • The next step is to create your .gitlab-ci.yml which defines your CI-pipeline.
---
stages:
    - validate ansible
    - staging iosv
    - staging iosxe
validate:
    stage: validate ansible
    script:
        - bash ./linter.sh
staging_iosv:
    before_script:
        - git clone https://github.com/berndonline/cisco-lab-vagrant.git
        - cd cisco-lab-vagrant/
        - cp Vagrantfile-IOSv Vagrantfile
    stage: staging iosv
    script:
        - bash ../staging.sh
staging_iosxe:
    before_script:
        - git clone https://github.com/berndonline/cisco-lab-vagrant.git
        - cd cisco-lab-vagrant/
        - cp Vagrantfile-IOSXE Vagrantfile
    stage: staging iosxe
    script:
        - bash ../staging.sh

I clone the cisco vagrant lab which I use to spin-up a virtual staging environment and run the Ansible playbook against the virtual lab. The stages IOSv and IOSXE are just examples in my case depending what Cisco IOS versions you want to test.

The production stage would be similar to staging only that you run the Ansible playbook against your physical environment.

  • Basically any commit or merge in the Gitlab repo triggers the pipeline which is defined in the gitlab-ci.

  • The first stage is only to validate that the YAML files have the correct syntax.

  • Here the details of a job and when everything goes well the job succeeded.

This is an easy way to test your Ansible playbooks against a virtual Cisco environment before deploying this to a production system.

Here again my two repositories I use:

https://github.com/berndonline/cisco-lab-vagrant

https://github.com/berndonline/cisco-lab-provision

Read my new posts about Ansible Playbook for Cisco ASAv Firewall Topology or Ansible Playbook for Cisco BGP Routing Topology.

Cisco ASAv network simulation using Vagrant

After creating IOSv and IOS XE Vagrant images, now doing the same for Cisco ASAv. Like in my last post same basic idea to create an simulated on-demand  network environment for continuous integration testing.

You need to buy the Cisco ASAv to get access to the KVM image on the Cisco website!

The Cisco ASAv is pretty easy because you can get QCOW2 images directly on the Cisco website, there are a few changes you need to do before you can use this together with Vagrant.

Boot the ASAv QCOW2 image on KVM and add the configuration below:

conf t
interface Management0/0
 nameif management
 security-level 0
 ip address dhcp
 no shutdown
 exit

hostname asa
domain-name lab.local
username vagrant password vagrant privilege 15
aaa authentication ssh console LOCAL
aaa authorization exec LOCAL auto-enable
ssh version 2
ssh timeout 60
ssh key-exchange group dh-group14-sha1
ssh 0 0 management

username vagrant attributes
  service-type admin
  ssh authentication publickey AAAAB3NzaC1yc2EAAAABIwAAAQEA6NF8iallvQVp22WDkTkyrtvp9eWW6A8YVr+kz4TjGYe7gHzIw+niNltGEFHzD8+v1I2YJ6oXevct1YeS0o9HZyN1Q9qgCgzUFtdOKLv6IedplqoPkcmF0aYet2PkEDo3MlTBckFXPITAMzF8dJSIFo9D8HfdOV0IAdx4O7PtixWKn5y2hMNG0zQPyUecp4pzC6kivAIhyfHilFR61RGL+GPXQ2MWZWFYbAGjyiYJnAmCP3NOTd0jMZEnDkbUvxhMmBYSdETk1rRgm+R4LOzFUGaHqHDLKLX+FIPKcF96hrucXzcWyLbIbEgE98OHlnVYCzRdK8jlqm8tehUc9c9WhQ==

Now the image is ready to use with Vagrant. Create an instance folder under the user vagrant directory and copy the QCOW2 image. As well create an metadata.json file:

mkdir -p ~/.vagrant.d/boxes/asav/0/libvirt/
cp ASAv.qcow2 ~/.vagrant.d/boxes/asav/0/libvirt/box.img
printf '{"provider":"libvirt","format":"qcow2","virtual_size":2}' > metadata.json

Create a Vagrantfile with the needed configuration and boot up the VMs. You have to start the VMs one by one.

berndonline@lab:~/asa-lab-vagrant$ vagrant status
Current machine states:

asa-1                     not created (libvirt)
asa-2                     not created (libvirt)

This environment represents multiple VMs. The VMs are all listed
above with their current state. For more information about a specific
VM, run `vagrant status NAME`.
berndonline@lab:~/asa-lab-vagrant$ vagrant up asa-1
Bringing machine 'asa-1' up with 'libvirt' provider...
==> asa-1: Creating image (snapshot of base box volume).
==> asa-1: Creating domain with the following settings...
==> asa-1:  -- Name:              asa-lab-vagrant_asa-1
==> asa-1:  -- Domain type:       kvm
==> asa-1:  -- Cpus:              1
==> asa-1:  -- Feature:           acpi
==> asa-1:  -- Feature:           apic
==> asa-1:  -- Feature:           pae
==> asa-1:  -- Memory:            2048M
==> asa-1:  -- Management MAC:
==> asa-1:  -- Loader:
==> asa-1:  -- Base box:          asav
==> asa-1:  -- Storage pool:      default
==> asa-1:  -- Image:             /var/lib/libvirt/images/asa-lab-vagrant_asa-1.img (8G)
==> asa-1:  -- Volume Cache:      default
==> asa-1:  -- Kernel:
==> asa-1:  -- Initrd:
==> asa-1:  -- Graphics Type:     vnc
==> asa-1:  -- Graphics Port:     5900
==> asa-1:  -- Graphics IP:       127.0.0.1
==> asa-1:  -- Graphics Password: Not defined
==> asa-1:  -- Video Type:        cirrus
==> asa-1:  -- Video VRAM:        9216
==> asa-1:  -- Sound Type:
==> asa-1:  -- Keymap:            en-us
==> asa-1:  -- TPM Path:
==> asa-1:  -- INPUT:             type=mouse, bus=ps2
==> asa-1: Creating shared folders metadata...
==> asa-1: Starting domain.
==> asa-1: Waiting for domain to get an IP address...
==> asa-1: Waiting for SSH to become available...
==> asa-1: Configuring and enabling network interfaces...
    asa-1: SSH address: 10.255.1.238:22
    asa-1: SSH username: vagrant
    asa-1: SSH auth method: private key
    asa-1: Warning: Connection refused. Retrying...
==> asa-1: Running provisioner: ansible...
    asa-1: Running ansible-playbook...

PLAY [all] *********************************************************************

PLAY RECAP *********************************************************************

berndonline@lab:~/asa-lab-vagrant$ vagrant up asa-2
Bringing machine 'asa-2' up with 'libvirt' provider...
==> asa-2: Creating image (snapshot of base box volume).
==> asa-2: Creating domain with the following settings...
==> asa-2:  -- Name:              asa-lab-vagrant_asa-2
==> asa-2:  -- Domain type:       kvm
==> asa-2:  -- Cpus:              1
==> asa-2:  -- Feature:           acpi
==> asa-2:  -- Feature:           apic
==> asa-2:  -- Feature:           pae
==> asa-2:  -- Memory:            2048M
==> asa-2:  -- Management MAC:
==> asa-2:  -- Loader:
==> asa-2:  -- Base box:          asav
==> asa-2:  -- Storage pool:      default
==> asa-2:  -- Image:             /var/lib/libvirt/images/asa-lab-vagrant_asa-2.img (8G)
==> asa-2:  -- Volume Cache:      default
==> asa-2:  -- Kernel:
==> asa-2:  -- Initrd:
==> asa-2:  -- Graphics Type:     vnc
==> asa-2:  -- Graphics Port:     5900
==> asa-2:  -- Graphics IP:       127.0.0.1
==> asa-2:  -- Graphics Password: Not defined
==> asa-2:  -- Video Type:        cirrus
==> asa-2:  -- Video VRAM:        9216
==> asa-2:  -- Sound Type:
==> asa-2:  -- Keymap:            en-us
==> asa-2:  -- TPM Path:
==> asa-2:  -- INPUT:             type=mouse, bus=ps2
==> asa-2: Creating shared folders metadata...
==> asa-2: Starting domain.
==> asa-2: Waiting for domain to get an IP address...
==> asa-2: Waiting for SSH to become available...
==> asa-2: Configuring and enabling network interfaces...
    asa-2: SSH address: 10.255.1.131:22
    asa-2: SSH username: vagrant
    asa-2: SSH auth method: private key
==> asa-2: Running provisioner: ansible...
    asa-2: Running ansible-playbook...

PLAY [all] *********************************************************************

PLAY RECAP *********************************************************************

berndonline@lab:~/asa-lab-vagrant$ vagrant status
Current machine states:

asa-1                     running (libvirt)
asa-2                     running (libvirt)

berndonline@lab:~/asa-lab-vagrant$

After the VMs are successfully booted you can connect with vagrant ssh:

berndonline@lab:~/asa-lab-vagrant$ vagrant ssh asa-1
Type help or '?' for a list of available commands.
asa# show version

Cisco Adaptive Security Appliance Software Version 9.6(2)
Device Manager Version 7.6(2)

Compiled on Tue 23-Aug-16 18:38 PDT by builders
System image file is "boot:/asa962-smp-k8.bin"
Config file at boot was "startup-config"

asa up 10 mins 31 secs

Hardware:   ASAv, 2048 MB RAM, CPU Xeon E5 series 3600 MHz,
Model Id:   ASAv10
Internal ATA Compact Flash, 8192MB
Slot 1: ATA Compact Flash, 8192MB
BIOS Flash Firmware Hub @ 0x0, 0KB

....

Configuration has not been modified since last system restart.
asa# exit

Logoff

Connection to 10.255.1.238 closed by remote host.
Connection to 10.255.1.238 closed.
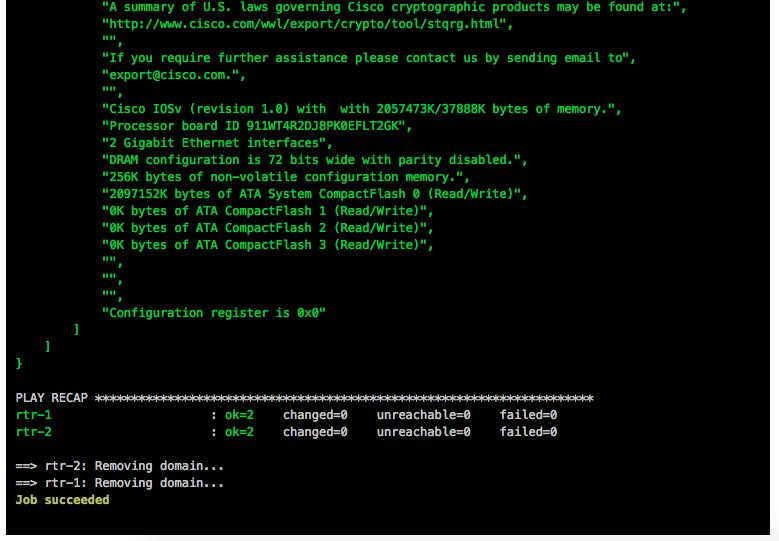
berndonline@lab:~/asa-lab-vagrant$ vagrant destroy
==> asa-2: Removing domain...
==> asa-2: Running triggers after destroy...
Removing known host entries
==> asa-1: Removing domain...
==> asa-1: Running triggers after destroy...
Removing known host entries
berndonline@lab:~/asa-lab-vagrant$

Here I have a virtual ASAv environment which I can spin-up and down as needed for automation testing.

The example Vagrantfile you can find in my Github repository:

https://github.com/berndonline/asa-lab-vagrant/blob/master/Vagrantfile

Read my new post about an Ansible Playbook for Cisco ASAv Firewall Topology

Cisco IOSv and XE network simulation using Vagrant

Here some interesting things I did with on-demand network simulation of Cisco IOSv and IOS XE using Vagrant. Yes, Cisco has is own product for network simulation called Cisco VIRL (Cisco Virtual Internet Routing Lab) but this is not as flexible and on-demand like using Vagrant and KVM. One of the reason was to do some continuous integration testing, same what I did with Cumulus Linux: Continuous Integration and Delivery for Networking with Cumulus Linux

You need to have an active Cisco VIRL subscription to download the VMDK images or buy the Cisco CSR1000V to get access to the ISO on the Cisco website!

IOS XE was the easiest because I found a Github repository to convert an existing CSR1000V ISO to vbox image to use with Vagrant. The only thing I needed to do was to converting the vbox image to KVM using vagrant mutate.

berndonline@lab:~/cisco-lab-vagrant$ vagrant status
Current machine states:

rtr-1                     not created (libvirt)
rtr-2                     not created (libvirt)

berndonline@lab:~/cisco-lab-vagrant$ vagrant up
Bringing machine 'rtr-1' up with 'libvirt' provider...
Bringing machine 'rtr-2' up with 'libvirt' provider...
==> rtr-1: Creating image (snapshot of base box volume).
==> rtr-2: Creating image (snapshot of base box volume).
==> rtr-1: Creating domain with the following settings...
==> rtr-1:  -- Name:              cisco-lab-vagrant_rtr-1
==> rtr-2: Creating domain with the following settings...
==> rtr-1:  -- Domain type:       kvm
==> rtr-2:  -- Name:              cisco-lab-vagrant_rtr-2
==> rtr-1:  -- Cpus:              1
==> rtr-2:  -- Domain type:       kvm
==> rtr-1:  -- Feature:           acpi
==> rtr-2:  -- Cpus:              1
==> rtr-2:  -- Feature:           acpi
==> rtr-2:  -- Feature:           apic
==> rtr-1:  -- Feature:           apic
==> rtr-2:  -- Feature:           pae
==> rtr-1:  -- Feature:           pae
==> rtr-2:  -- Memory:            2048M
==> rtr-2:  -- Management MAC:
==> rtr-2:  -- Loader:
==> rtr-1:  -- Memory:            2048M
==> rtr-2:  -- Base box:          iosxe

....

==> rtr-1: Waiting for SSH to become available...
==> rtr-2: Waiting for SSH to become available...
==> rtr-1: Configuring and enabling network interfaces...
==> rtr-2: Configuring and enabling network interfaces...
    rtr-1: SSH address: 10.255.1.84:22
    rtr-1: SSH username: vagrant
    rtr-1: SSH auth method: private key
    rtr-2: SSH address: 10.255.1.208:22
    rtr-2: SSH username: vagrant
    rtr-2: SSH auth method: private key
==> rtr-1: Running provisioner: ansible...
    rtr-1: Running ansible-playbook...

PLAY [all] *********************************************************************

TASK [run show version on remote devices] **************************************
==> rtr-2: Running provisioner: ansible...
    rtr-2: Running ansible-playbook...

PLAY [all] *********************************************************************

TASK [run show version on remote devices] **************************************
ok: [rtr-1]

PLAY RECAP *********************************************************************
rtr-1                      : ok=1    changed=0    unreachable=0    failed=0

ok: [rtr-2]

PLAY RECAP *********************************************************************
rtr-2                      : ok=1    changed=0    unreachable=0    failed=0
berndonline@lab:~/cisco-lab-vagrant$ vagrant status
Current machine states:

rtr-1                     running (libvirt)
rtr-2                     running (libvirt)

berndonline@lab:~/cisco-lab-vagrant$

Afterwards you can connect with vagrant ssh to your virtual IOS XE VM:

berndonline@lab:~/cisco-lab-vagrant$ vagrant ssh rtr-1

csr1kv#show version
Cisco IOS XE Software, Version 03.16.00.S - Extended Support Release
Cisco IOS Software, CSR1000V Software (X86_64_LINUX_IOSD-UNIVERSALK9-M), Version 15.5(3)S, RELEASE SOFTWARE (fc6)
Technical Support: http://www.cisco.com/techsupport
Copyright (c) 1986-2015 by Cisco Systems, Inc.
Compiled Sun 26-Jul-15 20:16 by mcpre

Cisco IOS-XE software, Copyright (c) 2005-2015 by cisco Systems, Inc.
All rights reserved.  Certain components of Cisco IOS-XE software are
licensed under the GNU General Public License ("GPL") Version 2.0.  The
software code licensed under GPL Version 2.0 is free software that comes
with ABSOLUTELY NO WARRANTY.  You can redistribute and/or modify such
GPL code under the terms of GPL Version 2.0.  For more details, see the
documentation or "License Notice" file accompanying the IOS-XE software,
or the applicable URL provided on the flyer accompanying the IOS-XE
software.

ROM: IOS-XE ROMMON

csr1kv uptime is 9 minutes
Uptime for this control processor is 10 minutes
System returned to ROM by reload
System image file is "bootflash:packages.conf"
Last reload reason: 

....

berndonline@lab:~/cisco-lab-vagrant$ vagrant destroy
==> rtr-2: Removing domain...
==> rtr-1: Removing domain...
berndonline@lab:~/cisco-lab-vagrant$

Running IOSv on KVM wasn’t that easy because you only get VMDK (Virtual Machine Disk) which you need to convert to a QCOW2 image. The next step is to boot the QCOW2 image and add some additional configuration changes before you can use this with Vagrant. Give the VM at least 2048 MB and min. 1 vCPU.

Ones the VM is booted, connect and add the following configuration below. You need to create an vagrant user and add the ssh key from Vagrant, additionally create an EEM applet to generate the rsa key during boot otherwise Vagrant cannot connect to the VM. Afterwards save the running-config and turn off the VM:

conf t
ip vrf vrf-mgmt
	rd 1:1
	exit

interface Gig0/0
 description management
 ip vrf forwarding vrf-mgmt
 ip address dhcp
 no shutdown
 exit

ip domain-name lab.local

aaa new-model
aaa authentication login default local
aaa authorization exec default local 

username vagrant privilege 15 secret vagrant

crypto key generate rsa general-keys modulus 2048 

ip ssh version 2
ip ssh authentication-retries 5

ip ssh pubkey-chain
   username vagrant
    key-hash ssh-rsa DD3BB82E850406E9ABFFA80AC0046ED6
    exit
   exit

line vty 0 4
 exec-timeout 0 0
 transport input ssh
 exit

shell processing full

event manager session cli username vagrant
event manager applet EEM_SSH_Keygen authorization bypass

event syslog pattern SYS-5-RESTART
action 0.0 info type routername
action 0.1 set status none
action 1.0 cli command enable
action 2.0 cli command "show ip ssh | include ^SSH"
action 2.1 regexp "([ED][^ ]+)" \$_cli_result result status
action 2.2 syslog priority informational msg "SSH is currently \$status"
action 3.0 if \$status eq Disabled
action 3.1 cli command "configure terminal"
action 3.2 cli command "crypto key generate rsa usage-keys label SSHKEYS modulus 2048"
action 3.3 cli command "end"
action 3.4 cli command "copy run start"
action 3.5 syslog priority informational msg "SSH keys generated by EEM"
action 4.0 end
end

exit
write mem

Now the QCOW2 image is ready to use with Vagrant. Create an instance folder under the user vagrant directory and copy the QCOW2 image. As well create an metadata.json file:

mkdir -p ~/.vagrant.d/boxes/iosv/0/libvirt/
cp IOSv.qcow2 ~/.vagrant.d/boxes/iosv/0/libvirt/box.img
printf '{"provider":"libvirt","format":"qcow2","virtual_size":2}' > metadata.json

The IOSv image is ready to use with Vagrant, just create an Vagrantfile with the needed configuration and boot up the VMs.

berndonline@lab:~/cisco-lab-vagrant$ vagrant status
Current machine states:

rtr-1                     not created (libvirt)
rtr-2                     not created (libvirt)

berndonline@lab:~/cisco-lab-vagrant$ vagrant up
Bringing machine 'rtr-1' up with 'libvirt' provider...
Bringing machine 'rtr-2' up with 'libvirt' provider...
==> rtr-2: Creating image (snapshot of base box volume).
==> rtr-1: Creating image (snapshot of base box volume).
==> rtr-2: Creating domain with the following settings...
==> rtr-1: Creating domain with the following settings...
==> rtr-2:  -- Name:              cisco-lab-vagrant_rtr-2
==> rtr-2:  -- Domain type:       kvm
==> rtr-1:  -- Name:              cisco-lab-vagrant_rtr-1
==> rtr-2:  -- Cpus:              1
==> rtr-1:  -- Domain type:       kvm
==> rtr-2:  -- Feature:           acpi
==> rtr-1:  -- Cpus:              1
==> rtr-2:  -- Feature:           apic
==> rtr-1:  -- Feature:           acpi
==> rtr-2:  -- Feature:           pae
==> rtr-1:  -- Feature:           apic
==> rtr-2:  -- Memory:            2048M
==> rtr-1:  -- Feature:           pae
==> rtr-2:  -- Management MAC:
==> rtr-1:  -- Memory:            2048M
==> rtr-2:  -- Loader:
==> rtr-1:  -- Management MAC:
==> rtr-2:  -- Base box:          iosv
==> rtr-1:  -- Loader:
==> rtr-1:  -- Base box:          iosv

....

==> rtr-2: Waiting for SSH to become available...
==> rtr-1: Waiting for SSH to become available...
==> rtr-2: Configuring and enabling network interfaces...
==> rtr-1: Configuring and enabling network interfaces...
    rtr-2: SSH address: 10.255.1.234:22
    rtr-2: SSH username: vagrant
    rtr-2: SSH auth method: private key
    rtr-1: SSH address: 10.255.1.237:22
    rtr-1: SSH username: vagrant
    rtr-1: SSH auth method: private key
==> rtr-2: Running provisioner: ansible...
    rtr-2: Running ansible-playbook...

PLAY [all] *********************************************************************

TASK [run show version on remote devices] **************************************
Thursday 26 October 2017  18:21:22 +0200 (0:00:00.015)       0:00:00.015 ******
==> rtr-1: Running provisioner: ansible...
    rtr-1: Running ansible-playbook...

PLAY [all] *********************************************************************

TASK [run show version on remote devices] **************************************
Thursday 26 October 2017  18:21:23 +0200 (0:00:00.014)       0:00:00.014 ******
ok: [rtr-2]

PLAY RECAP *********************************************************************
rtr-2                      : ok=1    changed=0    unreachable=0    failed=0

Thursday 26 October 2017  18:21:24 +0200 (0:00:01.373)       0:00:01.388 ******
===============================================================================
run show version on remote devices -------------------------------------- 1.37s
ok: [rtr-1]

PLAY RECAP *********************************************************************
rtr-1                      : ok=1    changed=0    unreachable=0    failed=0

Thursday 26 October 2017  18:21:24 +0200 (0:00:01.380)       0:00:01.395 ******
===============================================================================
run show version on remote devices -------------------------------------- 1.38s
berndonline@lab:~/cisco-lab-vagrant$

After the VMs are successfully booted you can connect again with vagrant ssh:

berndonline@lab:~/cisco-lab-vagrant$ vagrant ssh rtr-1
**************************************************************************
* IOSv is strictly limited to use for evaluation, demonstration and IOS  *
* education. IOSv is provided as-is and is not supported by Cisco's      *
* Technical Advisory Center. Any use or disclosure, in whole or in part, *
* of the IOSv Software or Documentation to any third party for any       *
* purposes is expressly prohibited except as otherwise authorized by     *
* Cisco in writing.                                                      *
**************************************************************************
router#show version
Cisco IOS Software, IOSv Software (VIOS-ADVENTERPRISEK9-M), Version 15.6(2)T, RELEASE SOFTWARE (fc2)
Technical Support: http://www.cisco.com/techsupport
Copyright (c) 1986-2016 by Cisco Systems, Inc.
Compiled Tue 22-Mar-16 16:19 by prod_rel_team

ROM: Bootstrap program is IOSv

router uptime is 1 minute
System returned to ROM by reload
System image file is "flash0:/vios-adventerprisek9-m"
Last reload reason: Unknown reason

....

berndonline@lab:~/cisco-lab-vagrant$ vagrant destroy
==> rtr-2: Removing domain...
==> rtr-1: Removing domain...
berndonline@lab:~/cisco-lab-vagrant$

Basically thats it, your on-demand IOSv and IOS XE lab using Vagrant, ready for some automation and continuous integration testing.

The example Vagrantfiles you can find in my Github repository:

https://github.com/berndonline/cisco-lab-vagrant/blob/master/Vagrantfile-IOSXE

https://github.com/berndonline/cisco-lab-vagrant/blob/master/Vagrantfile-IOSv