Kubernetes in Docker (KinD) – Cluster Bootstrap Script for Continuous Integration

I have been using Kubernetes in Docker (KinD) for over a year and it’s ideal when you require an ephemeral Kubernetes cluster for local development or testing. My focus with the bootstrap script was to create a Kubernetes cluster where I can easily customise the configuration, choose the required CNI plugin, the Ingress controller or enable Service Mesh if needed, which is especially important in continuous integration pipelines. I will show you two simple examples below of how I use KinD for testing.
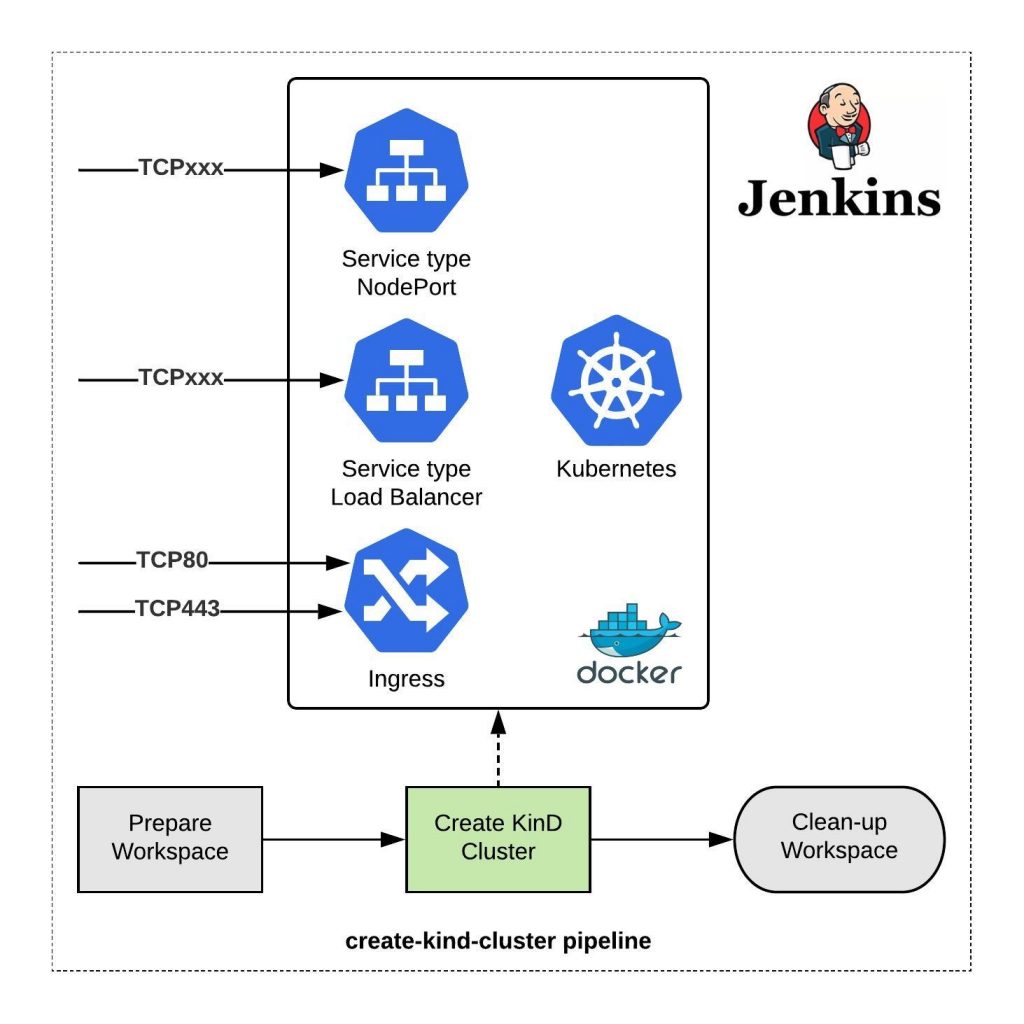
I created the ./kind.sh shell script which does what I need to create a cluster in a couple of minutes and apply the configuration.

    • Customise cluster configuration like Kubernetes version, the number of worker nodes, change the service- and pod IP address subnet and a couple of other cluster level configuration.
    • You can choose from different CNI plugins like KinD-CNI (default), Calico and Cilium, or optionally enable the Multus-CNI on top of the CNI plugin.
    • Install the popular known Nginx or Contour Kubernetes ingress controllers. Contour is interesting because it is an Envoy based Ingress controller and can be used for the Kubernetes Gateway API.
    • Enable Istio Service Mesh which is also available as a Gateway API option or install MetalLB, a Kubernetes service type load balancer plugin.
    • Install Operator Lifecycle Manager (OLM) to install Kubernetes community operators from OperatorHub.io.
$ ./kind.sh --help
usage: kind.sh [--name ]
               [--num-workers ]
               [--config-file ]
               [--kubernetes-version ]
               [--cluster-apiaddress ]
               [--cluster-apiport ]
               [--cluster-loglevel ]
               [--cluster-podsubnet ]
               [--cluster-svcsubnet ]
               [--disable-default-cni]
               [--install-calico-cni]
               [--install-cilium-cni]
               [--install-multus-cni]
               [--install-istio]
               [--install-metallb]
               [--install-nginx-ingress]
               [--install-contour-ingress]
               [--install-istio-gateway-api]
               [--install-contour-gateway-api]
               [--install-olm]
               [--help]

--name                          Name of the KIND cluster
                                DEFAULT: kind
--num-workers                   Number of worker nodes.
                                DEFAULT: 0 worker nodes.
--config-file                   Name of the KIND J2 configuration file.
                                DEFAULT: ./kind.yaml.j2
--kubernetes-version            Flag to specify the Kubernetes version.
                                DEFAULT: Kubernetes v1.21.1
--cluster-apiaddress            Kubernetes API IP address for kind (master).
                                DEFAULT: 0.0.0.0.
--cluster-apiport               Kubernetes API port for kind (master).
                                DEFAULT: 6443.
--cluster-loglevel              Log level for kind (master).
                                DEFAULT: 4.
--cluster-podsubnet             Pod subnet IP address range.
                                DEFAULT: 10.128.0.0/14.
--cluster-svcsubnet             Service subnet IP address range.
                                DEFAULT: 172.30.0.0/16.
--disable-default-cni           Flag to disable Kind default CNI - required to install custom cni plugin.
                                DEFAULT: Default CNI used.
--install-calico-cni            Flag to install Calico CNI Components.
                                DEFAULT: Don't install calico cni components.
--install-cilium-cni            Flag to install Cilium CNI Components.
                                DEFAULT: Don't install cilium cni components.
--install-multus-cni            Flag to install Multus CNI Components.
                                DEFAULT: Don't install multus cni components.
--install-istio                 Flag to install Istio Service Mesh Components.
                                DEFAULT: Don't install istio components.
--install-metallb               Flag to install Metal LB Components.
                                DEFAULT: Don't install loadbalancer components.
--install-nginx-ingress         Flag to install Ingress Components - can't be used in combination with istio.
                                DEFAULT: Don't install ingress components.
--install-contour-ingress       Flag to install Ingress Components - can't be used in combination with istio.
                                DEFAULT: Don't install ingress components.
--install-istio-gateway-api     Flag to install Istio Service Mesh Gateway API Components.
                                DEFAULT: Don't install istio components.
--install-contour-gateway-api   Flag to install Ingress Components - can't be used in combination with istio.
                                DEFAULT: Don't install ingress components.
--install-olm                   Flag to install Operator Lifecyle Manager
                                DEFAULT: Don't install olm components.
                                Visit https://operatorhub.io to install available operators
--delete                        Delete Kind cluster.

Based on the options you choose, the script renders the needed KinD config YAML file and creates the clusters locally in a couple of minutes. To install Istio Service Mesh on KinD you also need the Istio profile which you can find together with the bootstrap script in my GitHub Gists.

Let’s look into how I use KinD and the bootstrap script in Jenkins for continuous integration (CI). I have a pipeline which executes the bootstrap script to create the cluster on my Jenkins agent.
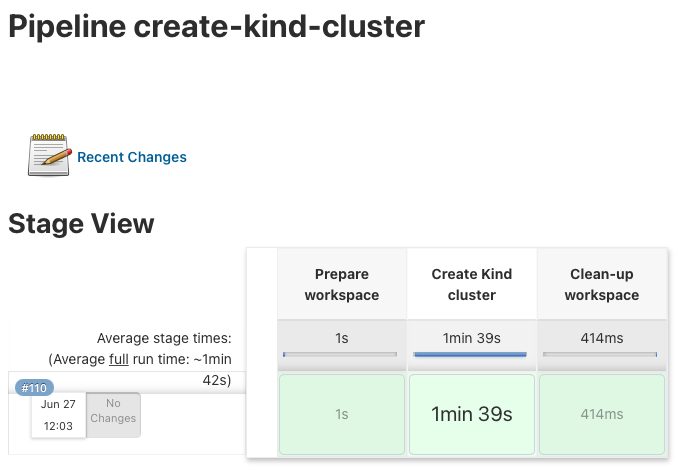
For now I kept the configuration very simple and only need the Nginx Ingress controller in this example:

stages {
    stage('Prepare workspace') {
        steps {
            git credentialsId: 'github-ssh', url: '[email protected]:ab7fb36162f39dbed08f7bd90072a3d2.git'
        }
    }

    stage('Create Kind cluster') {
        steps {
            sh '''#!/bin/bash
            bash ./kind.sh --kubernetes-version v1.21.1 \
                           --install-nginx-ingress
            '''
        }
    }
    stage('Clean-up workspace') {
        steps {
            sh 'rm -rf *'
        }
    }
}

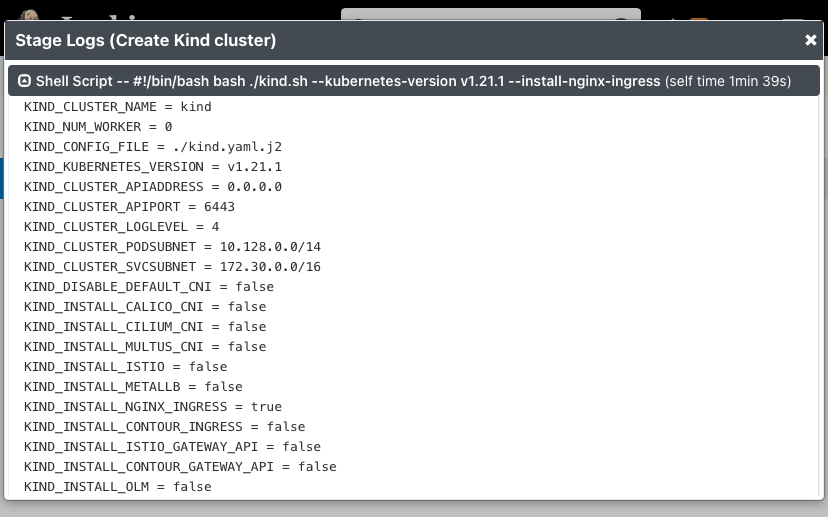
Log output of the script parameters:
I have written a Go Helloworld application and the Jenkins pipeline which runs the Go unit-tests and builds the container image. It also triggers the build job for the create-kind-cluster pipeline to spin-up the Kubernetes cluster.

...
stage ('Create Kind cluster') {
    steps {
        build job: 'create-kind-cluster'
    }
}
...

It then continues to deploy the newly build Helloworld container image and executes a simple end-to-end ingress test.
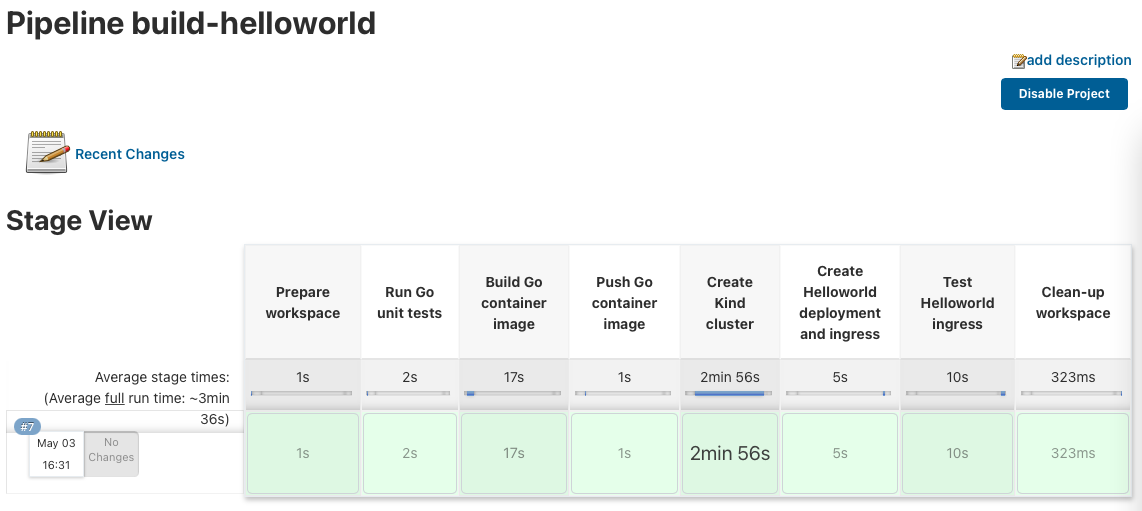
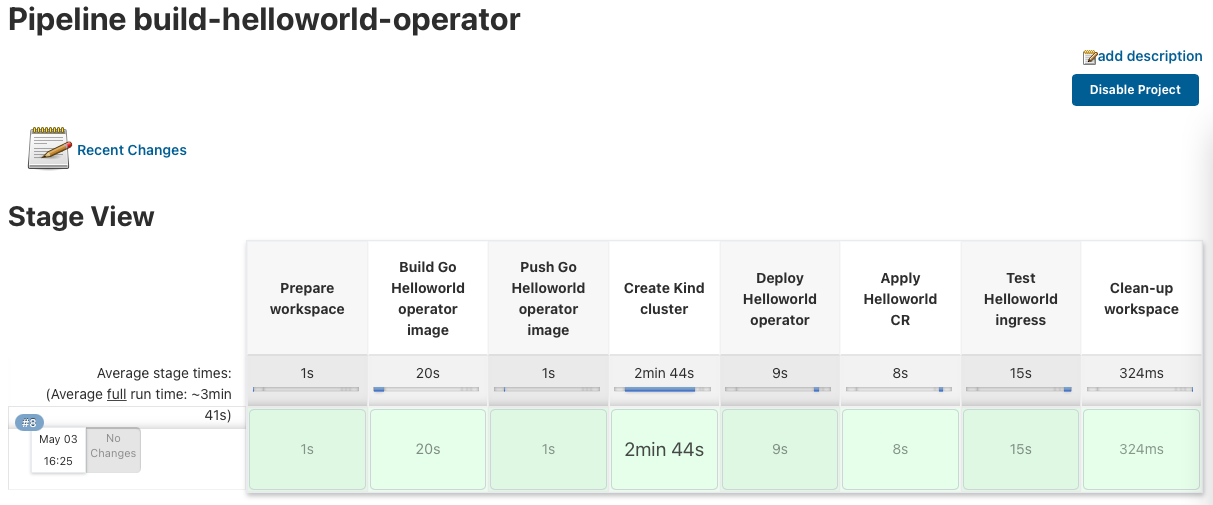
I also use this same example for my Go Helloworld Kubernetes operator build pipeline. It builds the Go operator and again triggers the build job to create the KinD cluster. It then continues to deploy the Helloworld operator and applies the Custom Resources, and finishes with a simple end-to-end ingress test.
I hope this is an interesting and useful article. Visit my GitHub Gists to download the KinD bootstrap script.
Deploy OpenShift using Jenkins Pipeline and Terraform

I wanted to make my life a bit easier and created a simple Jenkins pipeline to spin-up the AWS instance and deploy OpenShift. Read my previous article: Deploying OpenShift 3.11 Container Platform on AWS using Terraform. You will see in between steps which require input to stop the pipeline, and that keep the OpenShift cluster running without destroying it directly after installing OpenShift. Also check out my blog post I wrote about running Jenkins in a container with Ansible and Terraform.

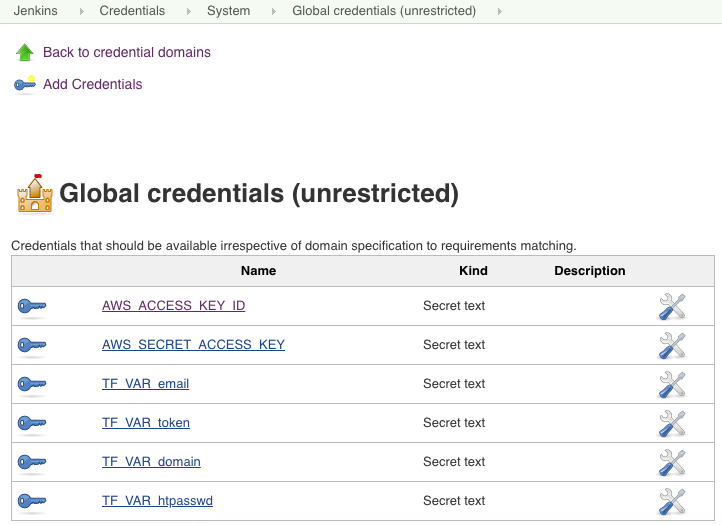
The Jenkins pipeline requires a few environment variables for the credentials to access AWS and CloudFlare. You need to create the necessary credentials beforehand and they get loaded when the pipeline starts.

Here are the pipeline steps which are self explanatory:

pipeline {
    agent any
    environment {
        AWS_ACCESS_KEY_ID = credentials('AWS_ACCESS_KEY_ID')
        AWS_SECRET_ACCESS_KEY = credentials('AWS_SECRET_ACCESS_KEY')
        TF_VAR_email = credentials('TF_VAR_email')
        TF_VAR_token = credentials('TF_VAR_token')
        TF_VAR_domain = credentials('TF_VAR_domain')
        TF_VAR_htpasswd = credentials('TF_VAR_htpasswd')
    }
    stages {
        stage('Prepare workspace') {
            steps {
                sh 'rm -rf *'
                git branch: 'aws-dev', url: 'https://github.com/berndonline/openshift-terraform.git'
                sh 'ssh-keygen -b 2048 -t rsa -f ./helper_scripts/id_rsa -q -N ""'
                sh 'chmod 600 ./helper_scripts/id_rsa'
                sh 'terraform init'
            }
        }
        stage('Run terraform apply') {
            steps {
                input 'Run terraform apply?'
            }
        }
        stage('terraform apply') {
            steps {
                sh 'terraform apply -auto-approve'
            }
        }
        stage('OpenShift Installation') {
            steps {
                sh 'sleep 600'
                sh 'scp -o StrictHostKeyChecking=no -o UserKnownHostsFile=/dev/null -i ./helper_scripts/id_rsa -r ./helper_scripts/id_rsa centos@$(terraform output bastion):/home/centos/.ssh/'
                sh 'scp -o StrictHostKeyChecking=no -o UserKnownHostsFile=/dev/null -i ./helper_scripts/id_rsa -r ./inventory/ansible-hosts  centos@$(terraform output bastion):/home/centos/ansible-hosts'
                sh 'ssh -o StrictHostKeyChecking=no -o UserKnownHostsFile=/dev/null -i ./helper_scripts/id_rsa -l centos $(terraform output bastion) -A "cd /openshift-ansible/ && ansible-playbook ./playbooks/openshift-pre.yml -i ~/ansible-hosts"'
                sh 'ssh -o StrictHostKeyChecking=no -o UserKnownHostsFile=/dev/null -i ./helper_scripts/id_rsa -l centos $(terraform output bastion) -A "cd /openshift-ansible/ && ansible-playbook ./playbooks/openshift-install.yml -i ~/ansible-hosts"'
            }
        }        
        stage('Run terraform destroy') {
            steps {
                input 'Run terraform destroy?'
            }
        }
        stage('terraform destroy') {
            steps {
                sh 'terraform destroy -force '
            }
        }
    }
}

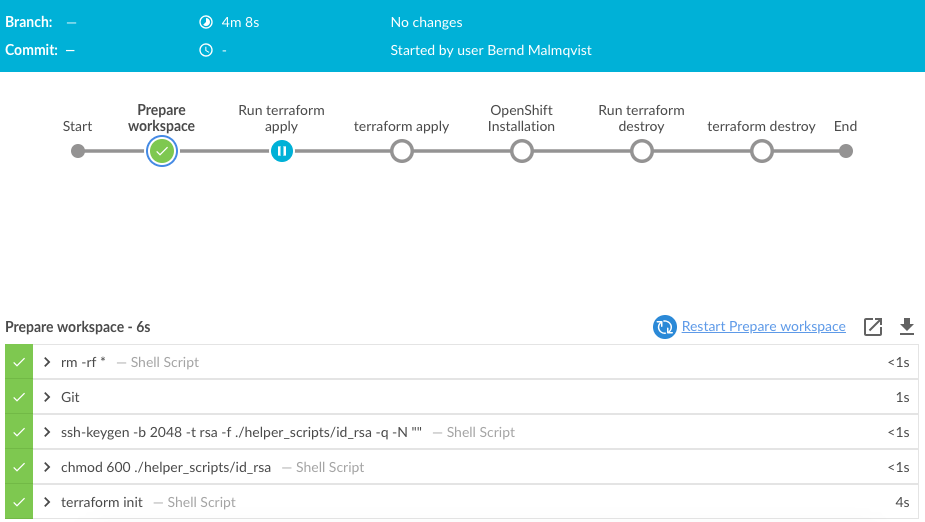
Let’s trigger the pipeline and look at the progress of the different steps.

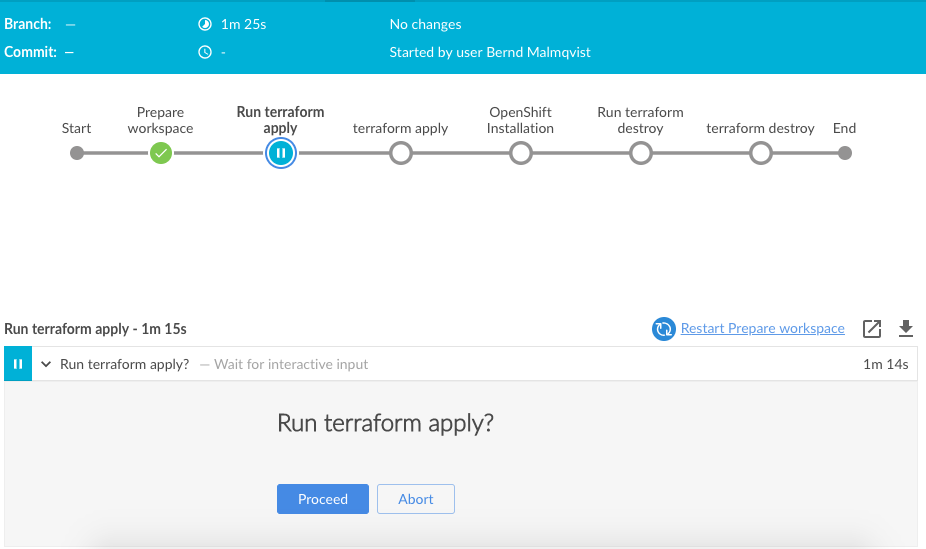
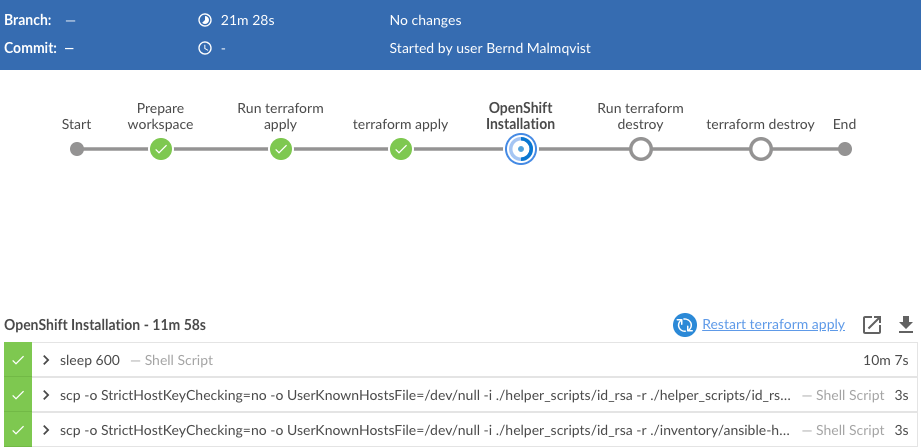
The first step preparing the workspace is very quick and the pipeline is waiting for an input to run terraform apply:

Just click on proceed to continue:

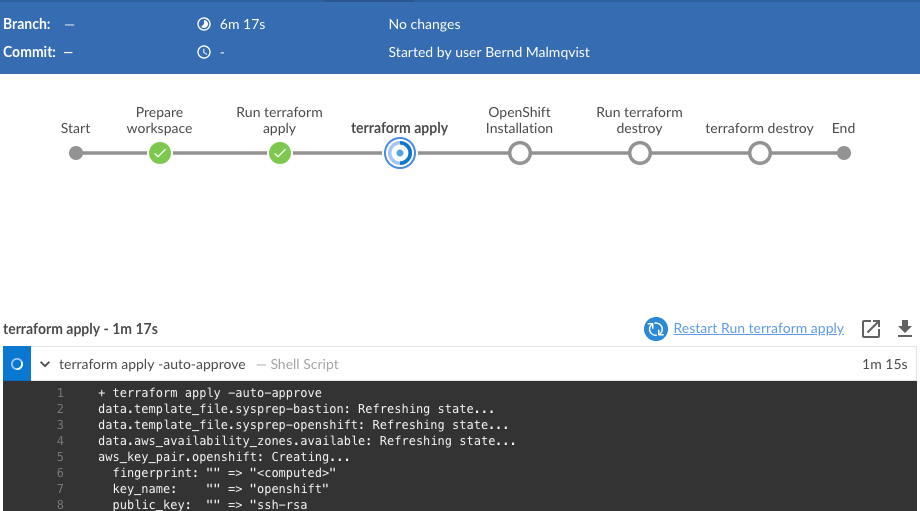
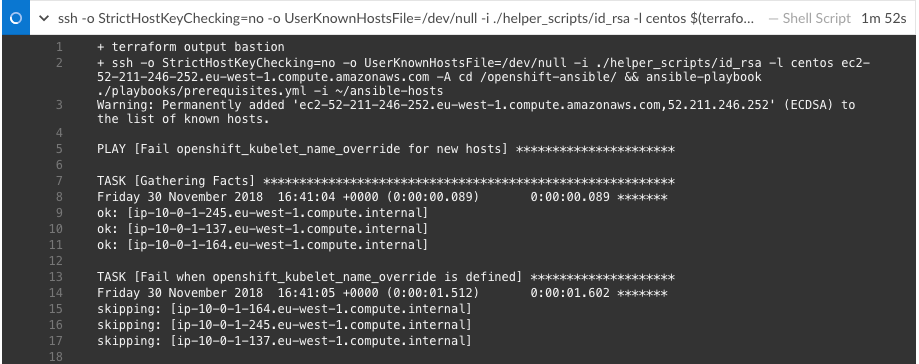
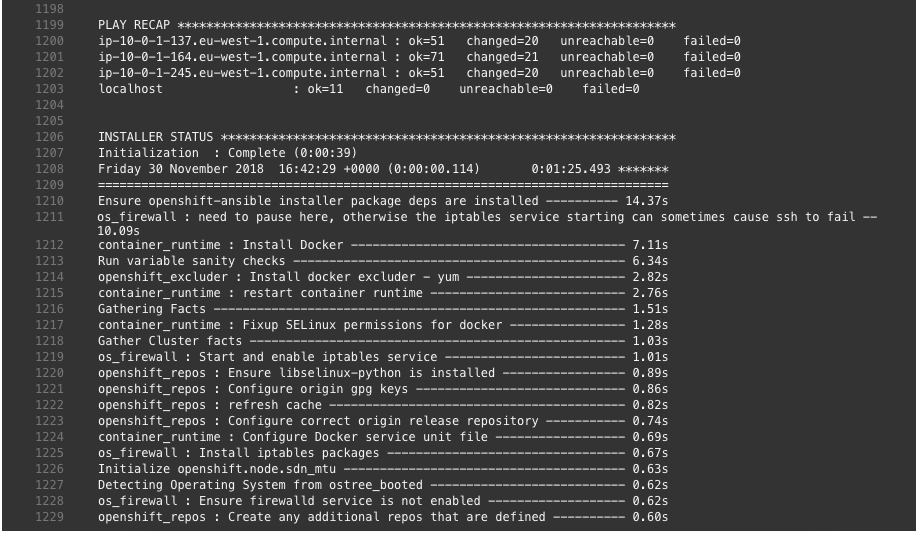
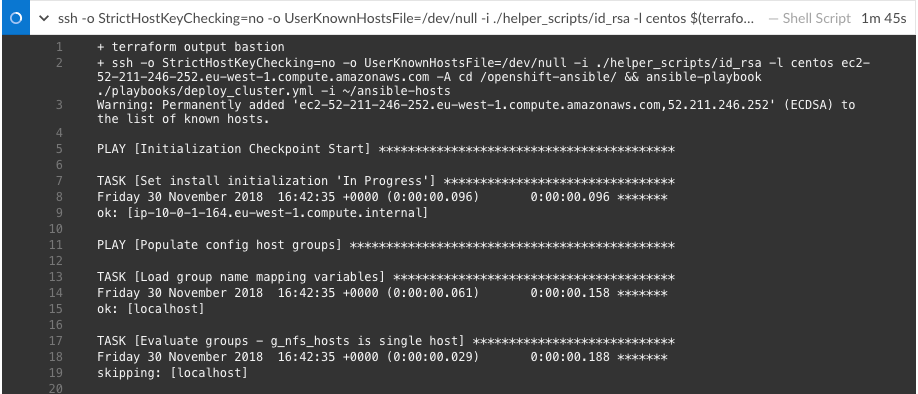
After the AWS and CloudFlare resources are created with Terraform, it continues with the next step installing OpenShift 3.11 on the AWS instances:

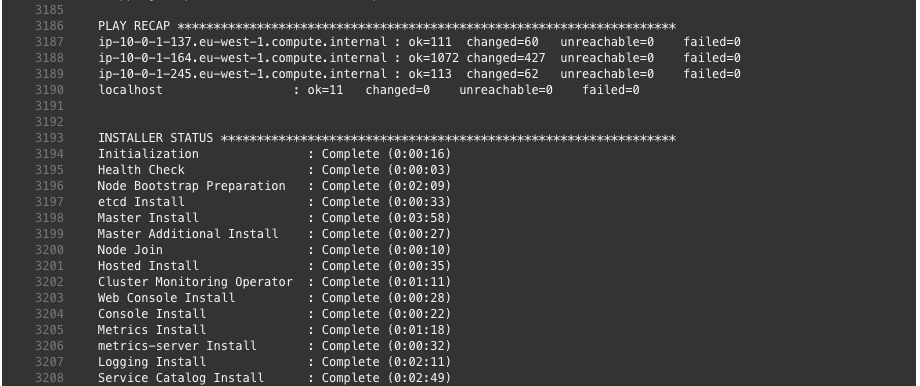
By this point the OpenShift installation is completed.

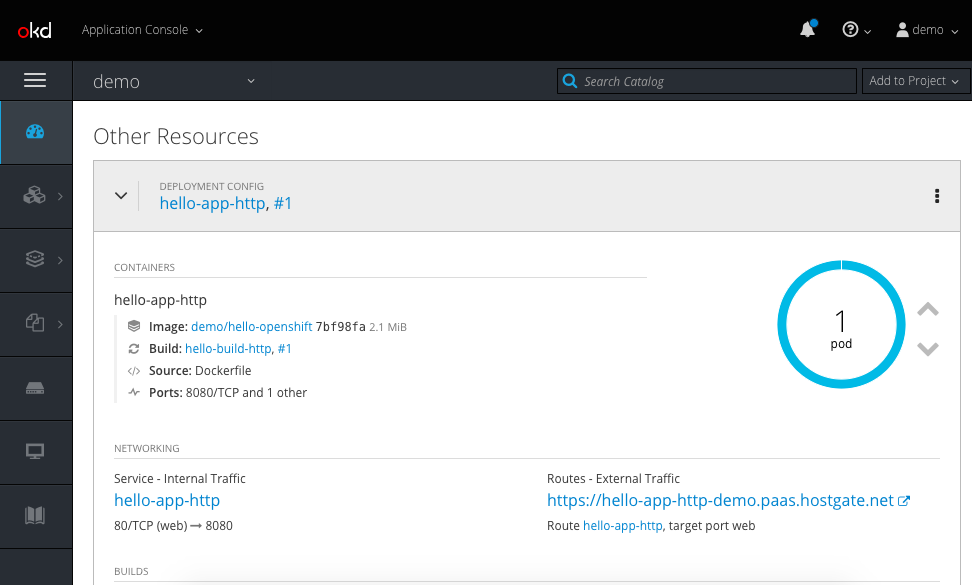
You can continue and login to the console-paas.. and continue doing your testing on OpenShift.

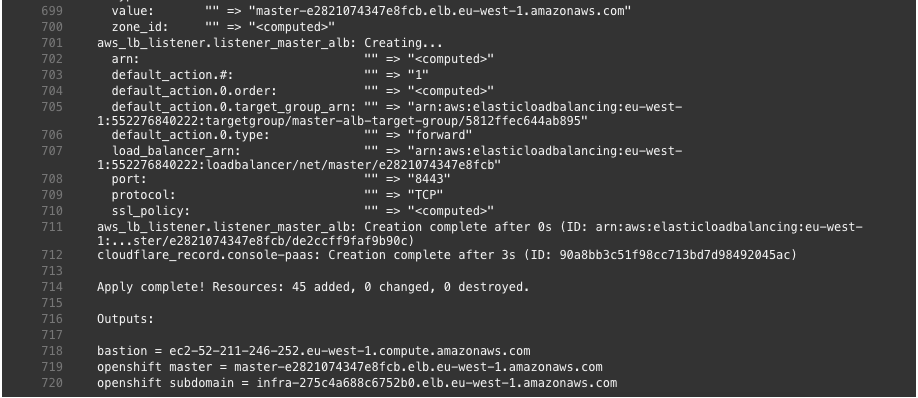
Terraform not only created all the AWS resources it also configured the necessary CNAME on CloudFlare DNS to point to the AWS load balancers.

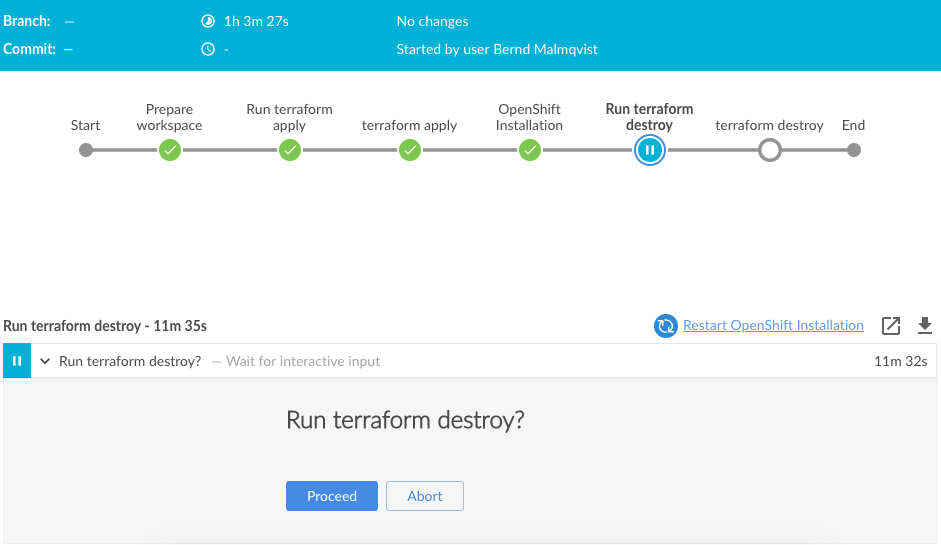
Once you are finished with your OpenShift testing you can go back into Jenkins pipeline and commit to destroy the environment again:

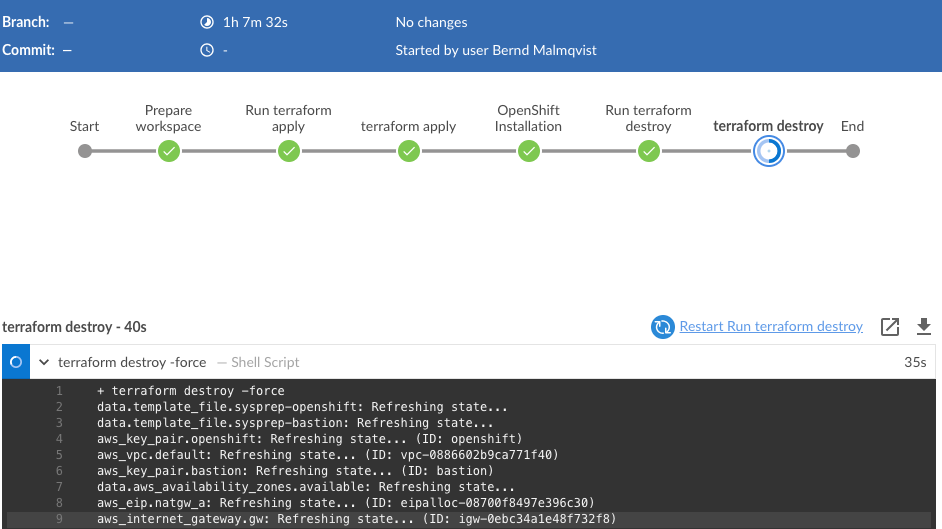
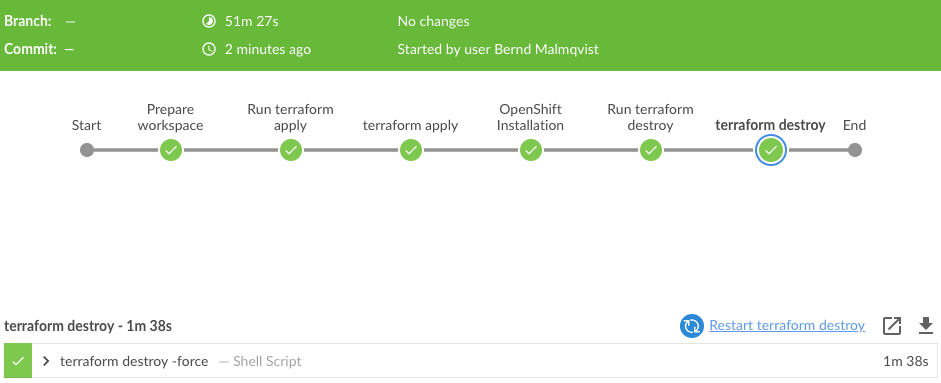
Running terraform destroy:

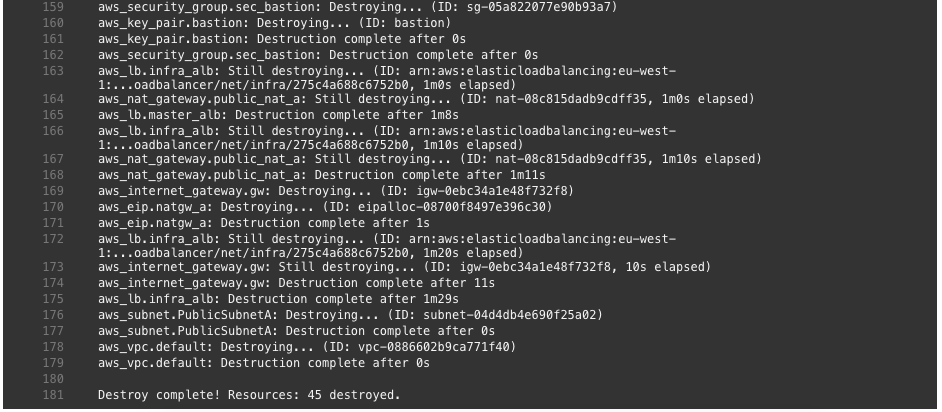
The pipeline completed successfully:

I hope this was in interesting post and let me know if you like it and want to see more of these. I am planning some improvements to integrate a validation step in the pipeline, to create a project and build, and deploy container on OpenShift automatically.

Please share your feedback and leave a comment.

Getting started with Jenkins for Network Automation

As I have mentioned my previous post about Getting started with Gitlab-CI for Network Automation, Jenkins is another continuous integration pipelining tool you can use for network automation. Have a look about how to install Jenkins: https://wiki.jenkins.io/display/JENKINS/Installing+Jenkins+on+Ubuntu

To use the Jenkins with Vagrant and KVM (libvirt) there are a few changes needed on the linux server similar with the Gitlab-Runner. The Jenkins user account needs to be able to control KVM and you need to install the vagrant-libvirt plugin:

usermod -aG libvirtd jenkins
sudo su jenkins
vagrant plugin install vagrant-libvirt

Optional: you may need to copy custom Vagrant boxes into the users vagrant folder ‘/var/lib/jenkins/.vagrant.d/boxes/*’. Note that the Jenkins home directory is not located under /home.

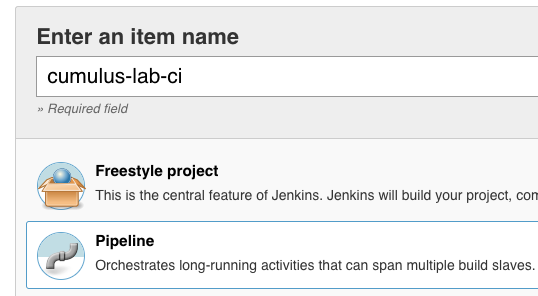
Now lets start configuring a Jenkins CI-pipeline, click on ‘New item’:

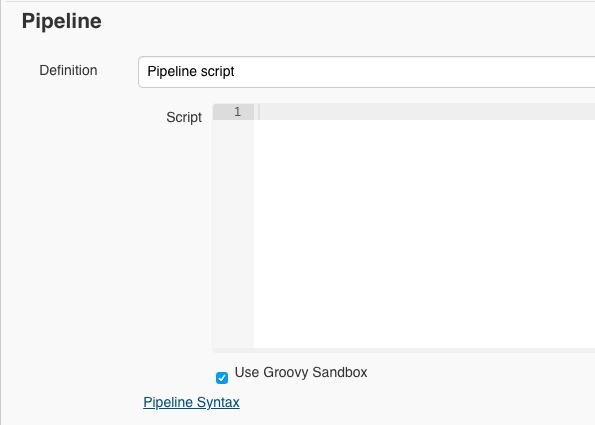
This creates an empty pipeline where you need to add the different stages  of what needs to be executed:

Below is an example Jenkins pipeline script which is very similar to the Gitlab-CI pipeline I have used with my Cumulus Linux Lab in the past.

pipeline {
    agent any
    stages {
        stage('Clean and prep workspace') {
            steps {
                sh 'rm -r *'
                git 'https://github.com/berndonline/cumulus-lab-provision'
                sh 'git clone --origin master https://github.com/berndonline/cumulus-lab-vagrant'
            }
        }
        stage('Validate Ansible') {
            steps {
                sh 'bash ./linter.sh'
            }
        }
        stage('Staging') {
            steps {
                sh 'cd ./cumulus-lab-vagrant/ && ./vagrant_create.sh'
                sh 'cd ./cumulus-lab-vagrant/ && bash ../staging.sh'
            }
        }
        stage('Deploy production approval') {
            steps {
                input 'Deploy to prod?'
            }
        }
        stage('Production') {
            steps {
                sh 'cd ./cumulus-lab-vagrant/ && ./vagrant_create.sh'
                sh 'cd ./cumulus-lab-vagrant/ && bash ../production.sh'
            }
        }
    }
}

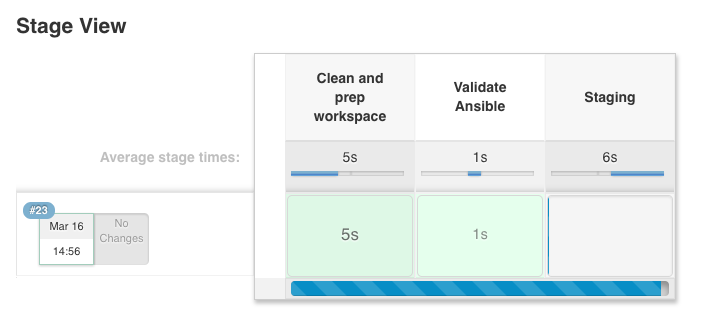
Let’s run the build pipeline:

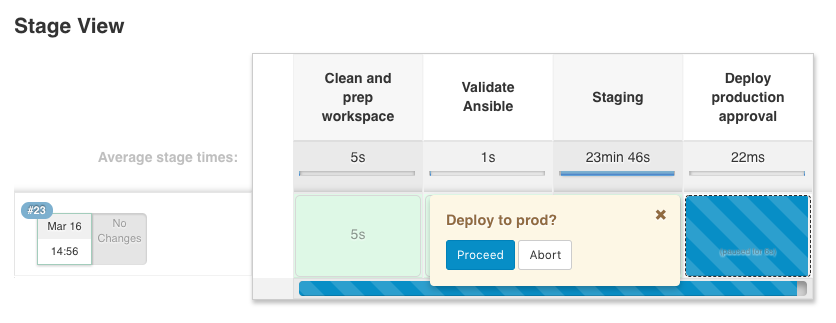
The stages get executed one by one and, as you can see below, the production stage has an manual approval build-in that nothing gets deployed to production without someone to approve before, for a controlled production deployment:

Finished pipeline:

This is just a simple example of a network automation pipeline, this can of course be more complex if needed. It should just help you a bit on how to start using Jenkins for network automation.

Please share your feedback and leave a comment.

Getting started with Gitlab-CI for Network Automation

Ken Murphy from networkautomationblog.com asked me to do a more detailed post about how to setup Gitlab-Runner on your local server to use with Gitlab-CI. I will not get into too much detail about the installation because Gitlab has a very detailed information about it which you can find here: https://docs.gitlab.com/runner/install/linux-repository.html

Once the Gitlab Runner is installed on your server you need to configure and register the runner with your Gitlab repo. If you are interested in information about this, you can find the documentation here: https://docs.gitlab.com/runner/register/ but lets continue with how to register the runner.

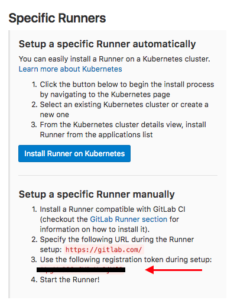
In your project go to ‘Settings -> CI / CD’ to find the registration token:

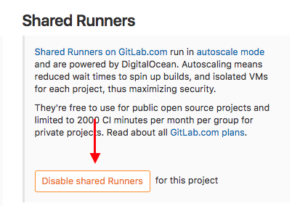
It is important to disable the shared runners:

Now let’s register the gitlab runner:

berndonline@lab ~ # sudo gitlab-runner register
Running in system-mode.

Please enter the gitlab-ci coordinator URL (e.g. https://gitlab.com/):
https://gitlab.com
Please enter the gitlab-ci token for this runner:
xxxxxxxxx
Please enter the gitlab-ci description for this runner:
[lab]:
Please enter the gitlab-ci tags for this runner (comma separated):
lab
Whether to run untagged builds [true/false]:
[false]: true
Whether to lock the Runner to current project [true/false]:
[true]: false
Registering runner... succeeded                     runner=xxxxx
Please enter the executor: docker-ssh, parallels, ssh, virtualbox, kubernetes, docker, shell, docker+machine, docker-ssh+machine:
shell
Runner registered successfully. Feel free to start it, but if it's running already the config should be automatically reloaded!
berndonline@lab ~ #

You will find the main configuration file under /etc/gitlab-runner/config.toml.

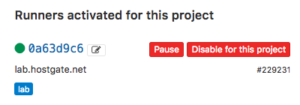
When everything goes well the runner is registered and active, and ready to apply the CI pipeline what is defined in the .gitlab-ci.yml.

To use the runner with Vagrant and KVM (libvirt) there are a few changes needed on the linux server itself, first the gitlab-runner user account needs to be able to control KVM, second the vagrant-libvirt plugin needs to be installed:

usermod -aG libvirtd gitlab-runner
sudo su gitlab-runner
vagrant plugin install vagrant-libvirt

Optional: you may need to copy custom Vagrant boxes into the users vagrant folder ‘/home/gitlab-runner/.vagrant.d/boxes/*’.

Here the example from my Cumulus CI-pipeline .gitlab-ci.yml that I have already shared in my other blog post about Continuous Integration and Delivery for Networking with Cumulus Linux:

---
stages:
    - validate ansible
    - staging
    - production
validate:
    stage: validate ansible
    script:
        - bash ./linter.sh
staging:
    before_script:
        - git clone https://github.com/berndonline/cumulus-lab-vagrant.git
        - cd cumulus-lab-vagrant/
        - python ./topology_converter.py ./topology-production.dot
          -p libvirt --ansible-hostfile
    stage: staging
    script:
        - bash ../staging.sh
production:
    before_script:
        - git clone https://github.com/berndonline/cumulus-lab-vagrant.git
        - cd cumulus-lab-vagrant/
        - python ./topology_converter.py ./topology-production.dot
          -p libvirt --ansible-hostfile
    stage: production
    when: manual
    script:
        - bash ../production.sh
    only:
        - master

The next step is the staging.sh shell script which boots up the vagrant instances and executes the Ansible playbooks. It is better to use a script and report the exit state so that if something goes wrong the Vagrant instances are correctly destroyed.

#!/bin/bash

EXIT=0
vagrant up mgmt-1 --color <<< 'mgmt-1 boot' || EXIT=$?
vagrant up netq-1 --color <<< 'netq-1 boot' || EXIT=$?
sleep 300
vagrant up spine-1 --color <<< 'spine-1 boot' || EXIT=$?
vagrant up spine-2 --color <<< 'spine-2 boot' || EXIT=$?
sleep 60
vagrant up edge-1 --color <<< 'edge-1 boot' || EXIT=$?
vagrant up edge-2 --color <<< 'edge-2 boot' || EXIT=$?
sleep 60
vagrant up leaf-1 --color <<< 'leaf-1 boot' || EXIT=$?
vagrant up leaf-2 --color <<< 'leaf-2 boot' || EXIT=$?
vagrant up leaf-3 --color <<< 'leaf-3 boot' || EXIT=$?
vagrant up leaf-4 --color <<< 'leaf-4 boot' || EXIT=$?
vagrant up leaf-5 --color <<< 'leaf-5 boot' || EXIT=$?
vagrant up leaf-6 --color <<< 'leaf-6 boot' || EXIT=$?
sleep 60
vagrant up server-1 --color <<< 'server-1 boot' || EXIT=$?
vagrant up server-2 --color <<< 'server-2 boot' || EXIT=$?
vagrant up server-3 --color <<< 'server-3 boot' || EXIT=$?
vagrant up server-4 --color <<< 'server-4 boot' || EXIT=$?
vagrant up server-5 --color <<< 'server-5 boot' || EXIT=$?
vagrant up server-6 --color <<< 'server-6 boot' || EXIT=$?
sleep 60
export ANSIBLE_FORCE_COLOR=true
ansible-playbook ./helper_scripts/configure_servers.yml <<< 'ansible playbook' || EXIT=$?
ansible-playbook ../site.yml <<< 'ansible playbook' || EXIT=$?
sleep 60
ansible-playbook ../icmp_check.yml <<< 'icmp check' || EXIT=$?
vagrant destroy -f
echo $EXIT
exit $EXIT

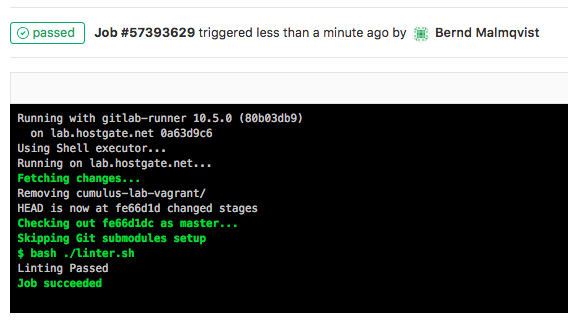
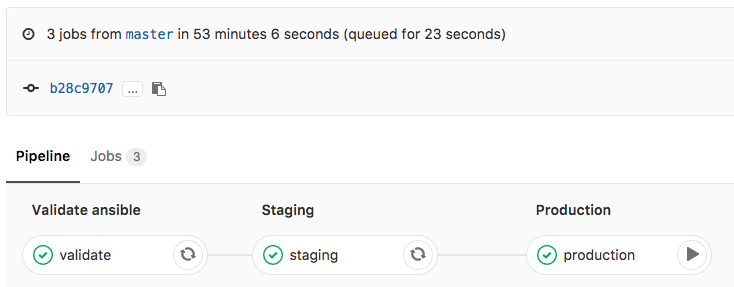
Basically any change in the repository triggers the .gitlab-ci.yml and executes the pipeline; starting with the stage validating the Ansible syntax:

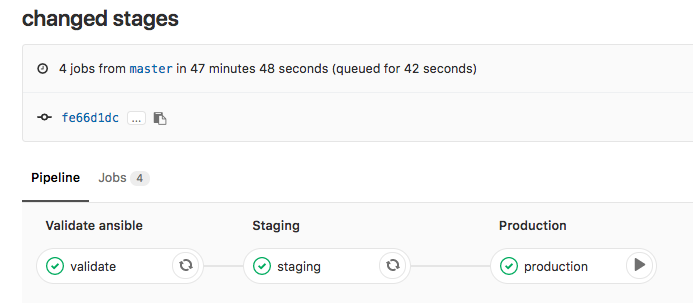
Continue with staging the configuration and deploying to production. The production stage is a manual trigger to have a controlled deployment:

In one of my next posts I will explain how to use Jenkins instead of Gitlab-CI for Network Automation. Jenkins is very similar to the runner but more flexible with what you can do with it.

Leave a comment

Ansible Playbook for Cumulus Linux BGP IP-Fabric and Cumulus NetQ Validation

This is my Ansible Playbook for a Cumulus Linux BGP IP-Fabric using BGP unnumbered and Cumulus NetQ to validate the configuration in a CICD pipeline. I use the same CICD pipeline from my previous post about Continuous Integration and Delivery for Networking with Cumulus Linux but added the Cumulus NetQ validation in the production stage to check BGP and CLAG configuration.

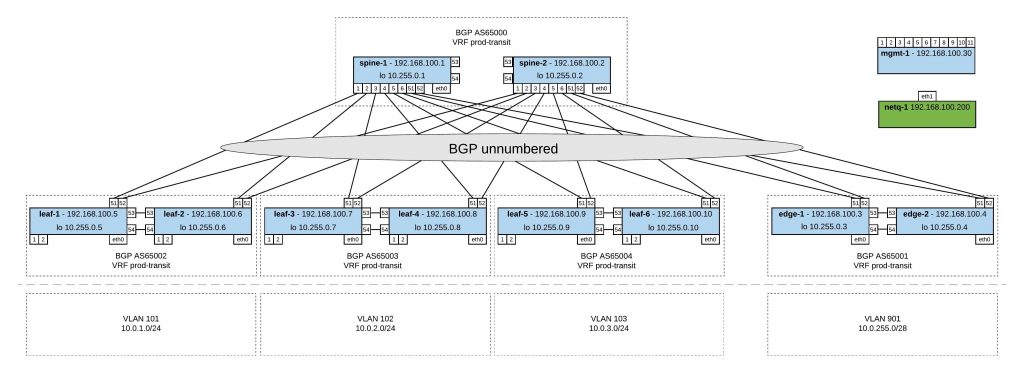
Network overview:

Here’s my Github repository where you find the complete Ansible Playbook: https://github.com/berndonline/cumulus-lab-provision

The variables are split between group_vars and host_vars. Still need to see if I can find a better way for the variables because interface settings for spine and edge switches are in group_vars, and for leaf switches the interface configuration is per host in host_vars. Not ideal at the moment, it should be the same for all devices.

Roles:

  • Hostname: This task changes the hostname
  • Interfaces: This creates the interfaces and bridge (only leafs and edges) configuration. The task uses templates interfaces.j2 and interfaces_config.j2 to create the configuration files under /etc/network/…
  • Routing: The template frr.j2 creates the FRR (Free Range Routing) configuration file. FRR replaces Quagga since Cumulus Linux version 3.4.x
  • PTM: Uses as well an template topology.j2 to generate the topology file for the Prescriptive Topology Manager (PTM)
  • NTP: Ntp and timezone settings

In most of the cases I use Jinja2 templates to generate configuration files. The site.yml is otherwise very simple. It executes the different roles, and triggers the handlers if a change is made by a role.

---

- hosts: network
  strategy: free

  user: cumulus
  become: 'True'
  gather_facts: 'False'

  handlers:
    - name: reload networking
      command: "{{item}}"
      with_items:
        - ifreload -a
        - sleep 10

    - name: reload frr
      service: name=frr state=reloaded

    - name: apply hostname
      command: hostname -F /etc/hostname

    - name: restart netq agent
      command: netq config agent restart

    - name: reload ptmd
      service: name=ptmd state=reloaded

    - name: apply timezone
      command: /usr/sbin/dpkg-reconfigure --frontend noninteractive tzdata

    - name: restart ntp
      service: name=ntp state=restarted

  roles:
    - hostname
    - interfaces
    - routing
    - ptm
    - ntp

Like mentioned in previous posts, I use Gitlab-CI for my Continuous Integration / Continuous Delivery (CICD) pipeline to simulate changes against a virtual Cumulus Linux network using Vagrant. You can find more information about the pipeline configuration in the .gitlab-ci.yml.

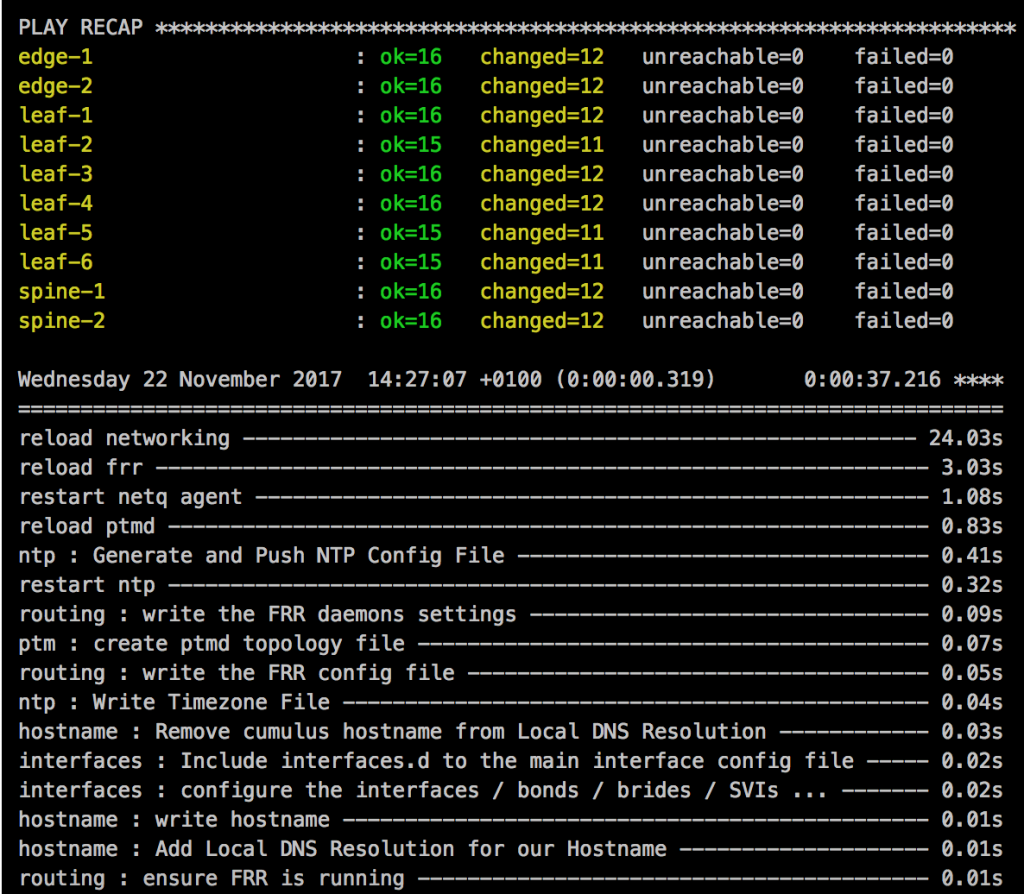
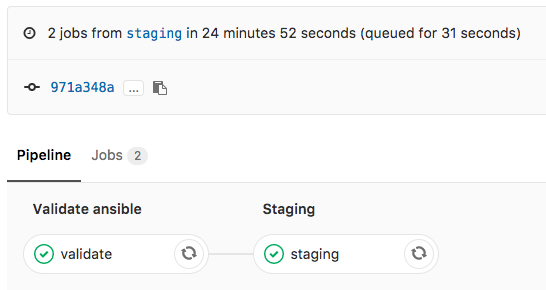
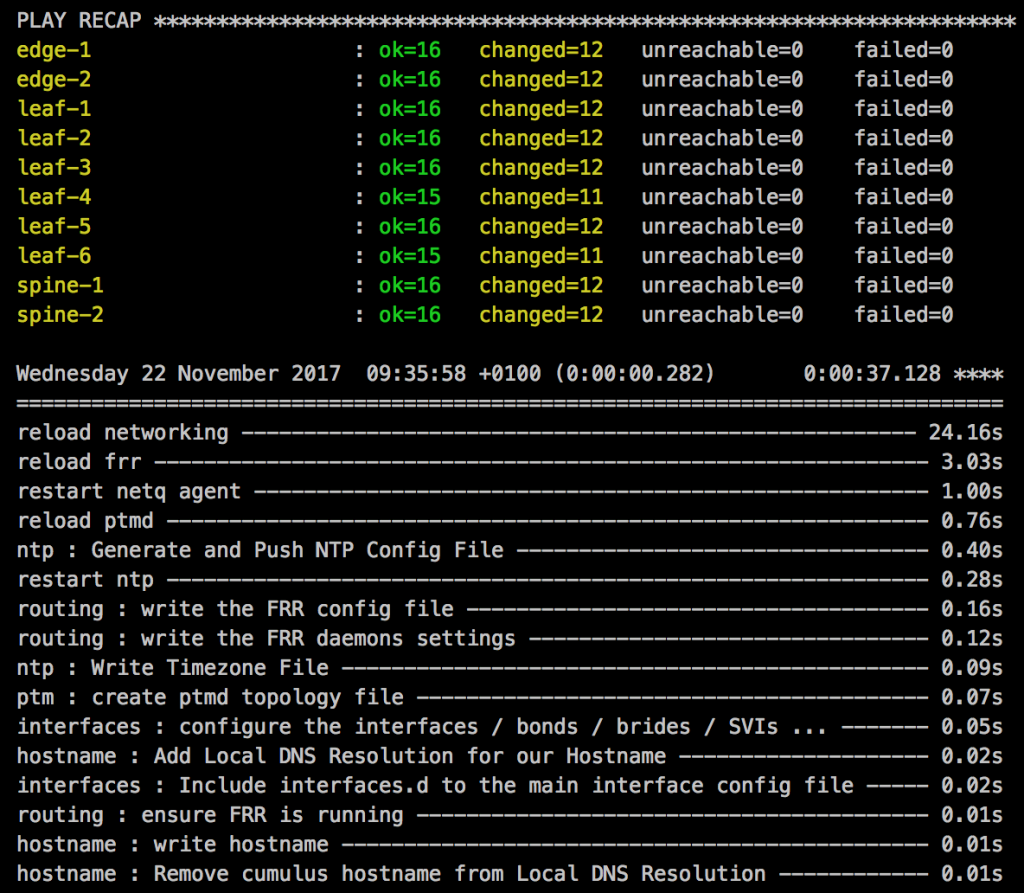
Changes in the staging branch will spin-up the Vagrant environment but only executes the the Ansible Playbook:

Cumulus NetQ configuration validation in production:

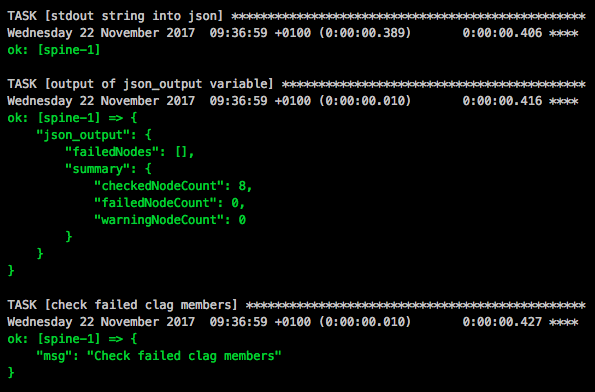
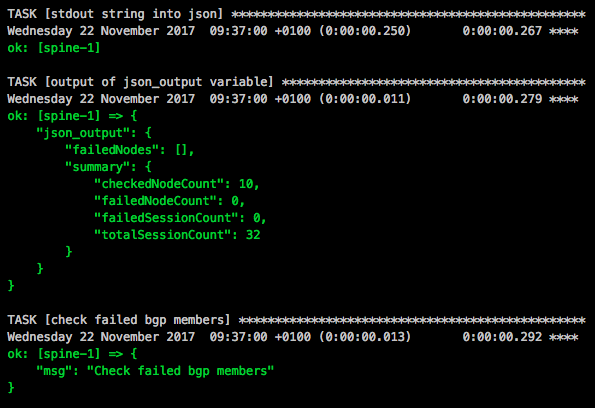
The production stage in the pipeline spins-up the Vagrant environment and executes the Ansible Playbook, then continues executing the two NetQ checks netq_check_bgp.yml and netq_check_clag.yml to validate the BGP and CLAG configuration:

The result will look like this when all stages finish successfully:

I will continue to improve the Playbook and the CICD pipeline so come back later to check it out.

In my repository I have some other useful Playbooks for config backup and restore but also to collect and remove cl-support.

config_backup.yml

config_restore.yml

cl-support_get.yml

cl-support_remove.yml

Please tell me if you like it and share your feedback.

See my new post about BGP EVPN and VXLAN with Cumulus Linux

Leave a comment